Border OptionsHugging border, circle, square, or rectangle — with a 3mm satin stitch.
Backing OptionsAvailable with iron-on, sew-on, or velcro backing.
Fast ShippingShipped quickly from the USA.
Free Online Tools
Powerful embroidery utilities that save time and prevent costly mistakes.
Stitch AssistantRECOMMENDED
Get the exact stabilizer, machine settings, needle, and thread color sequence for every embroidery design you purchase — based on that design's stitch density, dimensions, and color count.
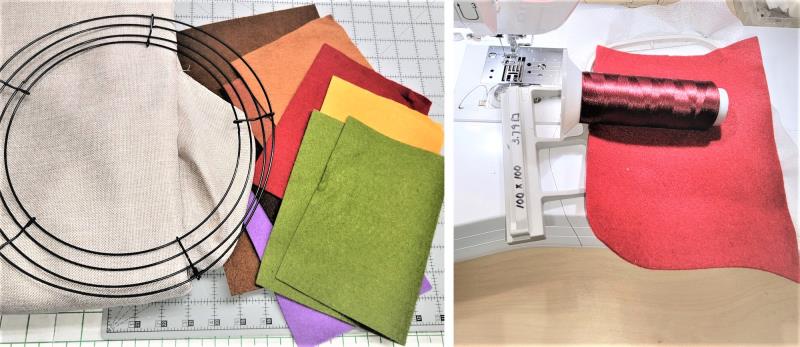
Read through the instructions thoroughly before beginning and assemble all the materials needed to complete the project. Use the same felt front and back, and embroidery thread to match the felt for the satin border. Use a contrasting thread color for the text on each leaf. The same color thread for the satin, should be used for the placement line and tack down stitches; any other color may be visible in the final stitching if it is a different color.
(Click Image to Enlarge)
Step 2:
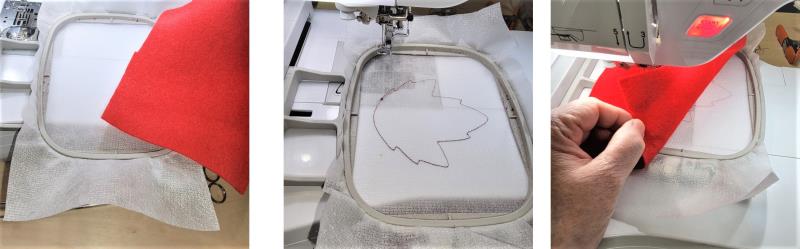
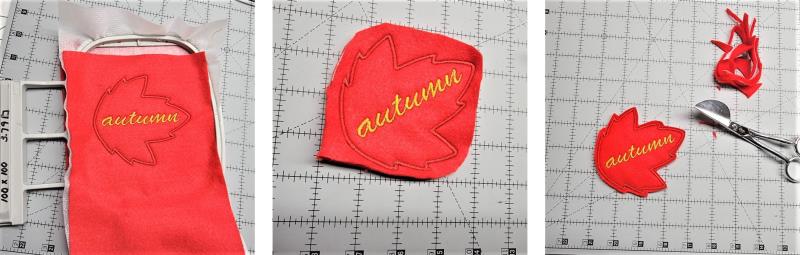
To stitch each leaf, hoop one layer of poly mesh stabilizer. Place the hoop on the machine and stitch Color 1, the placement line. Center the chosen felt color over the placement line.
(Click Image to Enlarge)
Step 3:
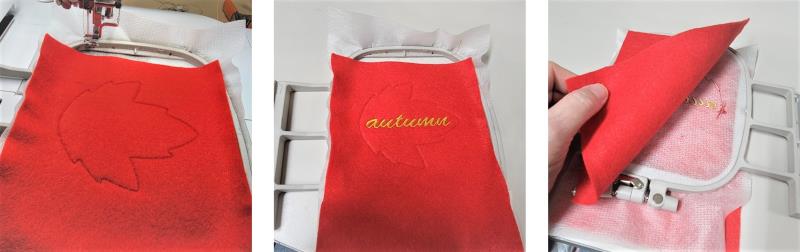
Stitch Color 2, the tack down. Switch embroidery thread to the chosen thread color and stitch Color 3, the text. Remove the hoop from the machine but do not remove the embroidery from the hoop. Center the second piece of felt over the back of the embroidery (tape or glue in place). Place the hoop back on the machine.
(Click Image to Enlarge)
Step 4:
Stitch Color 4 which will tack the back felt in place. Stitch Color 5, the satin border. Remove the piece from the hoop and generally trim around the entire outside of the leaf. With sharp scissors, trim around the leaf about 1/8” outside of the satin border.
(Click Image to Enlarge)
Step 5:
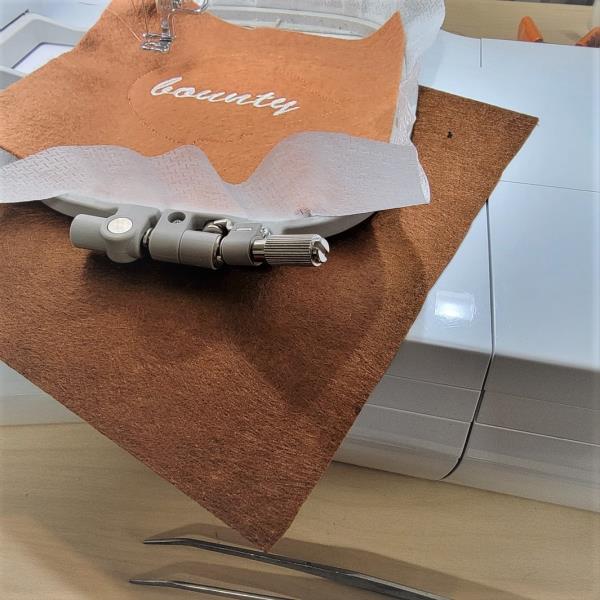
Here is an option. This was a stash buster project and I didn’t have enough felt for both the front and back for all the leaves. I had ordered some felt but it came as a thin, stiff felt. It actually was perfect for the backs of the leaves. I just matched the color as closely as possible to the top color. After the text was sewn, instead of removing the hoop, I just slid the stiffer felt under the hoop and then continued with the stitching. After the trimming was done and the leaf trimmed, there was no way to tell there was a different felt piece on the back.
(Click Image to Enlarge)
Step 6:
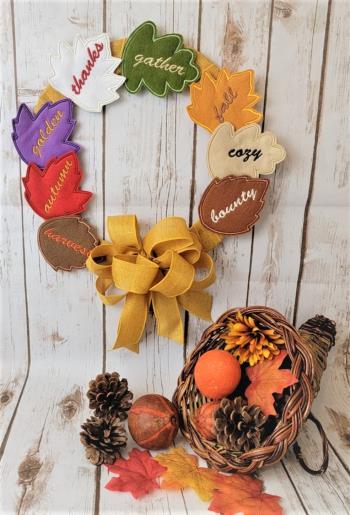
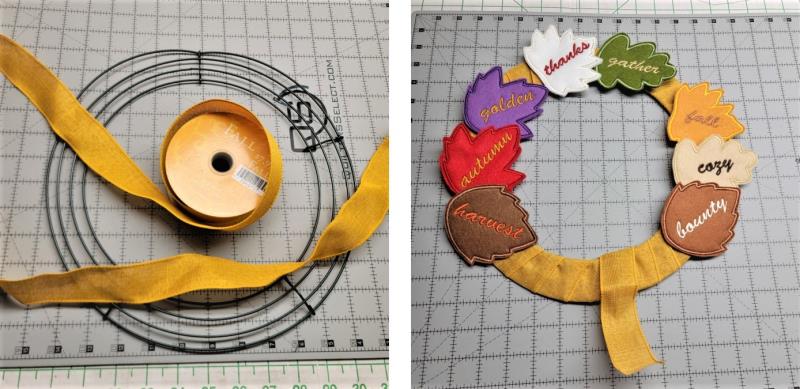
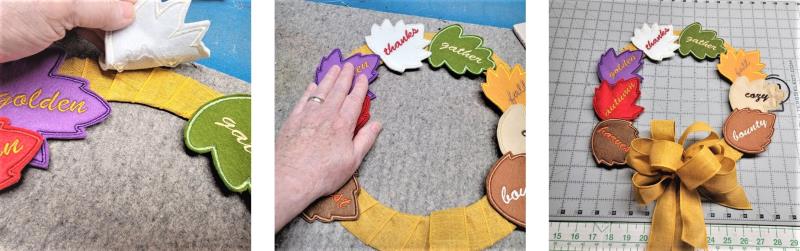
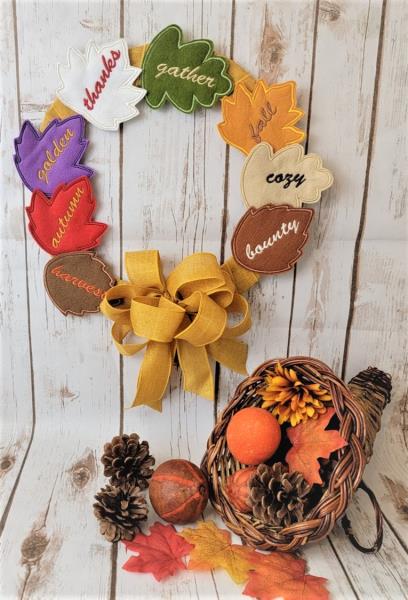
After all the leaves have been stitched, use ribbon to wrap around the wire frame and then arrange the leaves around the frame as you’d like.
(Click Image to Enlarge)
Step 7:
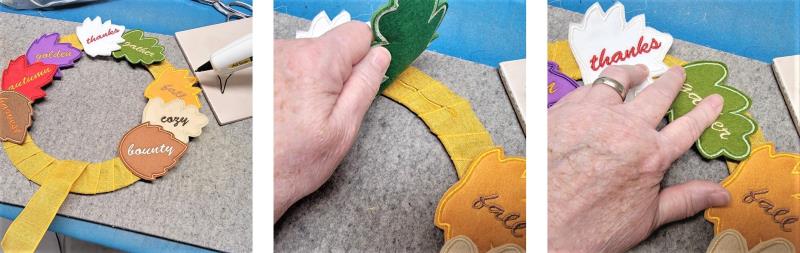
Heat up the glue gun. Lift each leaf, place glue under the leaf, and then press the leaf into place firmly.
(Click Image to Enlarge)
Step 8:
If you’d rather, the hot glue may be applied to the back of the leaf. Repeat for all the leaves. Make a nice bow with the ribbon and affix to the frame.
(Click Image to Enlarge)
Step 9:
Thank you for purchasing the fall leaves. This is a great project to do with children on a rainy summer day to get ready for fall decorating; they’ll be so proud to show off their project!
Ramona Baird has been in the embroidery industry for over 23 years. She and her husband owned a commercial and retail embroidery store in Arizona for many years. She is an experienced digitizer having been mentored by award-winners Pat Williams and Lindee Goodall. Ramona is a contributor to “Creative Machine Embroidery” magazine having 5 covers to her credit. Ramona has worked for Wilcom America and served many years as Education Director for the American Sewing Guild. With a degree in fashion design, she is able to design and execute patterns which Pat Williams says are “out of the box” in creativity and application. Ramona likes to challenge the boundaries of embroidery and bring new and exciting designs, ideas, and projects to EmbroideryDesigns.com. She wants embroiderers of all levels to increase their skills and enjoyment in using their embroidery machine for gift-making and personal pleasure.














































 Bags & ZippersIn-the-hoop bags, pouches & zipper projects
 Mug Rugs & CoastersQuick gift-ready mug rugs & coasters
 Quilts & Quilt BlocksIn-the-hoop quilt blocks & layouts
 Kitchen & DiningPlacemats, trivets & kitchen ITH projects
 Home DecorDecor accents you stitch entirely in the hoop
 OrnamentsHoliday & keepsake in-the-hoop ornaments
 ED.com StabilizersOur in-house stabilizers for every project (7 Stabilizers Available)
 Sulky StabilizersSulky stabilizers for every project (100+ Stabilizers Available)
 Madeira StabilizersMadeira stabilizers for every project (75+ Stabilizers Available)
 View All StabilizersView all stabilizers (200+ Stabilizers Available)


