Border OptionsHugging border, circle, square, or rectangle — with a 3mm satin stitch.
Backing OptionsAvailable with iron-on, sew-on, or velcro backing.
Fast ShippingShipped quickly from the USA.
Free Online Tools
Powerful embroidery utilities that save time and prevent costly mistakes.
Stitch AssistantRECOMMENDED
Get the exact stabilizer, machine settings, needle, and thread color sequence for every embroidery design you purchase — based on that design's stitch density, dimensions, and color count.
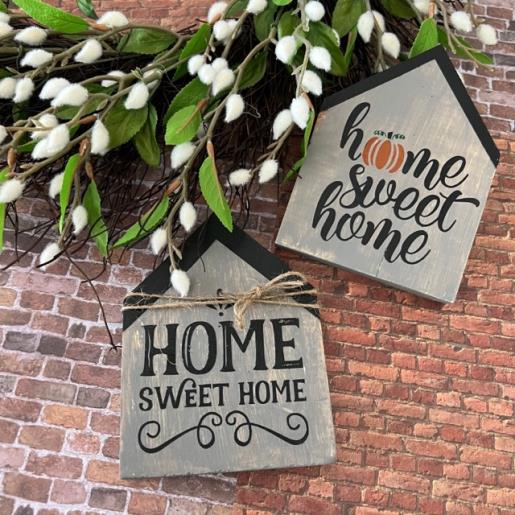
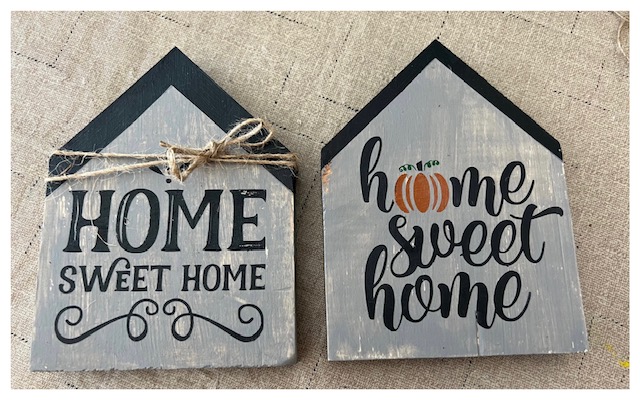
Create a charming house-shaped block with a heartwarming 'Home Sweet Home' message. Ideal for housewarming gifts or enhancing your home décor throughout the year. Step-by-step instructions are included.
Step
of
Quilt House Shaped Block with Sweet Home Message
By Linda Mills
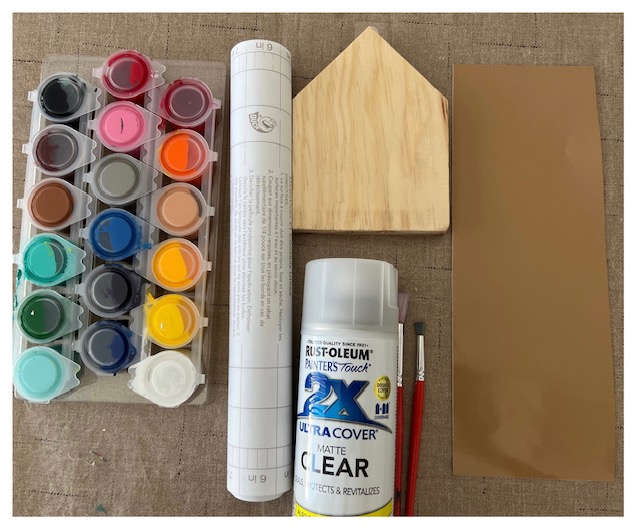
Gather all supplies and review instructions before beginning.
(Click Image to Enlarge)
Step 2:
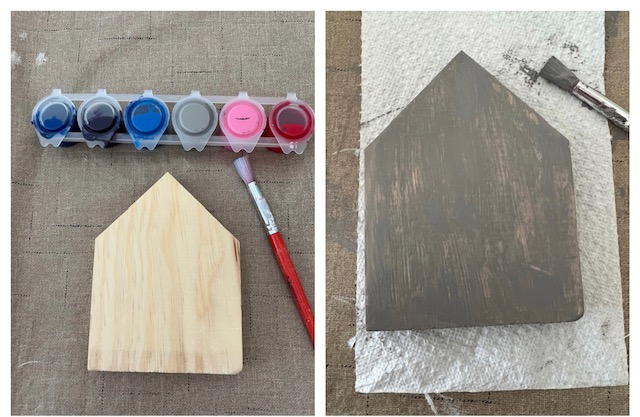
Paint the entire house shaped wooden block Your choice of color. ( front, back and sides) For this tutorial wood house block was painted farmhouse gray and wiped down with a cloth for a distressed look. Allow to completely dry.
(Click Image to Enlarge)
Step 3:
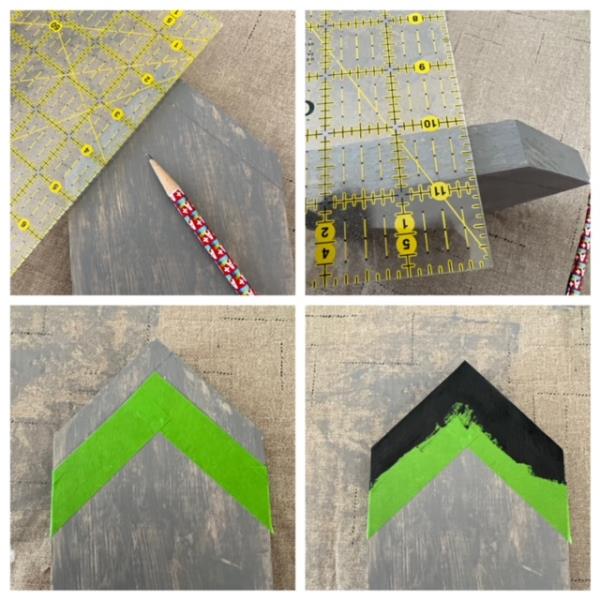
Measure and pencil in a roof line onto the front of the painted wood block. Width of roof line approx. ½” . Mark sides. Paint front, top and side of roof. Optional: Use painters tape to mask off roof for a straight roof line paint application. Allow to dry. Remove painters tape when dry.
(Click Image to Enlarge)
Step 4:
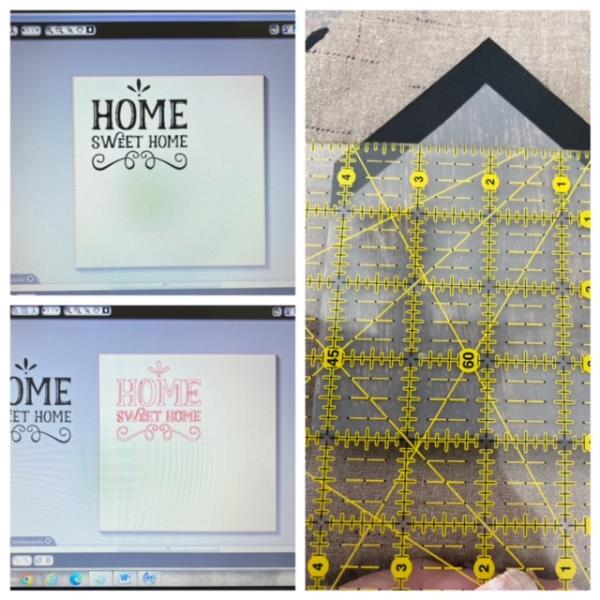
Bring into your cutting machine’s design space the Home Sweet Home SVG design. Cut design and resize to fit application area on your wood block. For the house block used in this tutorial design was resized to 3.4” x 3.5” Prepare cutting mat with vinyl.
(Click Image to Enlarge)
Step 5:
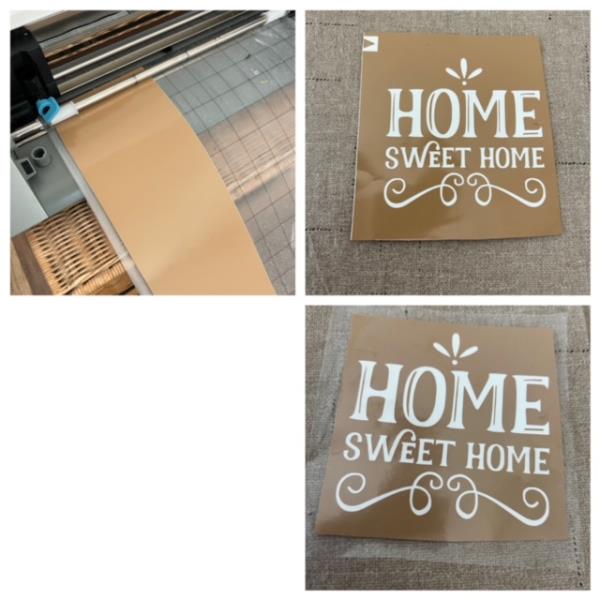
Load prepared cutting mat into cutting machine. Do a test cut. Make any necessary adjustments if needed. Cut design onto your vinyl. Cutting complete. Remove mat. Weed for stencil by removing all unwanted vinyl from cut design. Apply and finger press smooth the transfer tape over cut design. Remove adhesive back.
(Click Image to Enlarge)
Step 6:
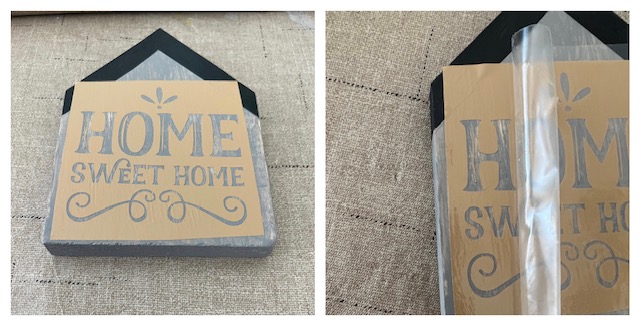
Center onto application area of house block. Finger press to secure. Remove transfer tape.
(Click Image to Enlarge)
Step 7:
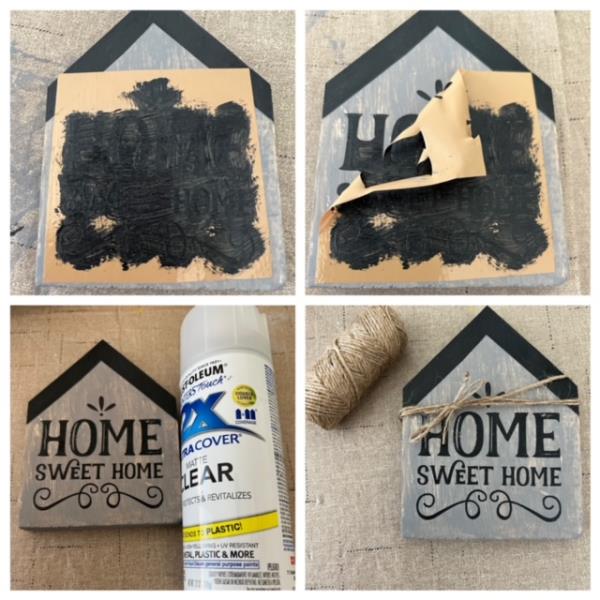
Paint all open areas of stencil. Your choice of color or refer to SVG design color used as was used in this tutorial. Allow to dry. Slowly remove stencil. Lightly spray matte finishing spray to protect and seal paints. Allow to dry. Optional: Add a twine around painted house block for embellishment.
(Click Image to Enlarge)
Step 8:
And you are done! Great job! Make additional wood house blocks using the linked design for a fall décor or take a look at the many different SVG designs on the website!