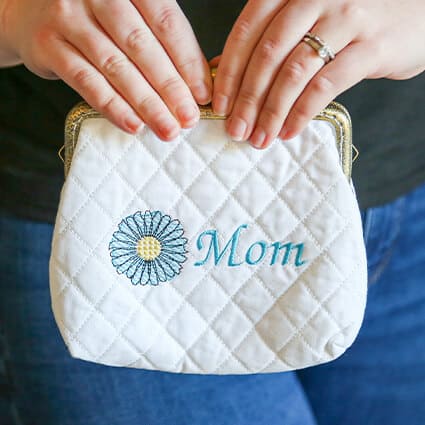
Step 1: | For Mother’s Day, Mom’s Birthday, or just because, stitch this ITH quilted clutch in an afternoon. There are four hoopings to this project. Most of the steps are done in the hoop, with just some final seaming and handwork done to finish it up. Use thread colors to coordinate with the chosen fabrics. Use a light color fabric for the lining and coordinate the print with the chosen thread color for the flower background and Mom text. For the project, white thread was used for all steps except the flower colors and text. The pattern was digitized specifically for the clutch frame listed. Read through the instructions thoroughly before beginning and assemble all the materials needed to complete the project. Starch and press the fabrics well. Press the interfacing to the back of the lining pieces. | 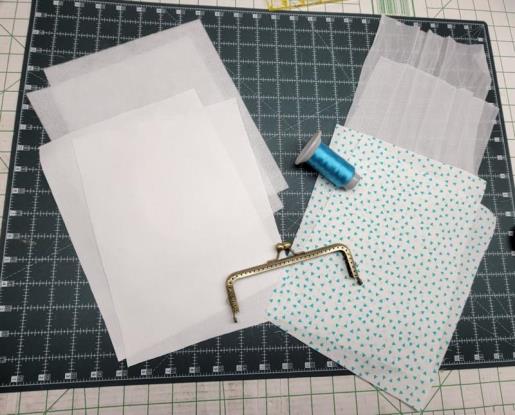 (Click Image to Enlarge) |
Step 2: | 1st Hooping (Battilizer outline): Hoop a layer of poly mesh stabilizer. This first hooping is to get the correct outline for the Battilizer; this allows the Battilizer to be the correct finished size since none of it should be included in any of the finished seams. Place the hoop on the machine and stitch Color 1, the placement line. | 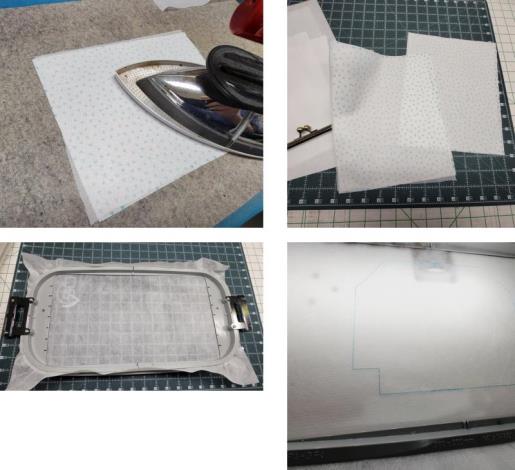 (Click Image to Enlarge) |
Step 3: | Center the 2 layers of Battilizer over the placement line. Stitch Color 2, the tack down line, which is actually the cutting line. Color 3 is a stop to rehoop--do not sew it. Remove the piece from the hoop and cut all the layers just inside the stitching line; discard the stabilizer. | 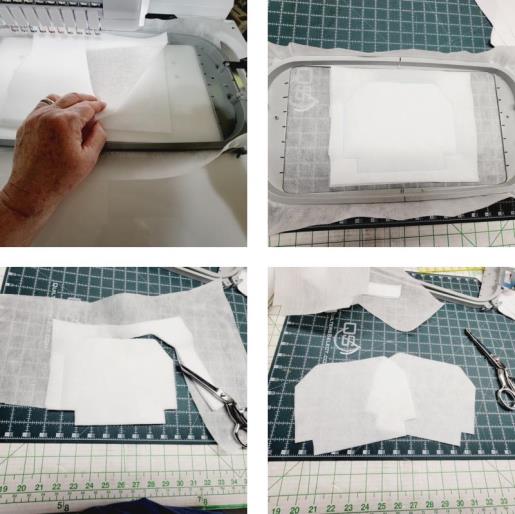 (Click Image to Enlarge) |
Step 4: | 2nd Hooping (bag lining): hoop a layer of poly mesh stabilizer. Stitch Color 4, the placement line. Place down 1 layer of lining fabric, right side up. Stitch Color 5, the tack down--this will be the cutting line for the lining pieces. Stitch color 6, the bottom stitching line for assembly. Color 7 is a stop for rehooping--do not stitch. | 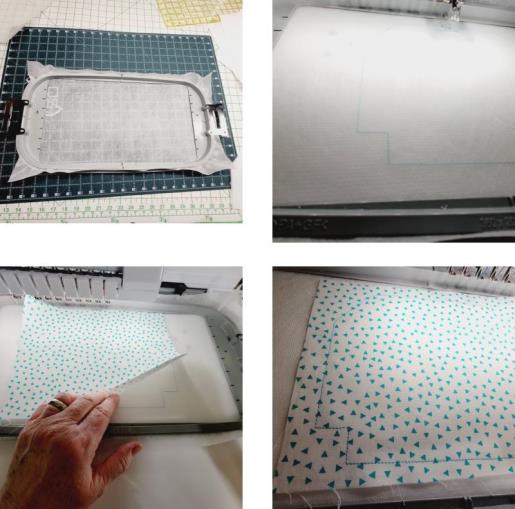 (Click Image to Enlarge) |
Step 5: | Remove the piece from the hoop. Lay the second lining piece under the one just stitched and pin the pieces together. Cut along the outer stitching line. Set the pieces aside until they are needed. | 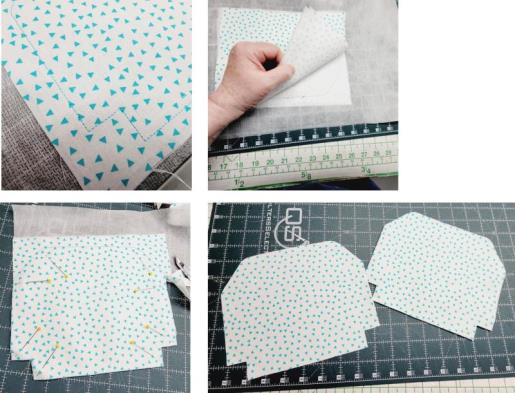 (Click Image to Enlarge) |
Step 6: | 3rd Hooping (bag back): hoop a layer of poly mesh. Stitch Color 8, the fabric placement line. Remove the hoop from the machine but do not remove the stabilizer. Spray one side of a piece of batting with temporary spray adhesive. Center the Batting, adhesives side down, within the placement line. There should be about ¼” all around from the cut edge of the batting to the placement line. | 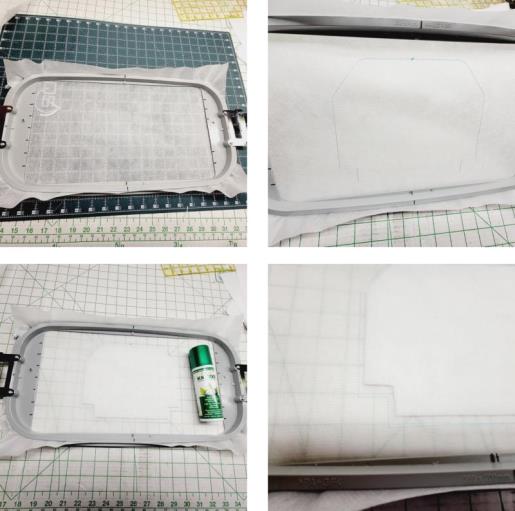 (Click Image to Enlarge) |
Step 7: | Place one piece of white Kona cotton over the batting. Return the hoop to the machine. Stitch Color 9, the tack down line. Stitch Color 10, the quilting. Stitch Color 11, the bottom stitching line to be used during assembly. | 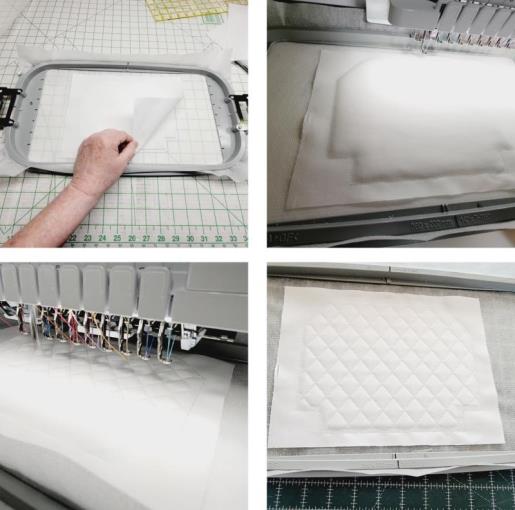 (Click Image to Enlarge) |
Step 8: | Remove the hoop from the machine, but do not remove the piece from the hoop. Place one of the lining pieces, right side down, matching all edges. Stitch Color 12, to tack the lining and bag back top edge. Color 13 is a stop for rehooping--do not stitch this color. | 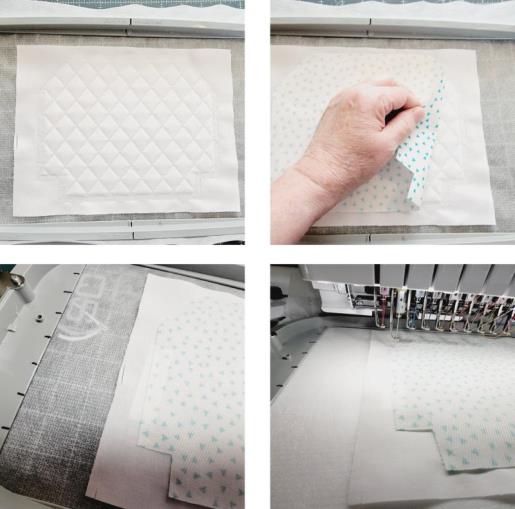 (Click Image to Enlarge) |
Step 9: | Remove the piece from the hoop. Cut the bag back along the outer stitching line. | 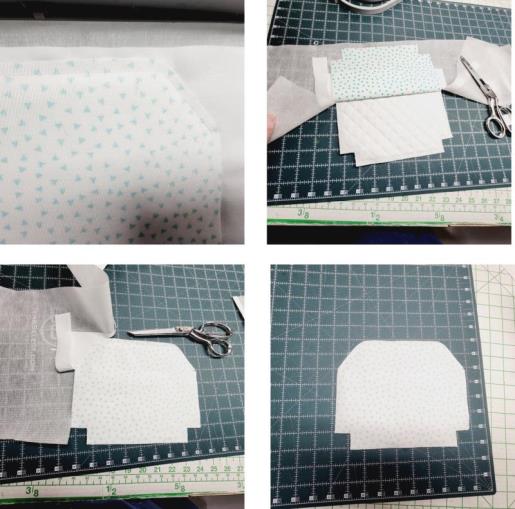 (Click Image to Enlarge) |
Step 10: | The lining and bag back should be attached at the top. Be sure the tie offs at the end of the top stitching are secure; if it is not, restitch on the sewing machine but do not stitch past the end of the original stitching line. The cutting of the bag bottom is done along the outer stitching line. | 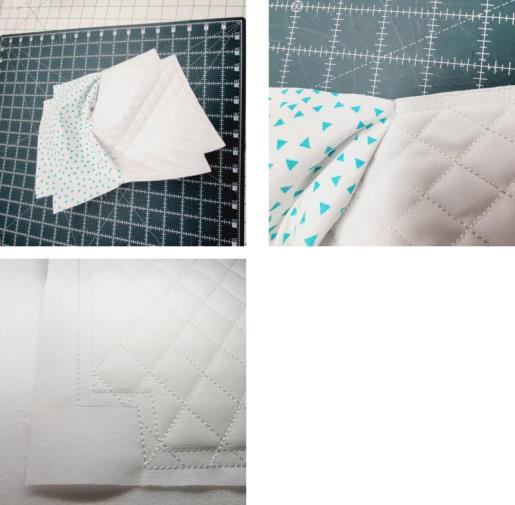 (Click Image to Enlarge) |
Step 11: | 4th Hooping (bag front): hoop a layer of poly mesh. Stitch Color 14, the fabric placement line. Remove the hoop from the machine but do not remove the stabilizer. Spray the second piece of batting with spray adhesive and center batting, adhesive side down, inside the placement line. Place the remaining piece of white Kona cotton over the batting. Return the hoop to the machine. Stitch Color 15, the tack down line. Stitch Color 16, the quilting. Stitch Color 17, the bottom stitching line for assembly. Stitch Color 18, the Mom text and flower background. Stitch Color 19, the black petals outline. Stitch Color 20, the flower center. | 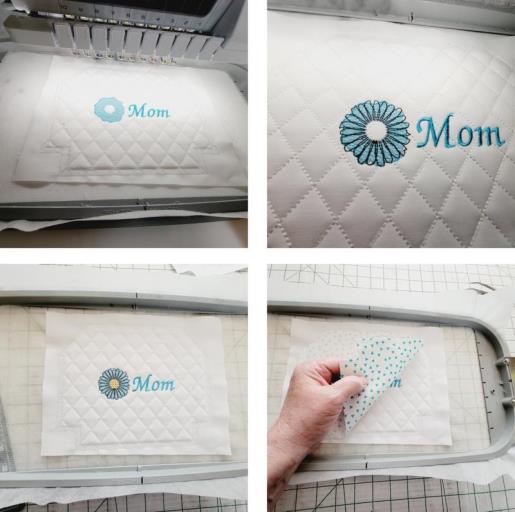 (Click Image to Enlarge) |
Step 12: | Remove the hoop from the machine, but do not remove the project from the hoop. Place the second lining piece, right side down, matching all edges. Return the hoop to the machine. Stitch Color 21, to tack the lining and bag front top edge. Remove the piece from the hoop. Cut the bag front along the outer stitching line and set aside until needed. Continue with the assembly instructions. | 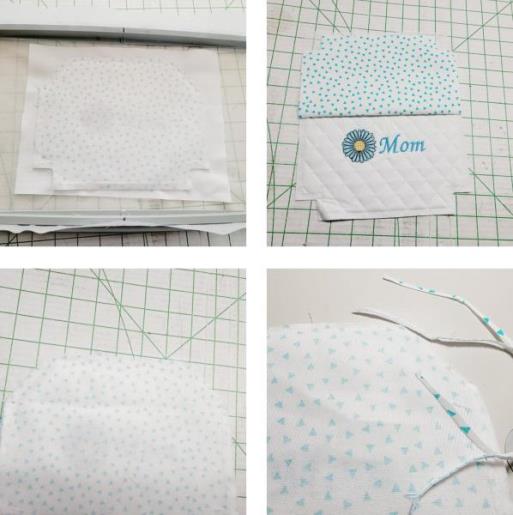 (Click Image to Enlarge) |
Step 13: | Again, double check to make sure the ends of the top stitching line are secure. Lay the pieces as shown and flip the lining on both pieces up. Place the bag back over the bag front, right sides together. Place a pin through the stop points of the bags. | 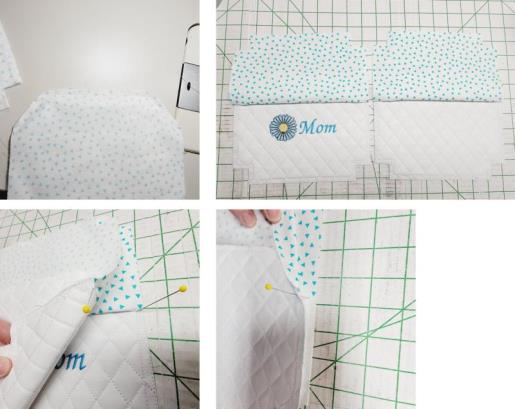 (Click Image to Enlarge) |
Step 14: | Repeat pinning the bag stop points on the other side and then pin the bag sections together along the bottom. Beginning one stitch below the stop point on one edge, stitch forward about four stitches and back stitch to where the stitching started. Continue stitching along the bag side to the end. The needle should be just to the left of the stitching line provided on the bag; backstitch at the end of the seam. Stitch the bag bottom, again using the provided stitching line. Flip the bag over and beginning along the other side seam, begin just below the stop point, back stitch, sew the seam, and backstitch at the end. | 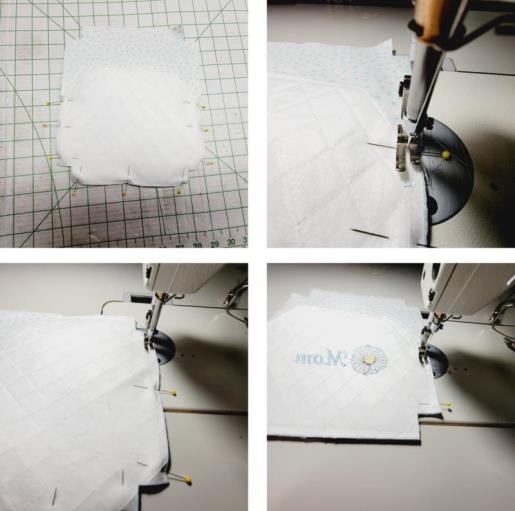 (Click Image to Enlarge) |
Step 15: | Next will be to box the corners of the bag. Align the side seam and bottom seam and place a pin. Stitch a ¼” seam. Repeat for the other side of the bag. | 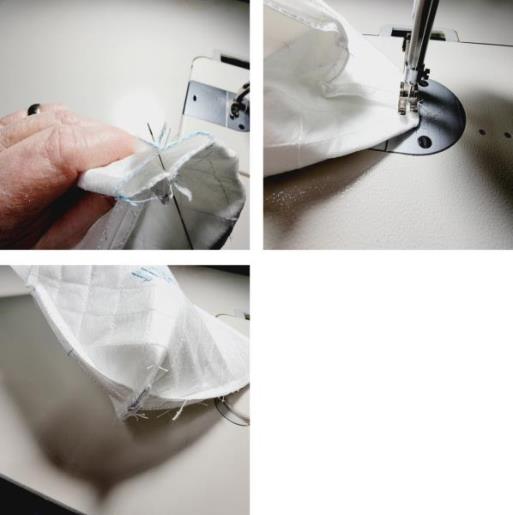 (Click Image to Enlarge) |
Step 16: | Now stitch the lining section seams and box the corners just like was done for the bag, leaving an opening in the lining bottom to turn the bag. | 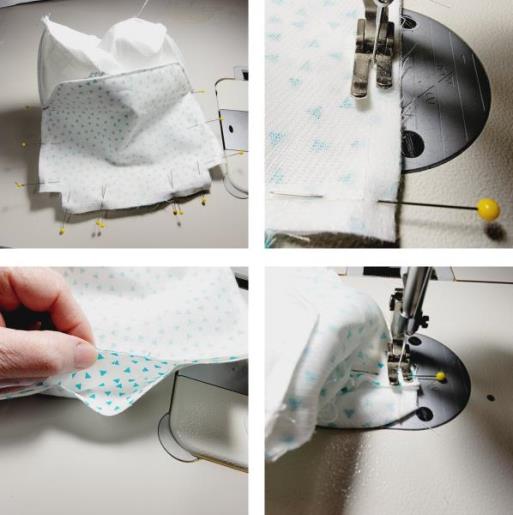 (Click Image to Enlarge) |
Step 17: | Turn the bag right side out, through the opening. Form all the corners well on both the bag and lining. | 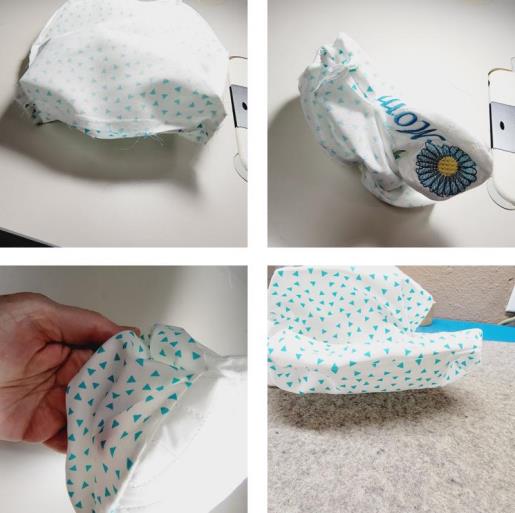 (Click Image to Enlarge) |
Step 18: | Roll the seams between your fingers to make them flat and then press them. Press the seam allowance at the lining bottom inside, press, and then edge stitch the seam closed. Using a pressing board, press the top edges of the bag and then edge stitch them close to the seam edge, just at the top portion from stop point to stop point. | 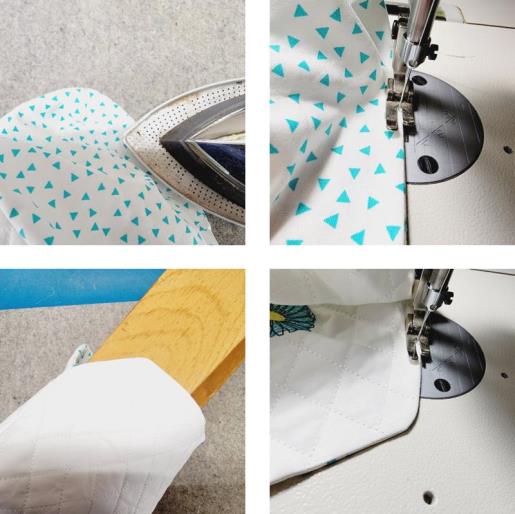 (Click Image to Enlarge) |
Step 19: | Find the center of the clasp frame and the center top of the bag on each side; place pins. Insert the top edge of the bag into the frame, matching the center pins. | 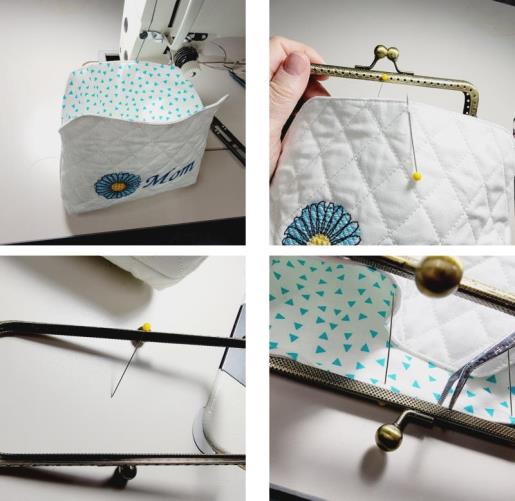 (Click Image to Enlarge) |
Step 20: | Using a hand needle and thread, just generally baste the bag top to the frame beginning at the center and working first to one outer edge and then the other. Repeat the basting from center out on both sides of the frame. | 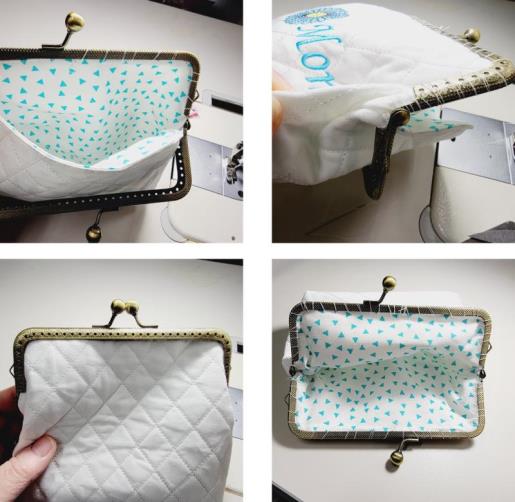 (Click Image to Enlarge) |
Step 21: | When closed, the bottom edge of the frame hinge should sit just above the stopping point of the seam line. Close the bag and check this as you work so you can adjust the fabric inside the frame as necessary as the basting. Now is a good time to put on a movie you enjoy. Using a hand needle and thread, sew the frame to the bag top (be sure the top part of the bag stays in the frame channel). Use a back stitch to sew in and out of the holes on the frame. The stitch to the back side will land just below the frame edge. | 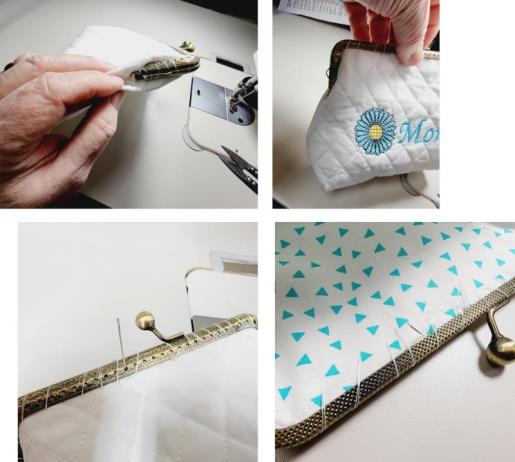 (Click Image to Enlarge) |
Step 22: | In the hole at the lower edge near the hinge, do several stitches below the frame and into the hole. Try and hide the knots under the frame as you rethread the needle. When the entire frame has been stitched to the bag, use a seam ripper to remove the basting stitches. | 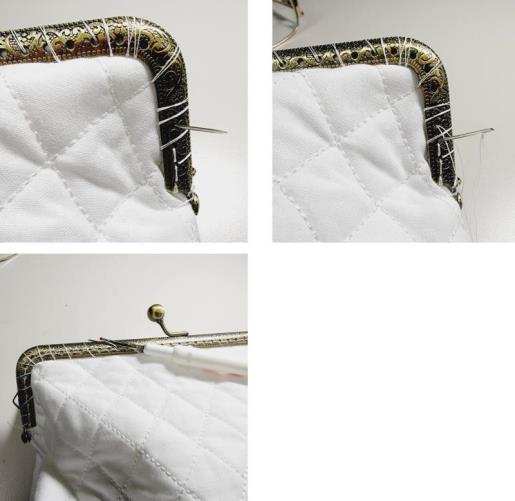 (Click Image to Enlarge) |
Step 23: | The bag back only has quilting, so it is a blank slate for some other things you may wish to add like some machine or hand embroidery, a nice hand-written sentiment using a fabric pen, a “handmade by . . .” tag, or a charm. | 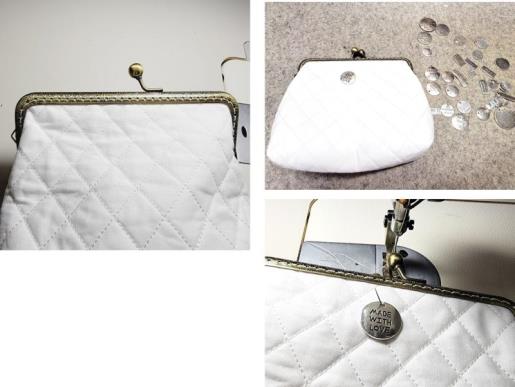 (Click Image to Enlarge) |
Step 24: | Here is the bag back and inside lining. Once one bag is done, you’ll be making more because they are so much fun to do and look professionally made by you! | 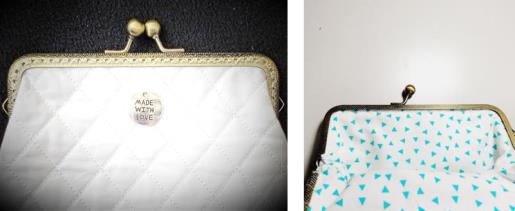 (Click Image to Enlarge) |
Step 25: | Thank you for purchasing this ITH Clutch. Do the flower and text in Mom’s favorite color. This can be used for cosmetics, small sewing items to take to retreats, given for Mother’s Day, Mom’s birthday, or just because. To get more use out of this pattern, instead of stitching Mom, omit that stitching but at the same spot in the color sequence, personalize it with a name or something like Cosmetics, Sewing, or whatever else you’d like. | 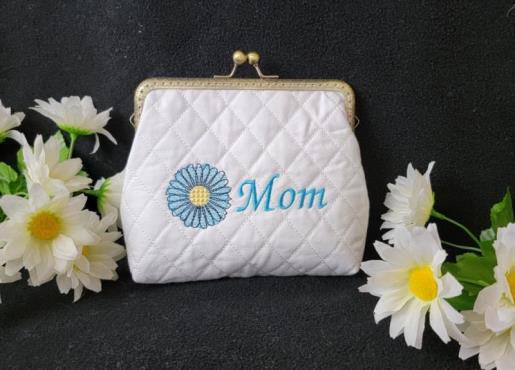 (Click Image to Enlarge) |
|