Border OptionsHugging border, circle, square, or rectangle — with a 3mm satin stitch.
Backing OptionsAvailable with iron-on, sew-on, or velcro backing.
Fast ShippingShipped quickly from the USA.
Free Online Tools
Powerful embroidery utilities that save time and prevent costly mistakes.
Stitch AssistantRECOMMENDED
Get the exact stabilizer, machine settings, needle, and thread color sequence for every embroidery design you purchase — based on that design's stitch density, dimensions, and color count.
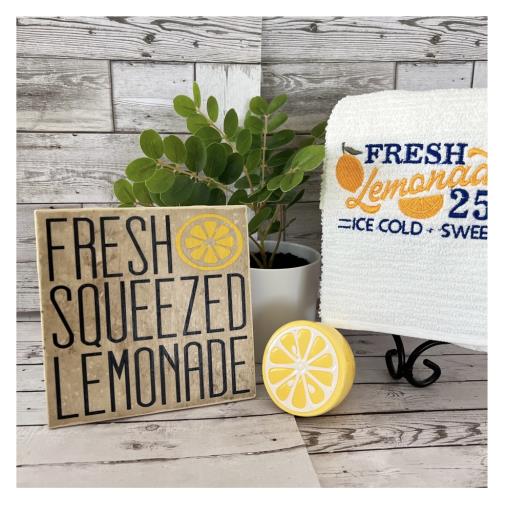
Enhance your kitchen's citrus décor with this unique Fresh Squeezed Lemonade sign. Perfect for adding a refreshing touch to your space, this signage features bold lettering and a vibrant lemon graphic. Step-by-step instructions are included.
Step
of
Fresh Squeezed Lemonade Kitchen Sign
By Linda Mills
Gather all supplies and review instructions before beginning. Wipe tile surface clean.
(Click Image to Enlarge)
Step 2:
Bring Fresh Squeezed Lemonade Print Art/SVG design file into your cutting machine program’s design board. Cut design.
(Click Image to Enlarge)
Step 3:
Resize design to fit application area of tile. Tile size is 6” x 6” so you will want to make your design to fit within the outer edges of tile leaving an approx. ½” space in between tile edges and design. Design resized to 5.5” x 5.5”
(Click Image to Enlarge)
Step 4:
Ungroup design to move just the lemon design file off the design board. Regroup lemon file and move off of board. Regroup wording.
(Click Image to Enlarge)
Step 5:
Prepare your black vinyl onto your cutting mat as you will be cutting vinyl for the wording. Adjust your cutting machine’s settings per your machine’s instructions. Insert prepared mat into cutting machine. Make a test cut. If needed make any necessary adjustments. Cut vinyl
(Click Image to Enlarge)
Step 6:
Remove wording design file off your design board. Move lemon design file back onto your design board. Prepare yellow vinyl onto your cutting mat for the lemon design file. Refer to step 5 for cutting instructions.
(Click Image to Enlarge)
Step 7:
Cutting complete on both. Weed for decals.
(Click Image to Enlarge)
Step 8:
Apply transfer tape to both weeded decals
(Click Image to Enlarge)
Step 9:
Remove adhesive back on the wording decal. Center place onto tile. Finger press. Remove transfer tape.
(Click Image to Enlarge)
Step 10:
Remove adhesive back on the lemon decal. Place into position onto tile. Finger press to secure. Remove transfer tape.
(Click Image to Enlarge)
Step 11:
Add a layer of mod podge to seal and protect. Apply using sponge applicator. (Tip: Wear your glove and apply with your finger for a smoother application) Allow to dry. Approx. 15 minutes. Lightly spray clear matte finish spray for the finishing touch!
(Click Image to Enlarge)
Step 12:
And you are done! Great job! Check out the linked tutorials for lemon themed projects