Border OptionsHugging border, circle, square, or rectangle — with a 3mm satin stitch.
Backing OptionsAvailable with iron-on, sew-on, or velcro backing.
Fast ShippingShipped quickly from the USA.
Free Online Tools
Powerful embroidery utilities that save time and prevent costly mistakes.
Stitch AssistantRECOMMENDED
Get the exact stabilizer, machine settings, needle, and thread color sequence for every embroidery design you purchase — based on that design's stitch density, dimensions, and color count.
Gather and prepare the materials needed for this project. Read the directions carefully before beginning the project. Print a design template. (A paper design template is the actual size of the stitch out. Use the template as a guide for placement and positioning of the design. Embrilliance Essentials embroidery software was used to print the template.)
Step 2:
Use the design template as a placement guide on the napkins. Measure 2" from the side and bottom edge of the napkin. If you are not using a design template, use a fabric marker or sticker to mark the center point and axis on the napkin.
Step 3:
Cut four 3.5"x4.5" pieces of white felt. Cut four 3.5"x4.5" pieces of SF101. Follow product directions to bond the SF101 to the back of each piece of felt.
Step 4:
Hoop one piece of cut away stabilizer. Center the napkin onto the stabilizer. Use a light mist of temporary adhesive spray to secure the napkin to the stabilizer. Add pins or wonder pins to hold the napkin securely in place.
Step 5:
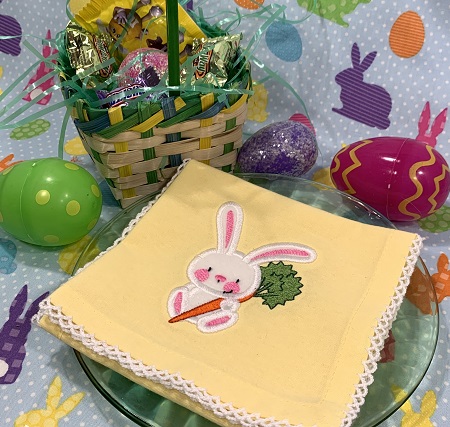
Load the design onto your machine. Attach the hoop to the machine. Check the needle size. Follow the color guide and stops to embroider the bunny. Color 1 and Color 2 are the carrot top. Embroider Color 1 and Color 2. The rabbit is appliqued. Applique Embroidery decoratively stitches one fabric on top of another. Applique embroidery designs include a placement stitch, a tack down stitch, and a finishing stitch for each piece of fabric. These stitches are usually in different colors on the color chart so that the machine will stop after each step. Color 3 is the placement stitch for the rabbit. Embroider Color 3.
Step 6:
Place one of the felt pieces over the placement stitches. Make sure that the fabric covers all of the stitches.
Step 7:
Color 4 is the tackdown stitches. Embroider Color 4.
Step 8:
Remove the hoop from the machine. DO NOT remove the project from the hoop. Use applique scissors to carefully trim the excess fabric from around the stitches. Re-attach the hoop to the machine.
Step 9:
Follow the color guide to finish stitching the design.
Step 10:
After the design has completed stitching, remove the project from the hoop. Carefully trim excess stabilizer from around the design. Trim any long threads if needed.
Step 11:
Congrats! You made an Easter napkin. Repeat steps 1-10 to make more napkins for a set.
Make something beautiful, one stitch at a time! Happy Stitching!
Marisa Littleton is a retired educator with a love for teaching and learning. Interests include machine embroidery, hand embroidery, quilting, cooking, and antiques.