Border OptionsHugging border, circle, square, or rectangle — with a 3mm satin stitch.
Backing OptionsAvailable with iron-on, sew-on, or velcro backing.
Fast ShippingShipped quickly from the USA.
Free Online Tools
Powerful embroidery utilities that save time and prevent costly mistakes.
Stitch AssistantRECOMMENDED
Get the exact stabilizer, machine settings, needle, and thread color sequence for every embroidery design you purchase — based on that design's stitch density, dimensions, and color count.
Gather all supplies and review instructions before beginning.
(Click Image to Enlarge)
Step 2:
Cut your fabric as follows: Cut (1) 6” x 10” for the front from your solid fabric and (1) from your coordinating fabric for the back of treat bag.
(Click Image to Enlarge)
Step 3:
Making the pattern
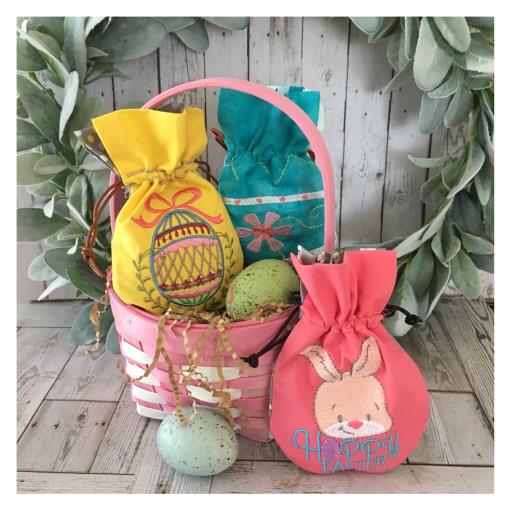
Load the embroidery design file Easter Basket Gift Bag. Hoop tear away stabilizer. Stitch out first color. This is the size and outline of your treat bag. Remove from hoop and cut out pattern on stitch line.
(Click Image to Enlarge)
Step 4:
Front and Back Cut fabric pieces.
Fold the top of fabric down 2 ¾” . Iron press. Find center by folding in half vertically. Center align and place your bag pattern matching top of bag pattern to top fold. Cut on each side up to corner. Fold in sides and iron press. Fold down top to the inside again and iron press.
(Click Image to Enlarge)
Step 5:
Back of bag
Load back of bag design file. Note: I found when using this particular design file for the treat bag back that I had to resize the width of this design to approx. 5” to accomodate for the ITH construction as this design file was a 4.3” x 7” size. Needing a size of 5” x7 “. Refer to your machine’s instruction manual . Hoop stabilizer. Attach to machine. Stitch first color. Place the wrong side of back bag fabric piece down onto stabilizer within outline. Embroider casing lines. Detach hoop. Cut trim any jump stitches and loose thread ends. Remove stabilizer and set aside
(Click Image to Enlarge)
Step 6:
Bag Front
Load design file Easter Egg Gift Bag into your machine. Hoop stabilizer. Attach to machine . Stitch first color. This will stitch out outline. Place your front bag piece right side up within outline. Tape in place.
(Click Image to Enlarge)
Step 7:
Stitch out 2nd color. This will tack down fabric piece. Continue to embroider your design. At the 12th color stitch out. Stop. Lay the back of bag that you had set aside atop front bag.. Right sides together. Matching top and sides. If needed use tape to hold in place. Stitch out tack down stitch. Stop. Detach hoop from machine. Do not unhoop. Trim approx. ¼” from bag stitch line.
(Click Image to Enlarge)
Step 8:
Reattach hoop to machine. Stitch out the last color.
(Click Image to Enlarge)
Step 9:
Detach hoop from machine. Remove from hoop. Tear away stabilizer. Turn right side out. Add your ribbon or cord by feeding it through the casing for a tie draw string. Fill with treats. Cinch the bag and you are done! Great Job!
(Click Image to Enlarge)
Step 10:
Create multiple treat bags using the embroidery design file links attached with this tutorial.