Border OptionsHugging border, circle, square, or rectangle — with a 3mm satin stitch.
Backing OptionsAvailable with iron-on, sew-on, or velcro backing.
Fast ShippingShipped quickly from the USA.
Free Online Tools
Powerful embroidery utilities that save time and prevent costly mistakes.
Stitch AssistantRECOMMENDED
Get the exact stabilizer, machine settings, needle, and thread color sequence for every embroidery design you purchase — based on that design's stitch density, dimensions, and color count.
Gather the materials. Read through the instructions before beginning. A design template is a printout of the actual size of the design. It's an excellent tool to use as a guide for placement and positioning. Print out a copy of the design template and color sequence chart.
Step 2:
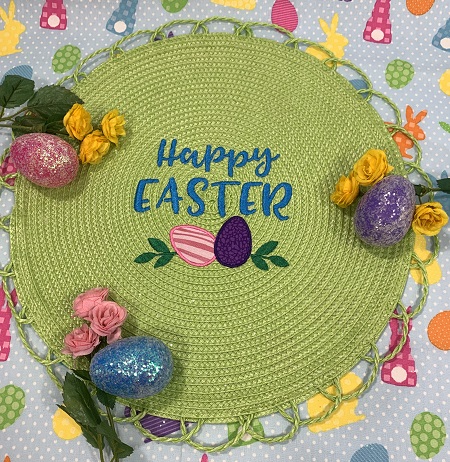
Hoop one piece of cut away stabilizer. Mark the center point on the stabilizer. A ‘floating’ technique’ will be used for this project. Only the stabilizer is hooped. The placemat is secured on top of the stabilizer with temporary adhesive spray. Put the placemat on top of the stabilizer, lining the axis lines made on the placemat with the marks on the hoop. Use pins or wonder pins to secure the placemat to the stabilizer.
Step 3:
Load the embroidery design onto the machine. Attach the hoop. Place one piece of water soluble topping on top of the placemat. The water soluble topping will keep the stitches from sinking into the placemat. Stitch color 1.
Step 4:
Applique Embroidery decoratively stitches one fabric on top of another. Applique embroidery designs include a placement stitch, a tack down stitch, and a finishing stitch for each piece of fabric. These stitches are usually in different colors on the color chart so that the machine will stop after each step. Stitch color 2. Color 2 is the placement stitches for one of the eggs.
Step 5:
Use a very light mist of 505 Temporary Adhesive spray on the back of a 3"x3" fabric piece. Place the fabric on top of the placement stitches. Stitch color 2. Color 2 is the tack down stitches.
Step 6:
Remove the hoop from the machine. DO NOT remove the project from the hoop. Trim the extra fabric from around the egg. Re-attach the hoop to the machine.
Step 7:
Stitch the placement stitches for the second egg. Use a light mist of temporary adhesive spray on the back a 3"x3" fabric piece. Place the fabric piece on the placement stitches. Stitch the tackdown stitches.
Step 8:
Trim the excess fabric from around the egg.
Step 9:
Follow the color chart to finish embroidering the design.
Step 10:
After the design has completed stitching, remove the project from the hoop. Gently tear away the water soluble topping. Use the honey comb tip on the Seam Fix to remove lingering pieces. Trim excess stabilizer from around the design. Trim long threads if needed.
Marisa Littleton is a retired educator with a love for teaching and learning. Interests include machine embroidery, hand embroidery, quilting, cooking, and antiques.