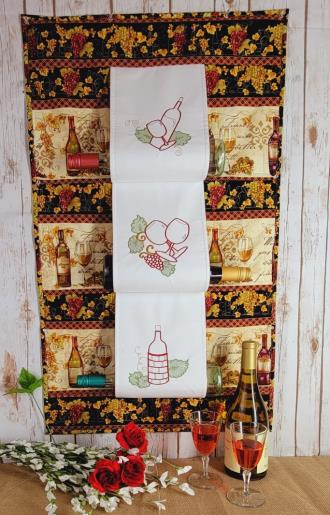
Step 1: | Read through the instructions thoroughly before beginning and assemble all the materials needed to complete the project. ¼” seams are used throughout the project. The border print used was printed on the lengthwise grain; another print in the collection was used for the back and binding. Using the color dots on the fabric, embroidery threads were chosen to coordinate with the fabric. | 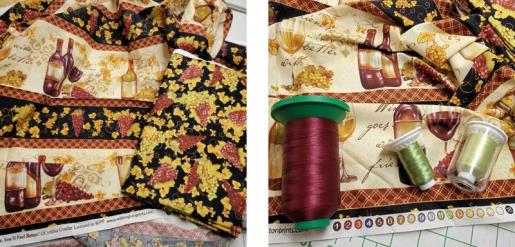 (Click Image to Enlarge) |
Step 2: | Measure the wine bottle, length and circumference. Measure the panel prints. I’ll show how I cut them, but your bottles may differ and you’ll have to decide on the panel sizes. | 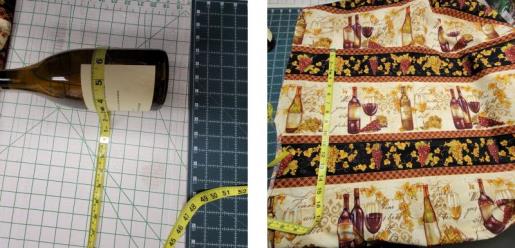 (Click Image to Enlarge) |
Step 3: | Choose the designs from the collection that you’d like for your project. Hoop one piece of white Kona cotton with a piece of poly mesh stabilizer and stitch following the color sequence. Please cut the fabric larger than stated in the materials list so it can be squared up after stitching. The placement line stitches first and then the Mylar is laid down on top of it. | 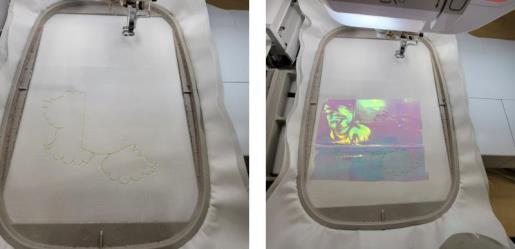 (Click Image to Enlarge) |
Step 4: | A light density fill will stitch and then the excess Mylar is torn away. | 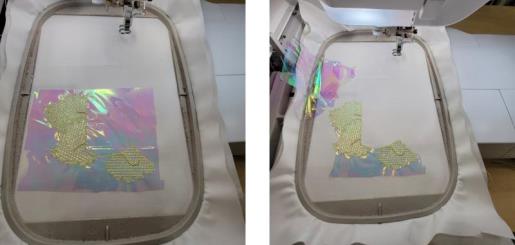 (Click Image to Enlarge) |
Step 5: | Continue stitching the design following the color sequence. | 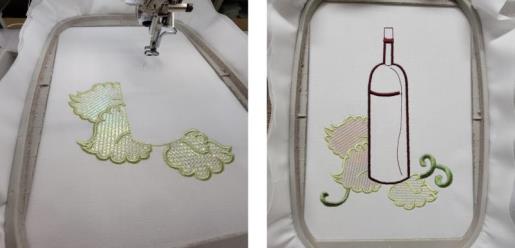 (Click Image to Enlarge) |
Step 6: | Repeat for the remaining designs. Right after hooping the fabric, or before removing it from the hoop, use the center markings on the hoop to mark the outer edge of the fabric. This will aid in squaring up the panels. | 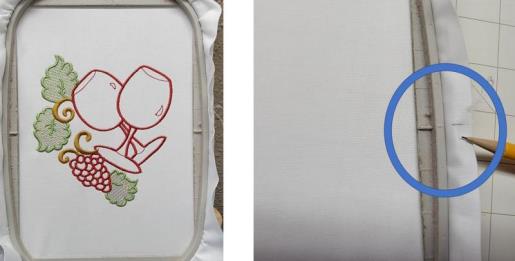 (Click Image to Enlarge) |
Step 7: | Stitch the three panels for that will hold the bottles. Next will be to trim them up. | 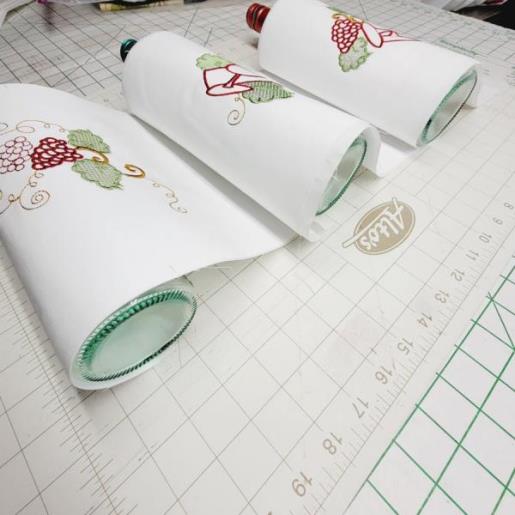 (Click Image to Enlarge) |
Step 8: | Using the measurements from the bottle, figure out how much length you’ll need for the panel. Also determine how wide the panel will need to be to securely hold the bottle. | 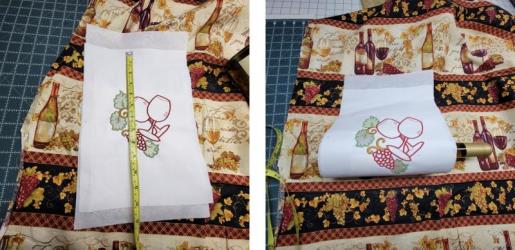 (Click Image to Enlarge) |
Step 9: | Using the centering marks made on the fabric with the determined measurements, square up the panel which will center the embroidery design. For my project, it was 8 x 11 ¾” (including ¼” seam allowances); your measurement will differ. | 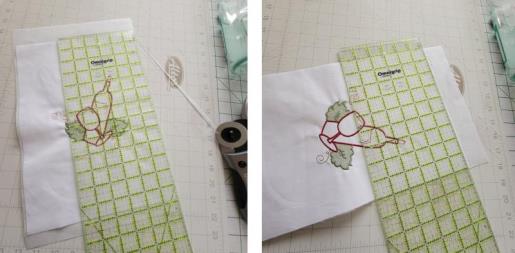 (Click Image to Enlarge) |
Step 10: | Cut three panel lining pieces the same length, but ¼” smaller in width. When sewn and turned, this will allow the panel piece to turn to the underside slightly to make sure none of this lining peeks out to the right side when finished. With right sides together, pin the lining to the embroidered panel on the long sides. | 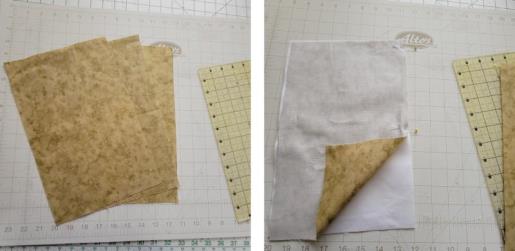 (Click Image to Enlarge) |
Step 11: | Sew the long sides. Because the lining is smaller in width, you’ll get a bit of cupping of the fabric. As shown. | 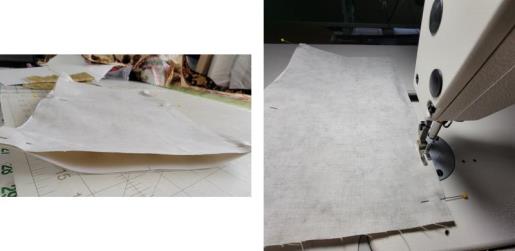 (Click Image to Enlarge) |
Step 12: | Turn the panel right side out through one end. Press the long sides—notice the right-side rolls toward the lining easily because the lining was cut shorter in the width. | 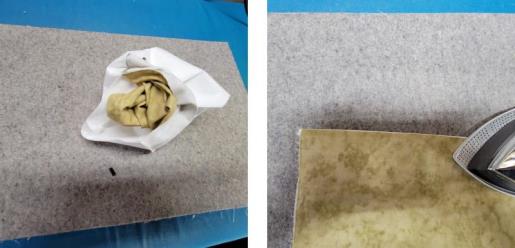 (Click Image to Enlarge) |
Step 13: | Top stitch the long sides and baste the top and bottom ends closed. | 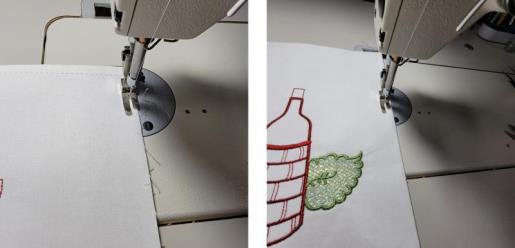 (Click Image to Enlarge) |
Step 14: | Repeat steps 9-13 for the remaining two panels. Fold the panels in half lengthwise and place pins at the top and bottom; set the panels aside. | 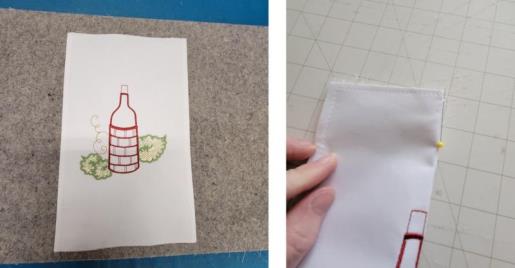 (Click Image to Enlarge) |
Step 15: | Now cut the background panels. For this fabric, I cut 3 panels as shown. They were cut wider than needed and then cut down to size before the binding was done. The size I cut for each was 9 ¼” from the top of the black grape border to the bottom of the crosshatch border, and 22” in width—this included seam allowances. | 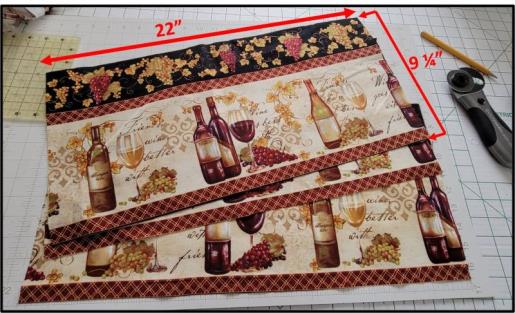 (Click Image to Enlarge) |
Step 16: | A grape border piece was cut for the bottom, and then the layout was planned. Because I was using the quilting frame and also because of the way the embroidered panels needed to be flipped up, the assembly was done from the bottom to the top. | 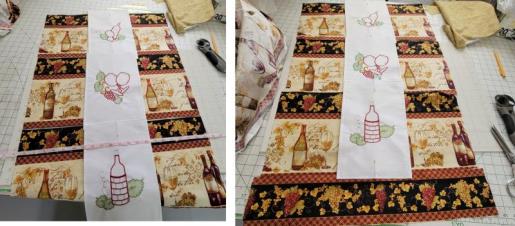 (Click Image to Enlarge) |
Step 17: | A top border piece was also cut. The pieces were stacked in the order they would be sewn (from bottom to top). The quilting frame was loaded with the backing fabric and batting. For a domestic machine, cut the backing fabric and batting larger than needed and spray baste them together. | 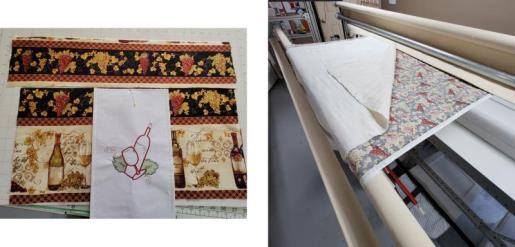 (Click Image to Enlarge) |
Step 18: | For the flip and stitch assembly, this is basically how it was done. The bottom border was placed down, basted in place, and then quilted. The bottom of the first embroidered panel was centered face down at the top of that first border and basted in place. | 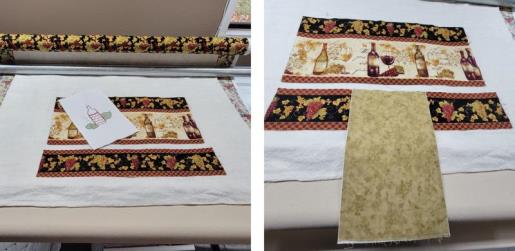 (Click Image to Enlarge) |
Step 19: | The bottom of the first (as sewn, third when hanging) panel was laid face down over the bottom border. A ¼” seam was sewn, the panel flipped up, basted down, and then quilted. | 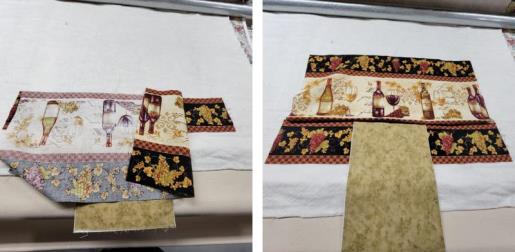 (Click Image to Enlarge) |
Step 20: | The embroidered panel was flipped up, centered at the top of the panel and basted in place. From there the next embroidered panel was placed face down over the first, then the second panel, and so on. Now we’ll look at the steps. | 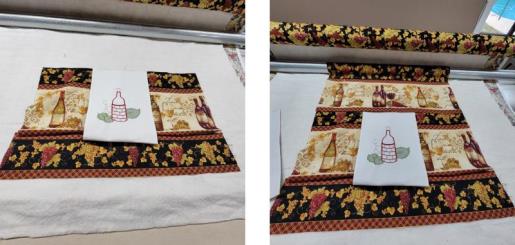 (Click Image to Enlarge) |
Step 21: | I found it easiest to keep the centering straight by first using the channel lock on the quilting machine and a fabric marking pencil to draw a dotted line vertically on the batting. All the fabric pieces are marked at the center top and bottom with pins, and those pins are used to align along these dots. | 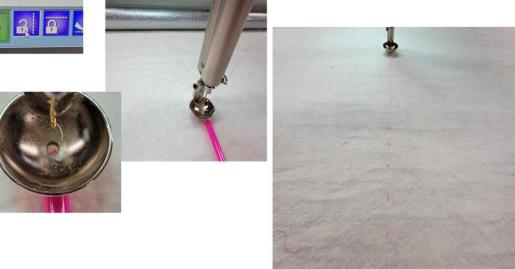 (Click Image to Enlarge) |
Step 22: | Fold the embroidered and fabric panels in half to find the center top and bottom; place pins in the center points. These pins will align to the center line drawn. For domestic machines, mark the batting and fabrics the same way. You’ll hoop the fabric and batting to quilt at the same step as on the longarm. | 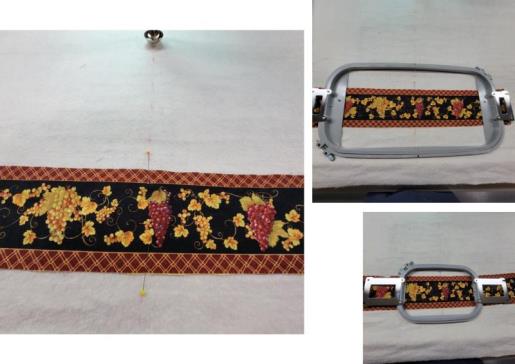 (Click Image to Enlarge) |
Step 23: | Using the channel lock, baste a plumb line at the bottom of the batting. Place the bottom border, right side up, with the bottom of the border along the plumb line and the pins aligned with the center marks on the batting. | 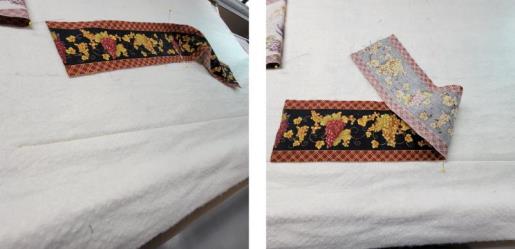 (Click Image to Enlarge) |
Step 24: | Baste the border in place. Measure the length and height of the border. Using software convert the Wine Outline design and load it on the quilting computer. For this border piece I sized the design to 2.25” high, kept the ratio, and just filled the length. Save the border file—it will be used for all the black grape borders. | 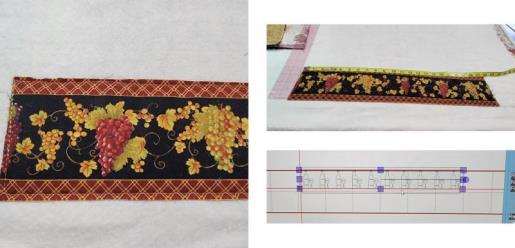 (Click Image to Enlarge) |
Step 25: | The border was stitched. To best center the row of quilting, I set the row to stitch ¼” above the crosshatch printing on the fabric. | 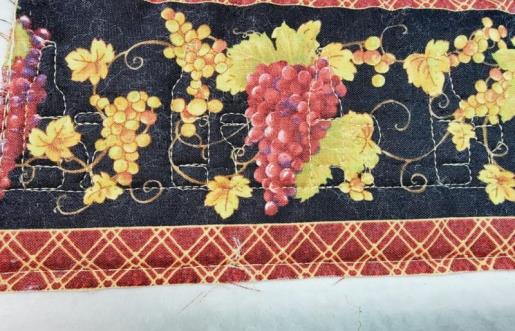 (Click Image to Enlarge) |
Step 26: | Take the bottom embroidered panel and place the bottom of the panel to the top of the border just quilted, matching the centers. | 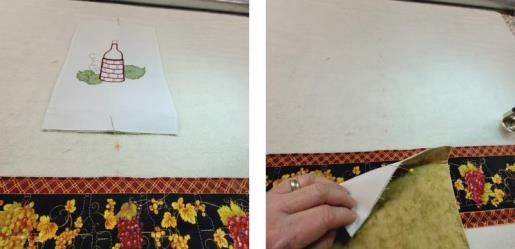 (Click Image to Enlarge) |
Step 27: | Baste the embroidered panel in place. | 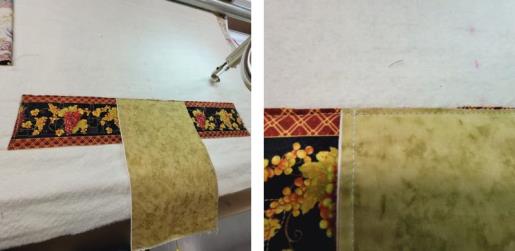 (Click Image to Enlarge) |
Step 28: | Now take the bottom large panel so the bottom aligns with the top of the bottom border, matching the center marks. | 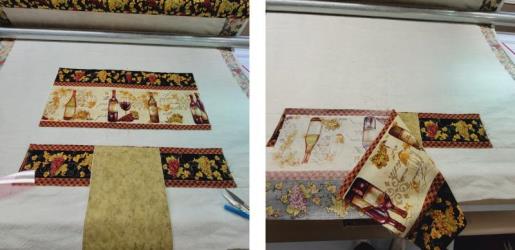 (Click Image to Enlarge) |
Step 29: | A ¼” seam needs to be sewn. Mark down ¼” from the cut edge, set the needle at the mark, turn on the channel lock, and stitch the seam. Because these seams need to be very strong to hold the weight of the bottles, stitch back to the beginning again. | 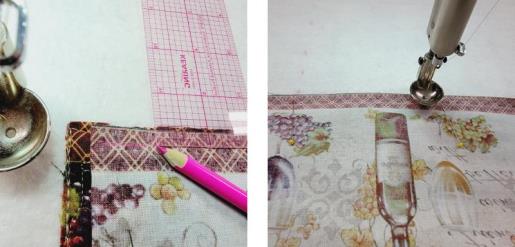 (Click Image to Enlarge) |
Step 30: | Flip the panel up matching the top center pin to the center mark on the batting. Baste the panel into place. | 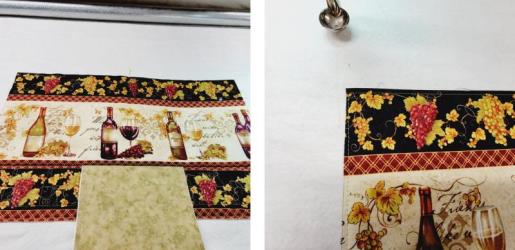 (Click Image to Enlarge) |
Step 31: | For the longarm, measure and center the design by planning. Using the measurements for the quilting design in the previous step, resize the design, fill the panel length, and save the file to be used on all the large panel sections. Quilt the panel. I did the main portion of the panel in a 5.5” quilting size (save file), and the grape portion like the bottom border with the saved 2.25” file. For domestic machines, rehoop as needed. | 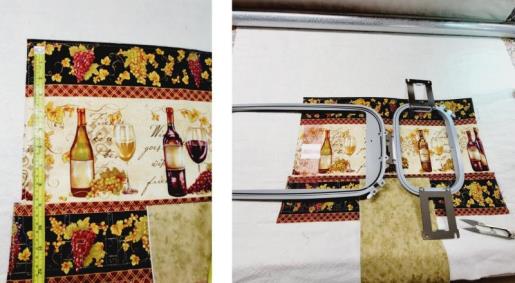 (Click Image to Enlarge) |
Step 32: | Quilt the design and grape border. | 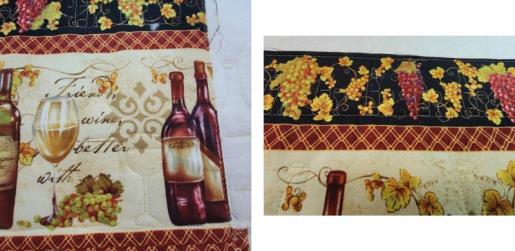 (Click Image to Enlarge) |
Step 33: | Flip the embroidered panel up, matching the center marks. | 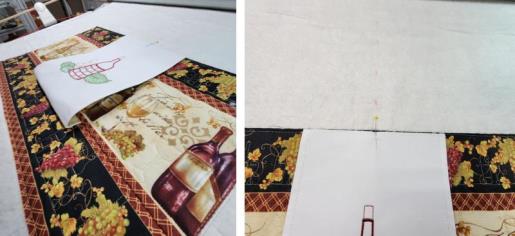 (Click Image to Enlarge) |
Step 34: | Baste the embroidered panel in place. Next will be to baste on the next embroidered panel and then sew the fabric panel on and quilt it just like the last steps. | 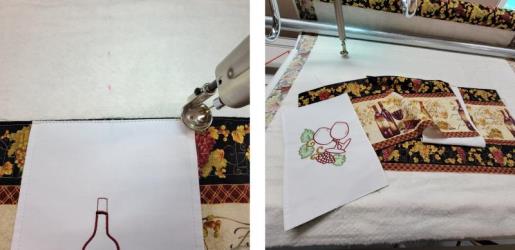 (Click Image to Enlarge) |
Step 35: | Lay the second embroidered panel over the first matching center pins, with the bottom edge of the panel at the top edge of the first panel; baste the panel in place. Place the second fabric panel right side down over the first with the bottom cut edge to the top edge of the first panel as shown. Measure the ¼” seam, use the channel lock, and sew the seam to secure everything together—be sure to sew it twice! Roll the project as needed to fit on the frame. | 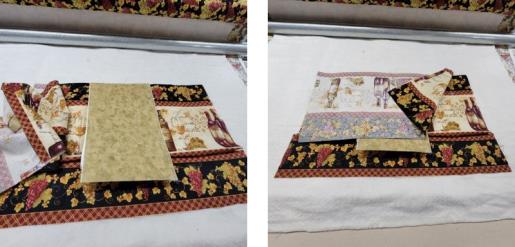 (Click Image to Enlarge) |
Step 36: | Baste the panel in place, quilt the main portion and border using the saved files; flip the embroidered panel up and baste it in place. | 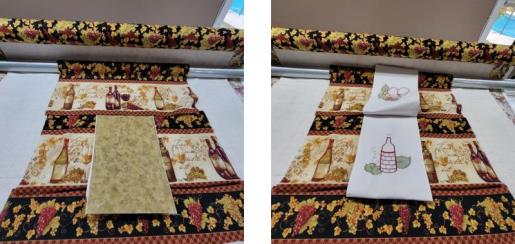 (Click Image to Enlarge) |
Step 37: | Continue in the same manner for the remaining embroidered and fabric panels. The last thing to stitch on is the top border and quilt it. | 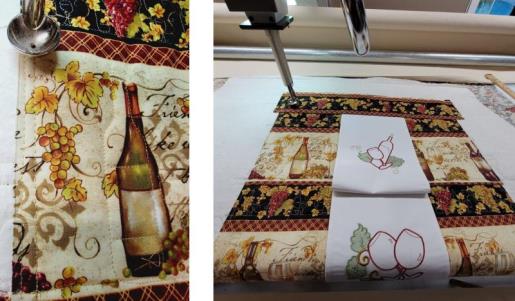 (Click Image to Enlarge) |
Step 38: | To aid in trimming, I ran a line of stitching on each side using the channel lock—I measured to be sure the stitching would be equidistance on each side of the embroidered panels. | 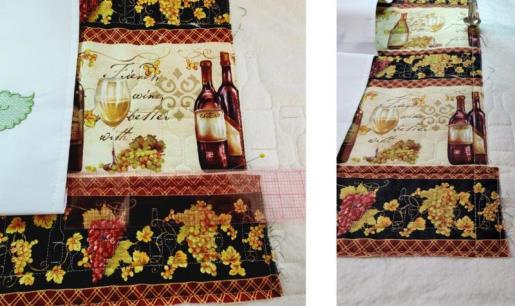 (Click Image to Enlarge) |
Step 39: | Here is the caddy ready to be removed from the frame and squared up. | 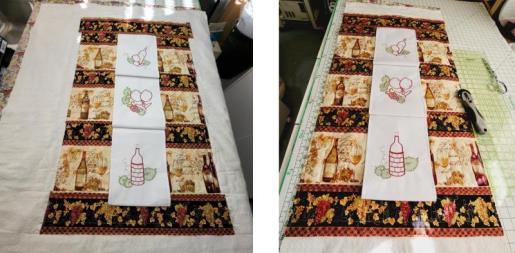 (Click Image to Enlarge) |
Step 40: | Using the stitching lines as a guide, trim all four sides 1/4” from the stitching line. | 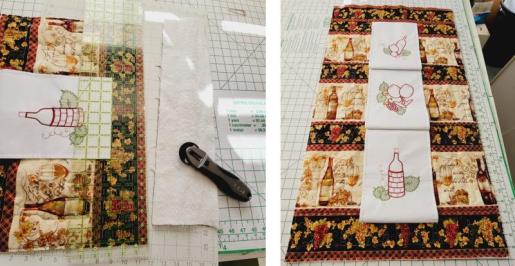 (Click Image to Enlarge) |
Step 41: | Measure and use some excess fabric to create a hanging sleeve for the back. I cut it double the width of a yard stick that I cut in half. This was used to add stability to the top of the wine caddy for hanging. Again, be sure you know how you are going to hang this on the wall—you may not want to do a header and use a yardstick. Figure out what you’d like to do. The fabric was cut 5” wide and 1” shorter than the width of the caddy. The short ends were double folded, pressed, and stitched down. | 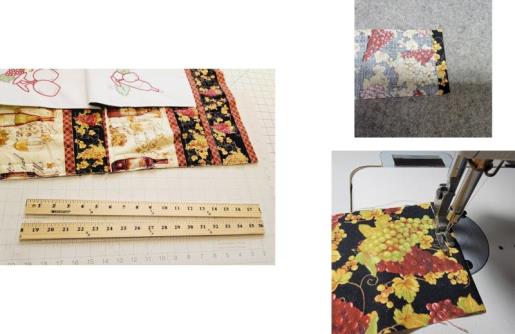 (Click Image to Enlarge) |
Step 42: | The sleeve was pressed in half lengthwise. | 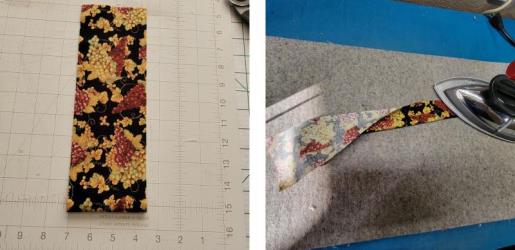 (Click Image to Enlarge) |
Step 43: | Centered at the top, the sleeve cut ends met the top of the caddy and it was basted in place and hand sewn down along the folded edge to the back of the caddy. The half yard stick was inserted to test fit it as shown, and then removed so the caddy could be finished up. | 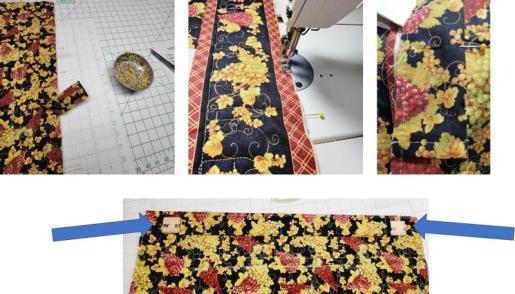 (Click Image to Enlarge) |
Step 44: | Use your favorite method for binding. Insert the wooden stick back into the sleeve and prepare to hang the wall caddy. Insert the wine bottles. You can see the embroidered panels cradle the wine bottles. I would only use this with inexpensive bottles of wine for display. | 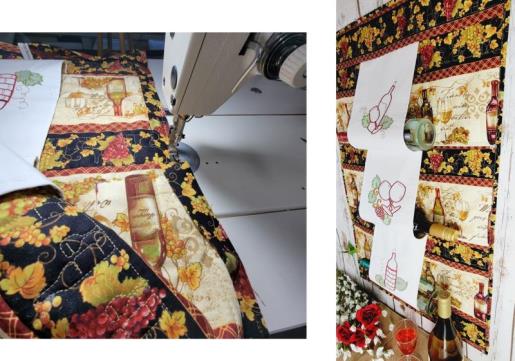 (Click Image to Enlarge) |
Step 45: | 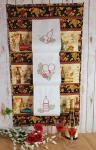 (Click Image to Enlarge) Congratulations on finishing the Wine Wall Caddy. It would be a nice addition to a dining room for the wine lovers you know. |
|