Holiday Flash $1.49
Rustic Merry Christmas Pillow Cover

Rustic Merry Christmas Pillow Cover Embroidery Project

By   Linda Mills   on   December 10, 2021
  • SKILL LEVELIntermediate
  • TIME REQUIRED01:00
Description

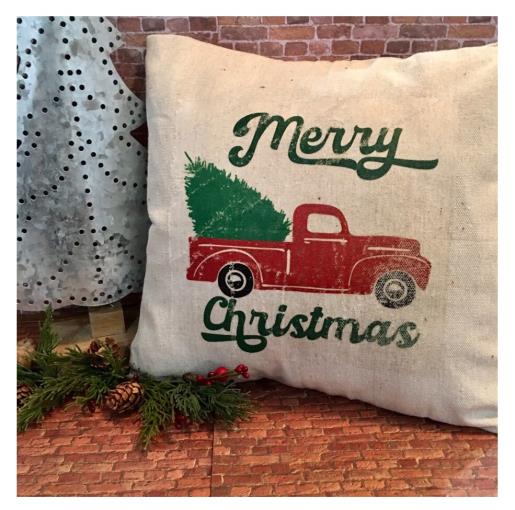
Create a charming rustic accent for the holidays with this Merry Christmas pillow cover featuring a vintage red truck carrying a Christmas tree. Perfect for adding festive cheer to any room. Step-by-step instructions are included.

Step of

Materials

Project Preview Video

Materials
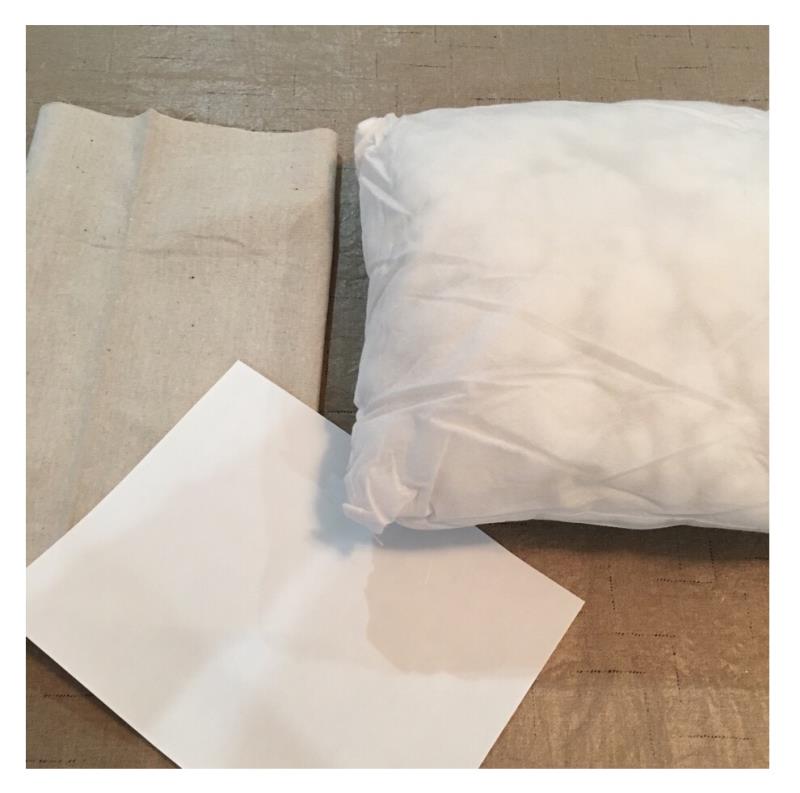
  • (1) 13” SQ PILLOW FORM
  • (1) PRINTABLE HEAT TRANSFER SHEET
  • IRON
  • DROP CLOTH COTTON FABRIC (PURCHASE AT HARDWARE, PAINT STORES)
  • COMPUTER WITH WORD PROGRAM
  • PRINTER

  • Designs used in this project

    Final Product: What You Will Create

    Preface:
    Simple tutorial that shows the making of an envelope pillow cover using just one cut of fabric for a squared pillow insert and which can be constructed quickly for those who are experienced. The printable heat transfers are a simple and quick way to apply print art designs to drop cloth for another technique to create rustic home décor charm.


    Step 1:
    Gather all supplies and review instructions before beginning. Iron press fabric.  

    (Click Image to Enlarge)


    Step 2:
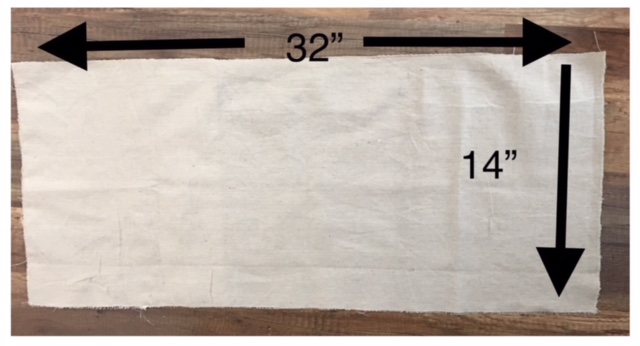
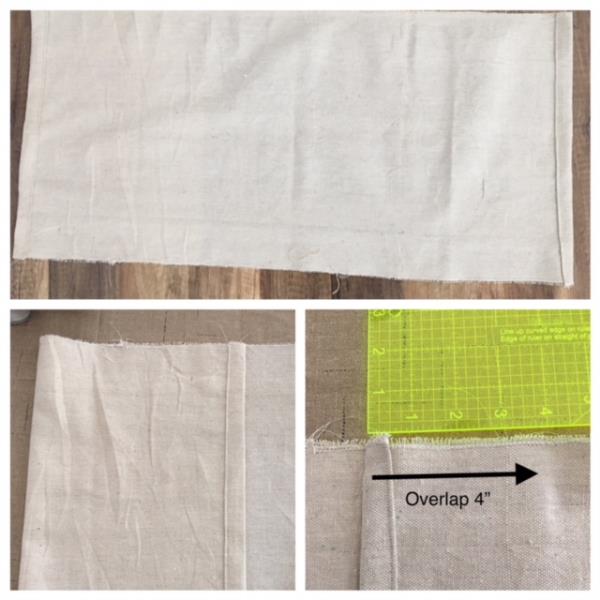
    Cut  pillow cover from drop cloth fabric 14” x 32”. This cut will be your pillow cover front and back envelope. This fabric easily frays. Serge or zig zag all raw edges before constructing.

    (Click Image to Enlarge)


    Step 3:
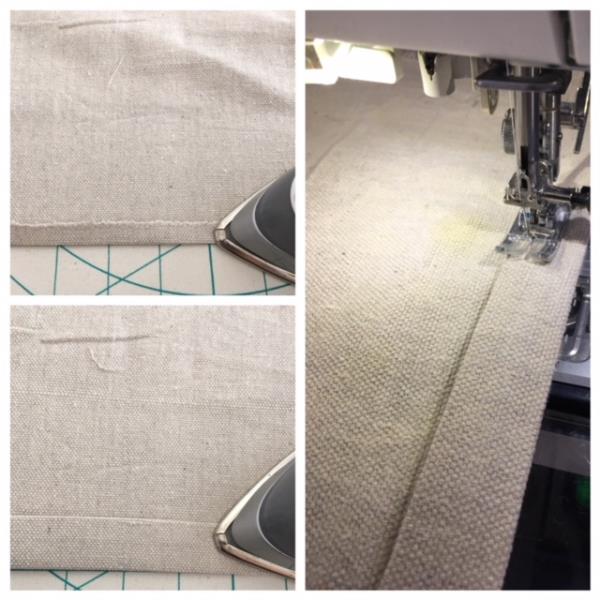
    Fold in each end ¼” and fold over again ¾” Iron press. Top stitch in place.

    (Click Image to Enlarge)


    Step 4:
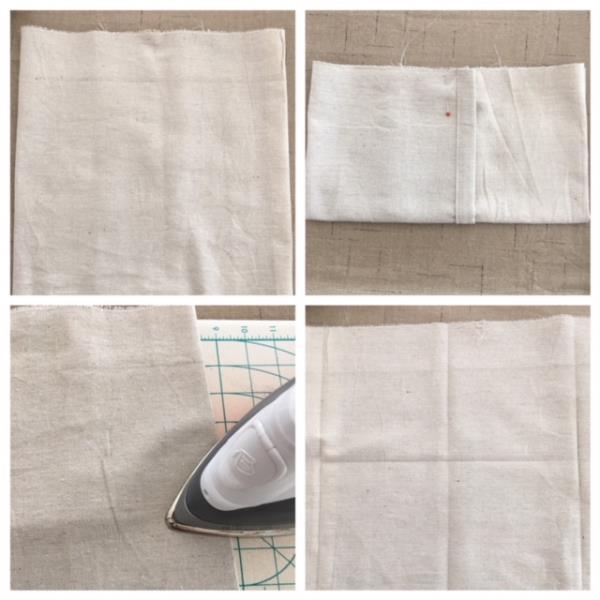
    With your cut fabric piece wrong side up. Fold in the left and right side hemmed edges. Overlap them by 4” . Center the overlap. Iron press side fold lines.
     .

    (Click Image to Enlarge)


    Step 5:
    Flip over. Right side up. This section is front of pillow cover. Find center of front section by quarter  folding. Fold in half and half again to form a creased crosshair. Iron press if needed to show crease. 

    (Click Image to Enlarge)


    Step 6:
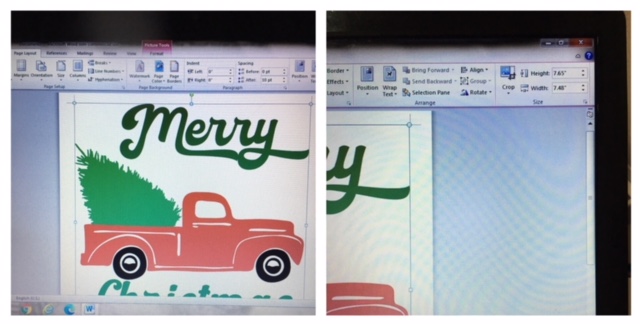
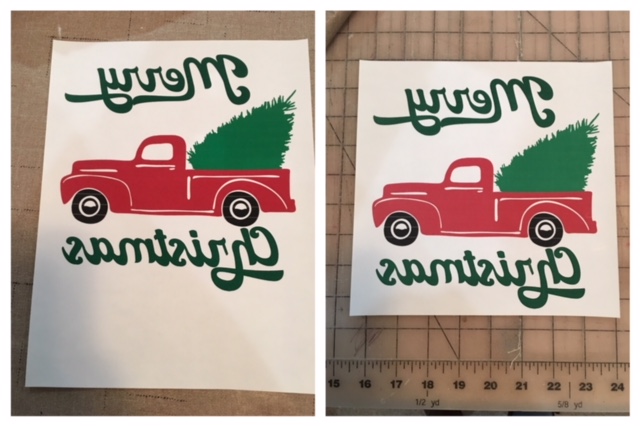
    Open a blank document in your computer word program and insert print art “Christmas Truck” . Resize print art design to fit application area or to approx. 7.7” x 7.7”

    (Click Image to Enlarge)


    Step 7:
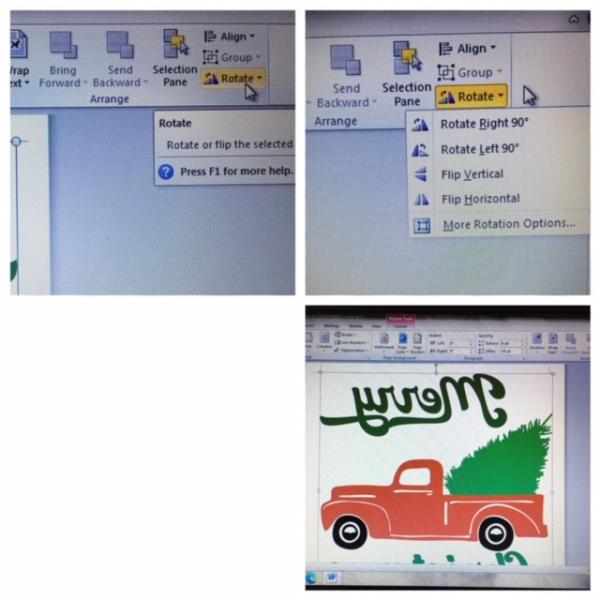
    Mirror image by clicking on page layout. Click rotate. Flip horizontally

    (Click Image to Enlarge)


    Step 8:
    Insert sheet of printable heat transfer into printer. Refer to your printable heat transfer product instructions. Check your printer settings for the best print quality. Print. Trim print out of design. 

    (Click Image to Enlarge)


    Step 9:
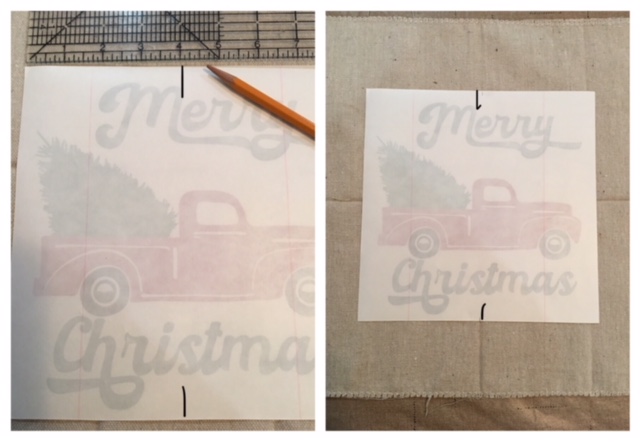
    Flip over printed heat transfer paper. Printed side face down. Mark center at top and bottom to help with centering onto front of pillow cover.

    (Click Image to Enlarge)


    Step 10:
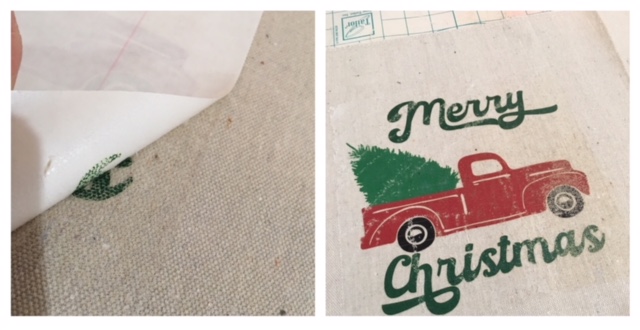
    Follow your printable heat transfer product instructions for application. Heat press transfer onto
    front of pillow cover.

    (Click Image to Enlarge)


    Step 11:
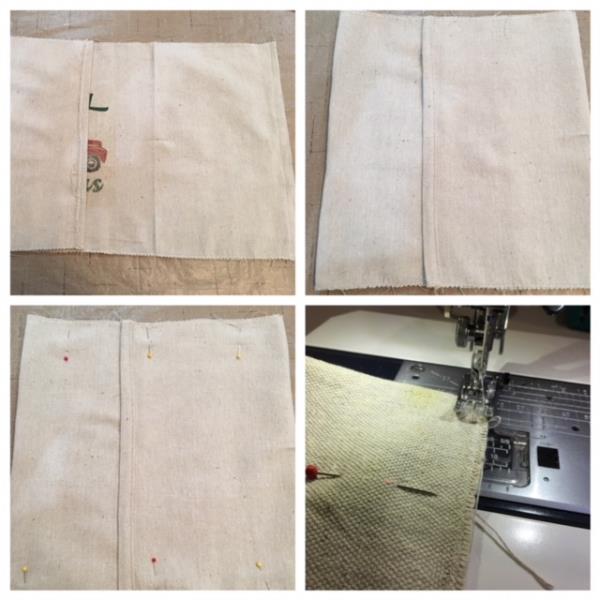
    Refold in each end. Right sides together, using your creased fold as your guide. Pin in place. Confirm that the Print Art design is centered in the front section. Stitch top and bottom using ¼” seam allowance.

    (Click Image to Enlarge)


    Step 12:
    Remove pins. Turn right side out. Insert pillow form. And you are done! Way to go! Congrats!

    (Click Image to Enlarge)

    Meet the Author: Linda Mills
    Linda Mills
    Linda loves to create by sharing her different sewing and machine embroidery techniques so others can utilize their machines to the fullest
    More From This Author
    Link is Broken, Please check the URL
    Exclusive Embroidery Offers!
    Copyright © {{ currentDate | date:'yyyy'}} - EmbroideryDesigns.com
    GET 50% OFF! ×