Labor Day 10 Off 30
Live Chat
Embroidery Designs
Welcome, Embroiderer
Login
North Pole Cookie Board/SVG

North Pole Cookie Board/SVG Embroidery Project

By   Linda Mills   on   September 13, 2021
  • SKILL LEVELIntermediate
  • TIME REQUIRED01:30
Description

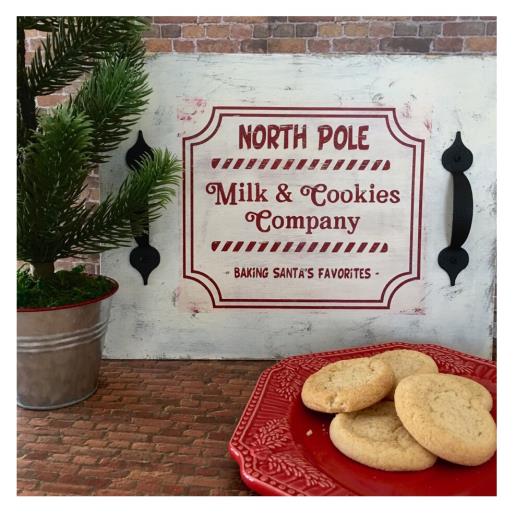
Add a little farmhouse charm to your holiday décor this season with a distressed vintage appeal board tray featuring a North Pole Milk and Cookie SVG design.

Step of

Materials

Project Preview Video

Materials
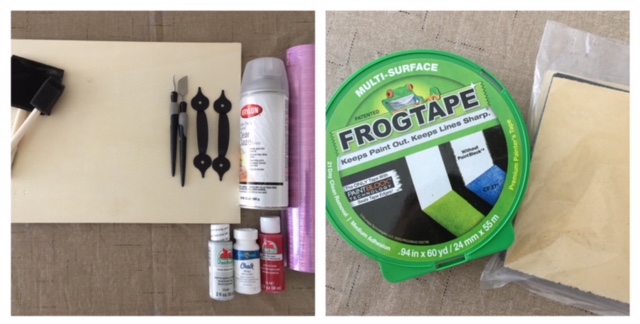
  • (1) WOOD BOARD/TRAY 13.5” X 10.5” ( BOARD USED WAS PURCHASED FROM WALMART IN CRAFT AREA)
  • ACRYLIC WATER BASED PAINTS (RED, WHITE, GRAY)
  • DOOR HANDLE HARDWARE (2)
  • REMOVABLE ADHESIVE BACK VINYL (1) 12” X 12”
  • TRANSFER TAPE
  • WEEDING TOOLS
  • CUTTING MACHINE (CRICUT,SILHOUETTE)
  • SPONGE PAINT BRUSH
  • SAND PAPER (SMALL SHEET)
  • FROG TAPE
  • PENCIL
  • CLEAR ACRYLIC COATING/GLAZE SPRAY

  • Designs used in this project

    Final Product: What You Will Create

    Preface:
    A board tray you can use for Santa’s cookies on Christmas Eve or adding a bit of farmhouse holiday decor charm to your kitchen. This tutorial will show you a reverse stencil method for a wood board signage. Three paint colors will be layered onto the board. Usually the reverse stencil method works best with just two layers of paint. One color for the base and the second color for the lettering/design. For this project three colors were used so that the SVG design would look like a vintage “label”. Basic knowledge of a cutting machine and how to weed for a decal is required.  


    Step 1:
    Gather all supplies and review instructions before beginning. 

    (Click Image to Enlarge)


    Step 2:
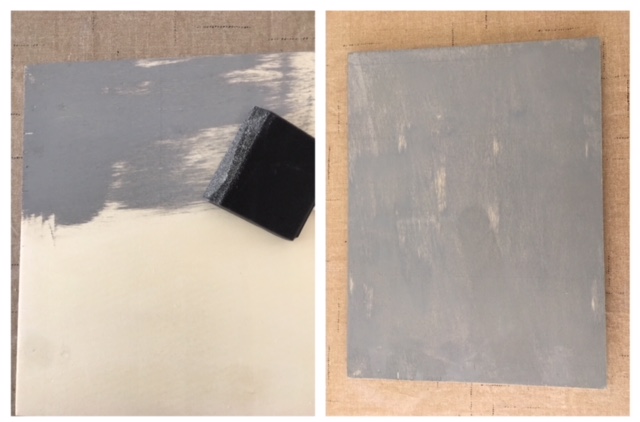
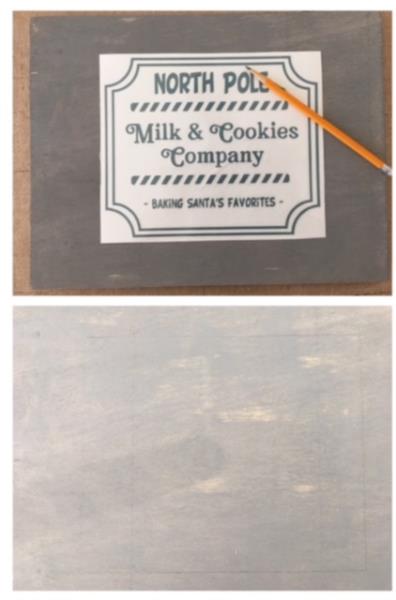
    Lightly paint board using the gray paint. Allow to dry. 

    (Click Image to Enlarge)


    Step 3:
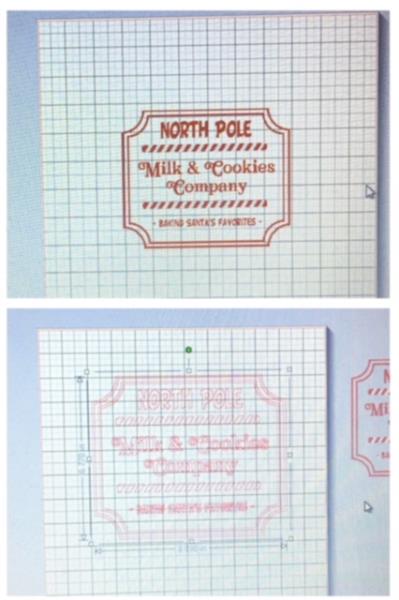
    Bring North Pole SVG design into your cutting machine program’s design board. Cut design and resize if needed to fit the center area of your board. Keep in mind the placement of your handles. Design for this project was resized to 6.5”x 8”.

    (Click Image to Enlarge)


    Step 4:
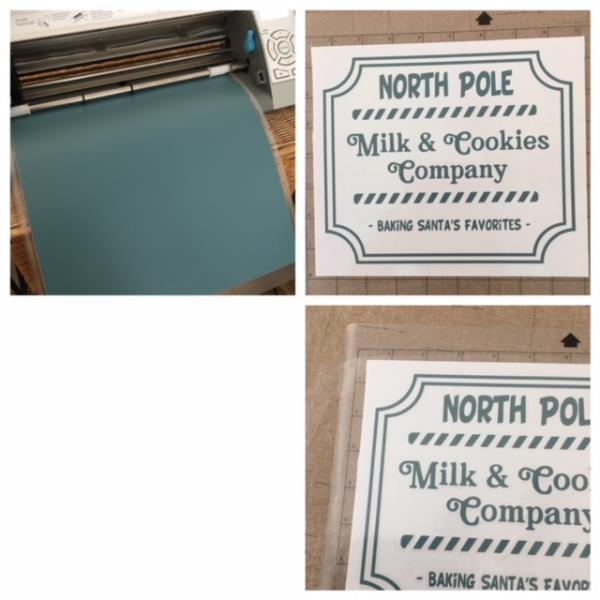
    Prepare your vinyl onto mat. Cut design onto vinyl. Weed vinyl for a decal. Apply transfer tape.

    (Click Image to Enlarge)


    Step 5:
    Trim all sides of decal close to design. Align and center position onto board. Pencil outline all around edges making a box. 

    (Click Image to Enlarge)


    Step 6:
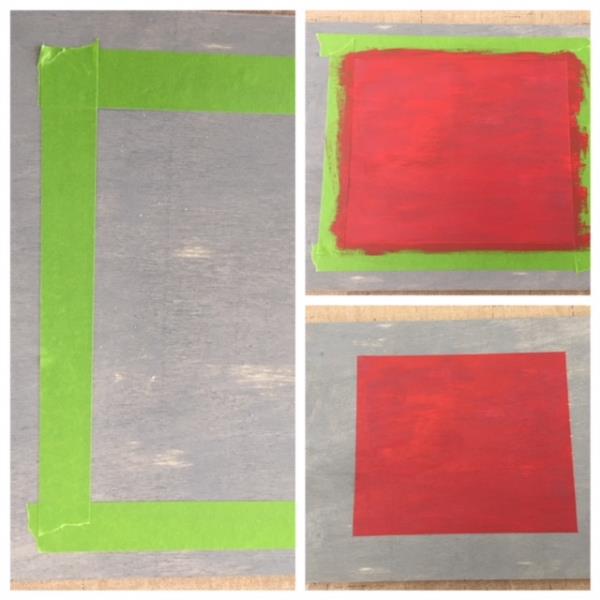
    Place frog tape around penciled drawn box. Lightly paint using red color inside of taped area. Remove tape when dry.

    (Click Image to Enlarge)


    Step 7:
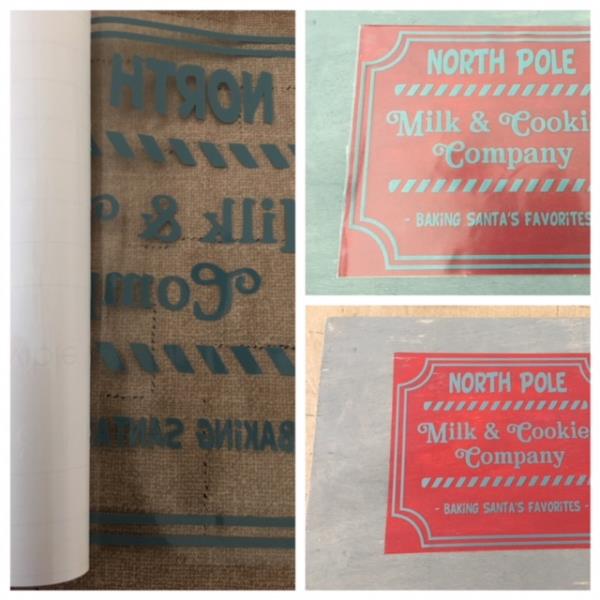
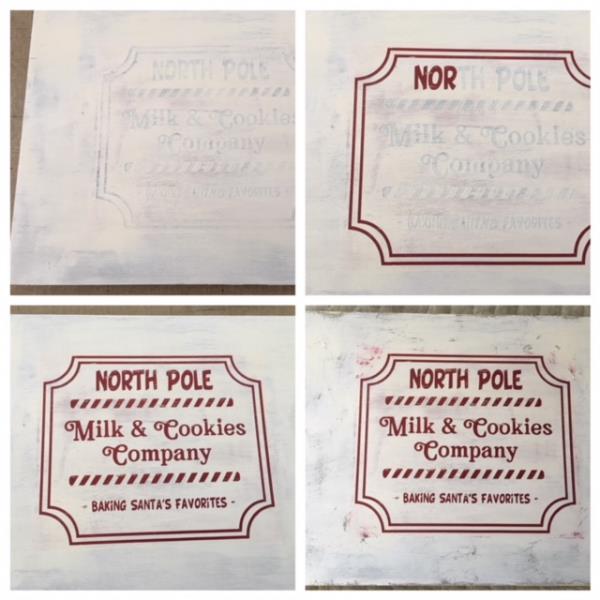
    Remove the adhesive backing from weeded design vinyl. Center and place in red painted area. Finger press down to secure. Push out any and all air bubbles. Remove transfer tape. 

    (Click Image to Enlarge)


    Step 8:
    Using white paint color. Paint over decal and cover board. Allow to dry. Carefully remove decal using a pick tool. Sand areas to give the board a distressed look.

    (Click Image to Enlarge)


    Step 9:
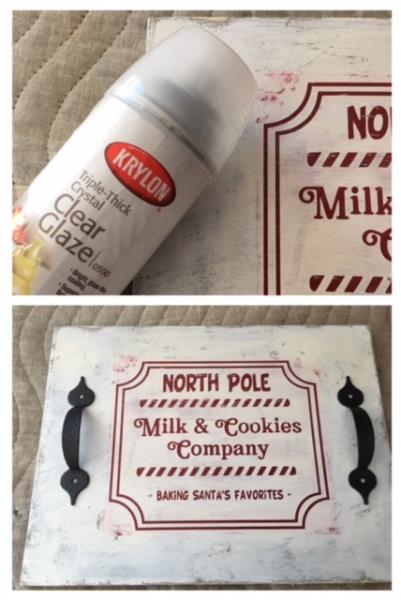
    Spray with acrylic coating/glaze to seal in paints. Allow to dry. Attach door handles to each side of board. And you are done! Great job!
     
    *Do not place food directly onto board. 

    (Click Image to Enlarge)

    Meet the Author: Linda Mills
    Linda Mills
    Linda loves to create by sharing her different sewing and machine embroidery techniques so others can utilize their machines to the fullest
    More From This Author
    Link is Broken, Please check the URL
    Exclusive Embroidery Offers!
    Copyright © {{ currentDate | date:'yyyy'}} - EmbroideryDesigns.com
    GET 50% OFF! ×