ITH Zodiac Key Fobs

ITH Zodiac Key Fobs Embroidery Project

By   Pat Williams   on   August 10, 2021
  • SKILL LEVELSome Experience
  • TIME REQUIRED00:15
  • FINISHED SIZE2.13 x 3 inches
Description

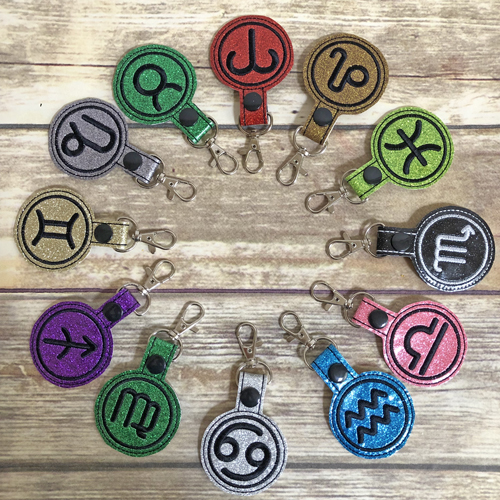
Create personalized Zodiac Key Fobs for every sign with this quick and easy in-the-hoop project. These vibrant key fobs are perfect for showcasing astrological pride. Ideal for birthdays and personalized gifts. Step-by-step instructions are included.

Step of

Materials

Project Preview Video

Materials
  • 5” x 7” embroidery hoop
  • 4 ½” x 3” Marine Vinyl – canvas backed
  • 4 ½” x 3” Glitter Mirror Vinyl® or Luxe Sparkle Vinyl® or other smooth faced glitter vinyl
  • Optional –Size 20 Long KamSnaps® or size 20 Short depending upon vinyl thickness
  • KamSnaps® pliers
  • Awl
  • Key rings and lobster clasps
  • 2.5 ounce Cut away stabilizer
  • Sharp scissors
  • Spray adhesive

  • Designs used in this project
  • https://www.embroiderydesigns.com/productdetails/pat-williams/designs/1/zokf01
  • https://www.embroiderydesigns.com/productdetails/pat-williams/designs/1/zokf06
  • https://www.embroiderydesigns.com/productdetails/pat-williams/designs/1/zokf02
  • https://www.embroiderydesigns.com/productdetails/pat-williams/designs/1/zokf05
  • https://www.embroiderydesigns.com/productdetails/pat-williams/designs/1/zokf04
  • https://www.embroiderydesigns.com/productdetails/pat-williams/designs/1/zokf03
  • https://www.embroiderydesigns.com/productdetails/pat-williams/designs/1/zokf09
  • https://www.embroiderydesigns.com/productdetails/pat-williams/designs/1/zokf08
  • https://www.embroiderydesigns.com/productdetails/pat-williams/designs/1/zokf07
  • https://www.embroiderydesigns.com/productdetails/pat-williams/designs/1/zokf12
  • https://www.embroiderydesigns.com/productdetails/pat-williams/designs/1/zokf11
  • https://www.embroiderydesigns.com/productdetails/pat-williams/designs/1/zokf10


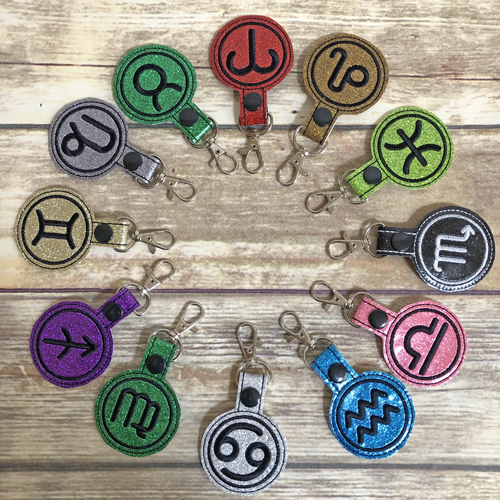
  • Final Product: What You Will Create

    Preface:
    The glitter/sparkle vinyl is generally thinner than the solid marine vinyl. I prefer to use the thinner vinyl on the front of the key fobs and a thicker vinyl on the back. If you feel that your vinyl is thin use two layers of stabilizer in the hoop.
    The Kam Snaps sizes depend upon the thickness of the vinyl. I prefer the “Long” size 20 Kam Snaps® on the thicker vinyl and the short ones on the thinner vinyl. The Kam Snaps pliers were ordered from Amazon but you have to go to Kam Snaps’ own website to get the longer pronged snaps. If you do not have a Kam Snaps® pliers you can insert the key ring circle into the extension on the key fob, fold it over and stitch it down with your sewing machine.
    All three color changes in these designs are stitched with a single color thread.
    The Zodiac dates are:
    • Aries Dates: March 21 – April 19
    • Taurus Dates: April 20 – May 20
    • Gemini Dates: May 21 – June 20
    • Cancer Dates: June 21 – July 22
    • Leo Dates: July 23 – August 22
    • Virgo Dates: August 23 – September 22
    • Libra Dates: September 23 – October 22
    • Scorpio Dates: October 23 – November 21
    • Sagittarius Dates: November 22 – December 21
    • Capricorn Dates: December 22 – January 19
    • Aquarius Dates: January 20 – February 18
    • Pisces Dates: February 19 – March 20


    Step 1:
    (Click Image to Enlarge)
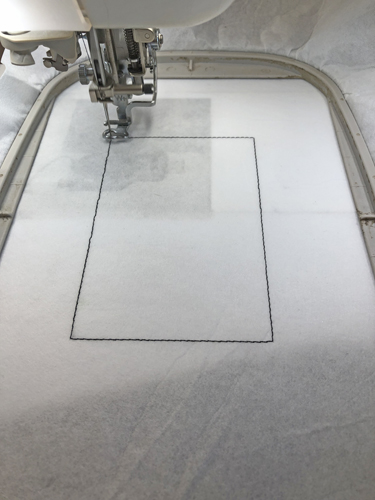
    Tautly hoop stabilizer in your hoop. Run the 1st color stop (CS 1) as a placement line for the vinyl.


    Step 2:
    (Click Image to Enlarge)
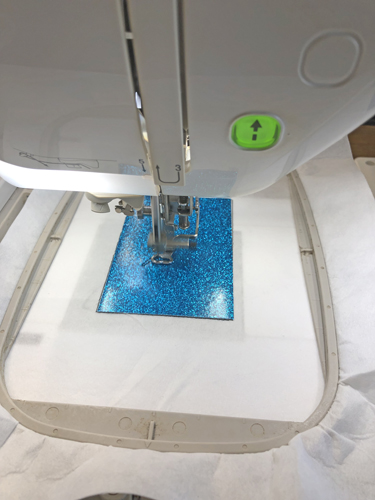
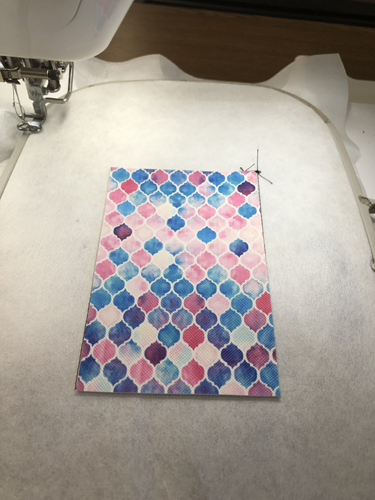
    Spray adhesive on the back of the front vinyl and position over the placement line.


    Step 3:
    (Click Image to Enlarge)
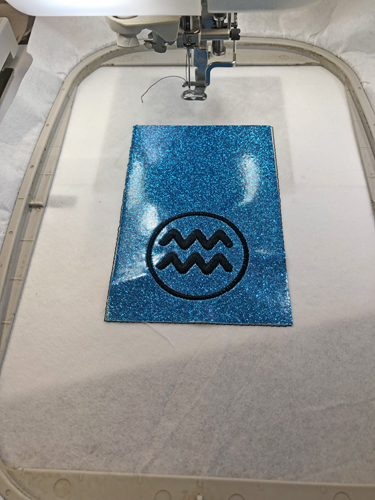
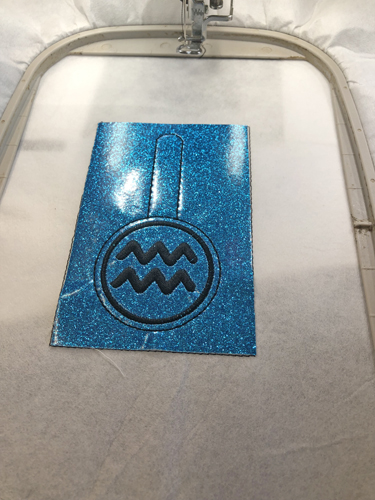
    Run the next color-stop to stitch the icon and the circle around it.


    Step 4:
    (Click Image to Enlarge)
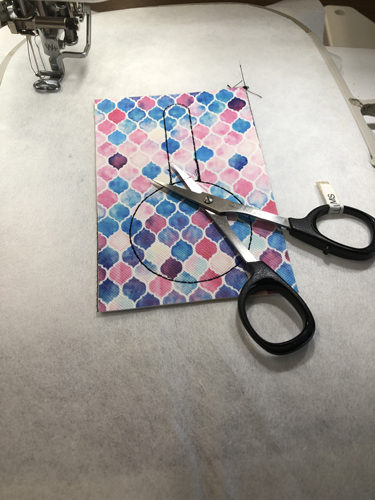
    Remove the hoop from the machine. Turn the hoop wrong side up, spray the remaining 4 ½” x 3” piece of vinyl and align over the placement lines on the back of the hoop.


    Step 5:
    (Click Image to Enlarge)
    Return the hoop to the machine and stitch the last CS to seam the two layers of vinyl together.


    Step 6:
    (Click Image to Enlarge)
    Trim the thread tails from the back of the key fob and trim around the key fob with about 1/8” outside the seam stitching.


    Step 7:
    (Click Image to Enlarge)
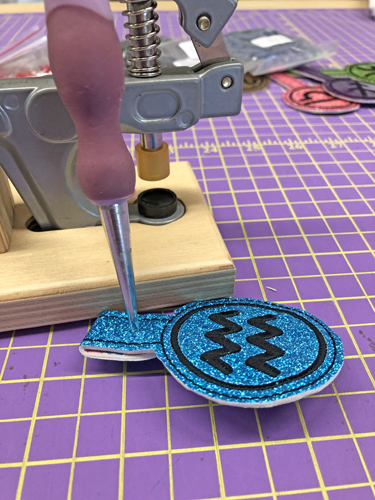
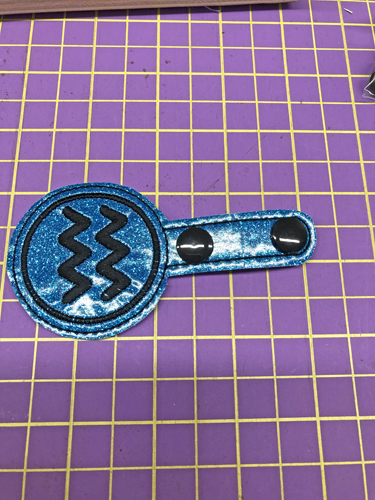
    Fold the top tab of the key fob in half. With an awl poke a hole through both layers of the tab about 3/8” up from the circle and in the center of the tab.


    Step 8:
    (Click Image to Enlarge)
    Following the manufacturer’s instructions insert the KamSnaps® into the tab. The outside of both snaps will be on the front of tab.


    Step 9:
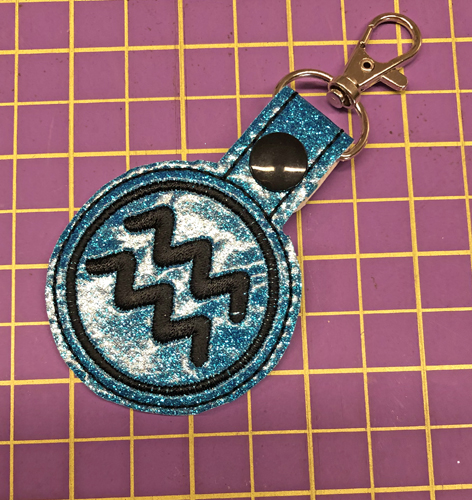
    Insert a key ring and lobster clasp and snap the tab in half.


    Step 10:
    Congratulations your ITH Zodiac Icon Key Fob is complete! Make the complete set.

    For the love of embroidery…
    Pat Williams
    Meet the Author: Pat Williams
    Pat Williams
    Award winning Digitizer, Embroidery Educator, Author and a Consultant to the Industry, Pat Williams has 30 years of experience in the embroidery industry. Pat has won multiple awards for her digitizing expertise including the 2007 Impressions Awards Grand Championship, Best of Show as well as the 1st and 2nd Place Awards. Pat’s love of digitizing has afforded her the opportunity to write numerous articles for Impressions magazine in the United States and Images Magazine in Europe. In 2001 Pat was named “Embroidery Educator of the Year.” For many years Pat taught digitizing seminars at the ISS Shows in Long Beach, CA and for Compucon software. She now resides in Tucson, AZ.
    More From This Author
    Link is Broken, Please check the URL
    Exclusive Embroidery Offers!
    Copyright © {{ currentDate | date:'yyyy'}} - EmbroideryDesigns.com
    GET 50% OFF! ×