Border OptionsHugging border, circle, square, or rectangle — with a 3mm satin stitch.
Backing OptionsAvailable with iron-on, sew-on, or velcro backing.
Fast ShippingShipped quickly from the USA.
Free Online Tools
Powerful embroidery utilities that save time and prevent costly mistakes.
Stitch AssistantRECOMMENDED
Get the exact stabilizer, machine settings, needle, and thread color sequence for every embroidery design you purchase — based on that design's stitch density, dimensions, and color count.
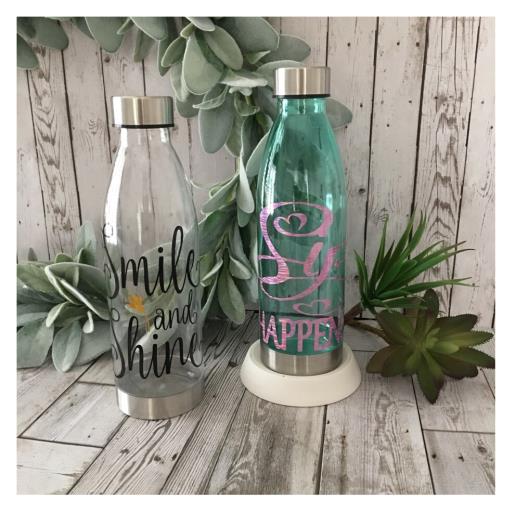
Create custom water bottles with these personalized decals, perfect for showcasing your unique style. These decals can be applied to any standard water bottle, adding a touch of individuality to your hydration routine. Step-by-step instructions are included.
Personalizing your water bottle is a great way to express yourself and show your creativity plus, to be able to tell your bottle from someone else’s. There are so many SVG designs and sayings to choose from the ED SVG site that you’ll want to create more than one bottle. Basic knowledge of a cutting machine and how to weed vinyl for a decal is needed. Simple to follow instructional tutorial which will go smoothly for those with some cutting machine experience. For those that are just beginning in the cutting machine world why not challenge yourself with this simple tutorial. Most of all just have fun creating! Time stated of 30 minutes is for (1) one bottle.
Step 1:
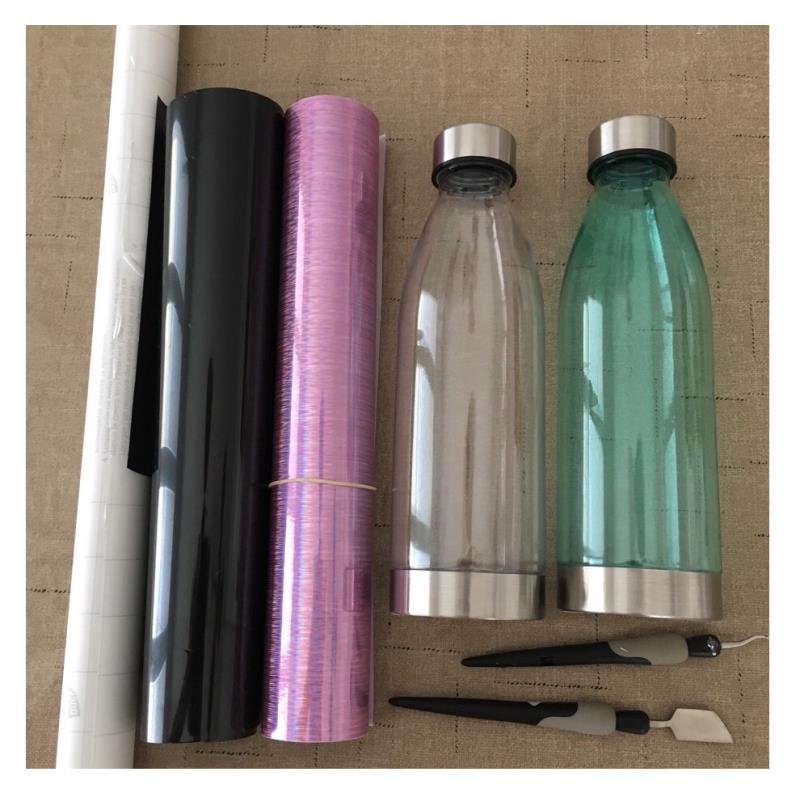
Gather all supplies and review instructions before beginning. ( water bottles used in this tutorial were purchased from Michaels craft store)
(Click Image to Enlarge)
Step 2:
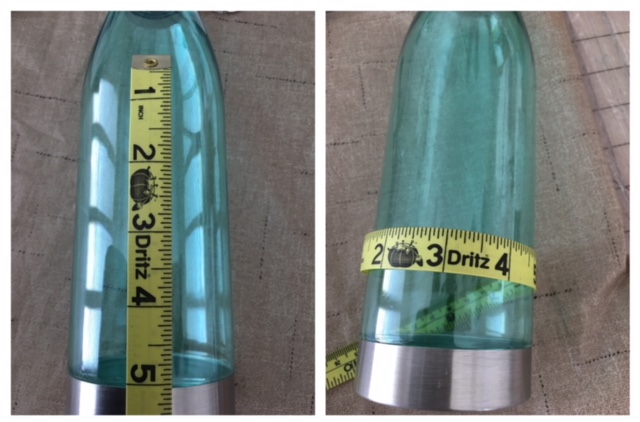
Measure your bottle. Keeping in mind the area of which you will be placing your decal. Bottle used in this tutorial measured 10”h by 3” diameter. Area that the stencil will placed measures 5” x 4”.
(Click Image to Enlarge)
Step 3:
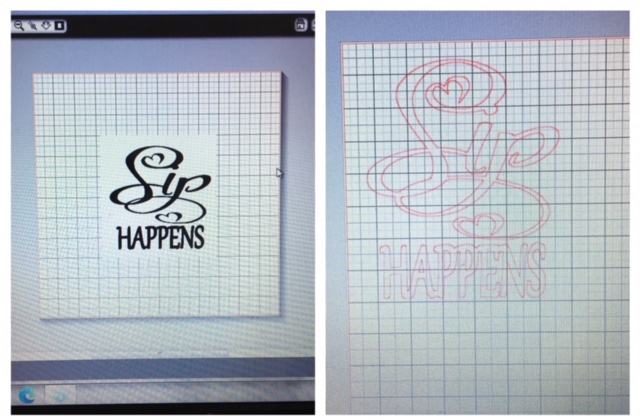
Bring in to your cutting machine program design the SVG design “Sip Happens”. Cut design/image.
(Click Image to Enlarge)
Step 4:
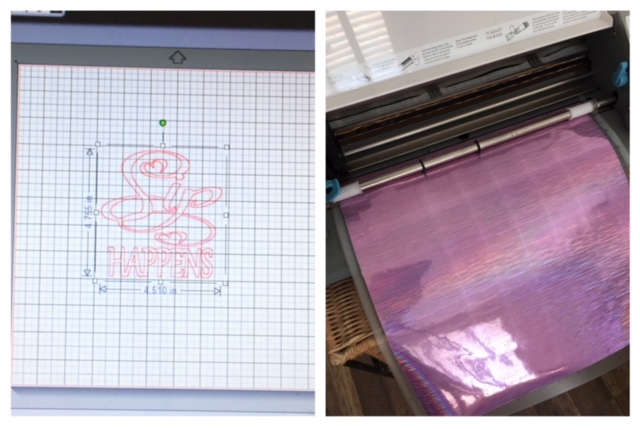
Resize to fit your bottle area. Design in this tutorial was resized to 4.7” x 4.5” to fit in bottle decal placement area. Prepare vinyl onto your cutting mat. Insert mat into your cutting machine.
(Click Image to Enlarge)
Step 5:
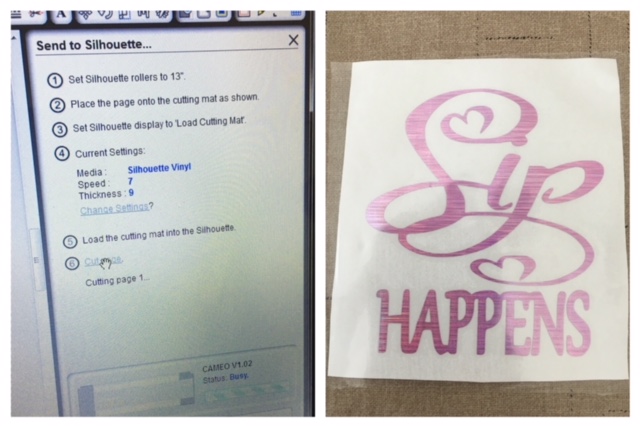
Confirm cutting machine settings. Cut vinyl. Weed cut vinyl design for a decal. Apply transfer tape on top of weeded vinyl design per manufacturer’s instructions.
(Click Image to Enlarge)
Step 6:
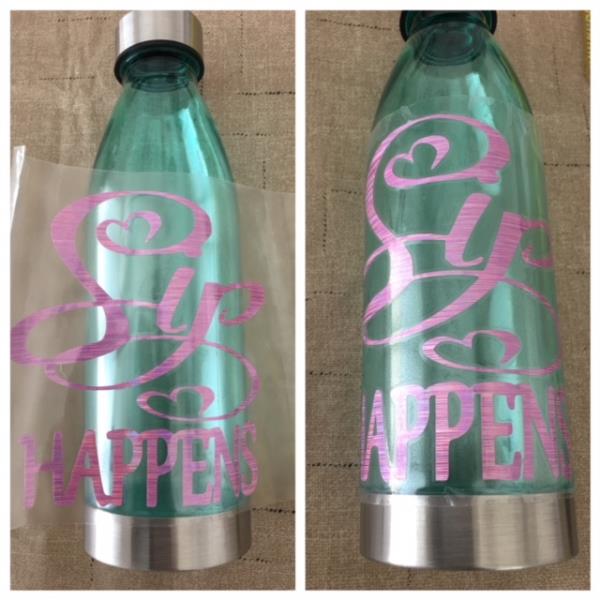
Remove adhesive back from decal . Center position onto bottle. Finger press down. Pressing outwards any bubbles.
(Click Image to Enlarge)
Step 7:
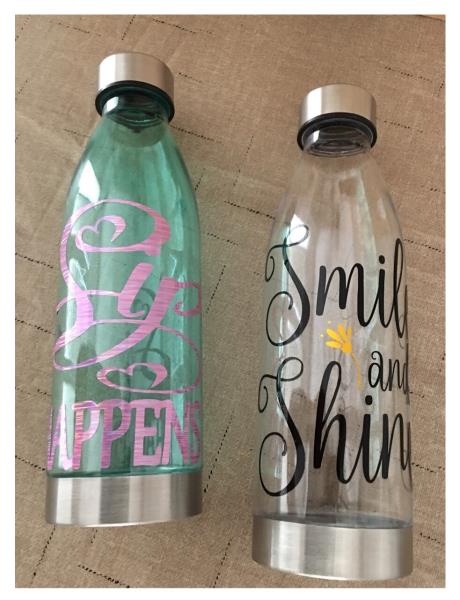
Slowly remove transfer tape. And you are done! Great job! Look for other SVG designs or use the “Smile and Shine” SVG design that is linked with this tutorial to make additional bottles. (Use your remnant/scrap vinyl for the flower for the Smile and Shine SVG design.)