Border OptionsHugging border, circle, square, or rectangle — with a 3mm satin stitch.
Backing OptionsAvailable with iron-on, sew-on, or velcro backing.
Fast ShippingShipped quickly from the USA.
Free Online Tools
Powerful embroidery utilities that save time and prevent costly mistakes.
Stitch AssistantRECOMMENDED
Get the exact stabilizer, machine settings, needle, and thread color sequence for every embroidery design you purchase — based on that design's stitch density, dimensions, and color count.
There are three methods for sewing on the back of a cap. Each one has benefits and drawbacks, but each is worth exploring.
Tubular Hoop Method
The most common method, but not necessarily the best, is to use a round tubular hoop such as a 9cm or 12cm to hoop the center of the back panel. The advantage is that most Embroiderers already have one of these hoops in their collection. However, it is time-consuming to use this method, plus it offers a limited sewing field, typically just the top of the keyhole area. Some embroiderers use a one gallon paint can as a base to hoop on. Others use the edge of a table. (Some framing devices such as the Hoopmaster have fixtures that can be used to assist in the hooping process.)
Clamping Device Method
The second method, is to invest in a clamping device such as the one offered by EMS/HoopTech. It offers a specialized frame that is designed specifically for hooping the back of a cap. It is much quicker and easier to use than a tubular hoop and offers a slightly larger sewing field. But it requires an investment from the Embroiderer.
Window Cap Frame Method
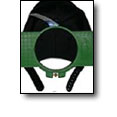
The third option for sewing on the back of a cap is to use a “window” style of cap frame. (Tajima refers to this as a semi-wide frame.) It offers the widest possible sewing field and allows lettering to completely surround the keyhole of the cap. Like the clamping device it also requires an investment. One key advantage of the window cap frame is that it uses the same cap driver as the standard (270) style of cap frame. That means you don’t have to change over the drive system of your machine when switching from fronts to backs, like you do when using the tubular frames.
When deciding which method to use for your shop, don’t let the cost of options 2 and 3 deter you. Both are much quicker and easier than option 1. If you are going to do a lot of cap backs, then it will be worth the investment.
Award-winning author and international speaker Jimmy Lamb has over 15 years of embroidery experience as well as 10 years of professional digitizing experience (as a business owner). Currently, he is the Director of Training and Education for Hirsch International Corp., where he has been instrumental in developing their educational seminars.