Labor Day 10 Off 30
Live Chat
Embroidery Designs
Welcome, Embroiderer
Login
Camping Toiletries Roll

Camping Toiletries Roll Embroidery Project

By   Kylie Burke   on   July 06, 2021
  • SKILL LEVELIntermediate
  • TIME REQUIRED02:00
Description

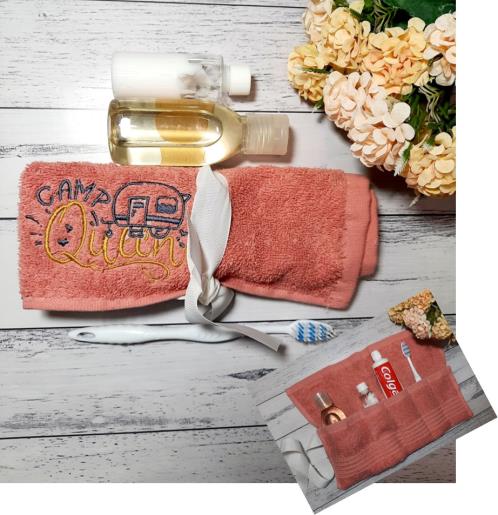
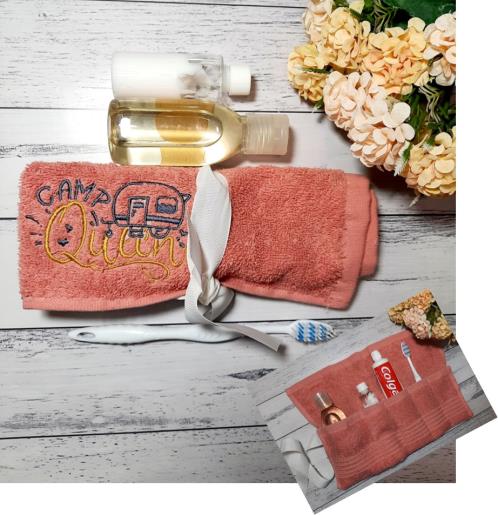
A convenient and compact toiletries roll made from a face washer with a quirky embroidery design

Step of

Materials

Project Preview Video

Materials
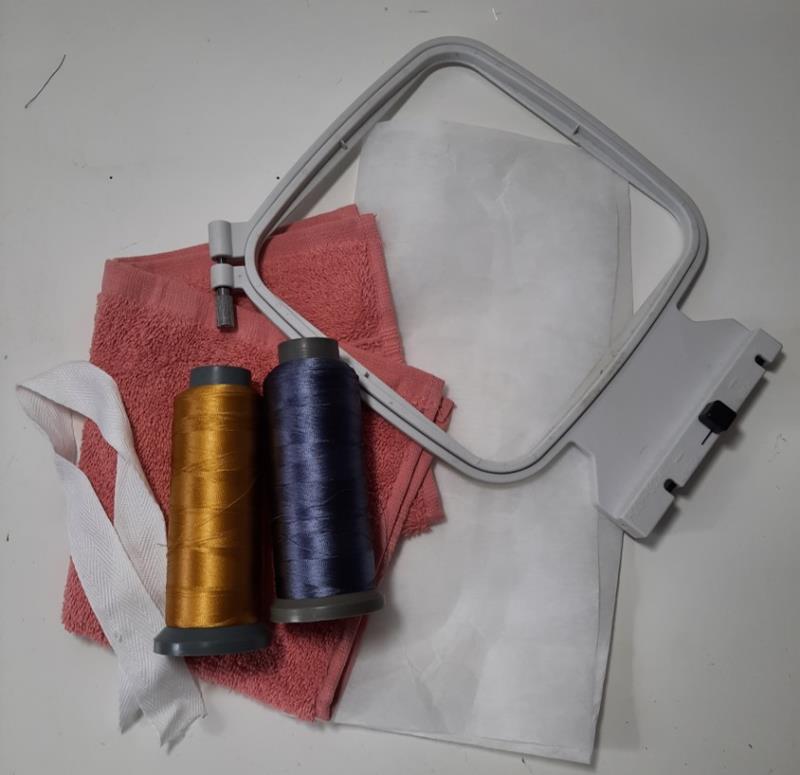
  • 1 x face washer
  • 25” grosgrain ribbon
  • Tearaway stabilizer
  • Water soluble topping film
  • Embroidery threads in color of choice
  • 6” embroidery hoop

  • Designs used in this project

    Final Product: What You Will Create

    Preface:
    You can size the pouches to whatever size would best fit your toiletries if my sizing does not work for you


    Step 1:
    Gather all your materials and read through the instructions before you begin. Have a copy of the color sequence on hand for the embroidery stitch out.

    (Click Image to Enlarge)


    Step 2:
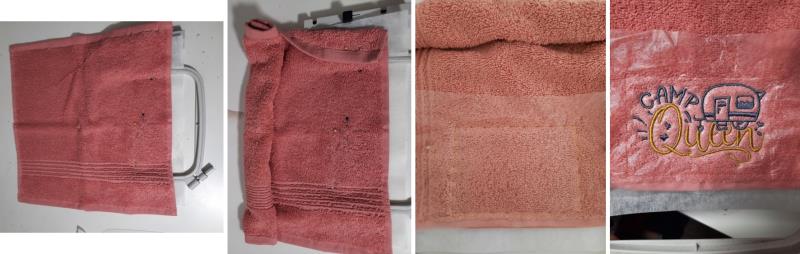
    Fold up the bottom of the face washer 4 ½” and pin in place. Turn the washer over to the front side and measure up from the fold line 50mm and in 45mm from the side edge to represent the center of the embroidery design, mark this position. 

    (Click Image to Enlarge)


    Step 3:
    Unpin and unfold the face washer out flat, hoop the stabilizer then position the face washer in the hoop ensuring it is centered with the mark you made. Secure the towel to the hoop/stabilizer, I prefer not to hoop towels to avoid hoop burn so I pin the towel to the stabilizer. Fold up the excess around the hoop to ensure it does not get caught. Lay the water soluble topping over the embroidery area and use a tackdown stitch to hold it in place. Stitch out the design.

    (Click Image to Enlarge)


    Step 4:
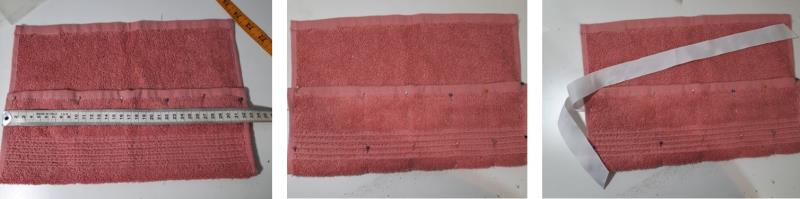
    Unhoop the towel and fold up the bottom edge 4 ½”, then pin it in place. The from the left side edge, measure in and mark at 10cm, 16cm, 22cm and 27cm to represent the separate pouch lines. Cut your grosgraqin ribbon into 2 pieces. 1 at 17” and 1 at 8”. Pin these in place on the left hand side between the 2 layers of towelling. 

    (Click Image to Enlarge)


    Step 5:
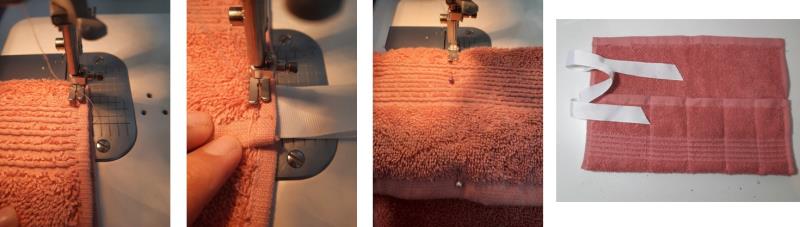
    First stitch the 2 edges down, ensuring on the left side you catch the ribbon ties. Then sew the lines to form the pouches.

    (Click Image to Enlarge)


    Step 6:
    Pop in your toiletries, roll up your pouch, tie it up and you are ready to go! 

    (Click Image to Enlarge)


    Step 7:
    ou

     could make the pouches
    Meet the Author: Kylie Burke
    Kylie Burke
    Kylie is based in Australia and loves creating and sharing her unique pieces.
    More From This Author
    Link is Broken, Please check the URL
    Exclusive Embroidery Offers!
    Copyright © {{ currentDate | date:'yyyy'}} - EmbroideryDesigns.com
    GET 50% OFF! ×