Border OptionsHugging border, circle, square, or rectangle — with a 3mm satin stitch.
Backing OptionsAvailable with iron-on, sew-on, or velcro backing.
Fast ShippingShipped quickly from the USA.
Free Online Tools
Powerful embroidery utilities that save time and prevent costly mistakes.
Stitch AssistantRECOMMENDED
Get the exact stabilizer, machine settings, needle, and thread color sequence for every embroidery design you purchase — based on that design's stitch density, dimensions, and color count.
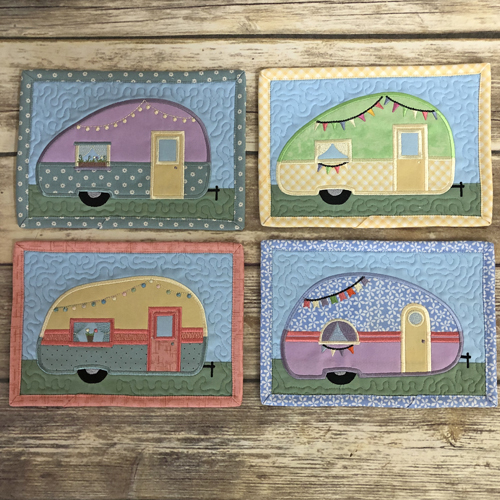
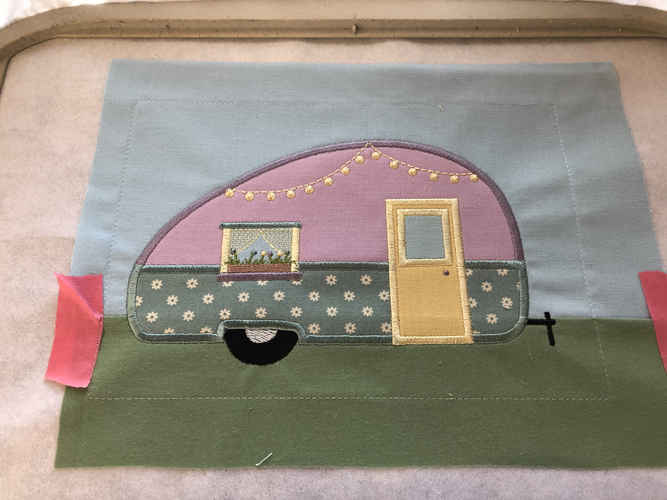
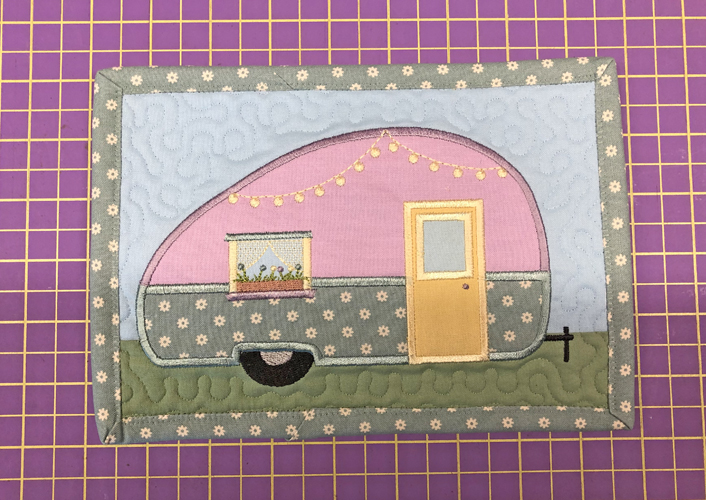
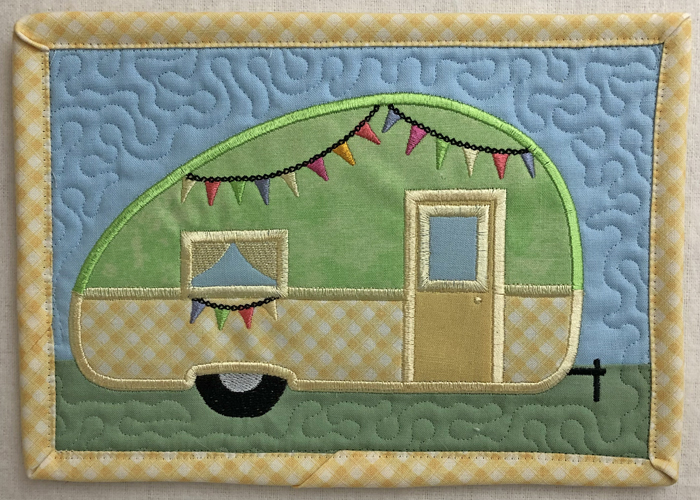
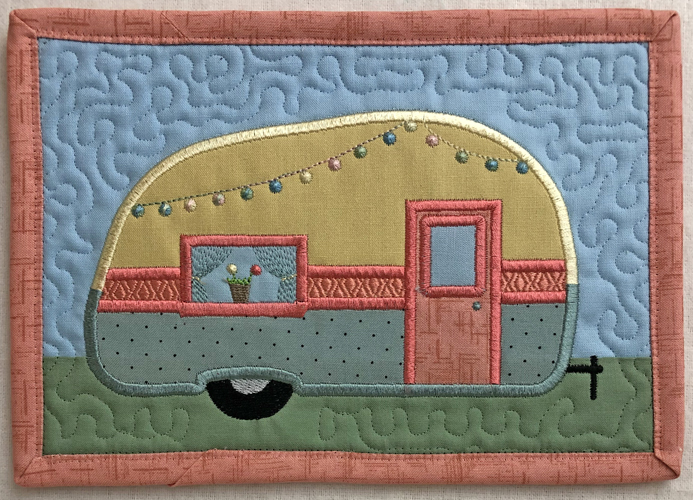
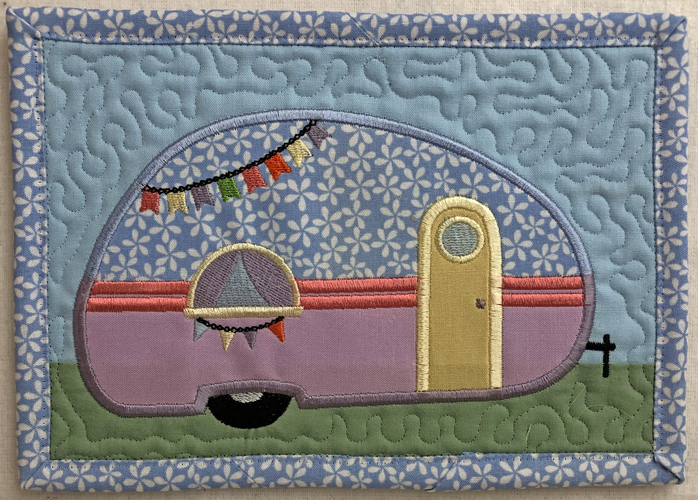
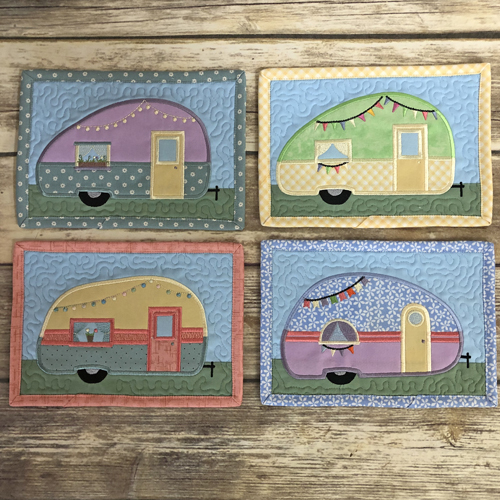
Celebrate camping season with these charming Applique Camper Mug Rugs. Each mug rug is crafted in the hoop with appliqued details and quilted texture, finished with machine-applied binding. Perfect for adding a touch of adventure to your coffee break. Step-by-step instructions are included.
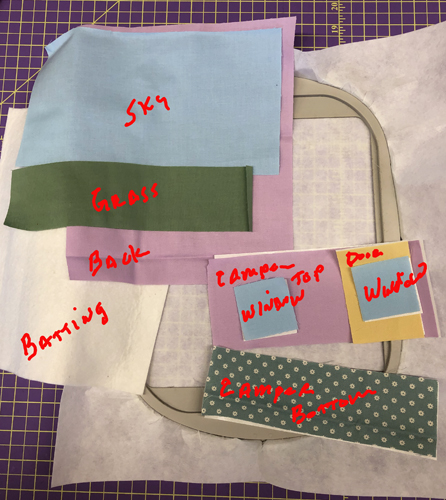
1. For Camper Applique Mug Rug 1 cut the background fabrics, back and batting as per the materials list above. For the appliques cut:
a. 3 ½” x 8” rectangle for the camper top b. 2 ½” x 8” rectangle for the camper bottom c. 3 ½” x 2 ½” rectangle for the camper door d. 2 2 ½” squares for the windows Cut Heat N Bond Lite® to match each applique piece.
Step 2:
(Click Image to Enlarge)
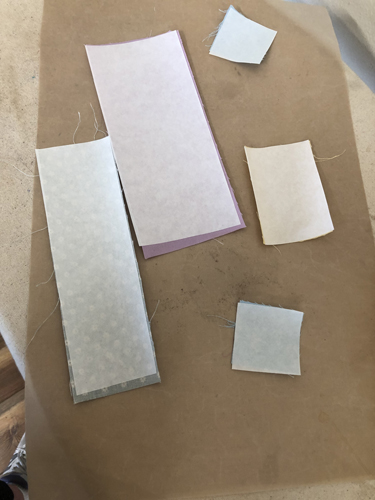
Iron each applique piece with Magic Sizing® 3 or 4 times which help prevent fraying. Fuse a corresponding Heat N Bond® piece to the back of each applique following the manufacturer’s instructions.
Step 3:
(Click Image to Enlarge)
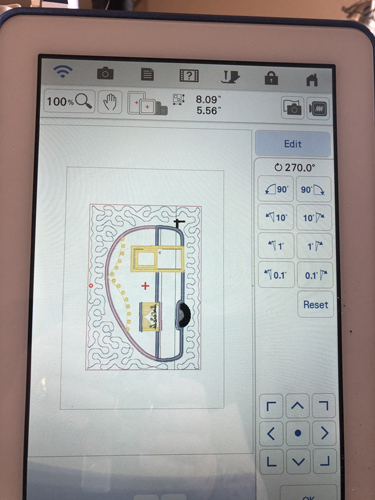
Load the design in your machine and rotate if necessary, depending on the type of machine and hoop size that you are using.
Step 4:
(Click Image to Enlarge)
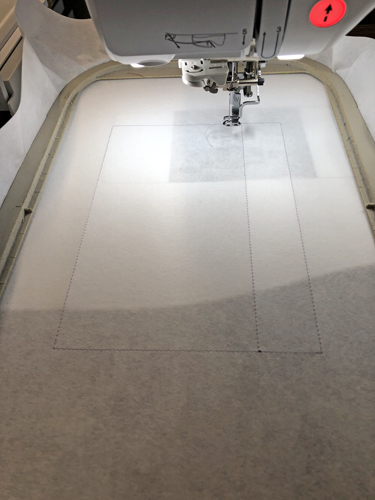
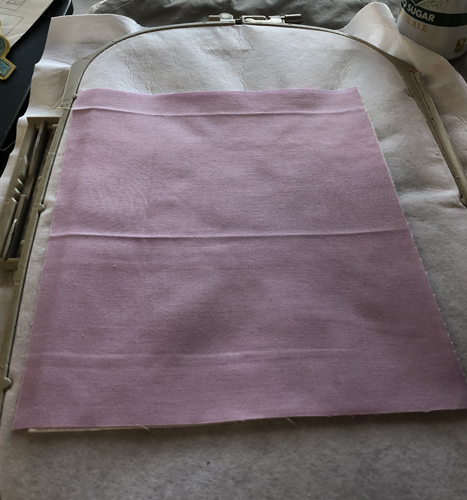
Tautly hoop the cut-away stabilizer. Run the first color-stop (CS) as a placement line for the fabrics in any color thread.
Step 5:
(Click Image to Enlarge)
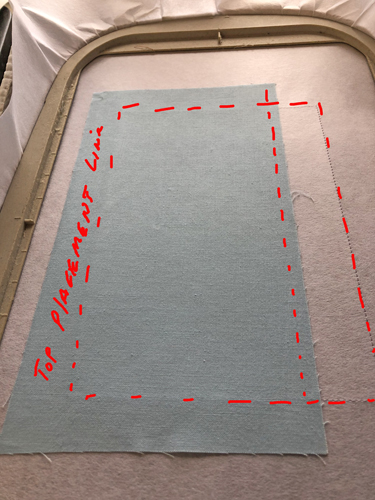
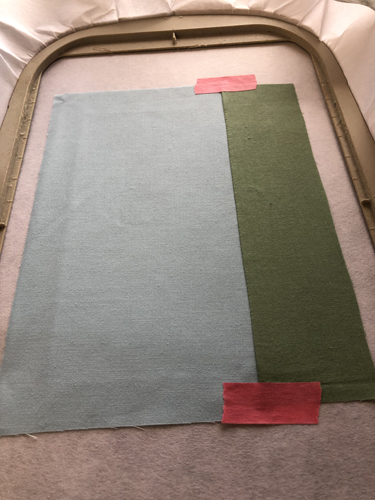
Spray adhesive on the back of your sky fabric. Position it so that the fabric exceeds the inside placement line by ¼” and that the top and sides of the sky exceed the placement lines by 1”.
Step 6:
(Click Image to Enlarge)
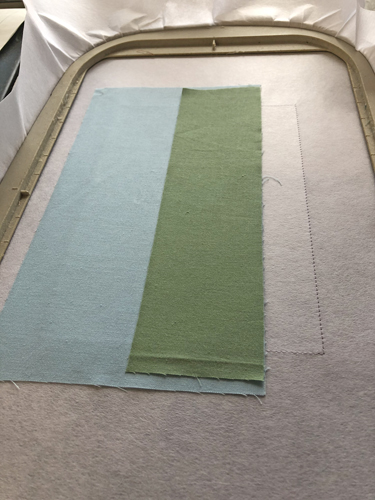
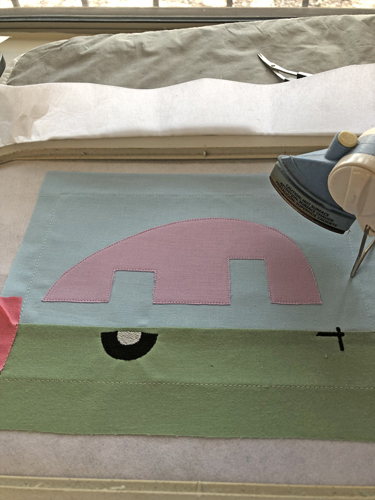
Lay the grass fabric strip over the sky fabrics. No spray adhesive is applied but you can tape down the two sides if you like.
Step 7:
(Click Image to Enlarge)
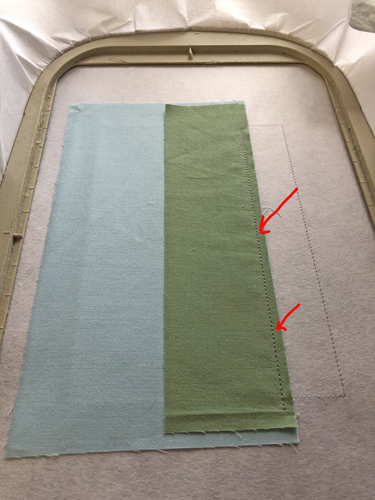
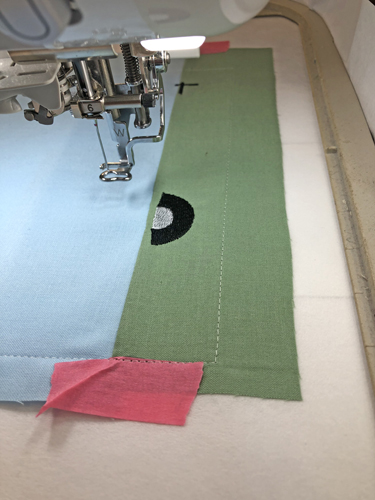
Run CS 2 in a neutral color to seam the two fabrics together.
Step 8:
(Click Image to Enlarge)
Remove the hoop from the machine, do not unhoop. Spray adhesive on the back grass fabric and or inside the remaining placement lines for the grass. Smooth the grass fabric down. Place little pieces of embroidery tape outside the placement lines where the grass fabric folds over the sky fabric so that the fold will not be picked up by the presser foot. Run CS 3in water soluble thread to tack down the fabrics. Note: If you never have issues with your binding covering the tack down stitches invisible thread can be used for this step.
Step 9:
(Click Image to Enlarge)
In all versions of this mug rug, CS 4 in black and CS 5 in smoke will embroider the tire and tongue of trailer and the hub cap.
Step 10:
(Click Image to Enlarge)
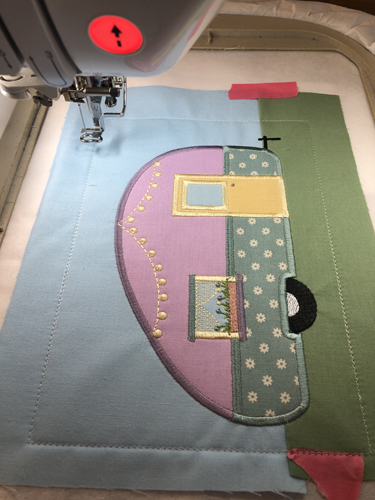
For Camper Applique Mug Rug 1, 2 and 3 the next 17 color-stops are placement lines and tack down stitches for the appliques. For Camper Applique Mug Rug 4 the next 13 color-stops are the placement lines and tack down stitches for the appliques. Using invisible thread in the top of your machine only will save a lot of time for these color changes. Run color stop 6 as the placement line for the first applique.
Step 11:
(Click Image to Enlarge)
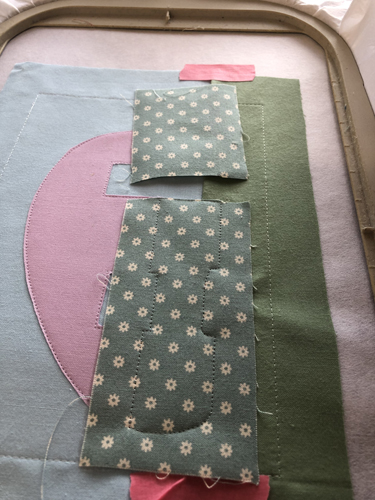
Remove the Heat N Bond Lite® paper from your applique piece. Spray the back with adhesive and position over the placement lines so that the applique fabric exceeds the placement line by ½” on all sides. Run the next color-stop to tack down the fabric.
Step 12:
(Click Image to Enlarge)
Remove the hoop from the machine, do not unhoop. By lifting the excess applique fabric and pulling it towards the tack-down stitches you will be able to trim the applique right up next to the tack down lines. Fuse the applique in place with an applique iron.
Step 13:
(Click Image to Enlarge)
The bottom of each camper has two separate appliques, but the directions for cutting the pieces of fabric gives you only one size to cut. Run the placement line for the 1st bottom section of the camper and tack down the fabric. Trim the fabric off on the door side right next to the tack down stitches. There will be enough fabric cut off to use for the second applique.
Step 14:
(Click Image to Enlarge)
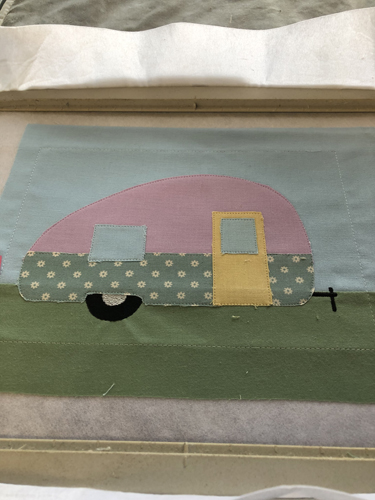
Continue adding each applique in the same manner until all are applied.
Step 15:
Follow the color chart to embroider the details on the camper. Leave the last two color-stops unstitched at this time.
(Click Image to Enlarge)
Step 16:
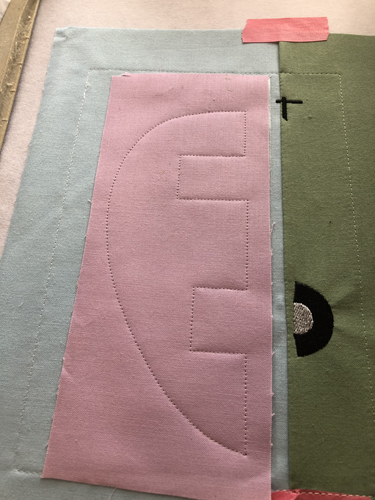
Remove the hoop from the machine, do not unhoop. Lay the hoop face down on a flat surface. Spray adhesive on one side of the Battilizer® and lay it over the back of the embroidery so that the Battilizer® exceeds the placement line by 1” on all sides. Spray adhesive on the back of your back fabric and smooth over the Battilizer ®.
Step 17:
(Click Image to Enlarge)
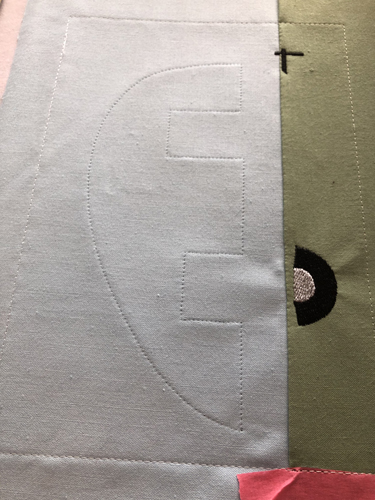
Return the hoop to the machine and run the next to last color-stop in water soluble thread to tack down the batting and back fabric.
Step 18:
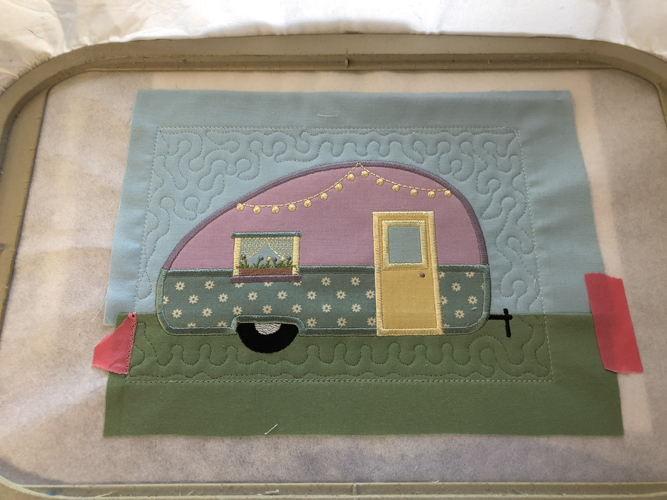
Use invisible thread for the last color stop as the quilting can runs over both the sky and the grass.
(Click Image to Enlarge)
Step 19:
(Click Image to Enlarge)
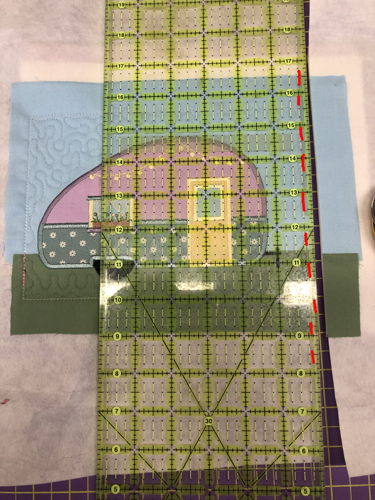
Remove the project from the hoop. Lay a see-through rulers ¼” mark over the water-soluble thread tack down stitches. Trim all sides to this ¼” seam allowance.
Step 20:
Cut a 2 ¼” x 42” strip of binding fabric and apply binding using your preferred method. If you don’t have a preferred method see our article Binding Small Embroidery Projects.
(Click Image to Enlarge)
Step 21:
For Camper Applique Mug Rug 2 cut the background fabrics, back and batting as per the materials list above. For the appliques cut:
a. 3 ½” x 8” rectangle for the camper top b. 2 ½” x 8” rectangle for the camper bottom c. 3 ½” x 2 ½” rectangle for the camper door d. 2 2 ½” squares for the windows
Cut Heat N Bond Lite® to match each applique piece.
(Click Image to Enlarge)
Step 22:
For Camper Applique Mug Rug 3 cut the background fabrics, back and batting as per the materials list above. For the appliques cut:
e. 4” x 8” rectangle for the camper top f. 2 ½” x 8” rectangle for the camper bottom g. 3 ½” x 2 ½” rectangle for the camper door h. 2 2 ½” squares for the windows
Cut Heat N Bond Lite® to match each applique piece. Note color-stop 24 was stitched in variegated thread so the lights at the top of the camper would have different colors.
(Click Image to Enlarge)
Step 23:
For Camper Applique Mug Rug 4 cut the background fabrics, back and batting as per the materials list above. For the appliques cut:
i. 3” x 8” rectangle for the camper top j. 3” x 8” rectangle for the camper bottom
k. 3” x 2” rectangle for the camper door
Cut Heat N Bond Lite® to match each applique piece
(Click Image to Enlarge)
Step 24:
Complete the whole set for yourself and as gifts for your camping friends.
Award winning Digitizer, Embroidery Educator, Author and a Consultant to the Industry, Pat Williams has 30 years of experience in the embroidery industry. Pat has won multiple awards for her digitizing expertise including the 2007 Impressions Awards Grand Championship, Best of Show as well as the 1st and 2nd Place Awards. Pat’s love of digitizing has afforded her the opportunity to write numerous articles for Impressions magazine in the United States and Images Magazine in Europe. In 2001 Pat was named “Embroidery Educator of the Year.” For many years Pat taught digitizing seminars at the ISS Shows in Long Beach, CA and for Compucon software. She now resides in Tucson, AZ.