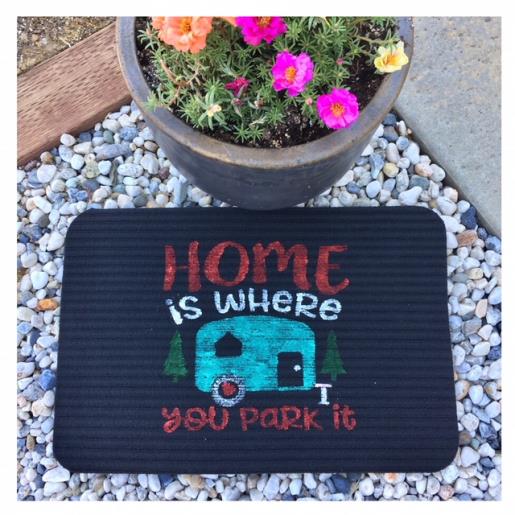
Home Is Where You Park It Camper Door Mat

Home Is Where You Park It Camper Door Mat Embroidery Project

By   Linda Mills   on   June 10, 2021
  • SKILL LEVELSome Experience
  • TIME REQUIRED01:00
Description

This charming door mat is perfect for campers and glampers, featuring a playful message that reads 'Home Is Where You Park It.' Ideal for adding a personal touch to your outdoor space. Step-by-step instructions are included.

Step of

Materials

Project Preview Video

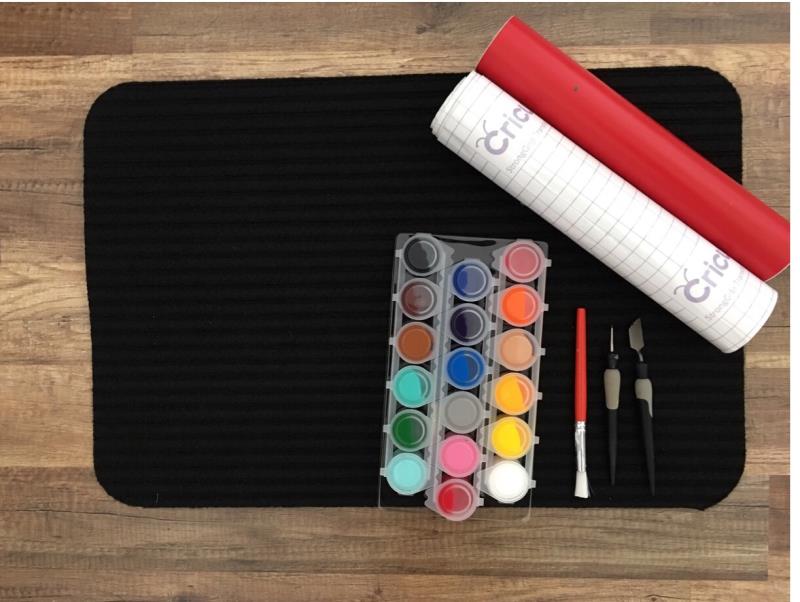
Materials
  • DOOR MAT ( SIZE USED IN THIS TUTORIAL 23” X 15”)
  • (1) 12” X 12” ADHESIVE BACK VINYL
  • TRANSFER PAPER
  • WEEDING TOOLS
  • ACRYLIC PAINT (WATER BASED) MULTIPLE COLORS OF YOUR CHOICE OR REFER TO DESIGN COLOR CHART
  • PAINT BRUSH
  • CUTTING MACHINE( SILHOUETTE CAMEO/CRICUT)

  • Designs used in this project

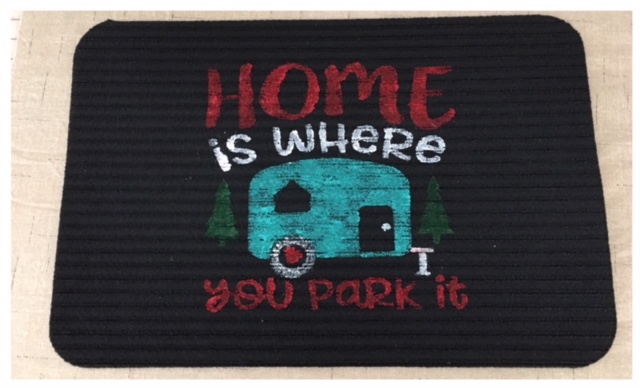
    Final Product: What You Will Create

    Preface:
    A simple tutorial for all experienced cutting machine owners/users. Create this whimsical camper door mat using multiple colors of acrylic paints and create a stencil using this delightful SVG design” Home Is Where You Park It”, Follow the paint color chart of the design or use your choice of colors. *Basic knowledge of a cutting machine and how to prepare vinyl for stencil is required.


    Step 1:
    Gather all supplies and review instructions before beginning. Dry time is not included in the time stated for project completion. Please allow additional time for drying.

    (Click Image to Enlarge)


    Step 2:
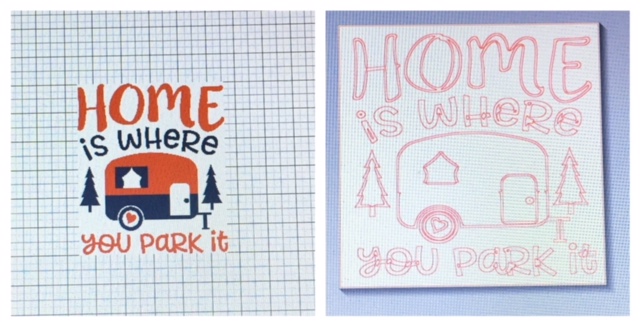
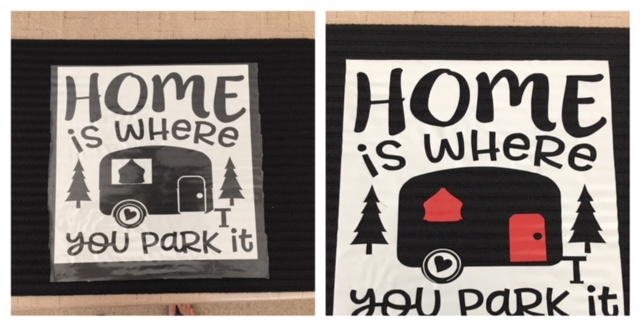
    Bring SVG design "Home Is Where You Park It" into your cutting machine program. Cut and resize design to 11.5” x 11.5” ( approx). If using a smaller or larger mat adjust your design size to fit.

    (Click Image to Enlarge)


    Step 3:
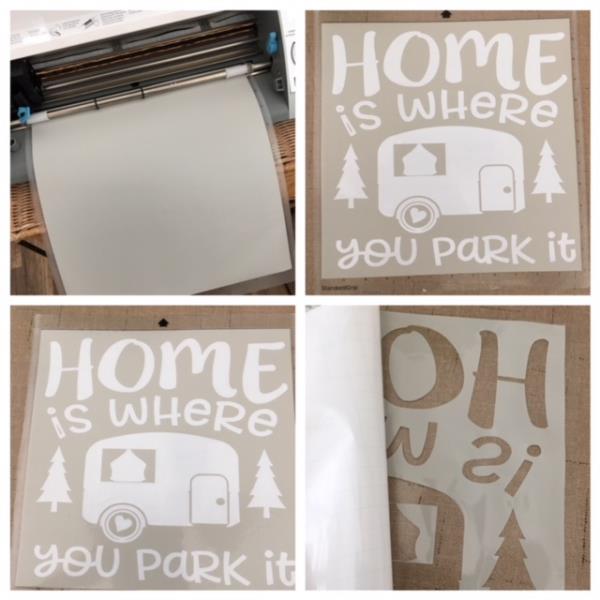
    Prepare your vinyl. Place onto your cutting mat. Load into your cutting machine. Cut design. Weed your cut vinyl for a stencil. ( Weeding vinyl is the process of removing the unwanted vinyl from your cut design.) The open areas will be painted.  Apply transfer paper per manufacturer’s instructions. Slowly remove adhesive back.

    (Click Image to Enlarge)


    Step 4:
    Center stencil onto your mat. When centered to your liking finger press down onto mat to secure. As you can see in the picture I needed to make some adjustments by piece cutting the window and the door due to a rip in the vinyl stencil when removing the transfer paper. If needed refer to your cutting machine instructions on how to piece cut from a design to make any adjustments before painting.

    (Click Image to Enlarge)


    Step 5:
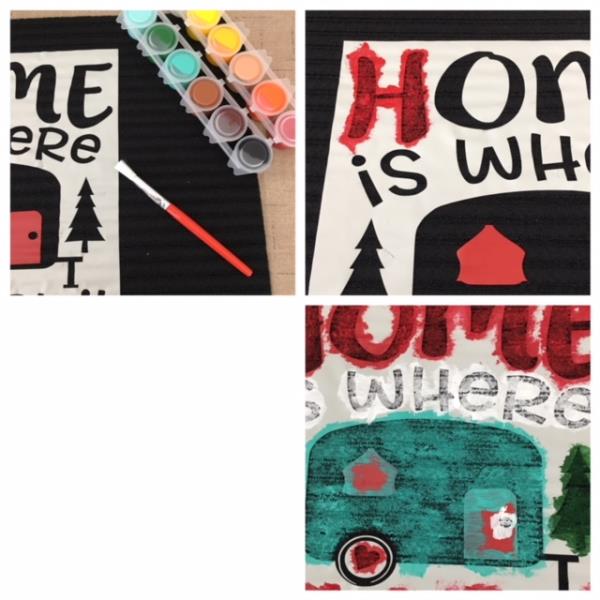
    Lets get ready to paint! Follow paint colors by referring to SVG design or your choice of colors. Paint all the open areas. Allow to dry completely.

    (Click Image to Enlarge)


    Step 6:
    Once paints have fully dried… slowly remove stencil and your are done! If needed make any touch ups where necessary. Great job!

    (Click Image to Enlarge)

    Meet the Author: Linda Mills
    Linda Mills
    Linda loves to create by sharing her different sewing and machine embroidery techniques so others can utilize their machines to the fullest
    More From This Author
    Link is Broken, Please check the URL
    Exclusive Embroidery Offers!
    Copyright © {{ currentDate | date:'yyyy'}} - EmbroideryDesigns.com
    GET 50% OFF! ×