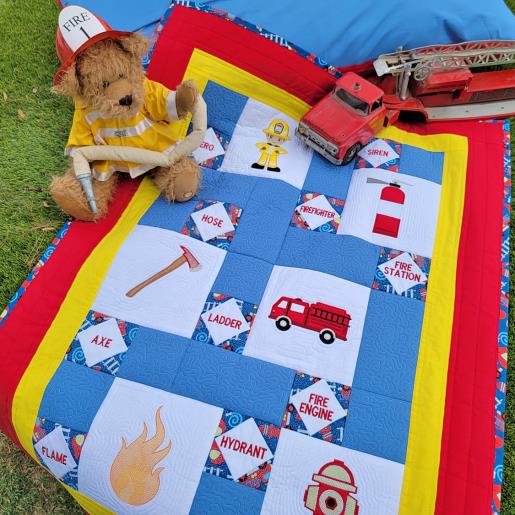
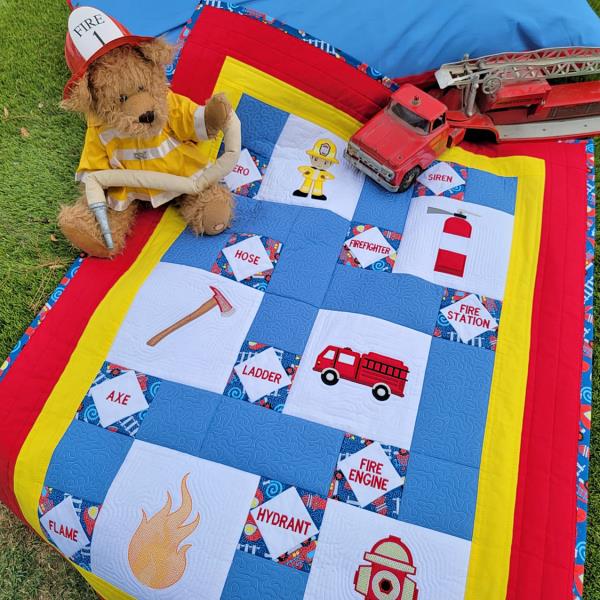
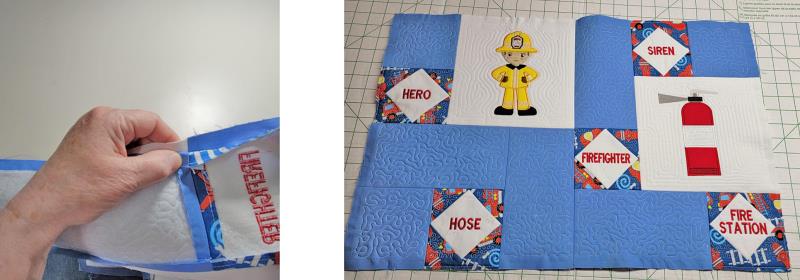
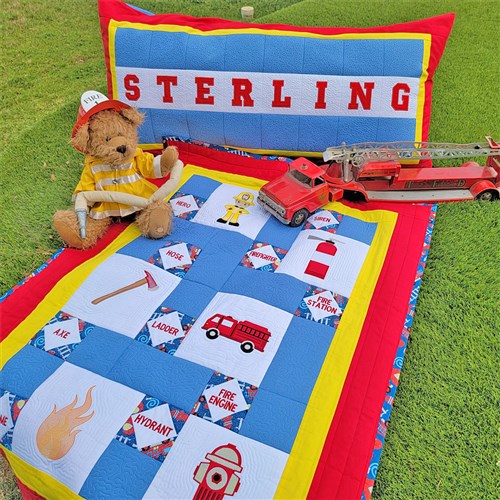
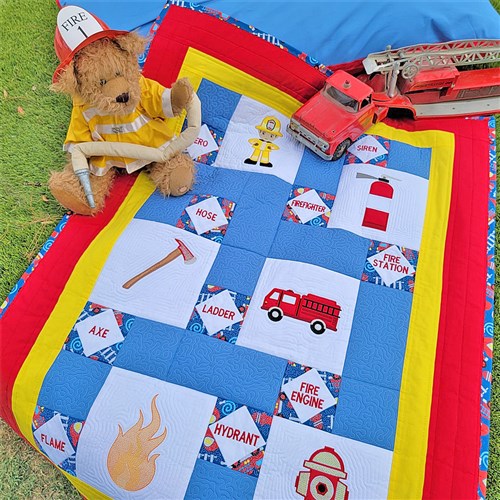
| Preface: | | Putting this little quilt together is pretty straight forward; this presumes you know the basics of quilting, including squaring up blocks and binding a quilt. Most of the work is done in the hoop. Apply borders, backing, and binding and you’ll have a wonderful quilt that sparkles with splashes of Mylar that any little firefighter would love. |
Step 1: | Materials
Be sure to look for the discounted pack which includes all the designs to make this project!
For EACH text block (10):
Poly mesh stabilizer
1- 4.5" x 4.5" low loft batting
1- 3.5" x 3.5" White Kona cotton
2- 4.5" x 4.5" firefighter print fabric then cut point to point
For EACH 4” x 4” stipple block (8):
Poly Mesh stabilizer
1- 6" x 6" low loft batting
1- 6" x 6" Fabric
For EACH 4” x 8” stipple block (6):
Poly Mesh Stabilizer
1- 6" x 10" low loft batting
1- 6" x 10" Fabric
Axe Block:
Poly mesh stabilizer to fit hoop
2- 10" X 10" 988 Pellon Fleece Stabilizer
1- 10" X 10" White Kona cotton background fabric
1- 2" x 8" Brown applique fabric- for handle
1- 4" x 2" Iridescent Mylar- for axe head
Extinguisher Block:
Poly mesh stabilizer
1- 10 x 10" low loft batting
1- 10" X 10" White Kona cotton background fabric
1- 4" X 6" Red Applique Fabric- tank
1- 2" x 3" White Applique Fabric- label
1- 2" x 3" Iridescent Mylar- label
Firefighter Block:
Poly mesh stabilizer to fit hoop
2- 10" X 10" low loft batting
1- 10" X 10" White Kona cotton background fabric
1- 5" x 7" Brownish Gold- for turnouts
1- 3" x 5" Iridescent Mylar- for reflective strips Flame Block:
Poly mesh stabilizer to fit hoop
1- 10" X 10" low loft batting
1- 10" X 10" White Kona cotton background fabric
1- 5" x 7" Iridescent Mylar- for flame Firetruck Block:
Poly mesh stabilizer to fit hoop
1- 10" X 10" low loft stabilizer
1- 10" X 10" White Kona cotton background fabric
1- 4" x 7" Red Applique Fabric- for truck body
1- 2" x 3" Iridescent Mylar- for window
2- 2" x 2" Iridescent Mylar- for wheels Hydrant Block:
Poly mesh stabilizer to fit hoop
1- 10" X 10" low loft batting
1- 10" X 10" White Kona cotton background fabric
1- 4" x 7" Red Applique Fabric- for hydrant
1- 4" x 4" Iridescent Mylar- for hydrant detail Yellow border fabric:
2- 3” x 32” (top and bottom)
2- 3” x 40” (left and right) Red border fabric:
2- 5” x 39” (top and bottom)
2- 5” x 44” (left and right) Backing fabric: 44” X 58”
Batting: 40” x 53”
Binding fabric: 2.5” X 5.5 yard
Sewing thread to sew quilt together Optional:
Glue
stick
Quilt
basting spray
Roxanne’s
quilt basting glue
Small applique scissors
Quilting
gloves |
Step 2: | Read through the instructions thoroughly before beginning and assemble all the materials needed to complete the project. The materials list contains information for fabrics, applique pieces, Mylar, border fabrics, backing and batting. I found it easiest to stitch all the text quilt blocks first, then the stipple blocks, and then the larger applique blocks which are a lot of fun to stitch with the Mylar. The small stipple block and text blocks will finish 4” x 4”, the applique blocks will finish 8” x 8”, and the large stipple blocks will finish at 4” x 8”. When trimming the blocks, be sure there is ½” all the way around for seam allowances. | 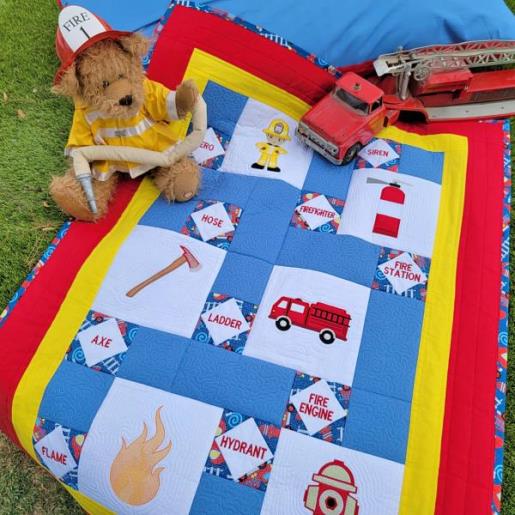 (Click Image to Enlarge) |
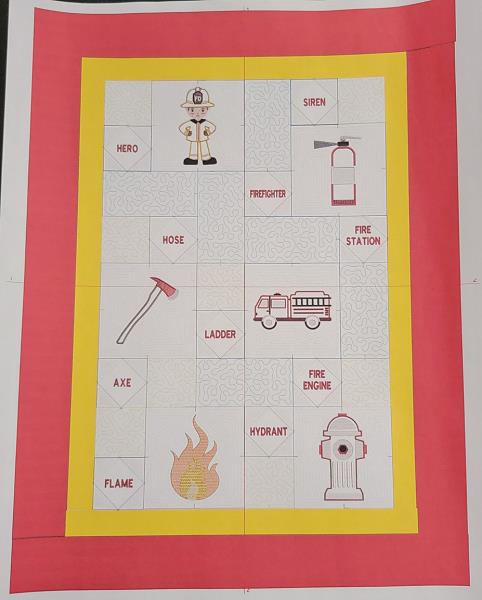
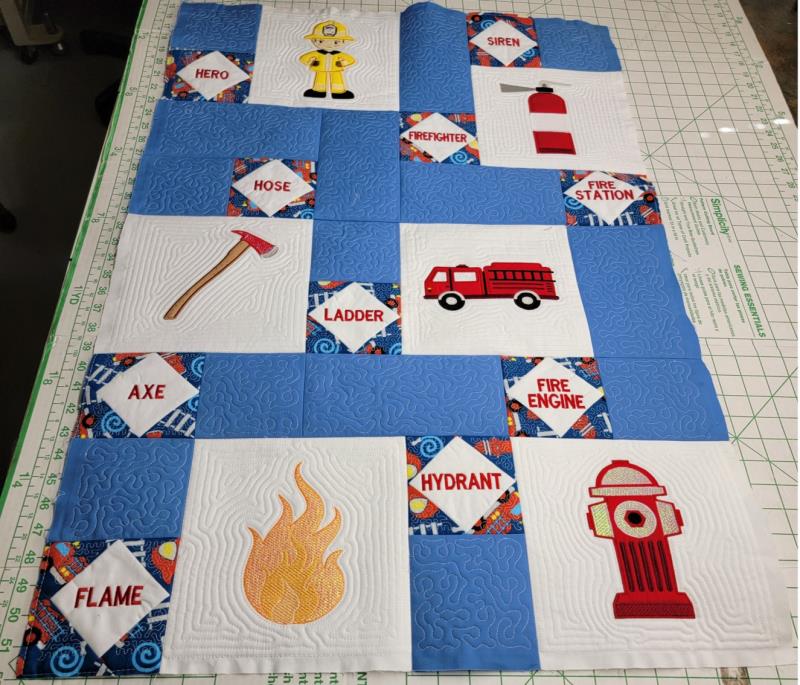
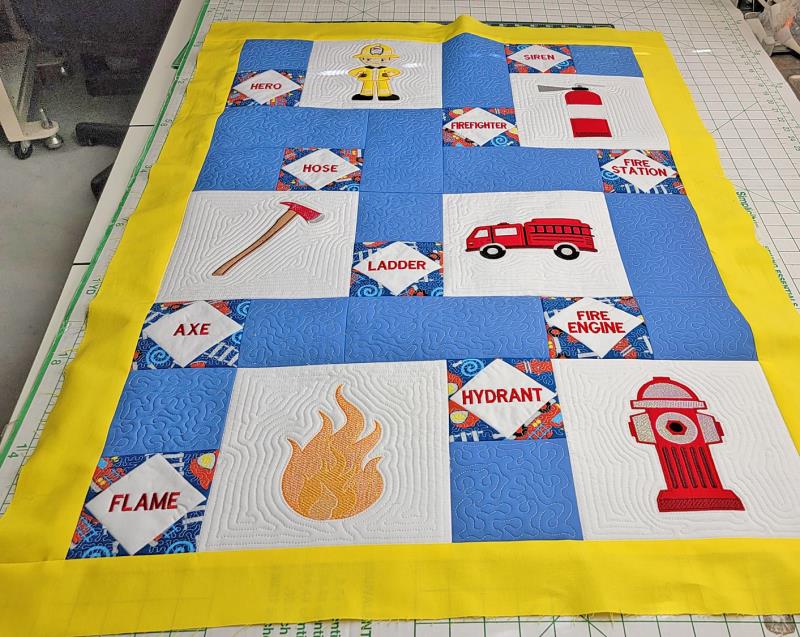
Step 3: | This is the layout I came up with for this quilt. You can use the designs to make the quilt as large or small as you would like. The yellow border pieces are cut a little longer and then trimmed. The red borders, batting, and backing are cut longer and wider than needed and then cut down to square up the quilt for binding. | 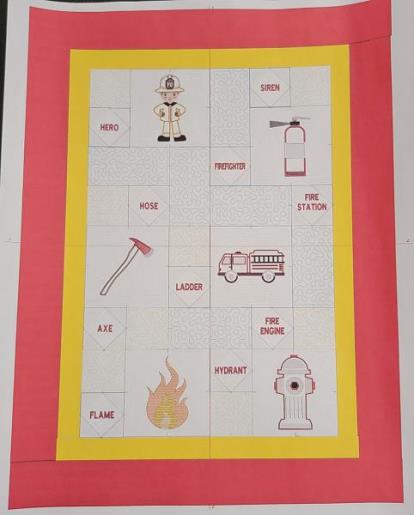 (Click Image to Enlarge) |
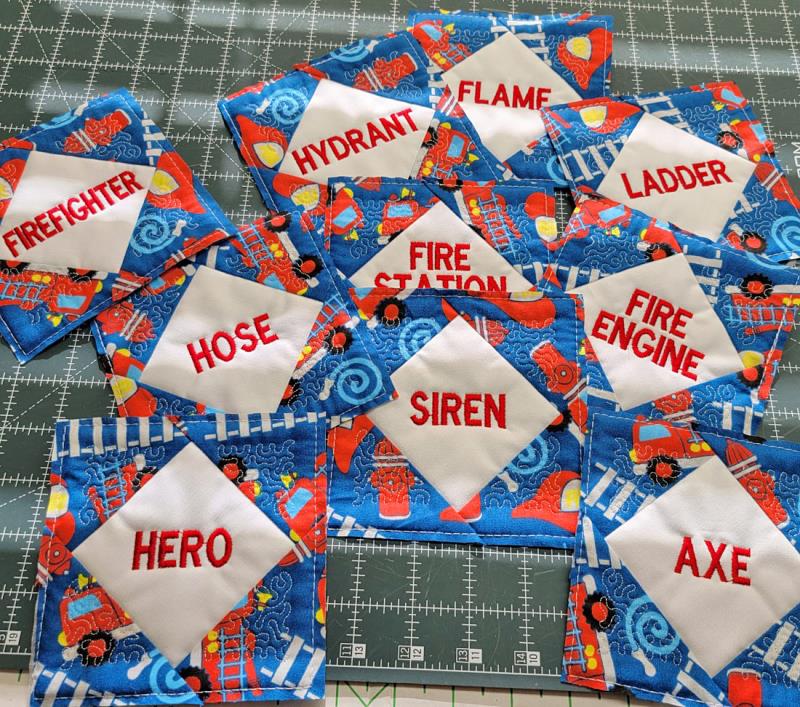
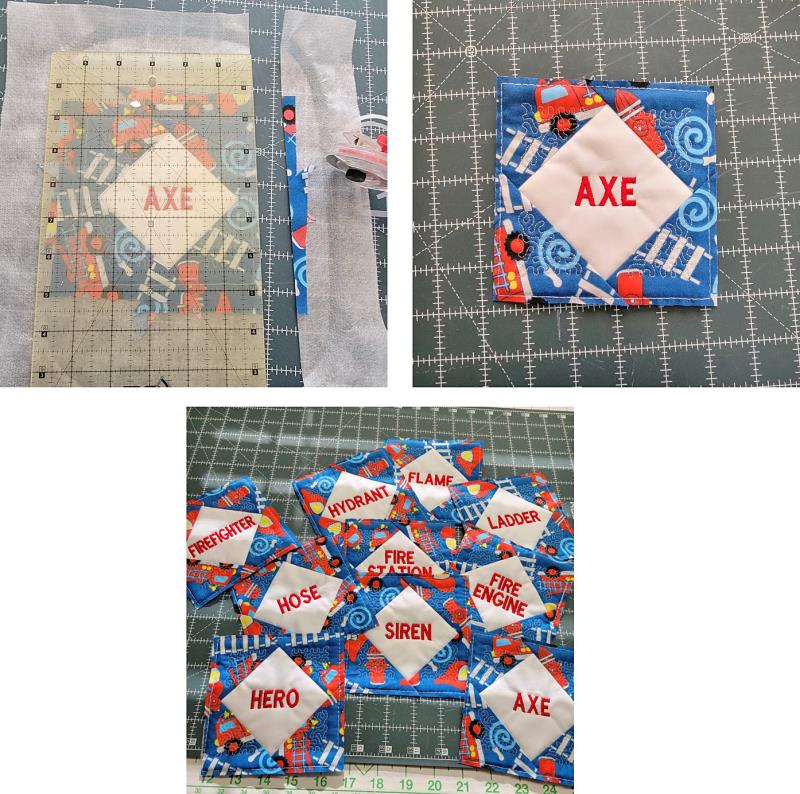
Step 4: | There are 10 text blocks to stitch. All of them are stitched in the same order; the only difference is the word on each block | 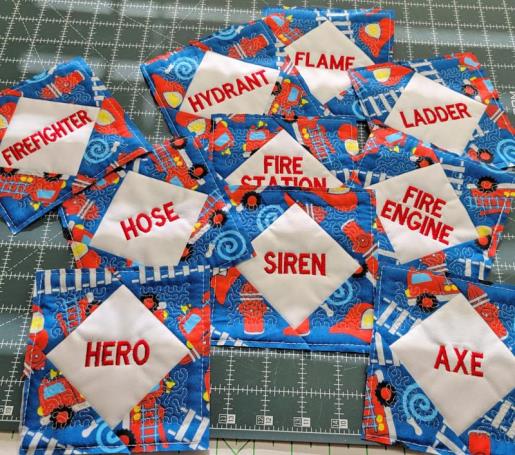 (Click Image to Enlarge) |
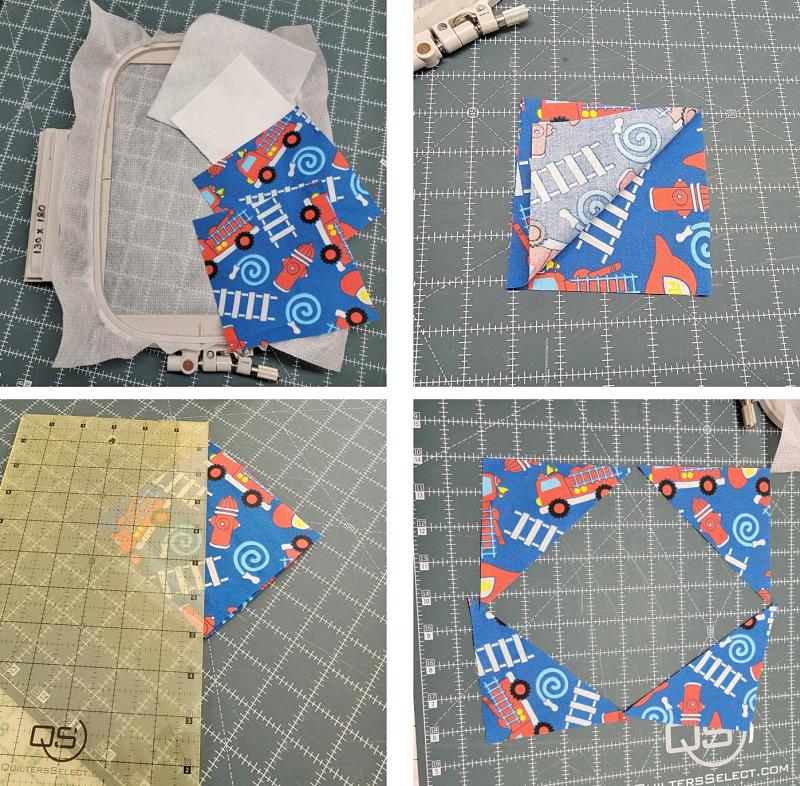
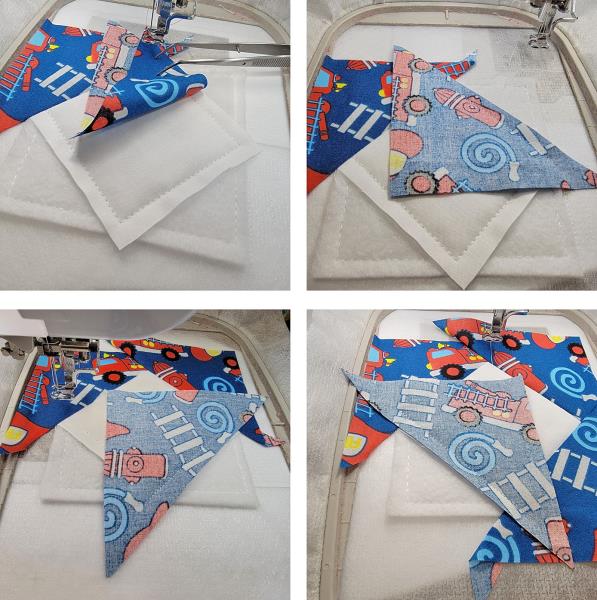
Step 5: | Cut all the stabilizer, batting, and fabric pieces needed for each block. Place the two print squares on top of each other and cut them on the diagonal as shown so there are four corner pieces. | 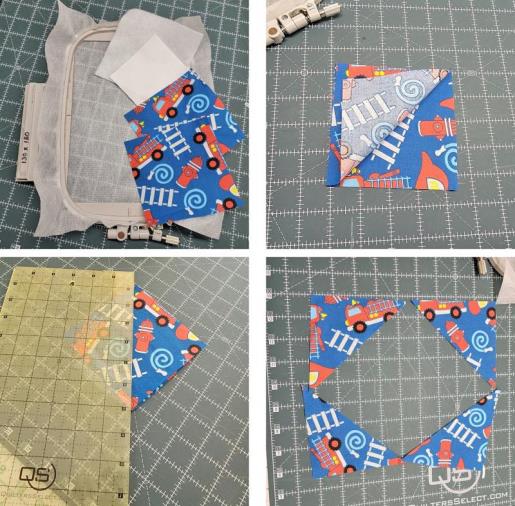 (Click Image to Enlarge) |
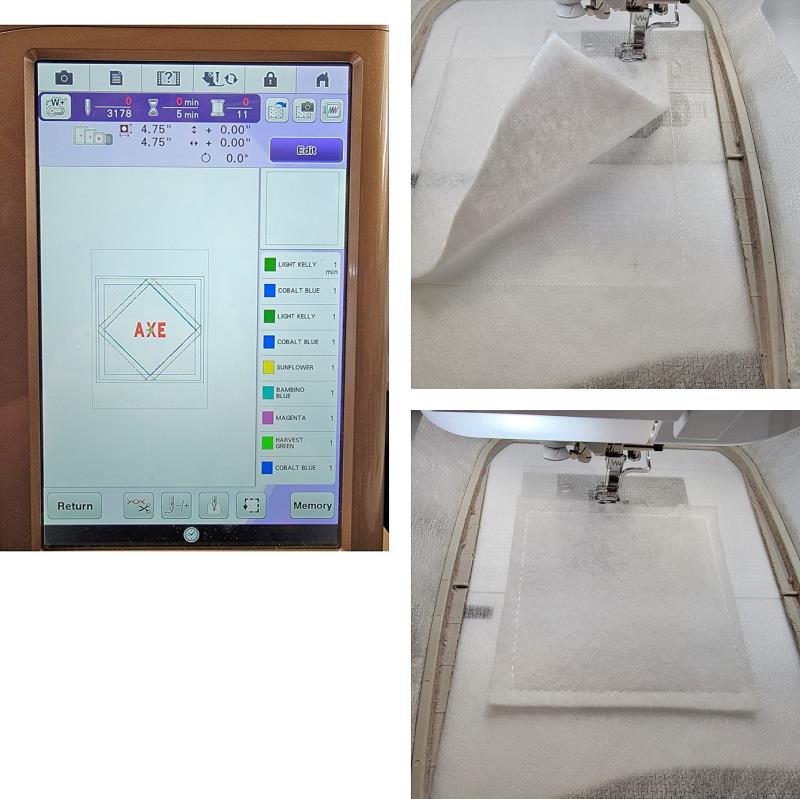
Step 6: | Load all the text block files on the machine. Stitch color 1, the placement line. Place down the batting and stitch color 2 to tack the batting to the stabilizer | 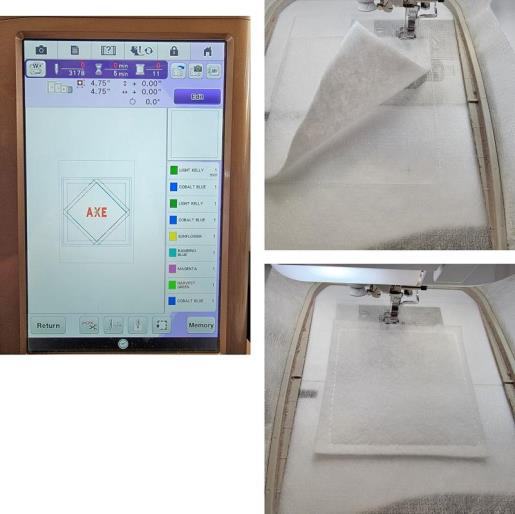 (Click Image to Enlarge) |
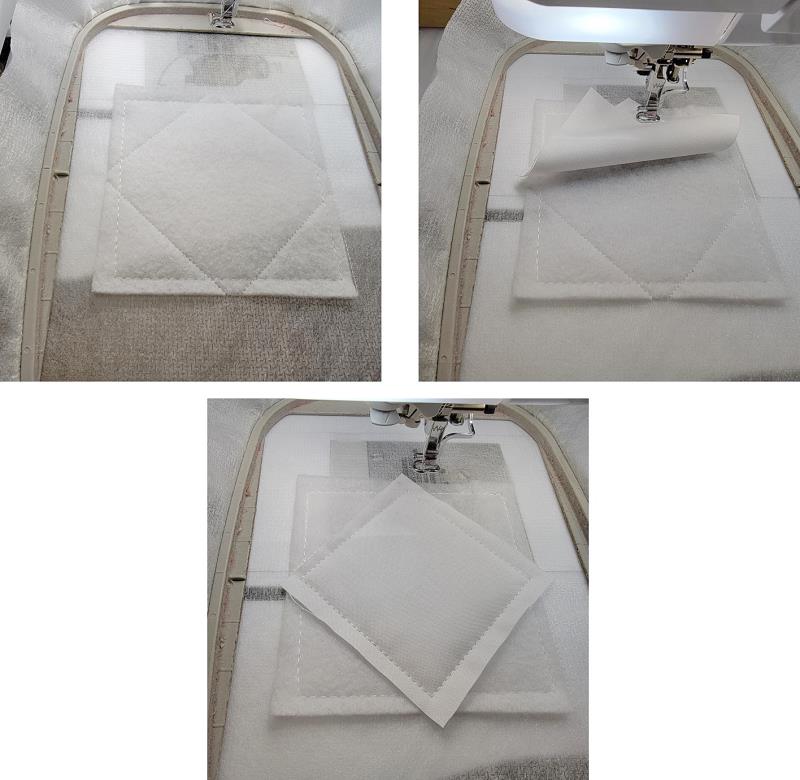
Step 7: | and show the placement lines for the corner pieces. On point, center the white fabric over the center stitching line. Stitch color 3 to tack the fabric in place. | 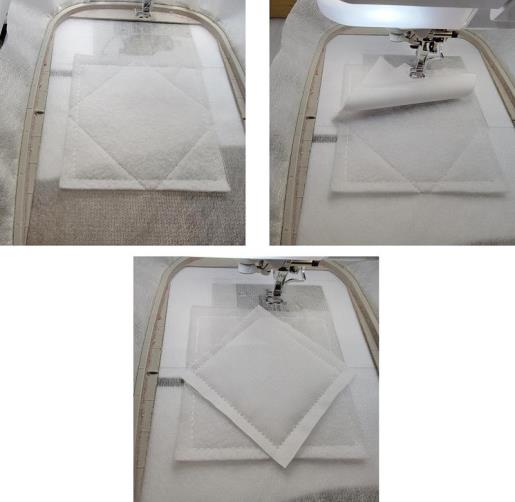 (Click Image to Enlarge) |
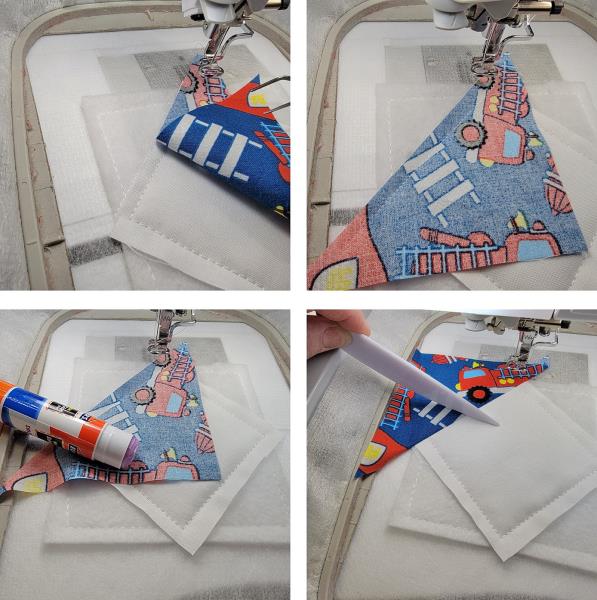
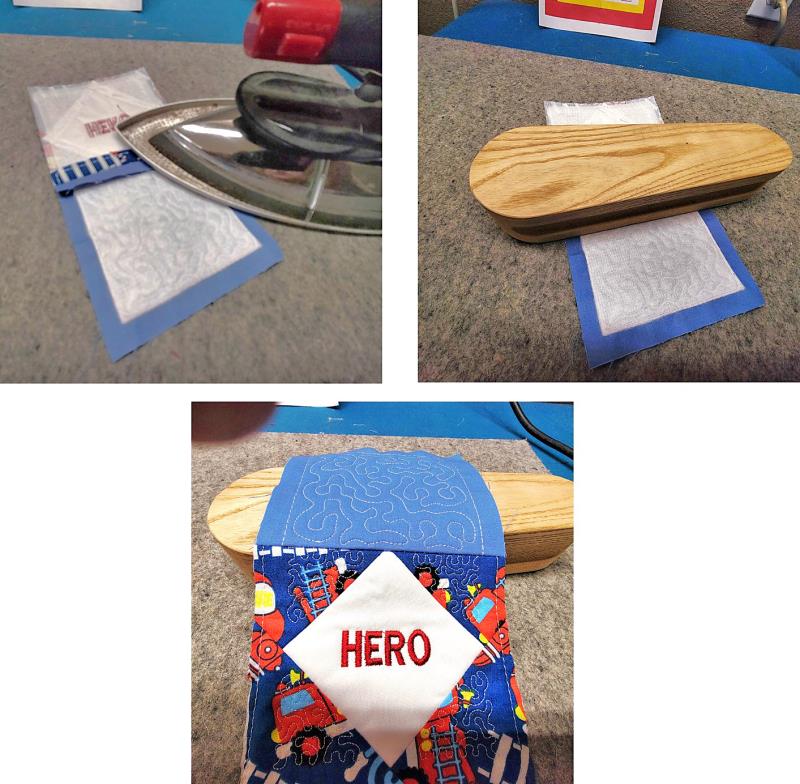
Step 8: | Next will be to stitch on the corner pieces, beginning with the upper left. Each corner is placed right side down, matching the long cut edge of the corner piece to the cut edge of the center piece. The next color is stitched and the machine stops. Place a little glue on the wrong side of the fabric and then flip it up over the corner using a creasing tool run over the seam line to make it crisp. | 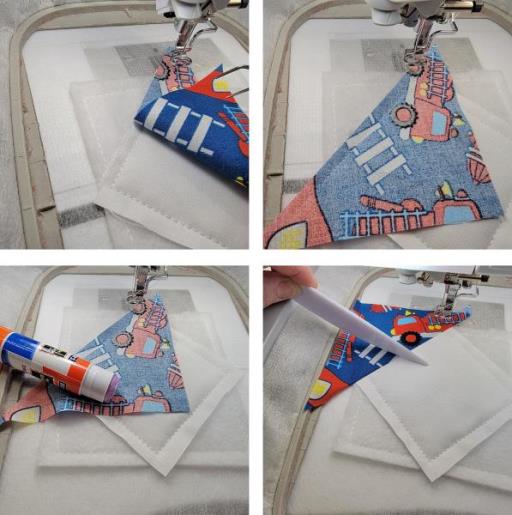 (Click Image to Enlarge) |
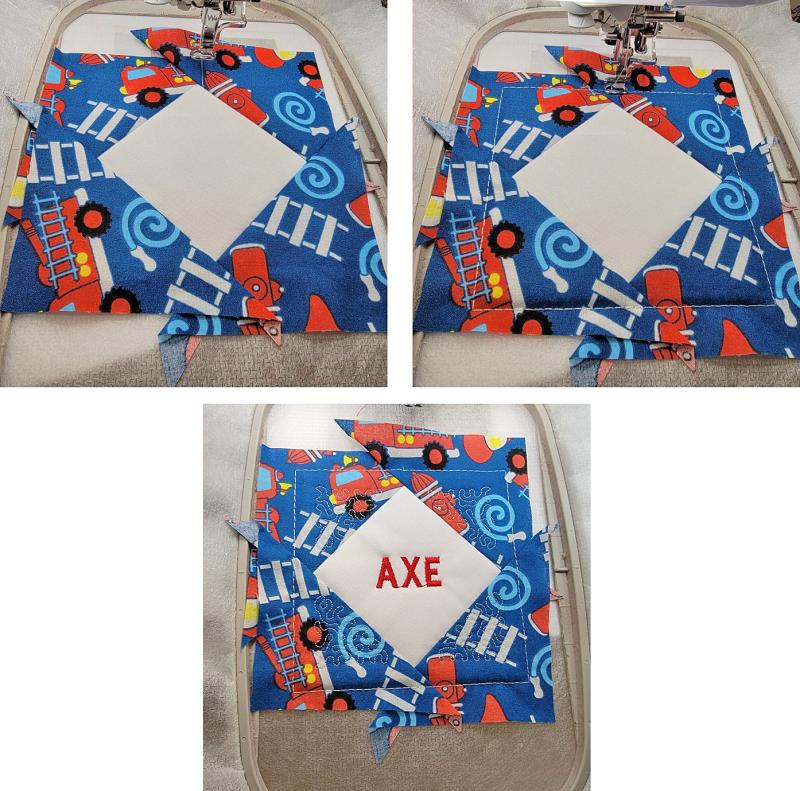
Step 9: | Repeat the process for stitching the upper right, lower right, and then lower left corner pieces. | 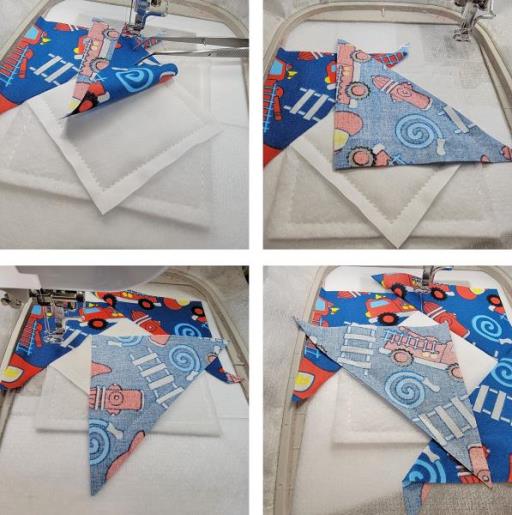 (Click Image to Enlarge) |
Step 10: | The next color tacks down all the corner pieces. The last color to stitch is the text. | 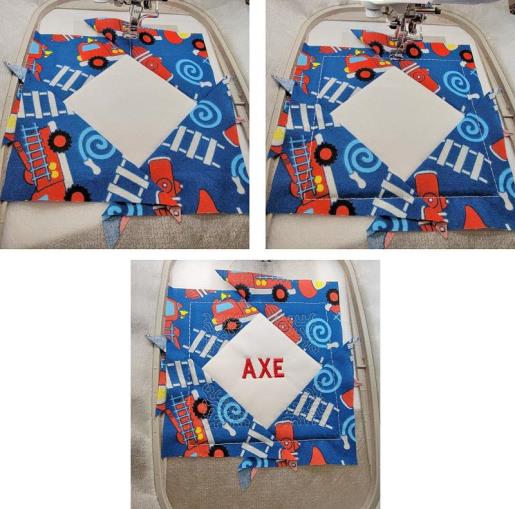 (Click Image to Enlarge) |
Step 11: | Trim the block to 5” square (includes ½” seam allowances). Repeat the steps to stitch all 10 text blocks. Set them aside. | 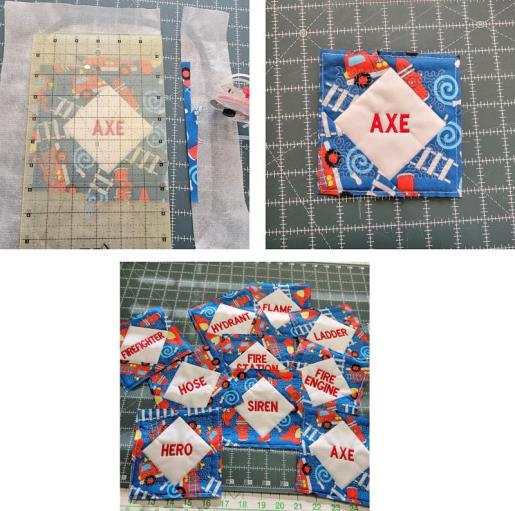 (Click Image to Enlarge) |
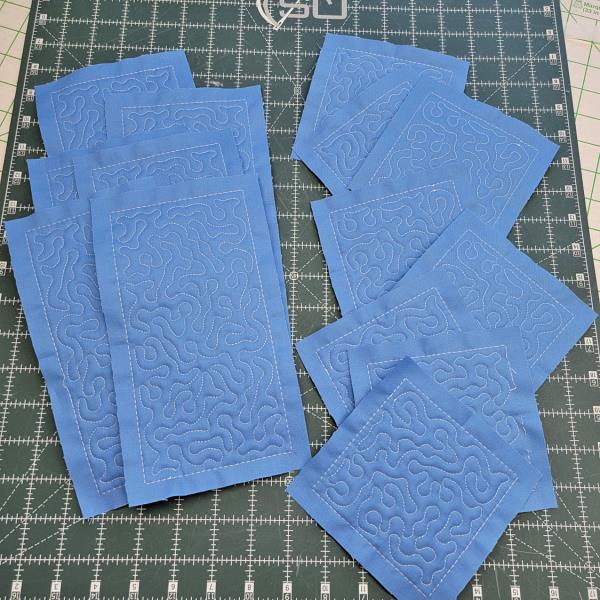
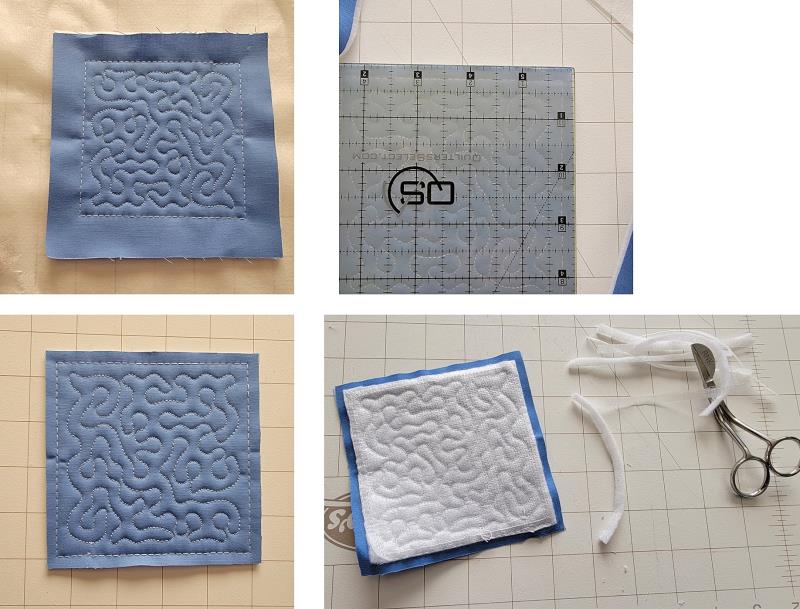
Step 12: | Now stitch the stipple blocks. There will be six 4” x 8” finished and eight 4” x 4” finished squares. | 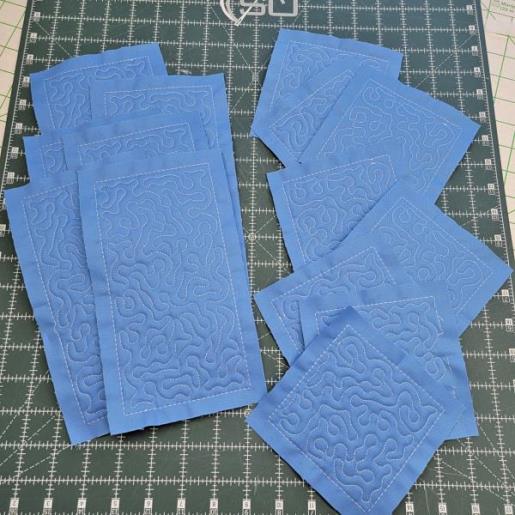 (Click Image to Enlarge) |
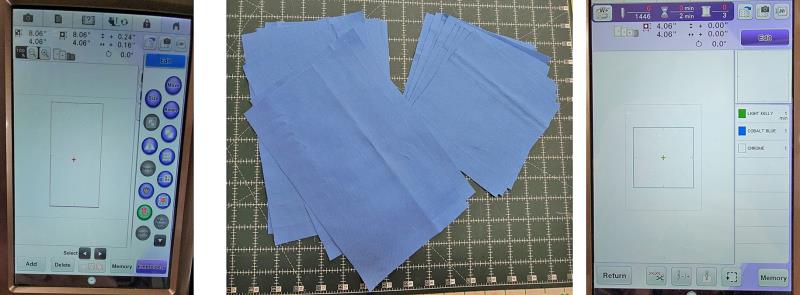
Step 13: | Load the small and large stipple blocks on the machine. Cut the stabilizer, batting, and fabric pieces. | 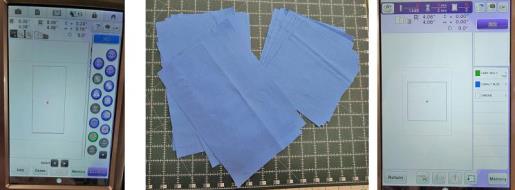 (Click Image to Enlarge) |
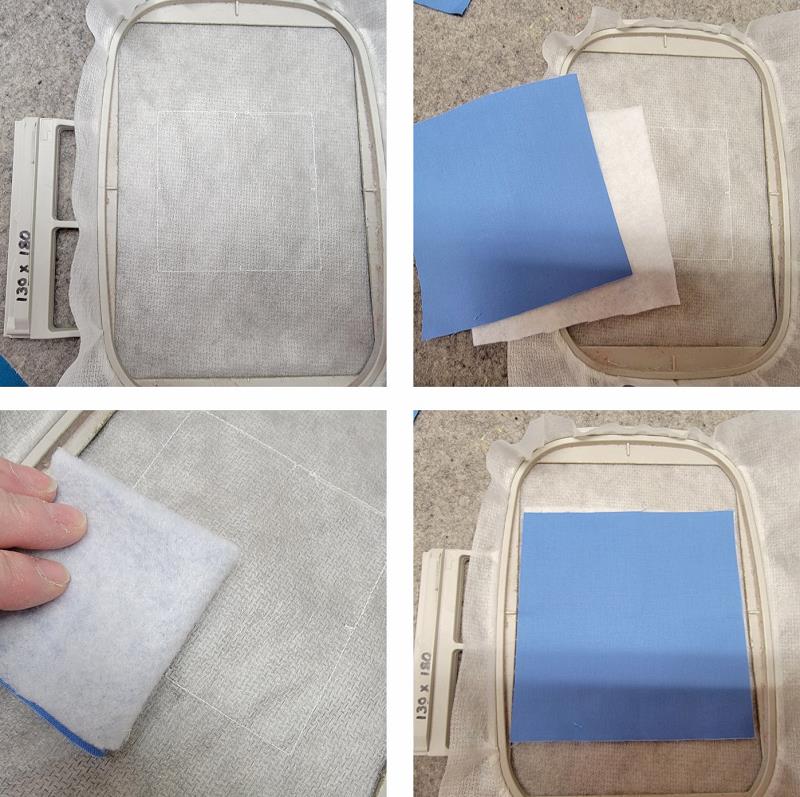
Step 14: | The process is basically the same for both the small and large stipple blocks. Begin by hooping a piece of stabilizer. Stitch color 1 which will be a placement line with tick marks to aid in aligning the batting and fabric. Place the fabric over the batting and quarter fold it. Align the folds to the tick marks at the left and bottom as shown Carefully open up the batting and fabric to cover the placement line. | 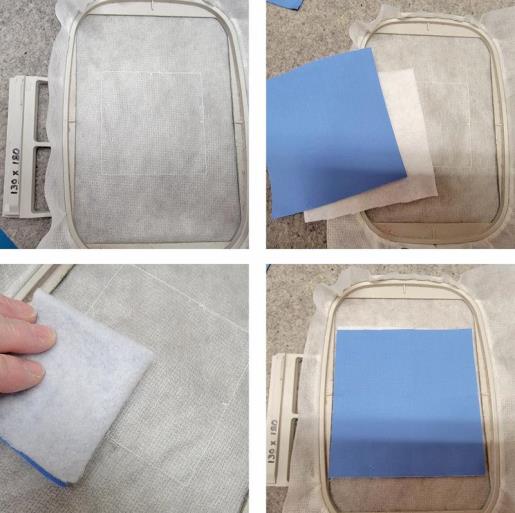 (Click Image to Enlarge) |
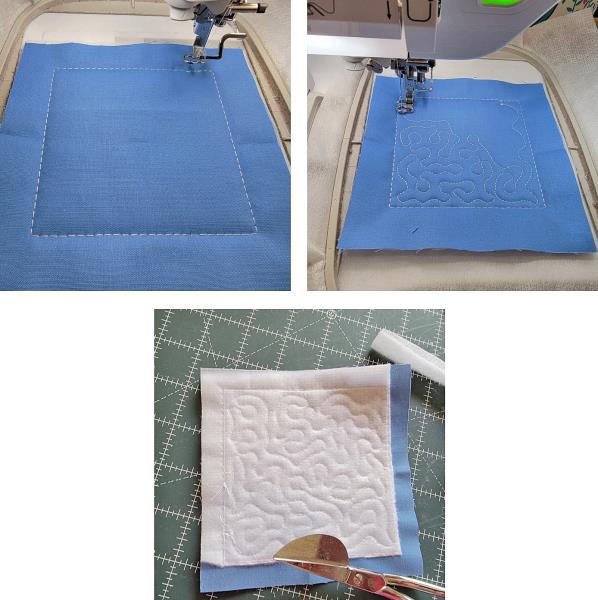
Step 15: | Stitch color 2, which will tack all the layers together. Stitch color 3, the stippling. Remove the piece from the hoop and use the small applique scissors to trim the stabilizer and batting close to the outer stitching line. Stitch all the small stipple squares. | 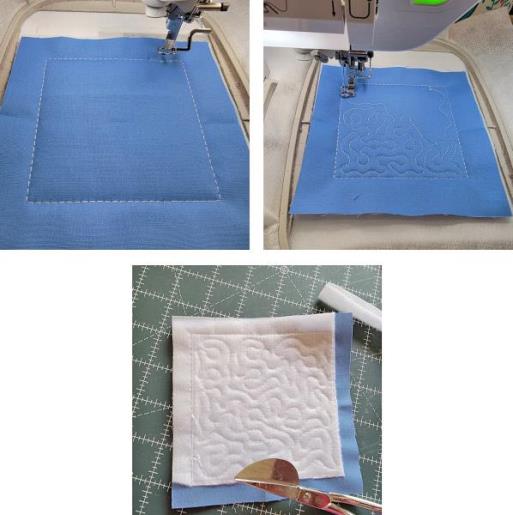 (Click Image to Enlarge) |
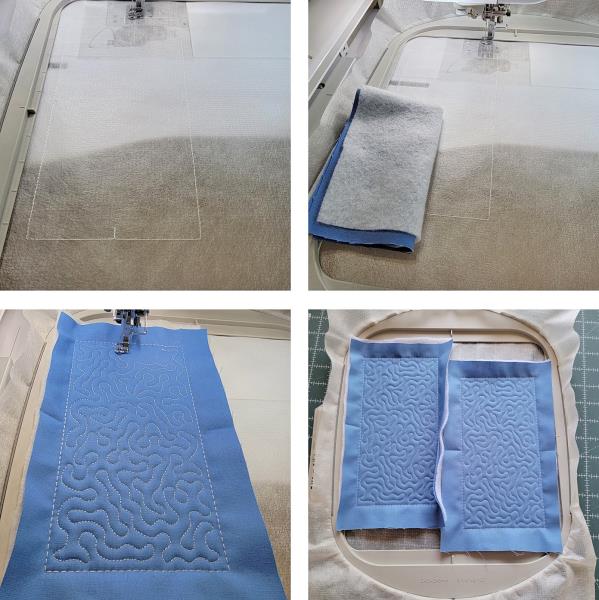
Step 16: | Stitch the large stipple blocks. Follow the same steps of hooping the stabilizer, quarter folding and aligning the fabric and batting and then stitching. If there is a hoop large enough for the machine, you may be able to place more than one block in the hoop which saves a little bit of stabilizer and time. Stitch all the large stipple blocks and trim the excess batting and stabilizer from the back. | 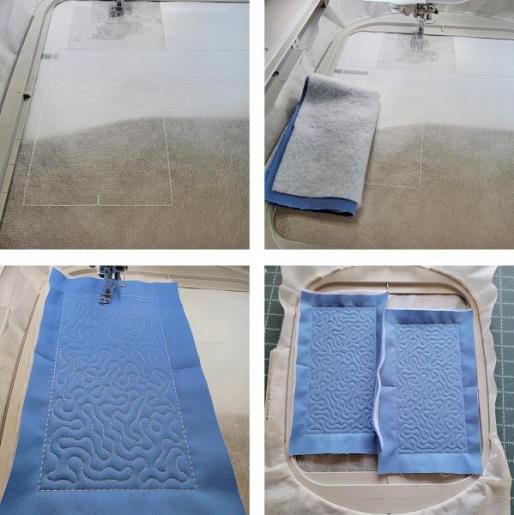 (Click Image to Enlarge) |
Step 17: | Trim the small blocks to 5” square (includes 1/2” seam allowances). Trim the large stipple blocks to 5” x 9” (includes ½” seam allowances). | 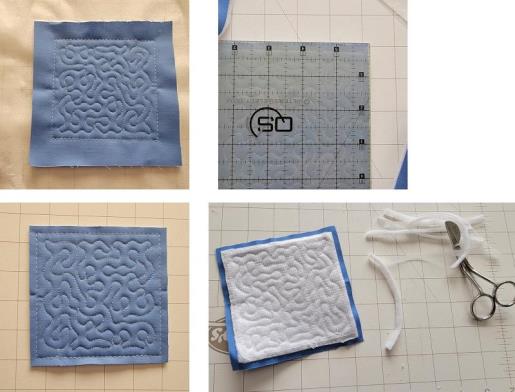 (Click Image to Enlarge) |
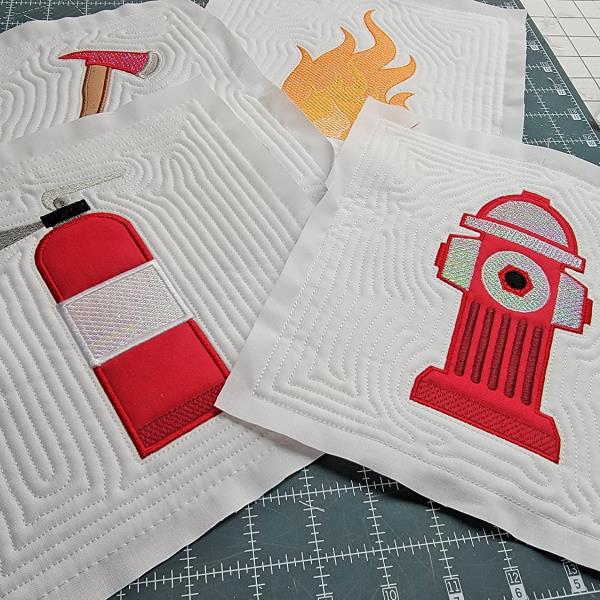
Step 18: | Now comes the fun stitching. Cut all the stabilizer, batting, fabrics and Mylar pieces. The last stitching done for each block is the outer quilting. You’ll have fun watching the designs come to life with the addition of the Mylar in each block. | 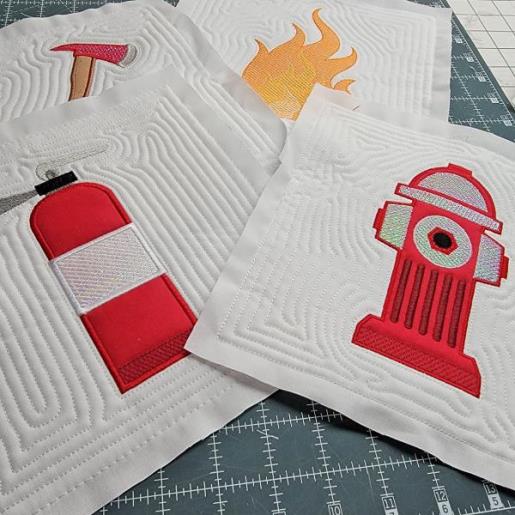 (Click Image to Enlarge) |
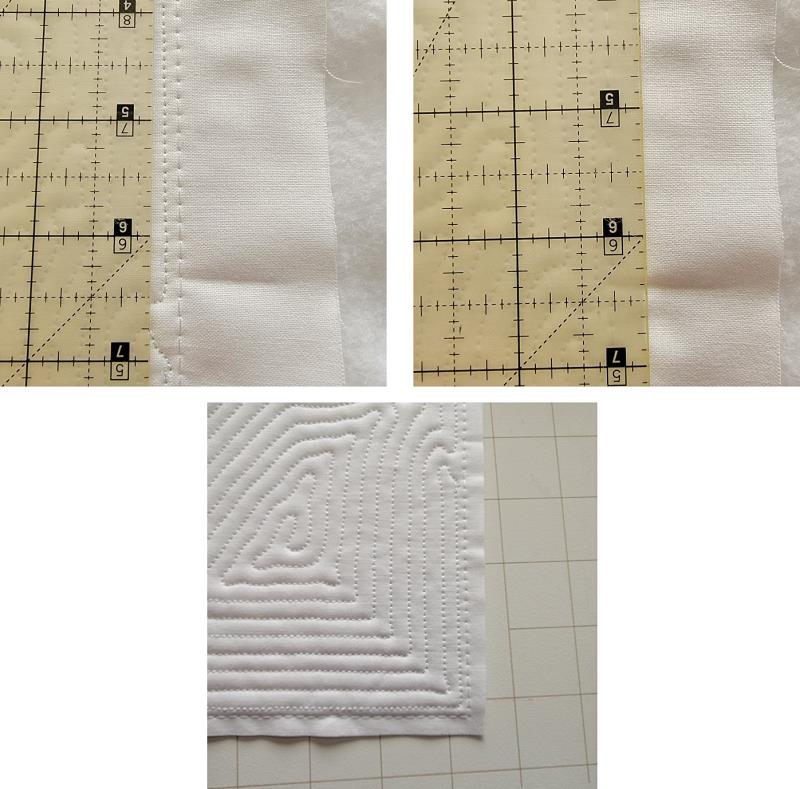
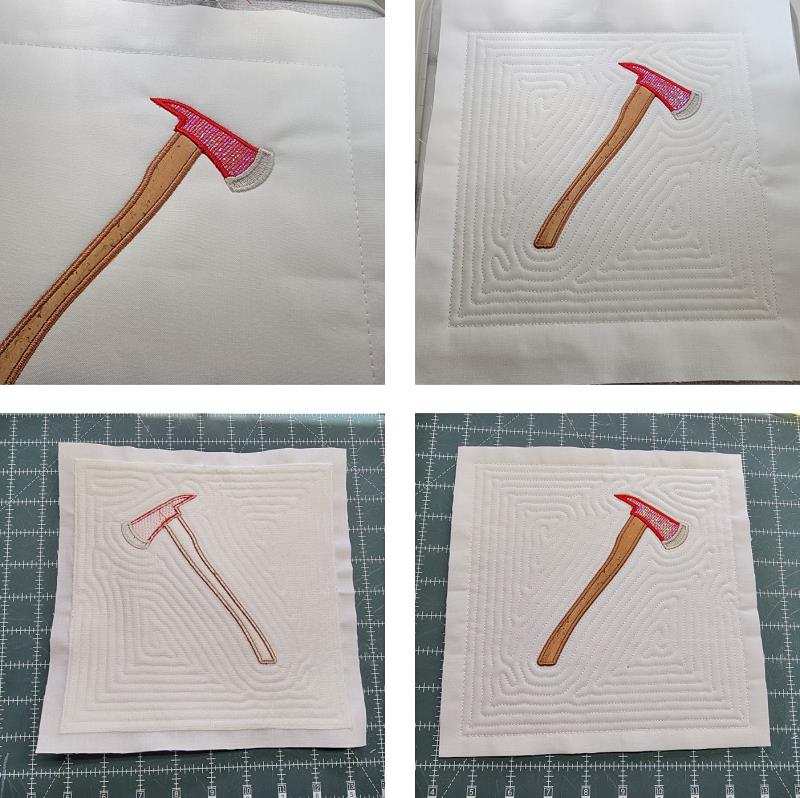
Step 19: | For each of the blocks in the end, there is an outer line to aid in alignment for trimming. Each block will be squared up to 9” x 9” (includes ½” seam allowances). The batting and stabilizer are also removed on the back of these blocks. | 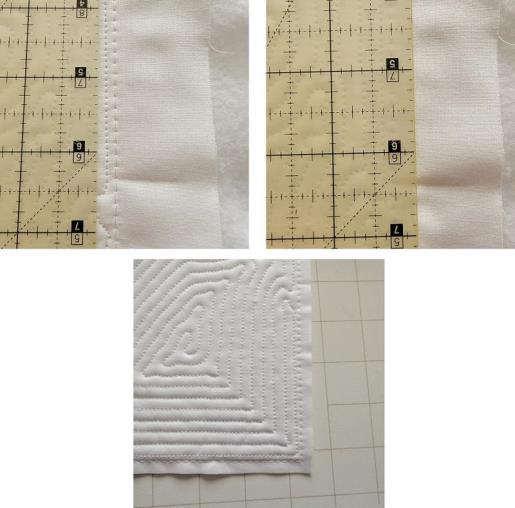 (Click Image to Enlarge) |
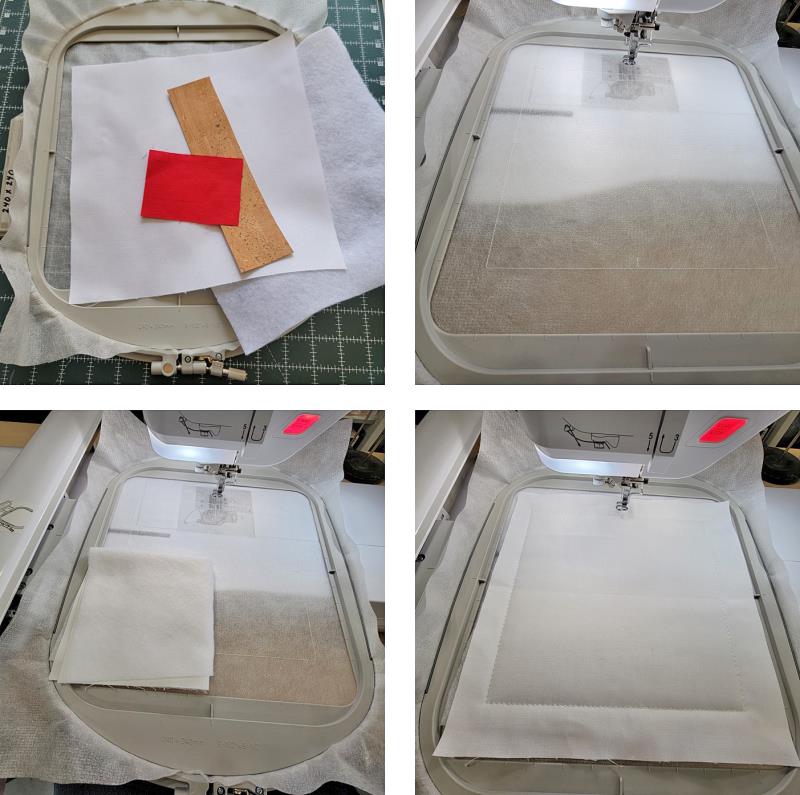
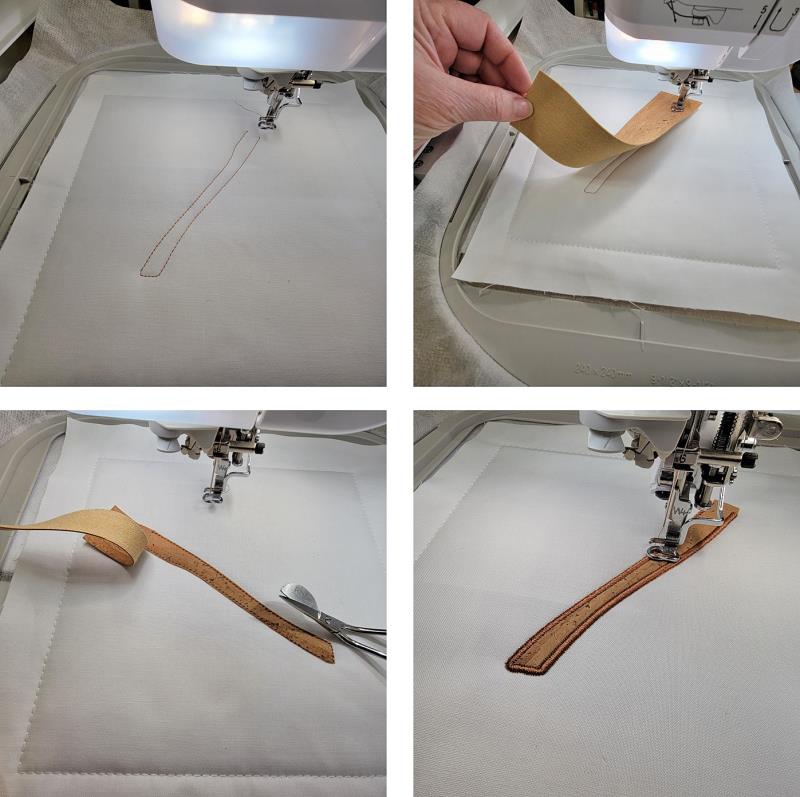
Step 20: | Begin with the axe block, following the color sequence. Hoop the stabilizer and stitch color 1, the placement line with tick marks for batting and fabric alignment. Quarter fold, align, and open up the fabric and batting as was done for the stipple blocks. Stitch color 2 which will tack all the layers together. | 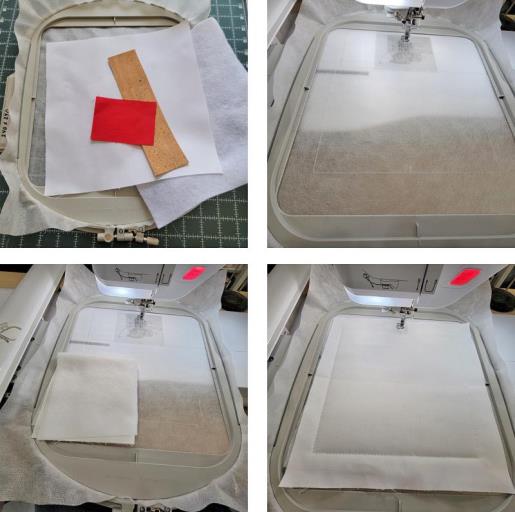 (Click Image to Enlarge) |
Step 21: | Next the placement line for the axe handle stitches. Place the fabric over the placement line and stitch the next color to tack down the fabric; trim the fabric close to the stitching line. Stitch the satin stitch over the handle. | 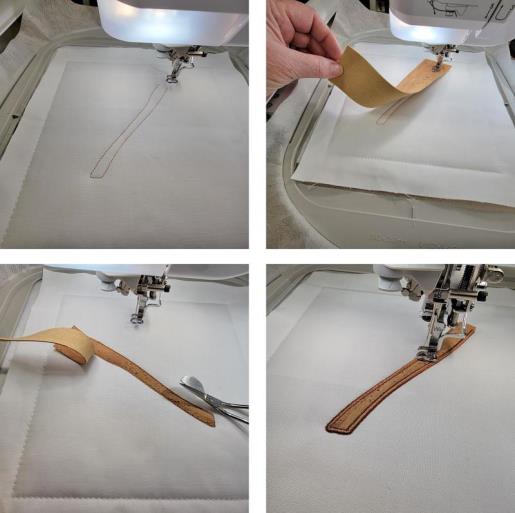 (Click Image to Enlarge) |
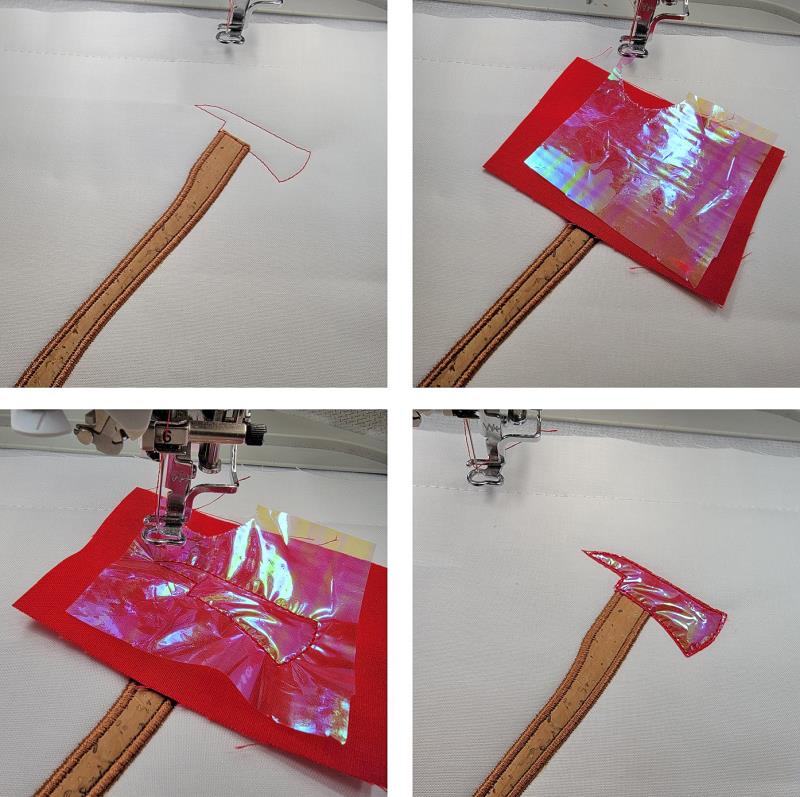
Step 22: | The axe head placement stitches. Place the red fabric down and mylar over it. Stitch the next color to tack those pieces down and then trim away the excess Mylar and fabric. | 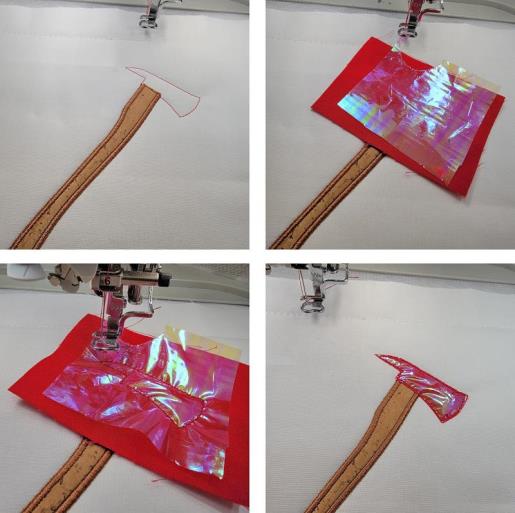 (Click Image to Enlarge) |
Step 23: | Continue the stitching following the color sequence. Trim away the excess stabilizer and backing and square up the piece to 9” square. | 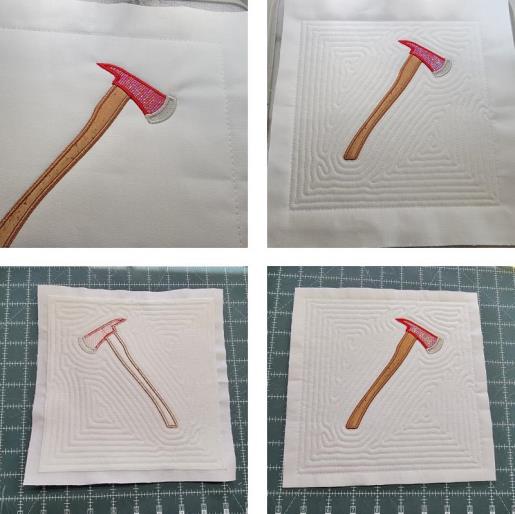 (Click Image to Enlarge) |
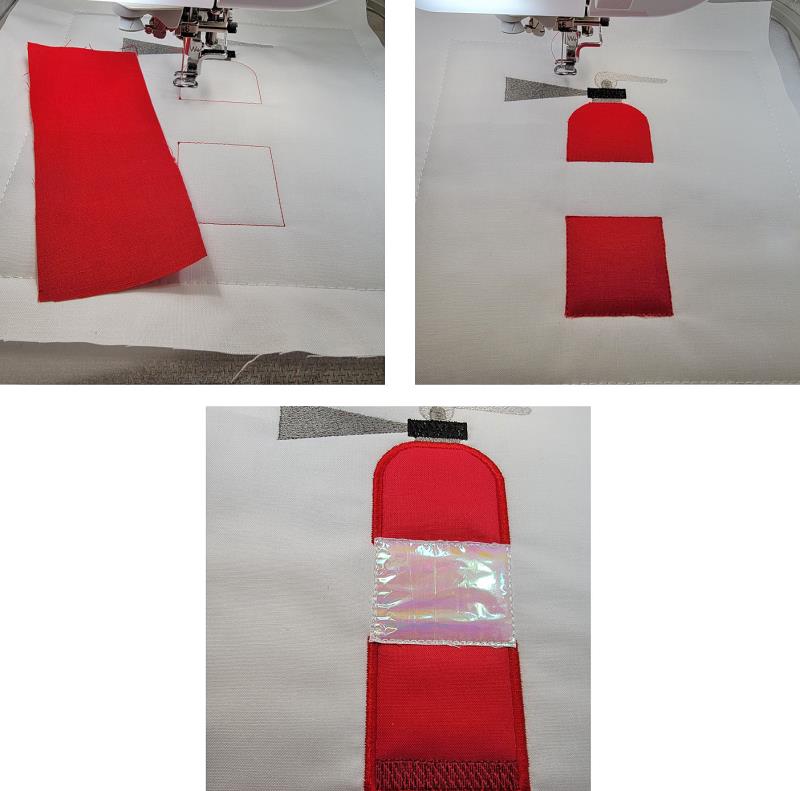
Step 24: | Stitch the extinguisher. Follow the color sequence, placing down the batting and batting as before. After the placement line stitches for the outline, place down the red fabric, stitch the tackdown color, and then stitch until the middle is ready for the white fabric and mylar. Tack it down, trim, and then finish stitching the remaining colors. Trim the back and square up. | 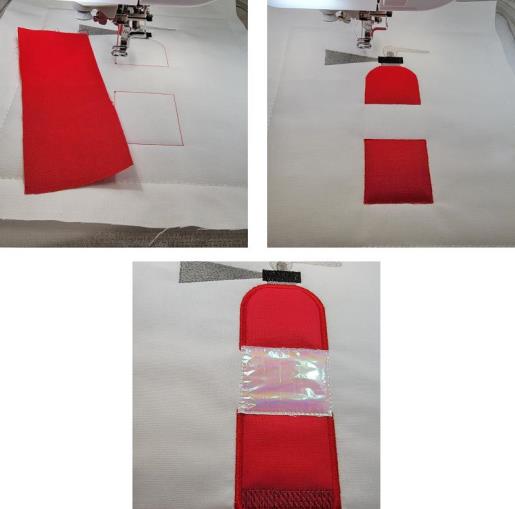 (Click Image to Enlarge) |
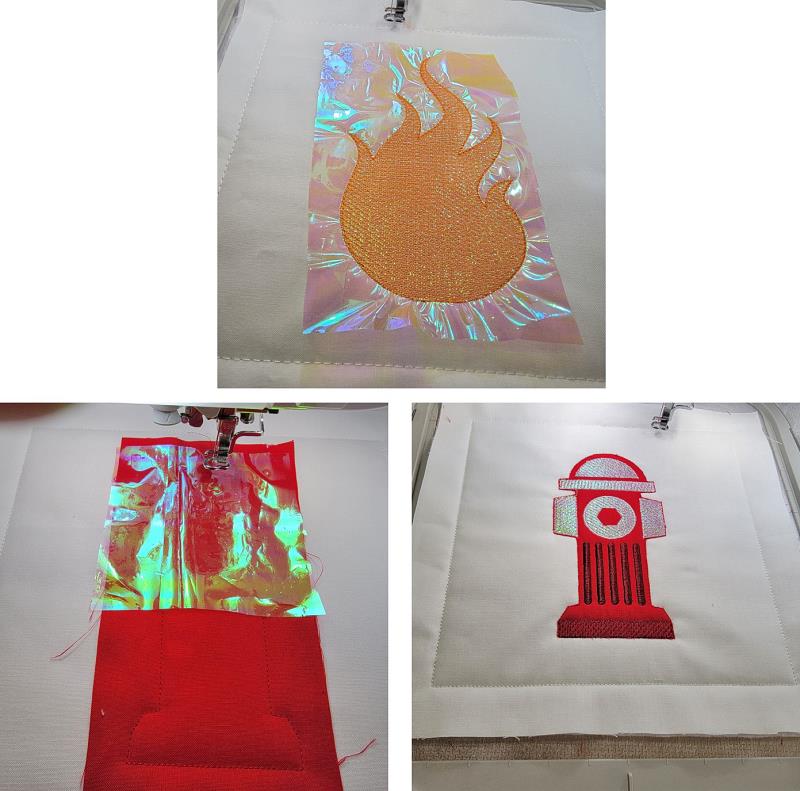
Step 25: | Stitch the flame block, and then stitch the hydrant block; the mylar for this block covers the top half of the design. | 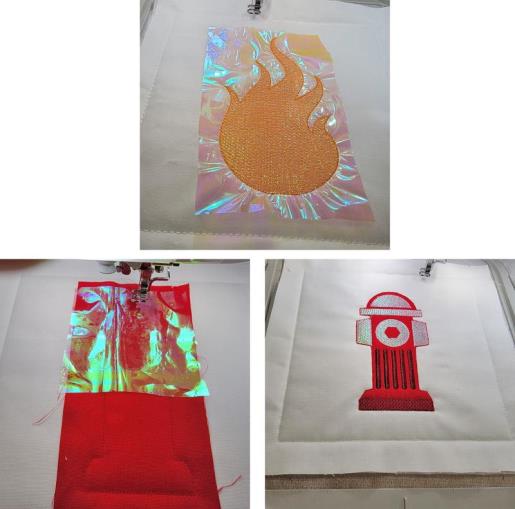 (Click Image to Enlarge) |
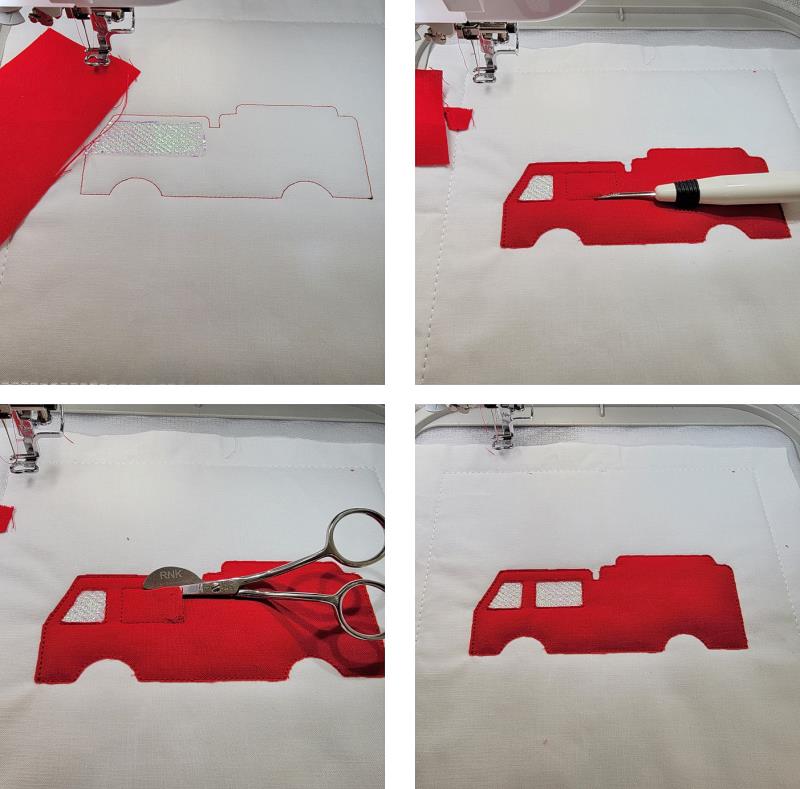
Step 26: | For the firetruck block, after the outline for the truck stitches, place the piece of mylar down over the window area and then stitch the light density fill. Place down the red fabric and tack it down. The machine stops to allow trimming of the window sections. I found it easiest to start by carefully lifting the fabric with the tip of the seam ripper and making a small slit and then trimming with the small applique scissors. | 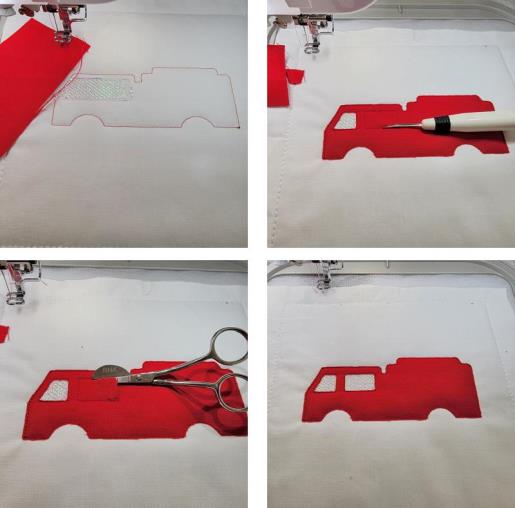 (Click Image to Enlarge) |
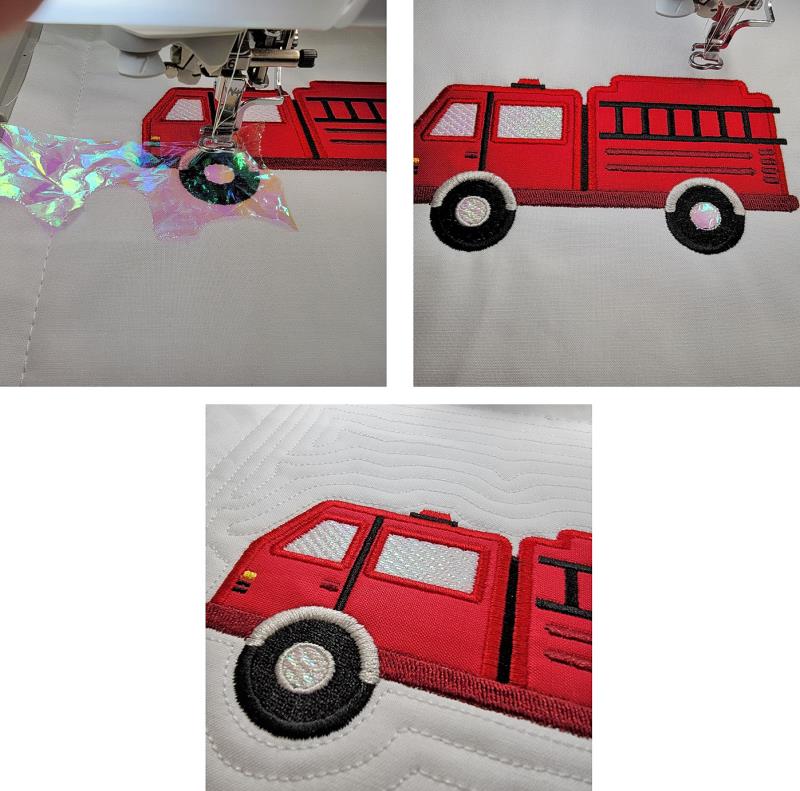
Step 27: | Continue stitching. The last mylar pieces to be placed are over the center of the wheels. | 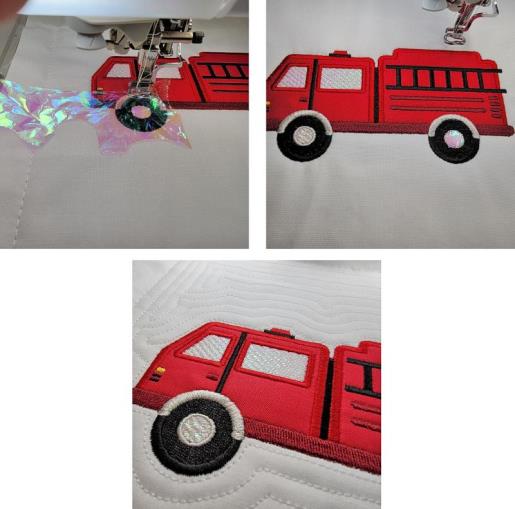 (Click Image to Enlarge) |
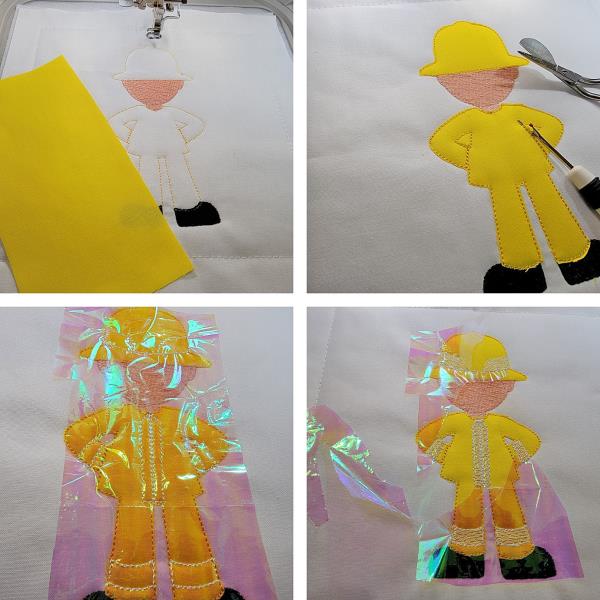
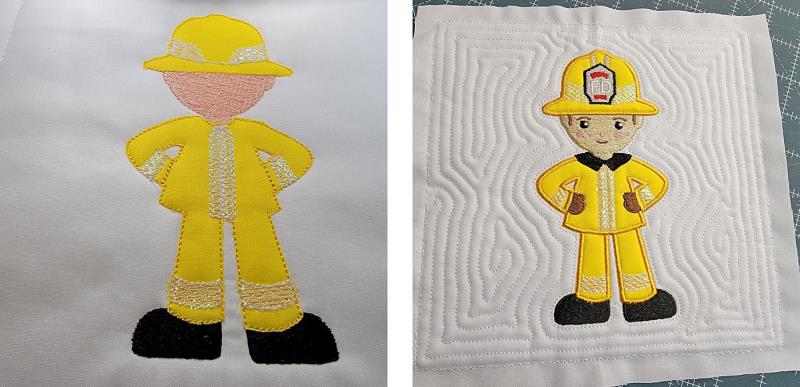
Step 28: | The little firefighter has mylar in the hat, down the center of the coat, on the sleeves, and on the turnout pants. | 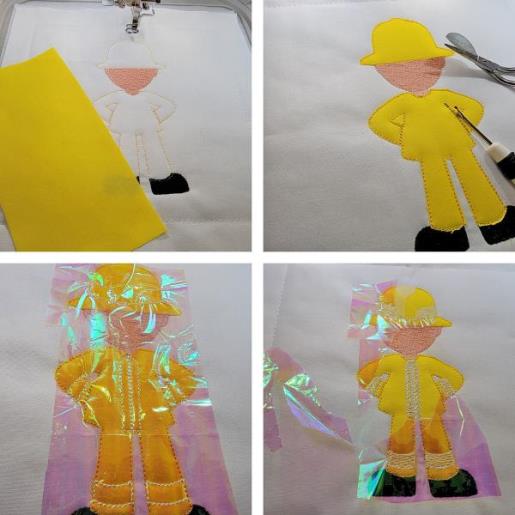 (Click Image to Enlarge) |
Step 29: | After the light density fill stitches down the mylar, carefully remove the excess and finish stitching the colors. | 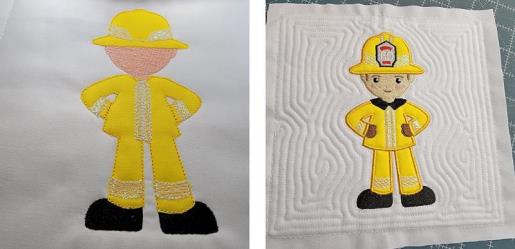 (Click Image to Enlarge) |
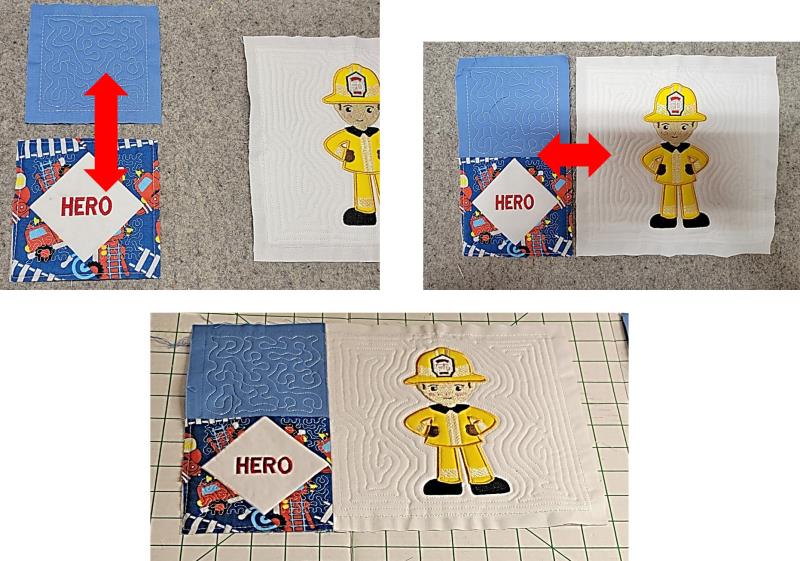
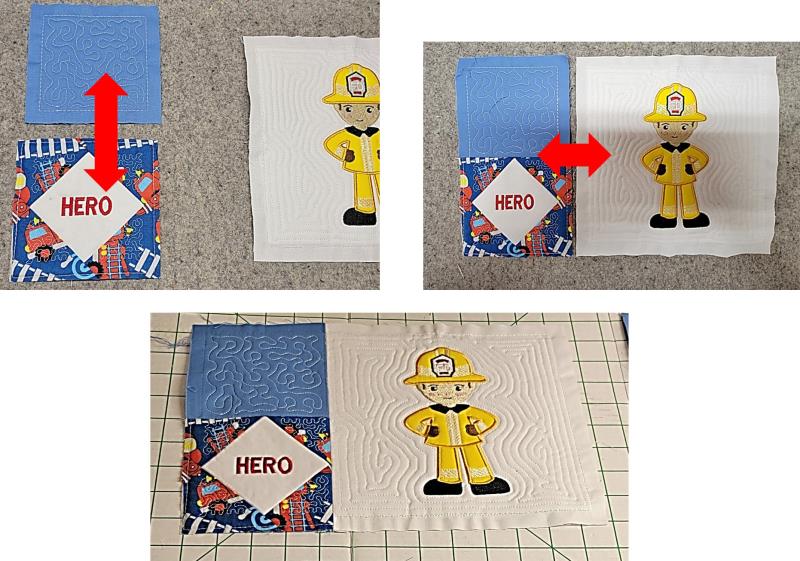
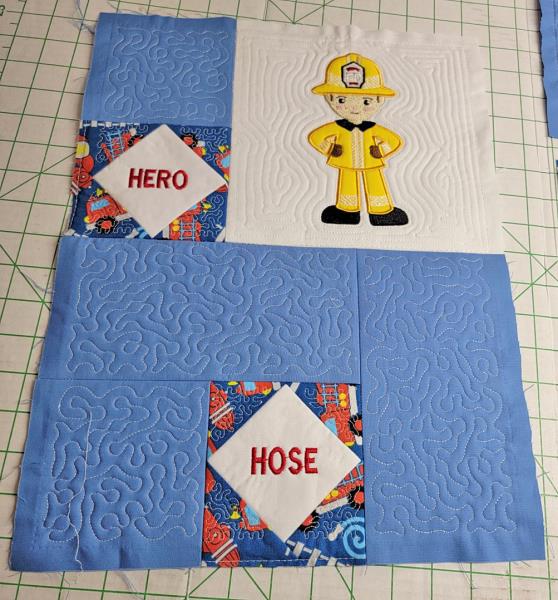
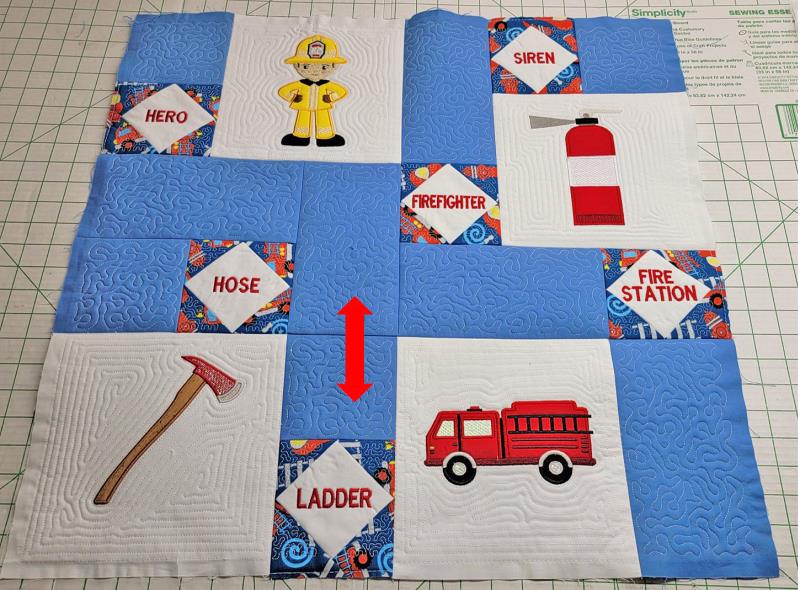
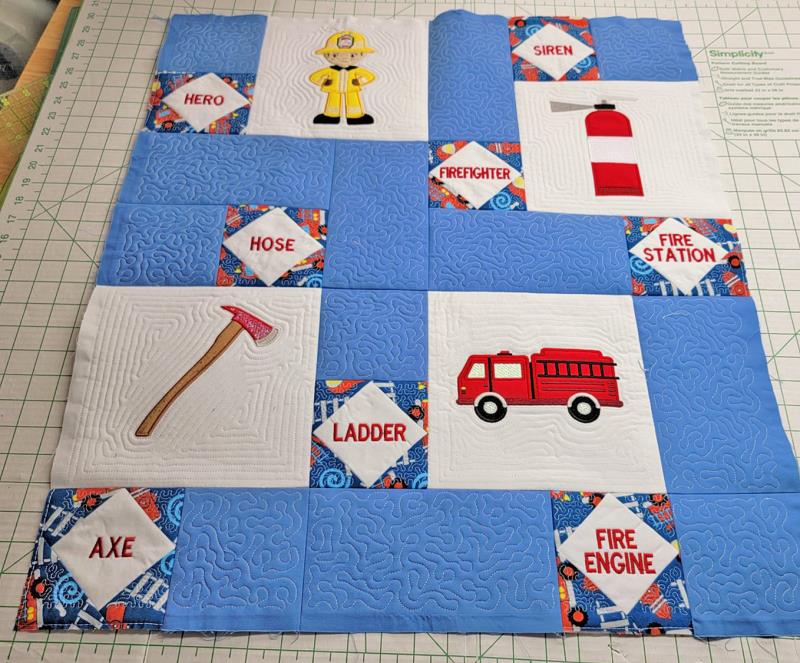
Step 30: | Once all the pieces are stitched, lay them out as shown. Small sections are joined and then sewn into larger sections. As laid out, we’ll start in the upper left. | 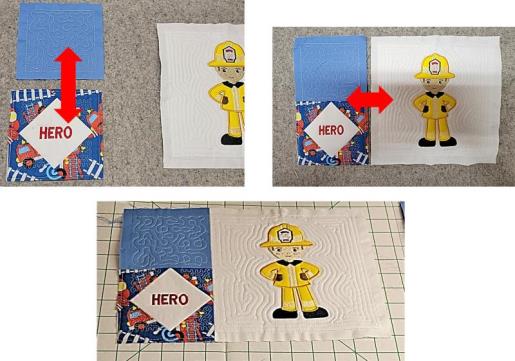 (Click Image to Enlarge) |
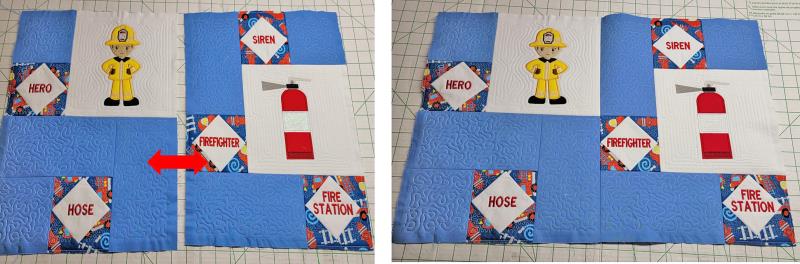
Step 31: | Arrows will be shown for the order to join the sections together. For this group, the blue block and hero text block are stitched together and then that section is stitched to the firefighter block. | 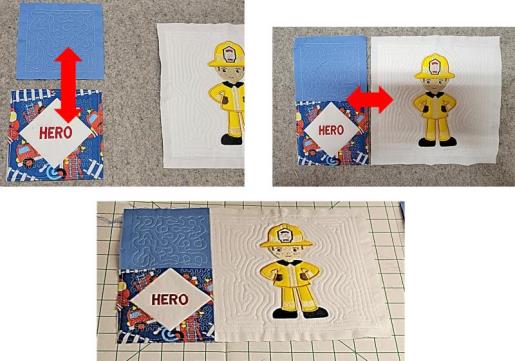 (Click Image to Enlarge) |
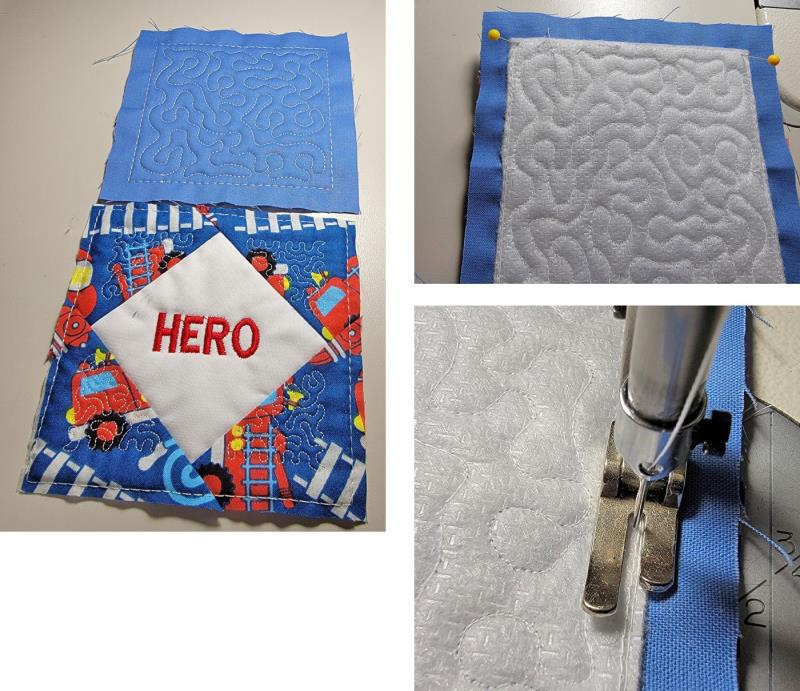
Step 32: | Place the small stipple block right sides together with the hero block. Stitch them together using a ½” seam allowance. A ½” seam allowance is used from here on out for stitching the entire quilt together. | 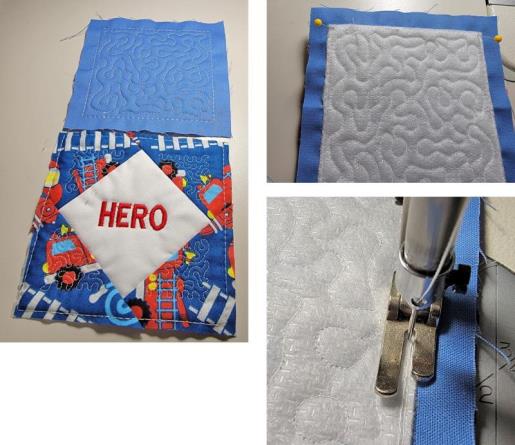 (Click Image to Enlarge) |
Step 33: | The pressing for all the blocks is the same. As each section is stitched, press the seam flat and then press it open. Use a press block over the seam for a few seconds to keep the seam flat. | 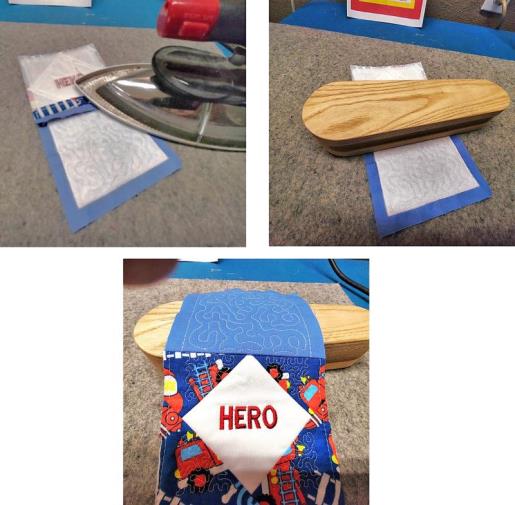 (Click Image to Enlarge) |
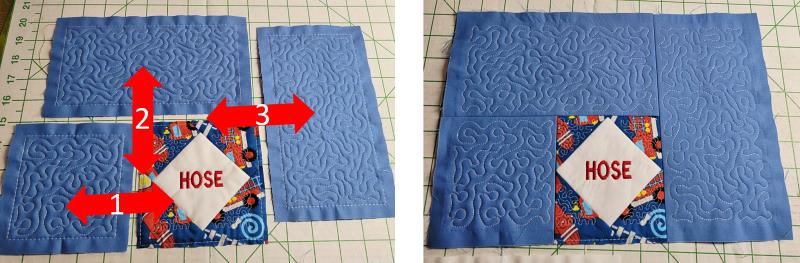
Step 34: | The next sections is the hose to the small stipple square, that section to a large stipple square, and then those sections to another large stipple square. | 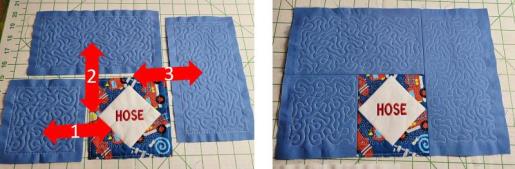 (Click Image to Enlarge) |
Step 35: | After those sections are stitched together, join the top to the bottom of the previously stitched section. | 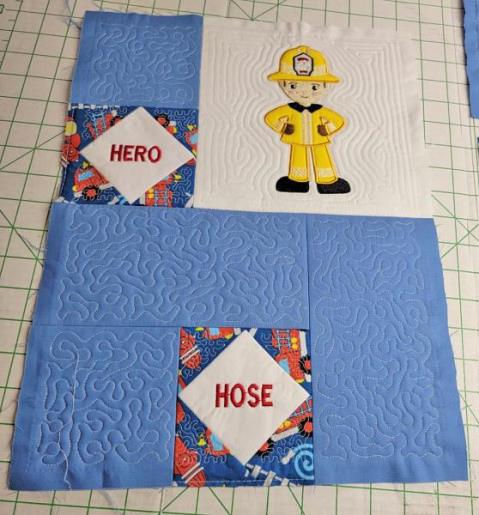 (Click Image to Enlarge) |
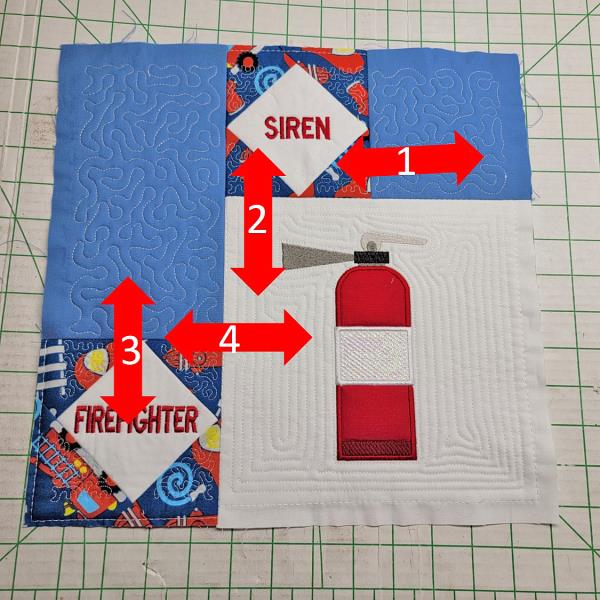
Step 36: | The third sections to be stitched together are a small stipple square to the right side of the siren square. Then stitch the bottom of that section to the top of the extinguisher block. Stitch a large stipple block to the top of the firefighter text block and then stitch that to the other sections. | 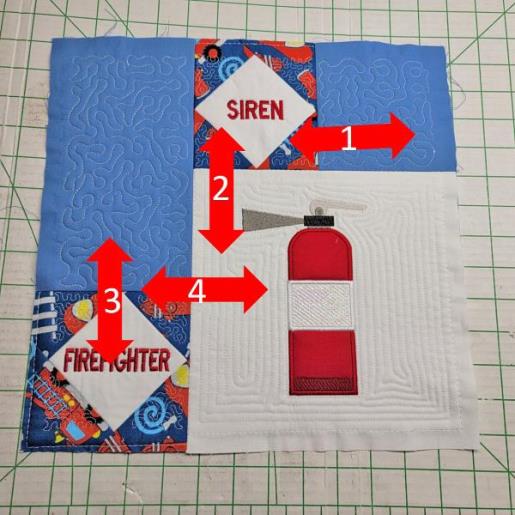 (Click Image to Enlarge) |
Step 37: | When putting these sections together, be sure to accurately align the seam allowances so everything aligns properly. | 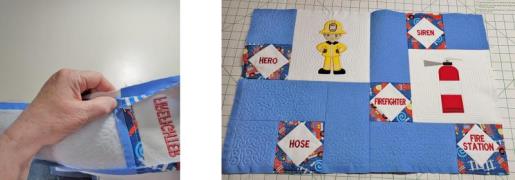 (Click Image to Enlarge) |
Step 38: | Sew the two large sections together as indicated by the arrow. | 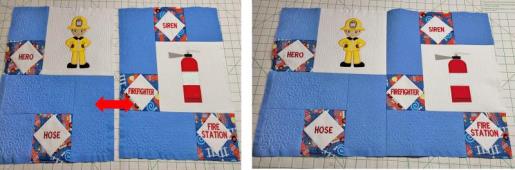 (Click Image to Enlarge) |
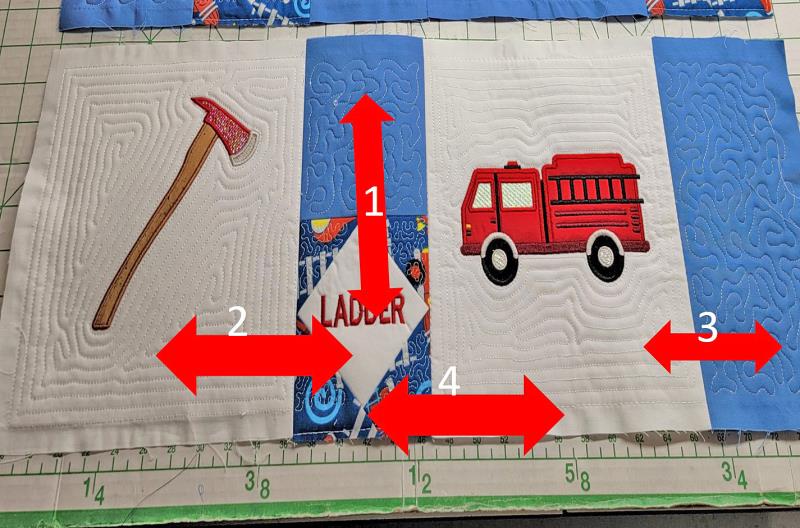
Step 39: | Sew a large stipple block to the top of the ladder block and then sew it to the right side of the axe block. Sew a large stipple block to the right side of the fire truck block. To complete this large section, sew the right side of the ladder section to the left side of the firetruck section. | 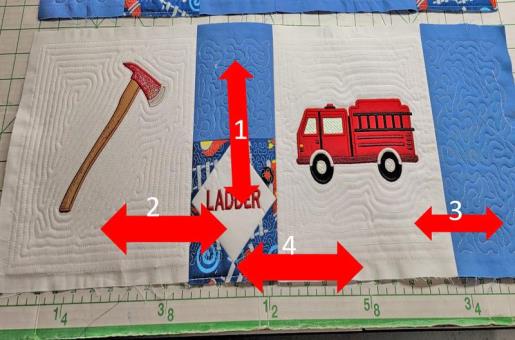 (Click Image to Enlarge) |
Step 40: | Sew the top of this section to the bottom of the previous sections. | 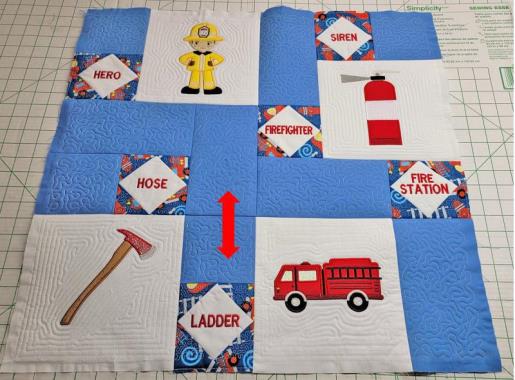 (Click Image to Enlarge) |
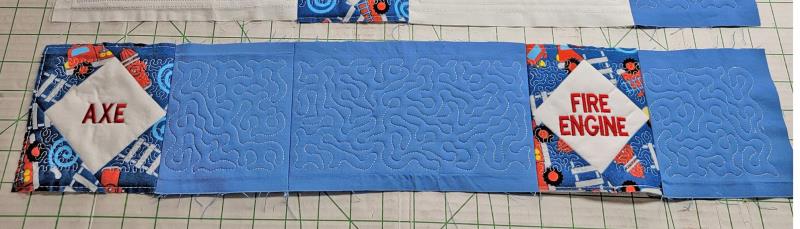
Step 41: | Now is a straight row to stitch. Place a small stipple block to the right side of the axe text block, attach the right side of the small stipple block to the left side of a large stipple block. Sew the left side of the fire engine text block to the right side of the large stipple block and complete the section by sewing a small stipple block to the right side of the fire engine text block. | 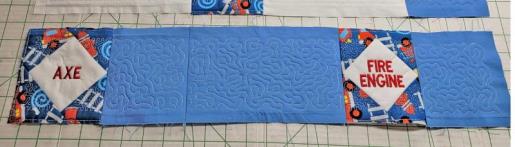 (Click Image to Enlarge) |
Step 42: | Sew the top of this section to the bottom of the axe-fire engine section. | 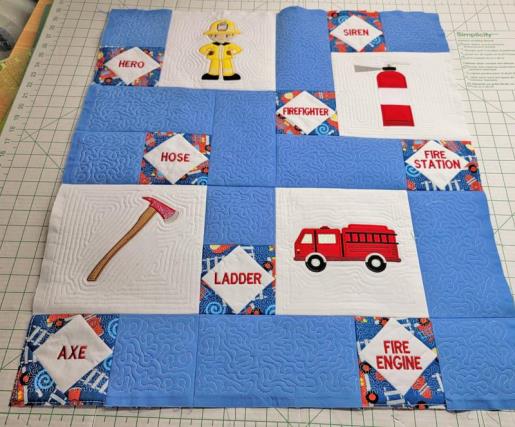 (Click Image to Enlarge) |
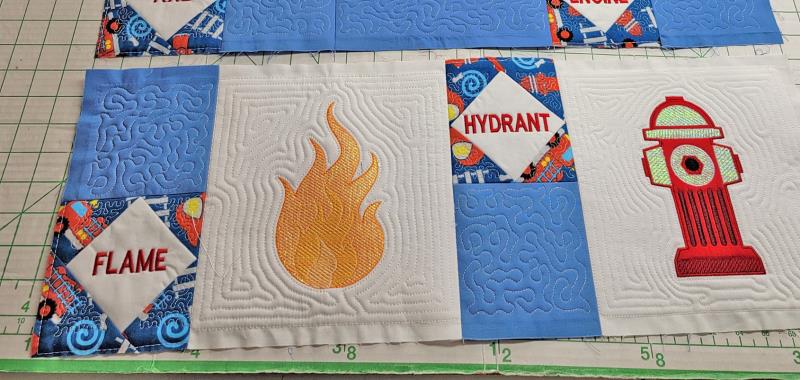
Step 43: | And now the last section. Sew the top of the flame text block to a small stipple block. Attach that to the left side of the flame block. Sew a small block to the bottom of the hydrant text block and sew that section to the right side of the flame block. Sew the hydrant text block section to the left side of the hydrant block. | 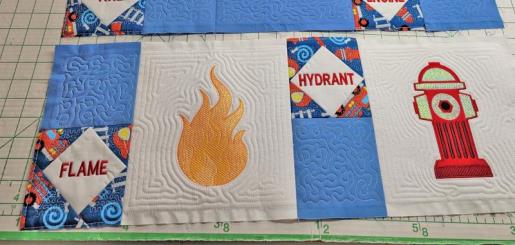 (Click Image to Enlarge) |
Step 44: | And lastly, stitch the top of this final section to the bottom of the straight row. This completes the basic quilt. | 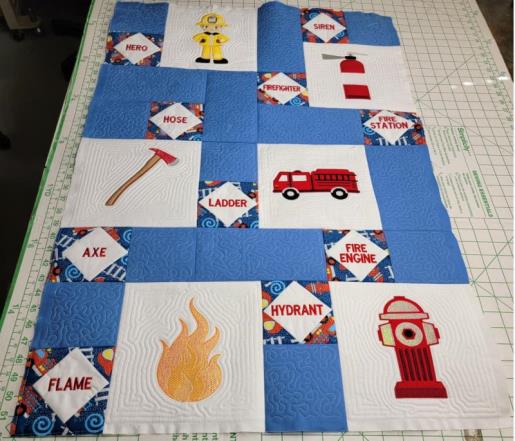 (Click Image to Enlarge) |
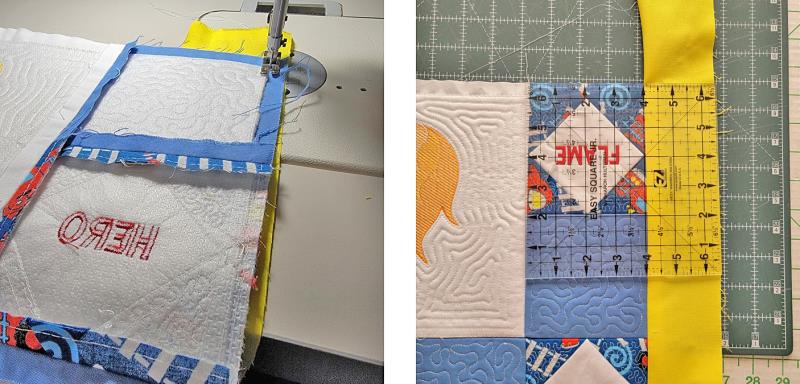
Step 45: | Borders. Measure and cut the yellow borders. The borders are sewn to the left and right sides of the quilt first, the seam pressed toward the border, and squared up even with the quilt. | 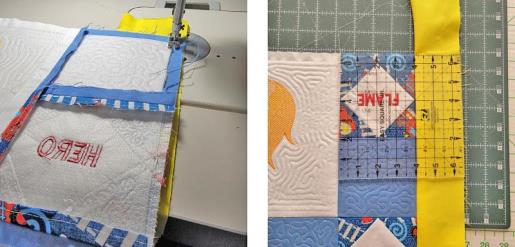 (Click Image to Enlarge) |
Step 46: | Then the top and bottom borders are stitched on and squared up. | 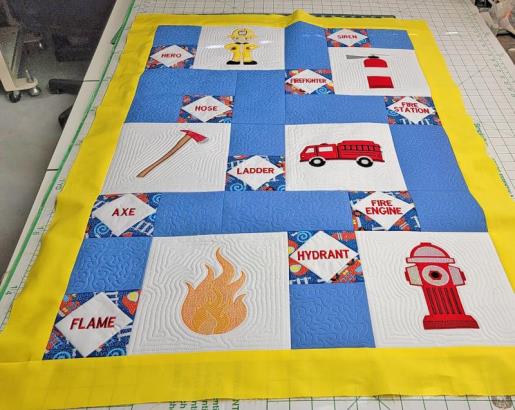 (Click Image to Enlarge) |
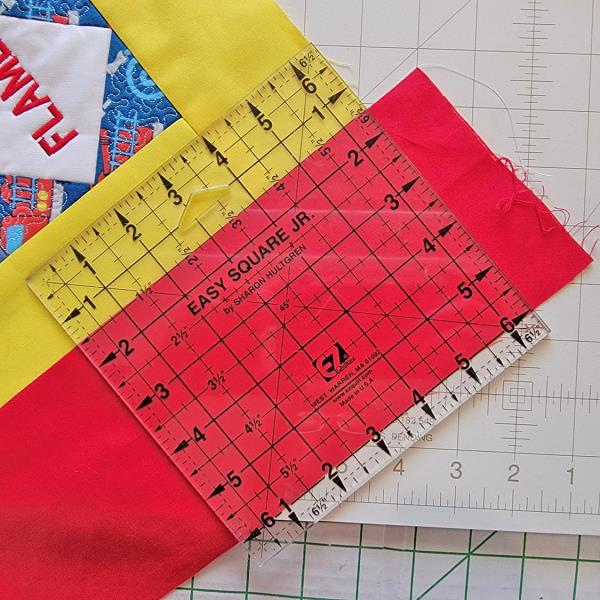
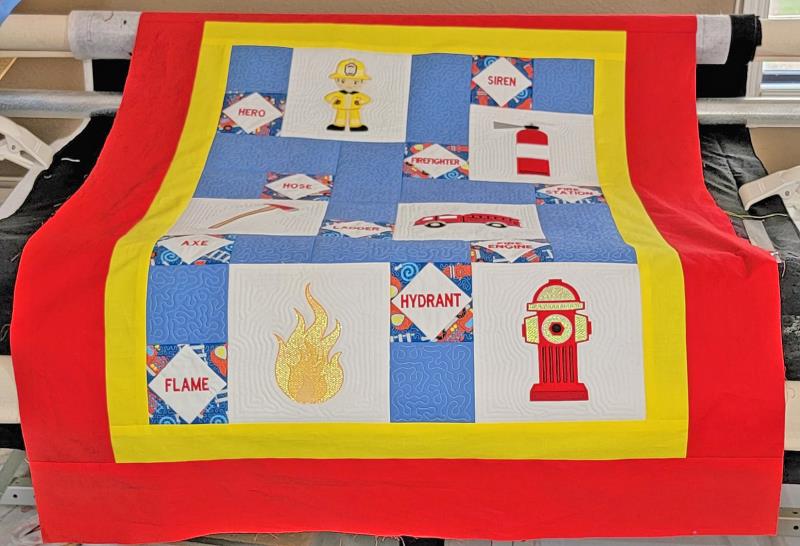
Step 47: | The same steps are used to sew on the larger red borders. Measure, cut, and sew the borders to the left and right sides and square them up. | 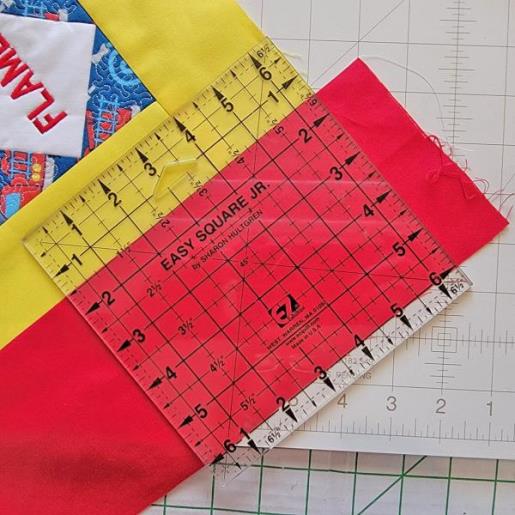 (Click Image to Enlarge) |
Step 48: | Repeat for the top and bottom borders. | 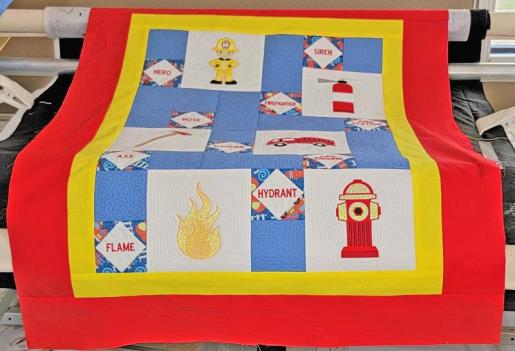 (Click Image to Enlarge) |
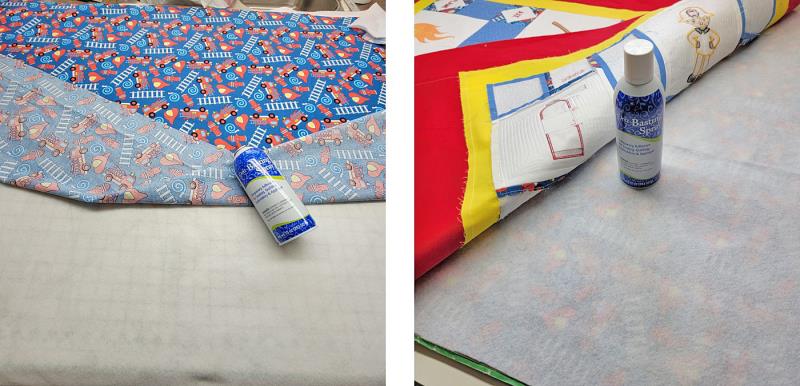
Step 49: | Measure and cut the backing and batting. Spray one side of the batting and center the backing over the batting, wrong side to the batting, smoothing it from the center out. Flip over the backing/batting. Spray the batting, center the quilt top (wrong side toward the batting) over the batting smoothing it from the center out and making sure everything stays squared up. | 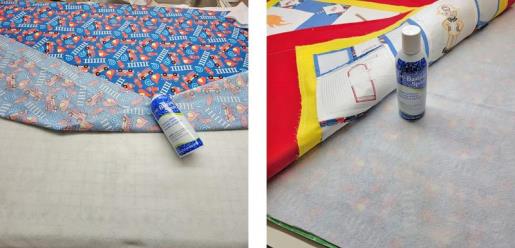 (Click Image to Enlarge) |
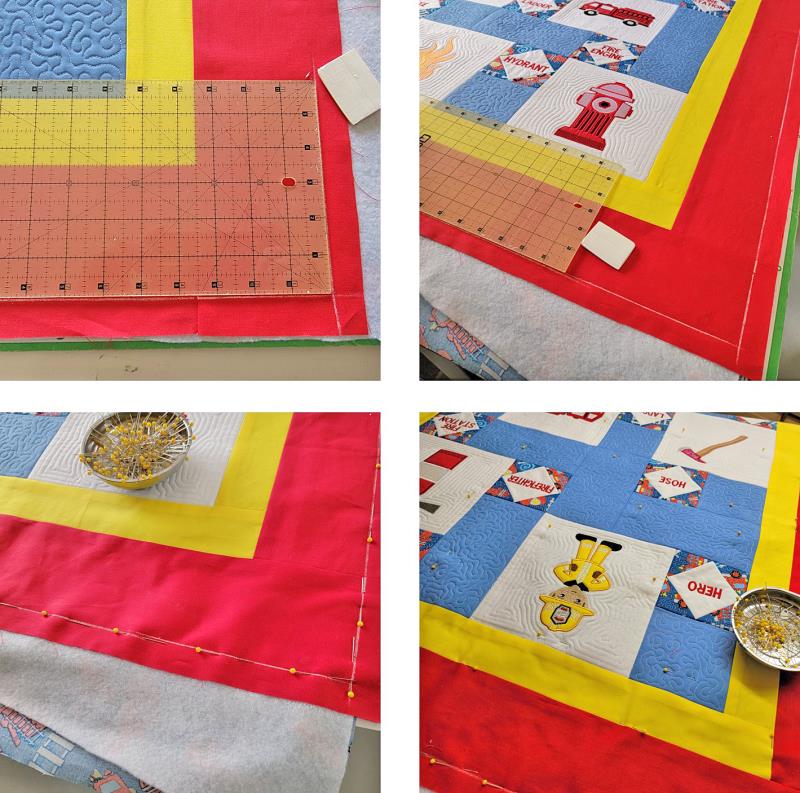
Step 50: | Using a gridded ruler, mark the outer border 3.5 from the stitching line all around; pin the border along the drawn line and then pin all layers together to further keep the sections from slipping. | 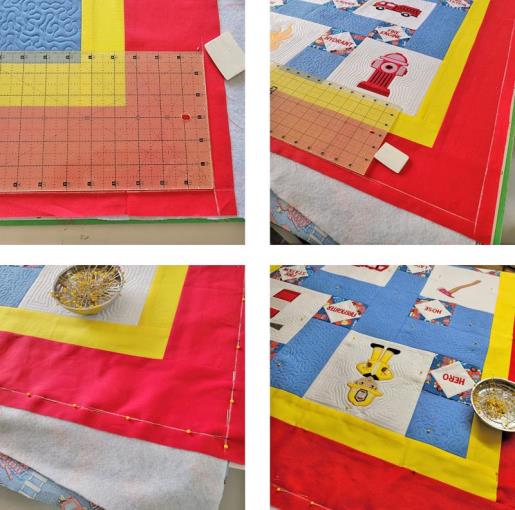 (Click Image to Enlarge) |
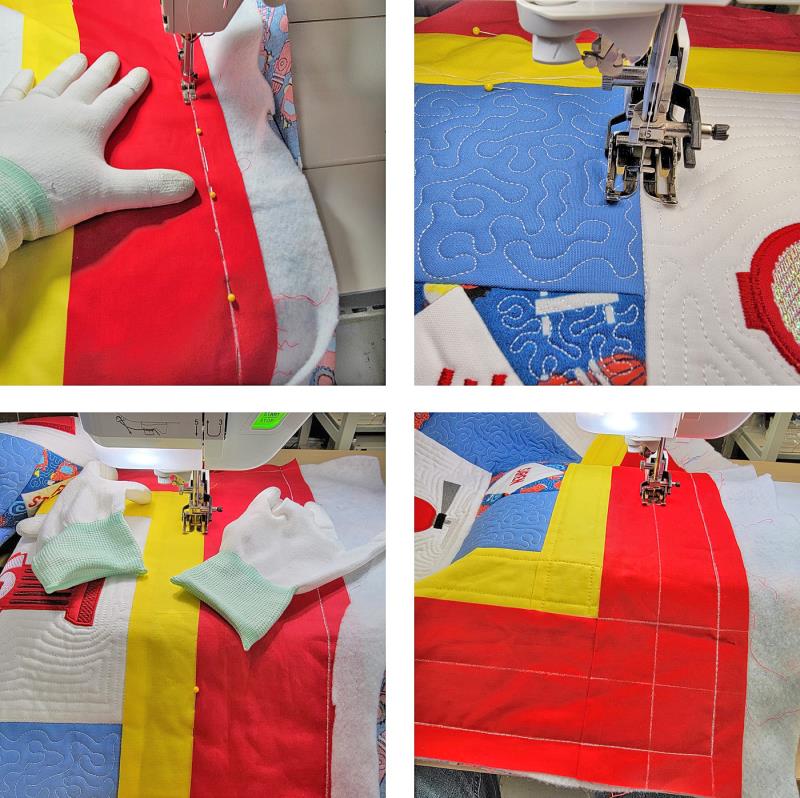
Step 51: | It is very helpful to use quilters glove when stitching everything together. Begin by stitching along the marked border line, removing the pins as you stitch. Use the stitch in the ditch technique to secure the top to the backing. If the machine has one, use a walking foot to feed everything under the machine evenly. Now mark and stitch straight lines to quilt the borders. | 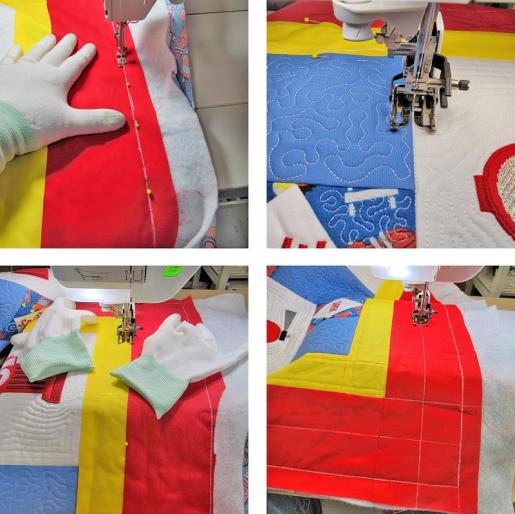 (Click Image to Enlarge) |
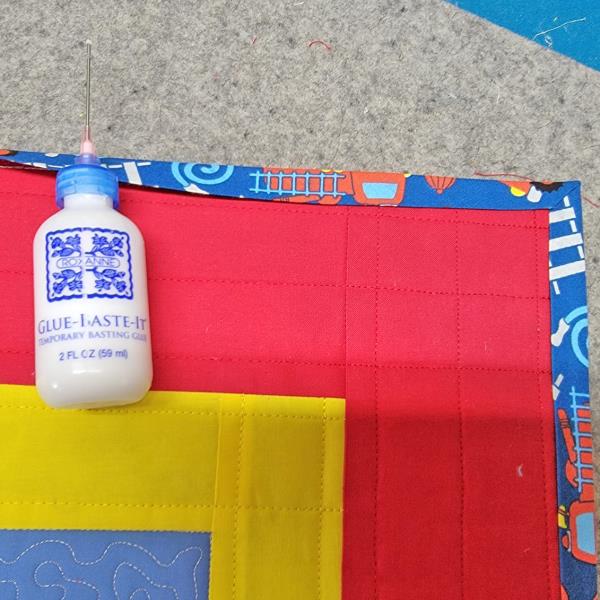
Step 52: | Prepare the binding using your favorite method, mitering the corners. Basting glue is a great product to help in binding the quilt. After the binding is stitched on (a blanket stitch was used for this project), the quilting is finished. | 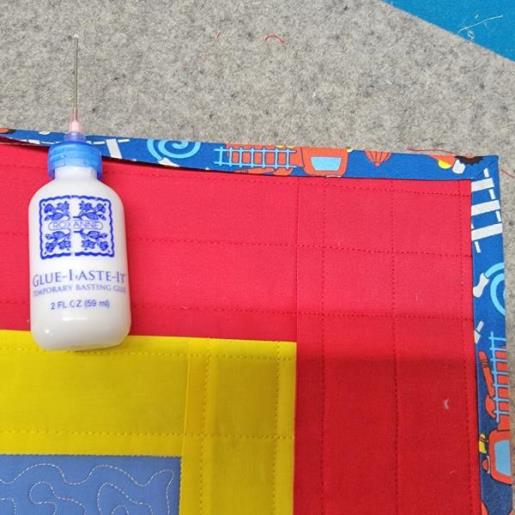 (Click Image to Enlarge) |
Step 53: | For a great gift, check out the pillow project that coordinates with this quilt. Also, check with a local fire station to see if they are need of a quilt and pillow as a fund-raiser—this would be a great community project for a sewing group donation. | 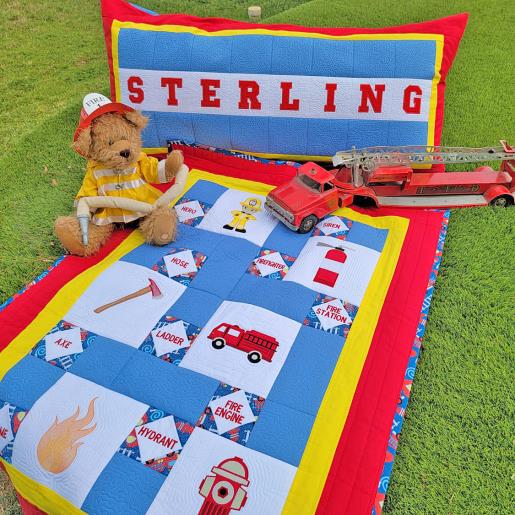 (Click Image to Enlarge) |
Step 54: | Congratulations!!! This project is quite involved but the stitching is easy so makes for an enjoyable project to be completed over a couple of weekends. | 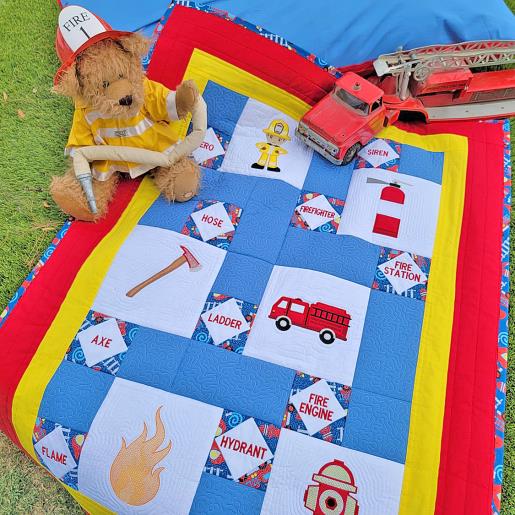 (Click Image to Enlarge) |
|