Border OptionsHugging border, circle, square, or rectangle — with a 3mm satin stitch.
Backing OptionsAvailable with iron-on, sew-on, or velcro backing.
Fast ShippingShipped quickly from the USA.
Free Online Tools
Powerful embroidery utilities that save time and prevent costly mistakes.
Stitch AssistantRECOMMENDED
Get the exact stabilizer, machine settings, needle, and thread color sequence for every embroidery design you purchase — based on that design's stitch density, dimensions, and color count.
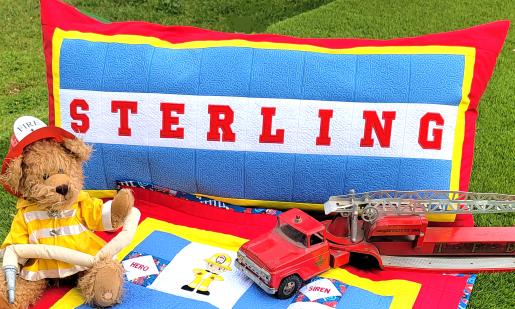
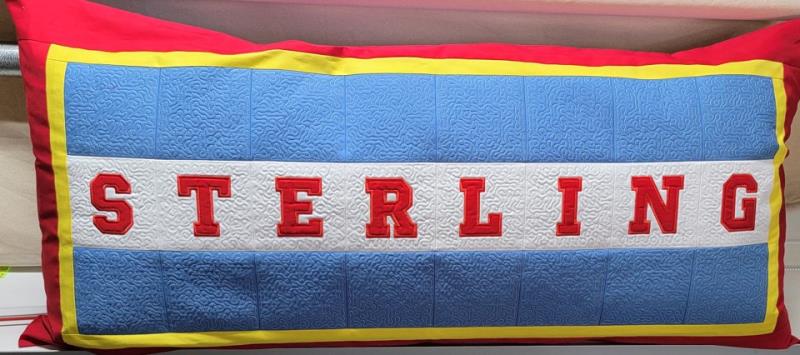
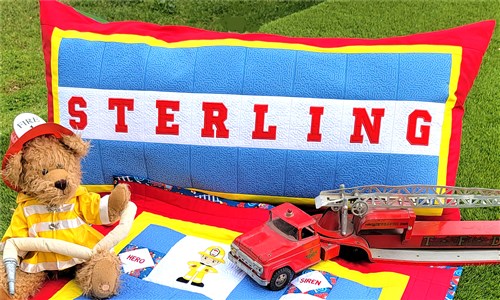
Any child from very young to college age would love this pillow! Almost everything is done in the hoop making it easy to do for even a beginning stitcher.
The time to complete this project will vary depending on the letters used. The materials needed will depend upon the name to be done, and size of the pillow.
Step 1:
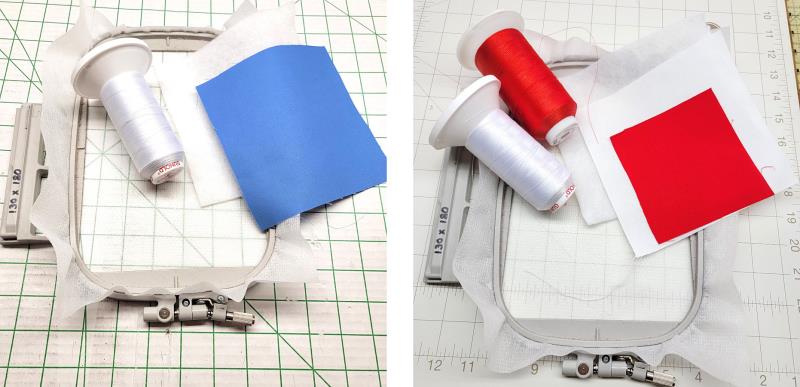
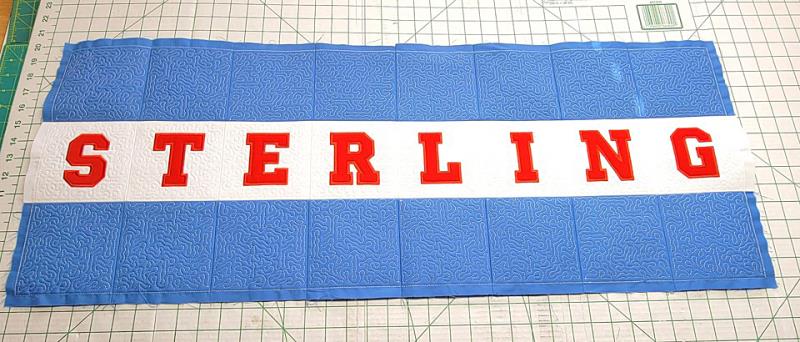
Read through the instructions thoroughly before beginning and assemble all the materials needed to complete the project. Depending on the number of letters for the name and the size of the pillow, the stipple blocks were stitched and borders were added to make enough fabric for the front of the body pillow. After the pillow front was assembled, then measurements were taken for the pillow back fabric dimensions.
(Click Image to Enlarge)
Step 2:
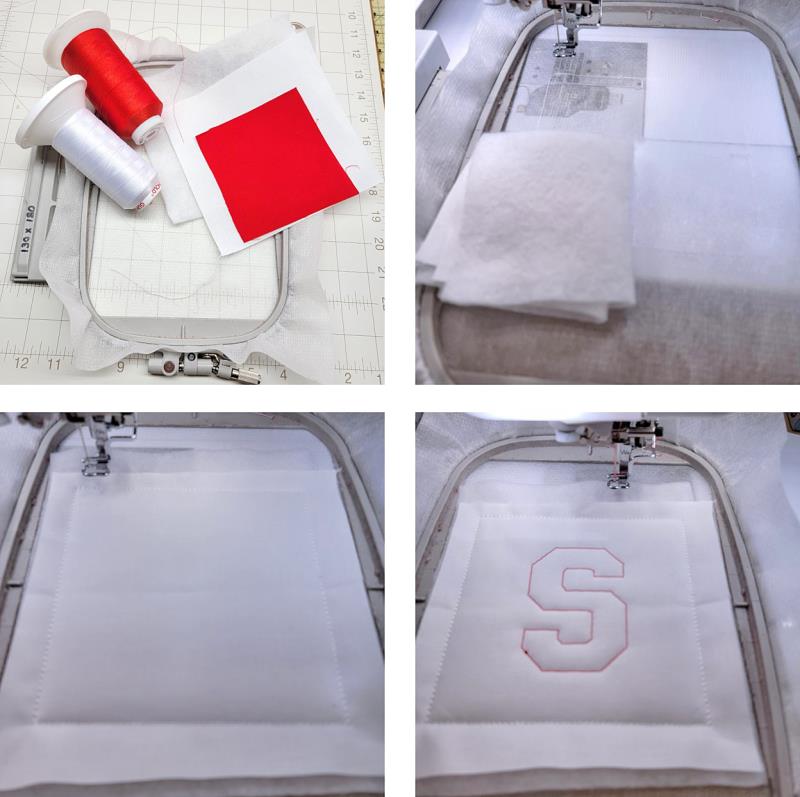
Cut all the fabrics, stabilizer for the hoop and fleece stabilizer needed, and gather the threads. Hoop one layer of poly mesh stabilizer in the hoop.
(Click Image to Enlarge)
Step 3:
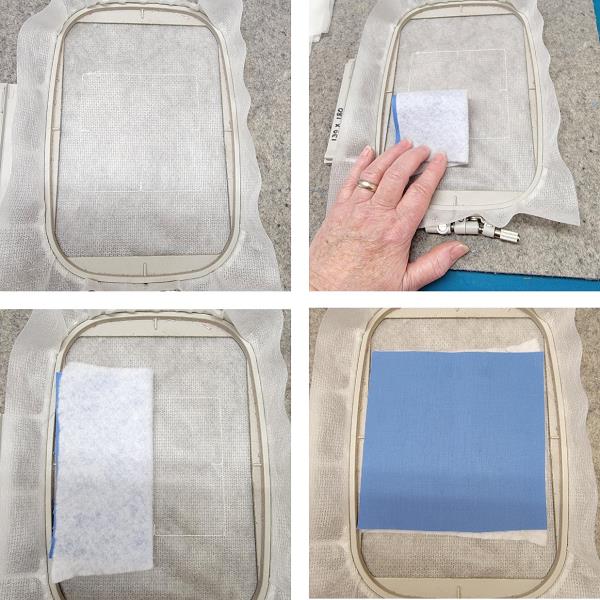
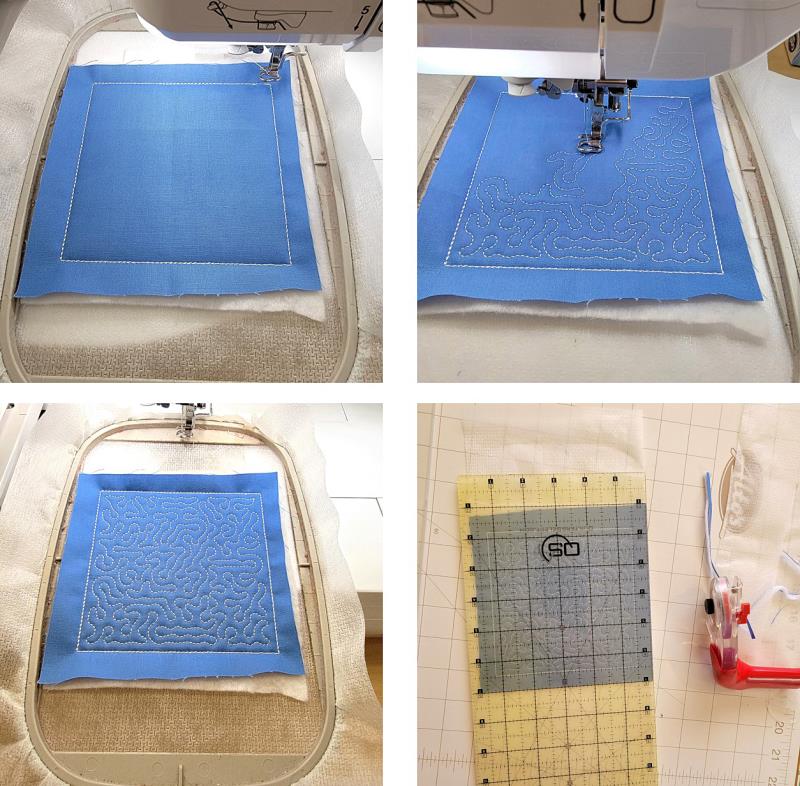
Begin with the stipple blocks. Stitch color 1, the placement line. This line includes four tick marks to aid in the alignment of the fleece and top fabric. Quarter fold the top fabric and fleece together and place it at the lower left corner, matching the fold lines to the tick marks. Open up the fabric and fleece so now the fold is at the top and bottom tick marks, then open up the fabrics fully.
(Click Image to Enlarge)
Step 4:
Stitch color 2, which will tack everything together. Stitch color 3, the stippling. Remove the fabric from the hoop and trim the fabric leaving ½” seam allowance beyond the outer stitching line.
(Click Image to Enlarge)
Step 5:
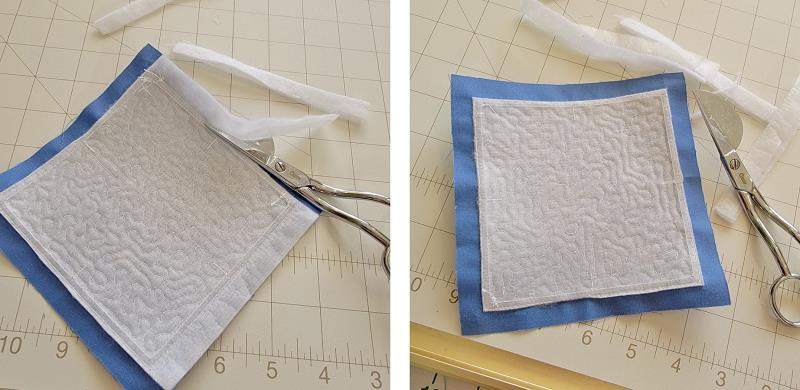
Using applique scissors, trim the fleece and mesh stabilizer close to the stitching line—be careful not to cut into the seam allowance.
(Click Image to Enlarge)
Step 6:
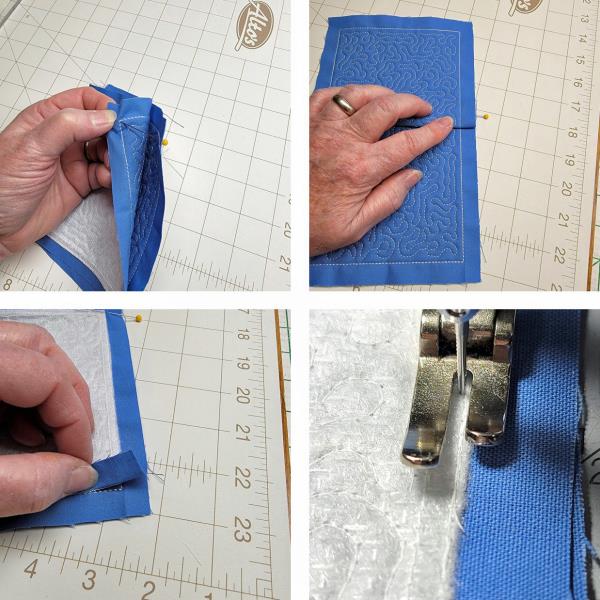
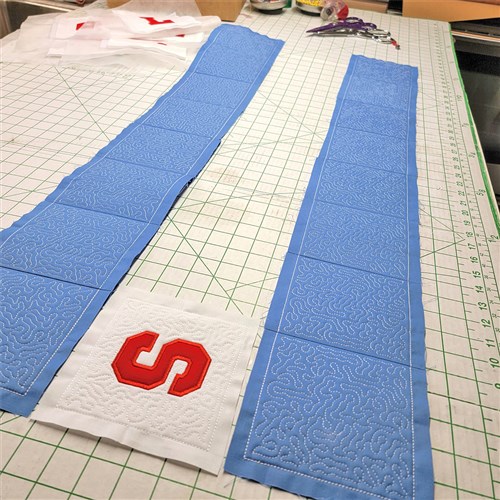
Follow steps 3-5 to stitch as many stipple blocks as needed. Now sew the blocks together in rows. Meet the corners of two blocks together, pin matching the stitching line to the other corner. At the machine, use the presser foot as a guide and stitch so the needle is just to the inside of the stitching line of the embroidery.
(Click Image to Enlarge)
Step 7:
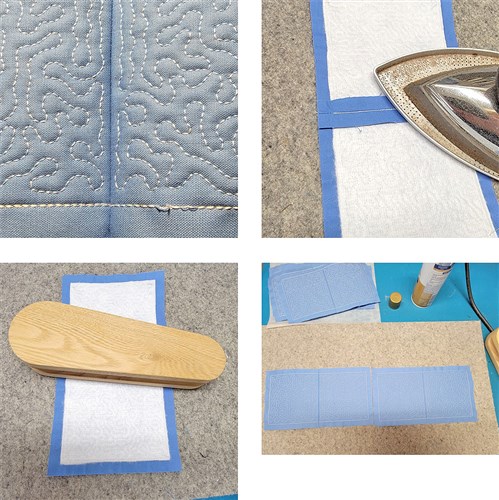
This is what the seam should look like. Now press the seam open and use a press block to hold the seam flat.
(Click Image to Enlarge)
Step 8:
Continue joining as many stipple blocks as needed for each row. Next, start stitching the letters needed. These will be joined and placed as the center row. The block is done basically in the same manner as the stipple block, with the addition of the appliqué letter.
(Click Image to Enlarge)
Step 9:
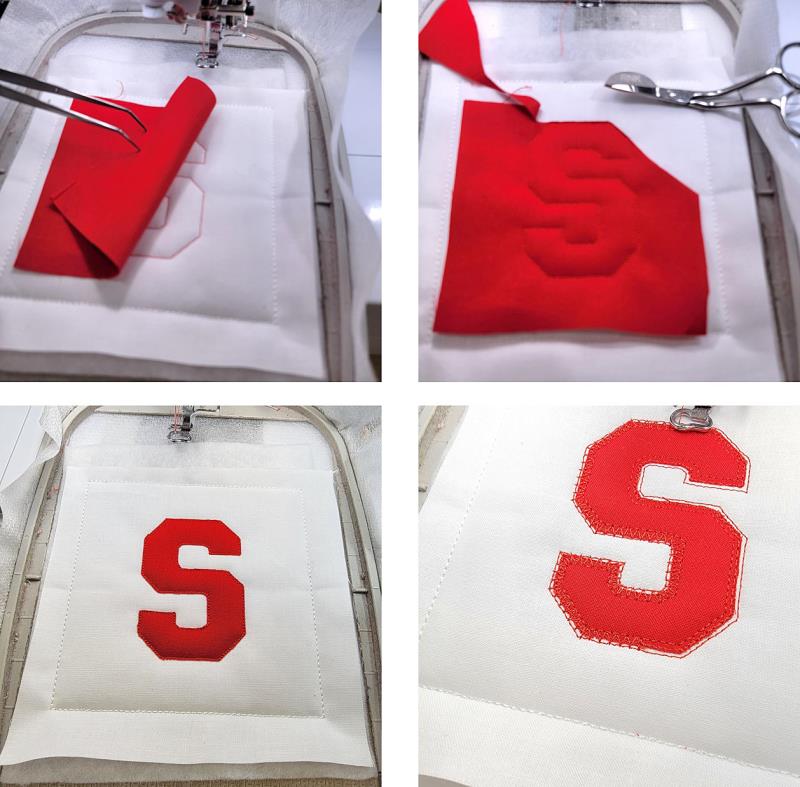
Cut the fabrics, fleece, and stabilizer for each letter. Hoop one layer of poly mesh stabilizer. Place the hoop on the machine, load the first letter and stitch color 1, the placement line. Again, this has tick marks for the fabric placement. Quarter-fold the white fabric and fleece together, place in the lower left corner with the folds matching the left and bottom tick marks. Open up the fleece and fabric and stitch color 2, to tack all the layers together. Color 3 will stitch the letter placement line for the fabric.
(Click Image to Enlarge)
Step 10:
Center the red square of fabric over the letter and stitch color 4 to tack it down. Remove the hoop from the machine. Use applique scissors to trim the excess fabric close to the stitching line. Place the hoop back on the machine and continue stitching.
(Click Image to Enlarge)
Step 11:
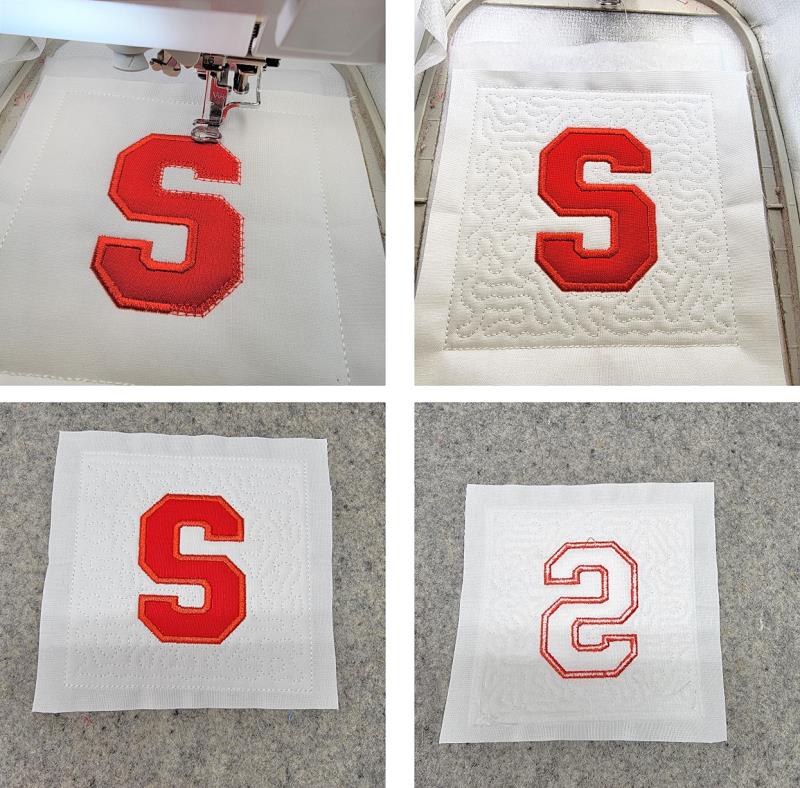
After the satin stitches change to white thread and stitch the last color, the stippling. Remove the fabric from the hoop, trim the fabric leaving ½” seam allowances and on the back trim the stabilizer and fleece close to the outer stitching line.
(Click Image to Enlarge)
Step 12:
Stitch the remaining letters needed, following steps 8-11. Sew the blocks together like was done with the blue blocks and then sew the rows together, making sure all the seams align.
(Click Image to Enlarge)
Step 13:
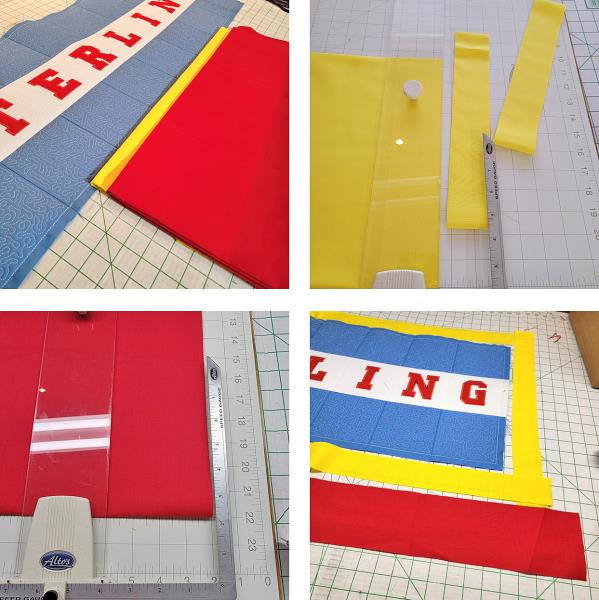
Now measure for the borders. I cut the yellow borders 2” and the red fabric 4”, by the length needed; this included ½” seam allowances.
(Click Image to Enlarge)
Step 14:
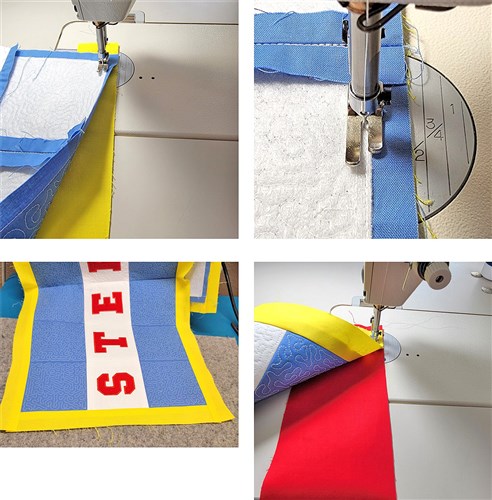
Stitch the side yellow borders on first, square up the fabric and then stitch on the top and bottom yellow borders. Again, use the outer stitching line on the embroidered squares as a guide for stitching the seams. Now do the same for the red borders sewing on the side borders first, and then the top and bottom borders.
(Click Image to Enlarge)
Step 15:
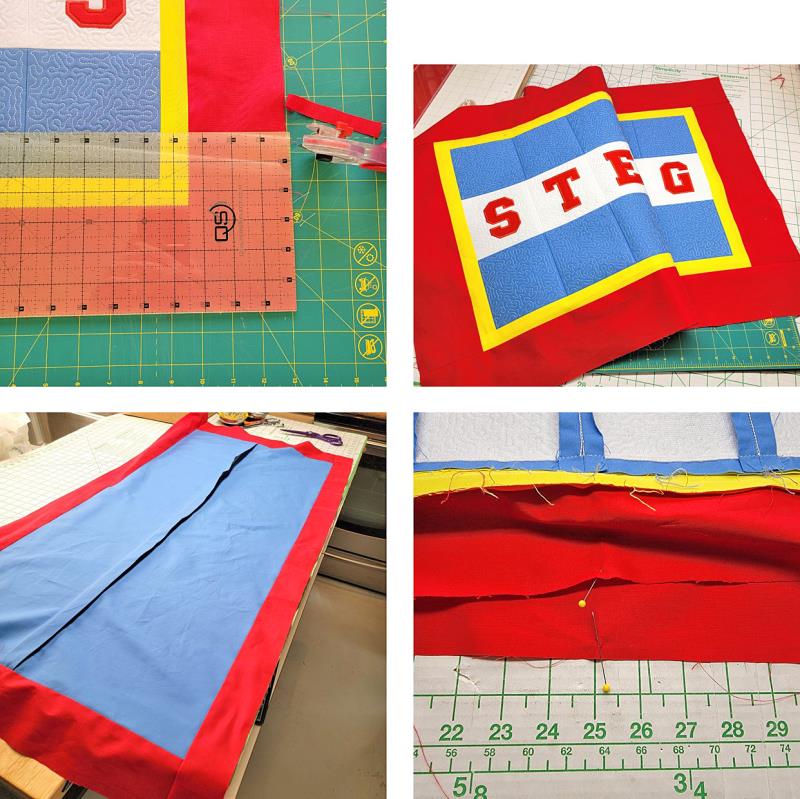
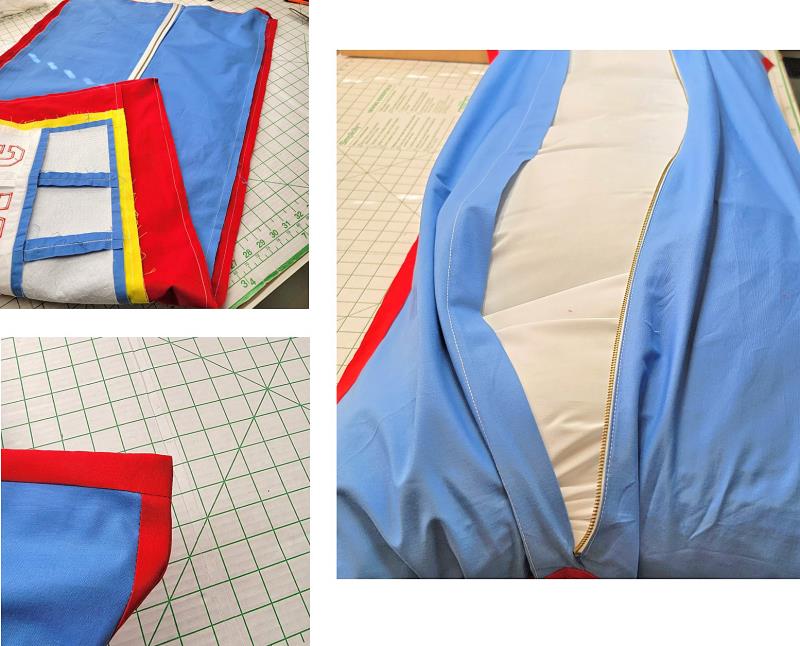
Square up all the borders and that completes the front for the pillow. Now measure cut and sew the back, inserting the zipper at the center back for easily inserting the pillow, and adding the borders to make the measurements the same as the pillow front. Find the centers of the sides and top and bottom of both the pillow back and front. Match the pins, match the cut edges, match the corners and pin the front to the pillow cover back.
(Click Image to Enlarge)
Step 16:
Sew the front to the back. Press the seams and form the corners well. Insert the pillow form into the cover and zip it closed. Keep in mind that besides names for children/students, school names could also be done for a child going to college or starting a new high school—and in the school colors!
(Click Image to Enlarge)
Step 17:
Congratulations on completing this ITH Collegiate Font Pillow. Don’t be surprised if you start getting requests for these. Purchase the design pack because it has the entire alphabet, plus number 0-9 at a discounted price. Pair this pillow with the Child’s Firefighter Quilt.
Ramona Baird has been in the embroidery industry for over 23 years. She and her husband owned a commercial and retail embroidery store in Arizona for many years. She is an experienced digitizer having been mentored by award-winners Pat Williams and Lindee Goodall. Ramona is a contributor to “Creative Machine Embroidery” magazine having 5 covers to her credit. Ramona has worked for Wilcom America and served many years as Education Director for the American Sewing Guild. With a degree in fashion design, she is able to design and execute patterns which Pat Williams says are “out of the box” in creativity and application. Ramona likes to challenge the boundaries of embroidery and bring new and exciting designs, ideas, and projects to EmbroideryDesigns.com. She wants embroiderers of all levels to increase their skills and enjoyment in using their embroidery machine for gift-making and personal pleasure.