{{superHeaderAds.title}}
Live Chat
Embroidery Designs
Welcome, Embroiderer
Login
ITH Dog Lovers Eyeglass Cases
{{mainImageAlt || (productInfo._source && productInfo._source.name) || ''}}

ITH Dog Lovers Eyeglass Cases Embroidery Project

By   Pat Williams   on   June 17, 2024

PROJECT DETAILS

SKILL LEVEL
Some Experience
TIME REQUIRED
00:45
Description

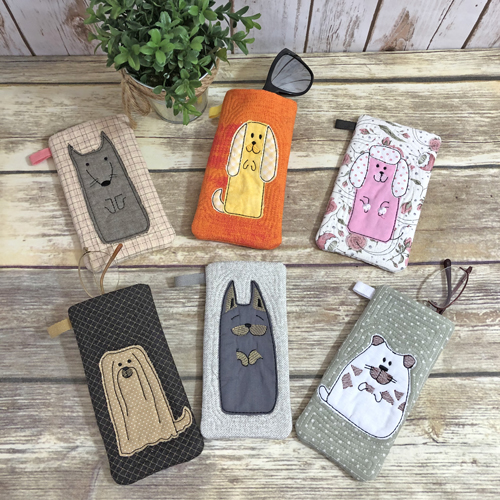
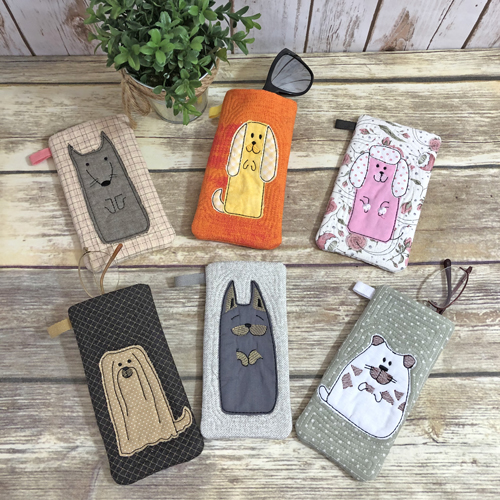
A fun project for ITH soft quilted eyeglass cases in two widths. These ITH cases are fully lined with no exposed seams and can be completed in about 45 minutes.

Project Preview Video

Materials
  • For each eyeglass case you will need:
  • 5” x 7” embroidery hoop
  • Fat Quarter or ¼ yard of cotton fabric
  • 4” x 6” rectangle of cotton fabric for dog
  • 2 designs require small scraps for ears approximately 4” x 4”
  • 4” of 3/8” twill tape for loop
  • 6” x 16” of Battilizer® or low loft batting
  • Spray Adhesive
  • Embroidery or Painter’s tape
  • Cut-away Stabilizer to fit your hoop
  • Wooden dowel to assist in turning the project

  • Designs used in this project

    Final Product: What You Will Create

    Preface:
    The color threads you use in these eyeglass cases are going to depend largely on the colors of the material you choose. Feel free to change them from what is in the color charts except for when the color charts call for Emerald Black as these are the tack down and detail stitches for the dog.

    The wider eyeglass cases, DGEG01, DGEG02 and DGEG03 measure 3.5” x 6.5” the narrow versions, DGEG04, DGEG05 and DGEG06 measure 3” x 6.5”.


    Step 1:
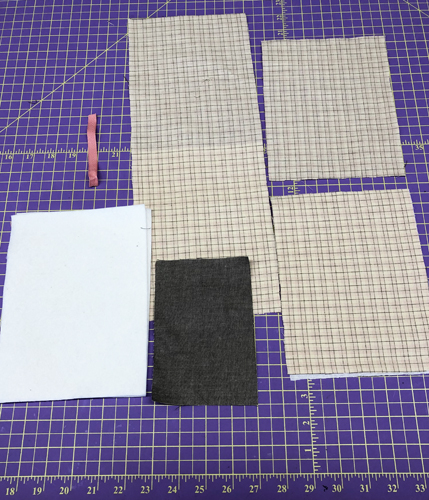
    For the wider versions cut:
    A. 1 - 6” x 16” rectangle of fabric
    B. 2 - 6” x 8” rectangles of fabric
    C. 2 - 6” x 8” rectangles of Battilizer®
    D. 1 - 6” x 4” of fabric for the raw edge applique
    E. 1 - 4” x 2” of 3/8” twill tape
    F. For version DGEG02 only cut from contrasting fabric two 1 ½”x 3” rectangles for the ears and a 2” x 2” square for the tail
    G. For version DGEG02 only cut from a contrasting fabric a 3 ½” x 3 ½” square for the ears and top knot of the poodle
     
    For the narrow versions cut:
    A. 1 - 5” x 16 “rectangle of fabric
    B. 2 - 5” x 8” rectangles of fabric
    C. 2 – 5” x 8” rectangles of Battilizer®
    D. 1 - 6” x 4” of fabric for the raw edge applique
    E. E. 1 - 4” of 3/8” twill


    Step 2:
    (Click Image to Enlarge)
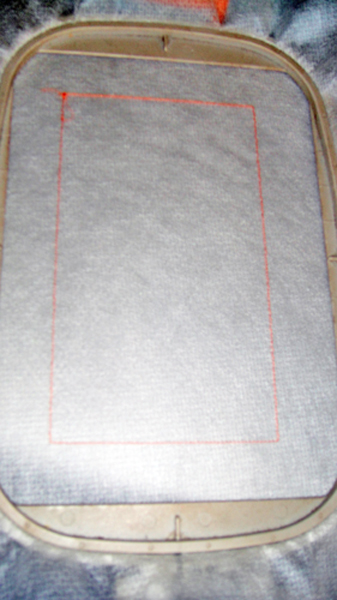
    Hoop cut-away stabilizer in a 5” x 7” hoop. Stitch the first color stop (CS) as a placement line for the eyeglass case.


    Step 3:
    (Click Image to Enlarge)
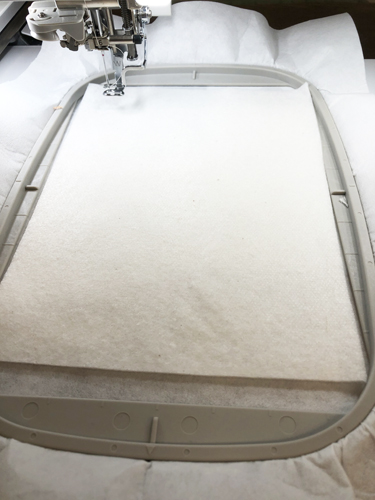
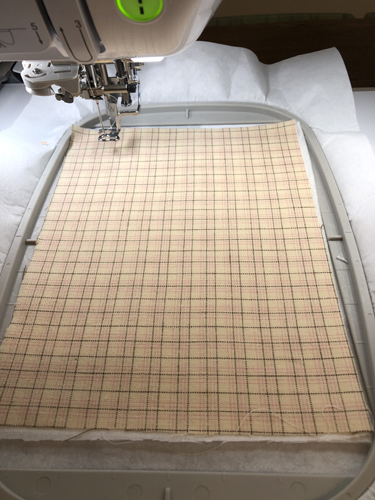
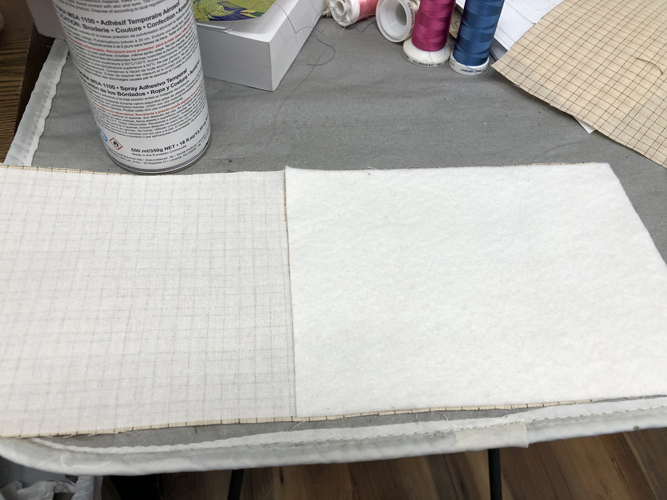
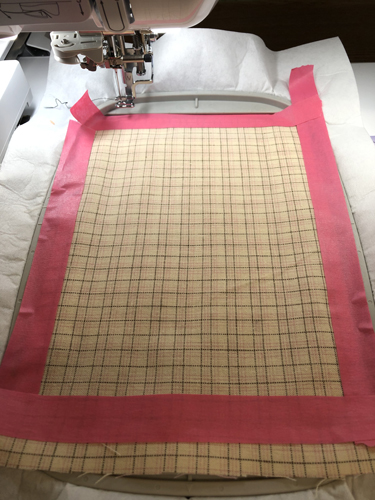
    Spray adhesive on a rectangle of Battilizer® and position over the placement line so that the Battilizer® exceeds the placement line by ½” on all sides.


    Step 4:
    (Click Image to Enlarge)
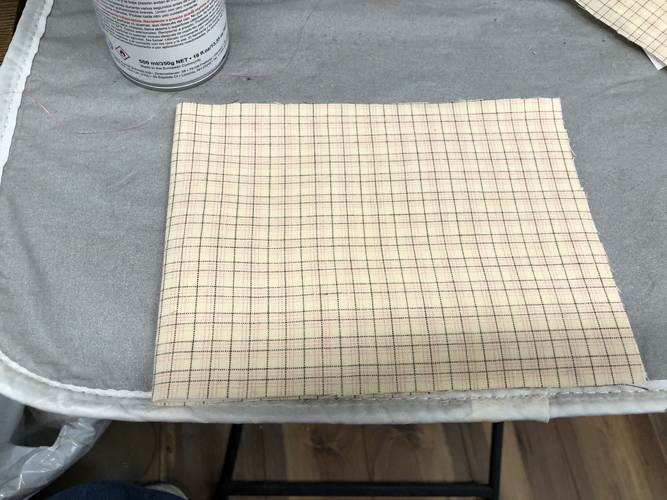
    Spray adhesive on the back side of a fabric rectangle and align over the Battilizer®.


    Step 5:
    (Click Image to Enlarge)
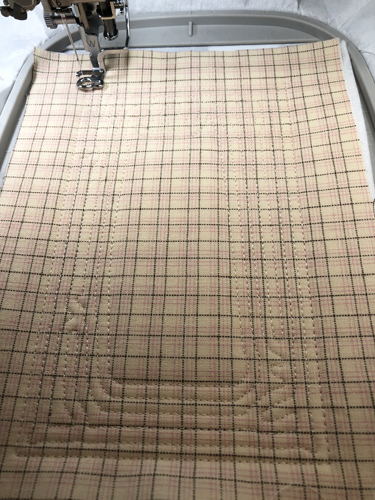
    CS 2 will tack down and quilt the eyeglass case front. Use a thread color of your choice.


    Step 6:
    (Click Image to Enlarge)
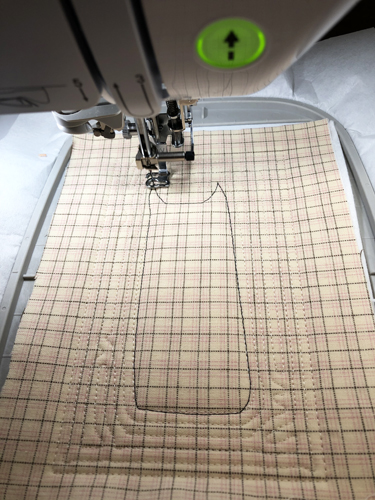
    Run CS 3 in black as a placement line for the dog.


    Step 7:
    (Click Image to Enlarge)
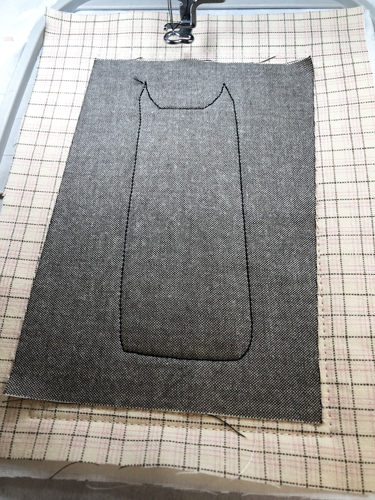
    Spray adhesive on your fabric for the dog applique and place over the outline. Run CS 4 to tack down the applique fabric.


    Step 8:
    (Click Image to Enlarge)
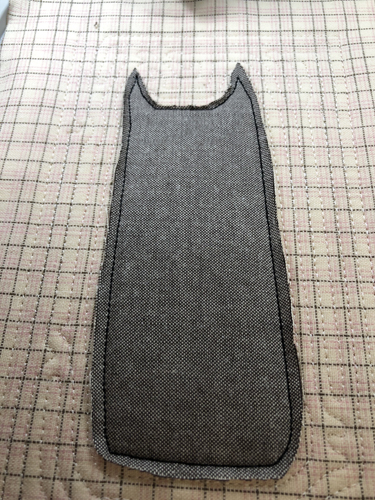
    Trim around the applique about 1/8th” from the tack down lines. For this primitive look you do not have to be exactly even in the trimming. For the two eyeglass cases that have contrasting fabric for the ears and or tails repeat Step 6 and 7 until all appliques are in tacked down.


    Step 9:
    (Click Image to Enlarge)
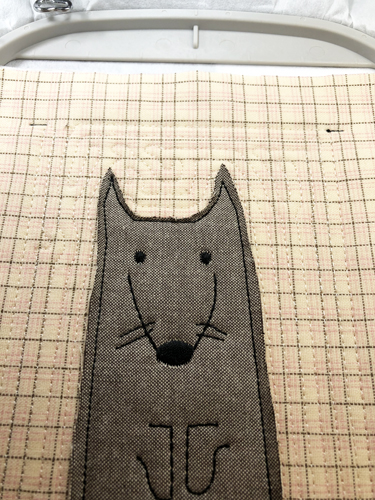
    Follow the color chart to complete the details of the dog. In most cases this will just be done with black thread. In the poodle you will also have a color stop for white to embroider the puffs on his tail and paws.


    Step 10:
    (Click Image to Enlarge)
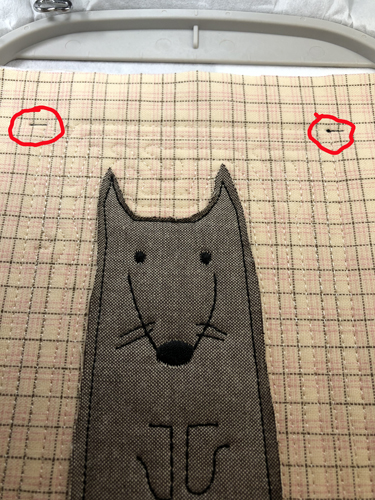
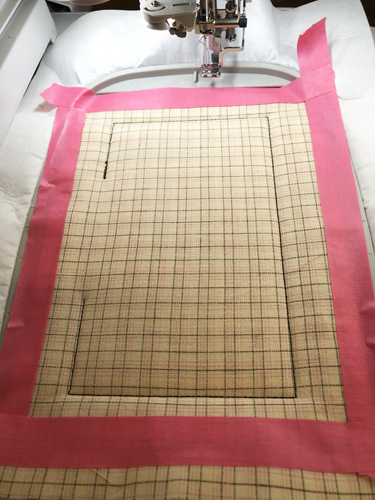
    The next color-stop is two placement lines for the placement of the back of the eyeglass case. Stitch this in a contrasting color that will be easy for you to see.


    Step 11:
    (Click Image to Enlarge)
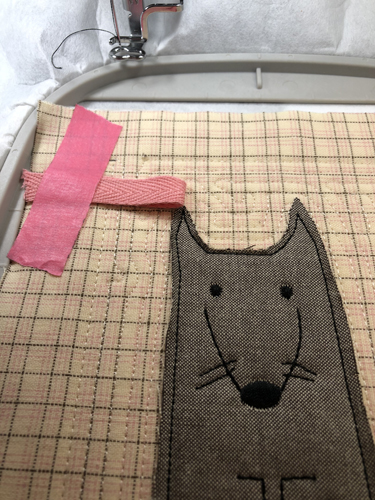
    Fold the 3/8” twill tape in half. Tape it to the project in your desired location and outside of the quilting stitches. The loop of the tape faces the inside of the eyeglass case. Position the twill tape about 1/8th to ¼” down from the back placement stitches.


    Step 12:
    Lay the 16” fabric strip face down. Spray adhesive on the remaining Battilizer® and align it with one end of the 16” strip.

    (Click Image to Enlarge)


    Step 13:
    Fold the other end of the 16” strip over the Battilizer®.

    (Click Image to Enlarge)


    Step 14:
    (Click Image to Enlarge)
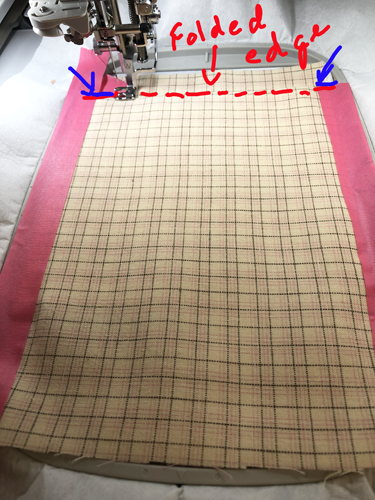
    Lay the folded edge of the back fabric just below the two placement lines (blue arrows.) Tape down both sides of the fabrics.


    Step 15:
    (Click Image to Enlarge)
    Run the next to last CS to tack down the case back. Remove all tape from the project


    Step 16:
    (Click Image to Enlarge)
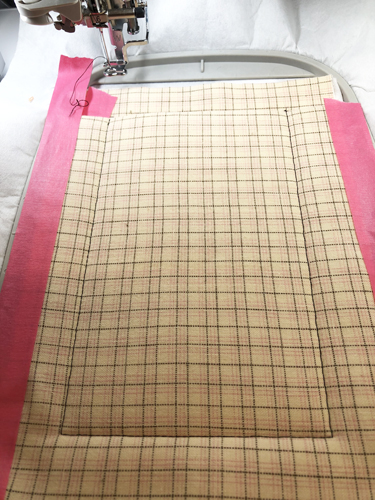
    Place the remaining 8” fabric over the project face down aligning the fabric at the top of the hoop. Tape down on all sides.


    Step 17:
    (Click Image to Enlarge)
    Run the final color-stop to stitch the lining to the project.


    Step 18:
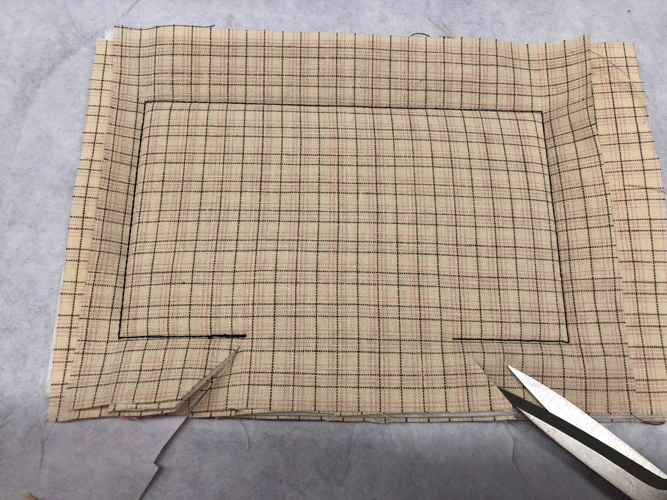
    Remove the project from the hoop. Make angled cuts from the edge to the send of the stitching lines that are used to leave an opening for turning the project. Trim a ¼” seam allowance around the project, clipping straight across the corners and leaving the excess fabric across the opening.

    (Click Image to Enlarge)


    Step 19:
    (Click Image to Enlarge)
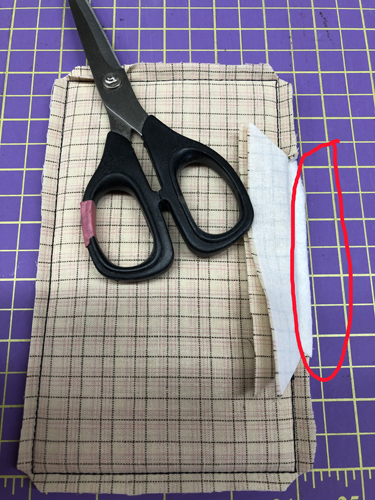
    Fold back the top two fabrics and trim the excess stabilizer, batting and fabrics to ¼”. 


    Step 20:
    (Click Image to Enlarge)
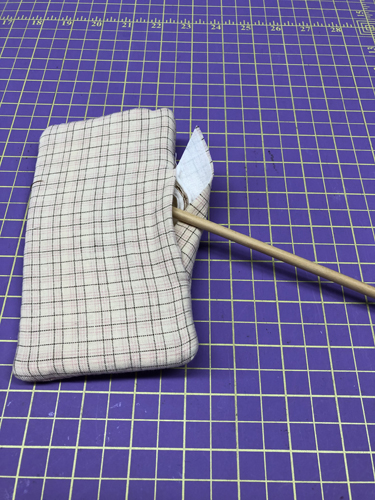
    Turn the eyeglass case lining side out through the opening. Use a wooden dowel or point turn to turn out the corners.


    Step 21:
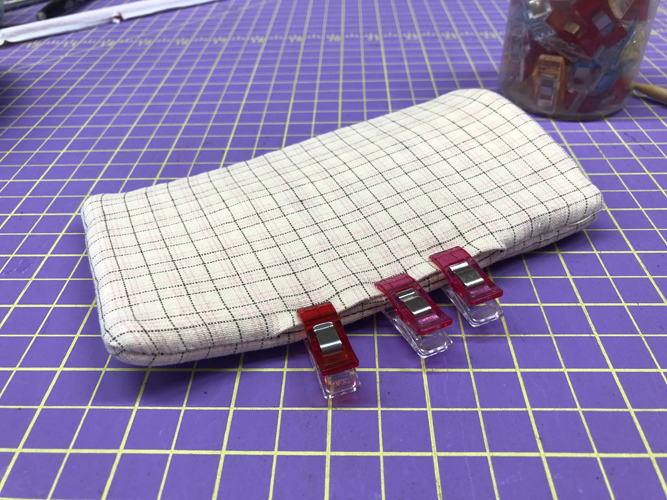
    Trim the fabric over the opening down to about ½” if yours is wider. Tuck it into the opening and hand stitch closed.

    (Click Image to Enlarge)


    Step 22:
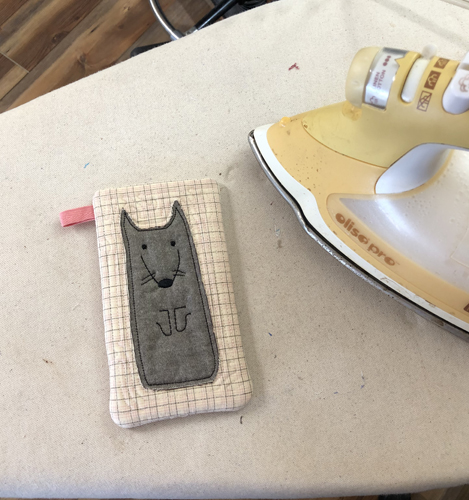
    Turn the project right side out through the top of the case and press with a steam iron to flatten the edges.


    Step 23:
    Congratulations your first ITH Dog Lovers Eyeglass Case is complete. Make the whole set for your dog loving family and friends.

    For the love of embroidery…
    Pat Williams
    Meet the Author: Pat Williams
    Pat Williams
    Award winning Digitizer, Embroidery Educator, Author and a Consultant to the Industry, Pat Williams has 30 years of experience in the embroidery industry. Pat has won multiple awards for her digitizing expertise including the 2007 Impressions Awards Grand Championship, Best of Show as well as the 1st and 2nd Place Awards. Pat’s love of digitizing has afforded her the opportunity to write numerous articles for Impressions magazine in the United States and Images Magazine in Europe. In 2001 Pat was named “Embroidery Educator of the Year.” For many years Pat taught digitizing seminars at the ISS Shows in Long Beach, CA and for Compucon software. She now resides in Tucson, AZ.
    More From This Author
    Link is Broken, Please check the URL
    Exclusive Embroidery Offers!
    Copyright © {{ currentDate | date:'yyyy'}} - EmbroideryDesigns.com
    GET 50% OFF! ×