

















































The Final Act Embroidery Project
Trimming cut-away backing
Materials
Project Preview Video

Cut Away Stabilizer - 2.5 Oz wt.

Cut Away Stabilizer - 2 oz wt.
Trimming cut-away backing
Cutaway backing tends to deliver the best sewing quality, but it adds more labor to the process since the excess must be trimmed with scissors at the completion of the job. Extreme care should be used in this process to avoid damaging the fabric. There is a wrong way and a right way to trim it. |

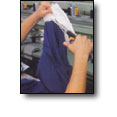
Begin the trimming process by holding the backing and letting the weight of the item hang down. The item being trimmed should always be facing you. By following this rule, you are never trimming blindly. You can see where you are cutting in relation to the fabric at all times. Don’t try to trim right up to the embroidery. Leave a border of approximately 1/4” to ½” of backing around the embroidery. Trimming any closer may create a damaging hole in the garment. Also, slide the scissors rather than snip. This will prevent you from accidentally cutting a hole in the garment. The one exception to this rule, is the polymesh backing (sometimes referred to as “no-show” backing). Unfortunately, scissors do not slide well with this fabric, so the excess must be snipped away. |
