Labor Day 10 Off 30
Live Chat
Embroidery Designs
Welcome, Embroiderer
Login
ITH Dresses for Small Felt Paperdolls

ITH Dresses for Small Felt Paperdolls Embroidery Project

By   Pat Williams   on   March 19, 2025
  • SKILL LEVELSome Experience
  • TIME REQUIRED00:15
  • FINISHED SIZE2.75 x 3 inches
Description

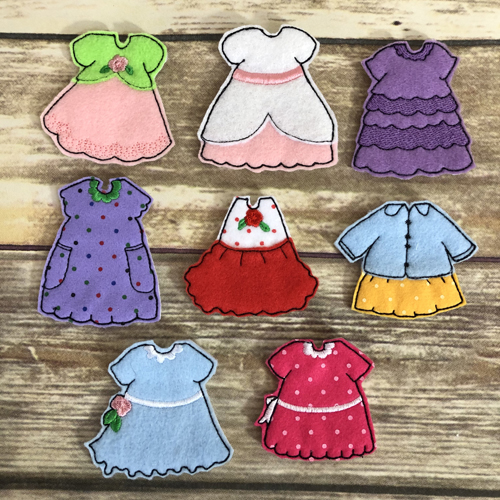
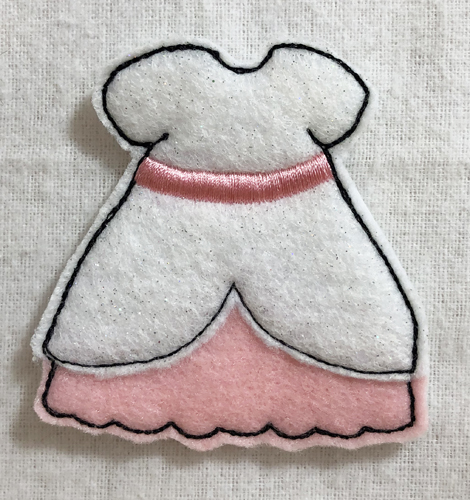
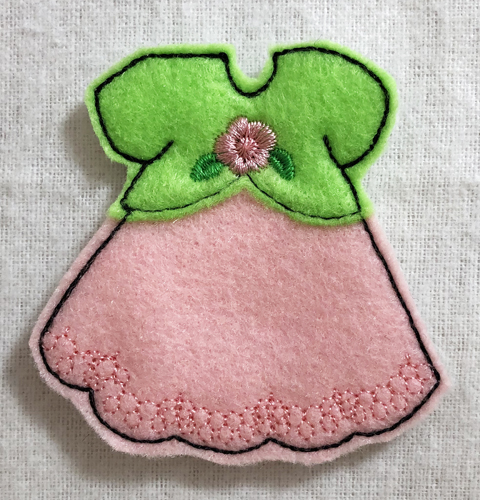
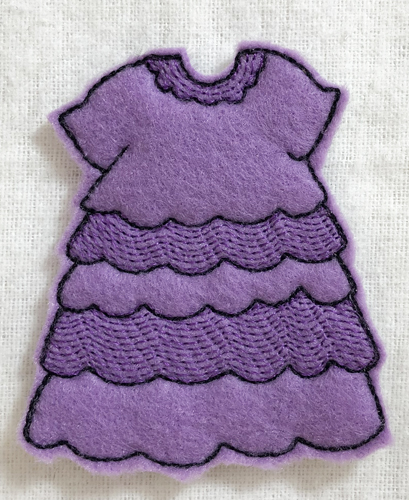
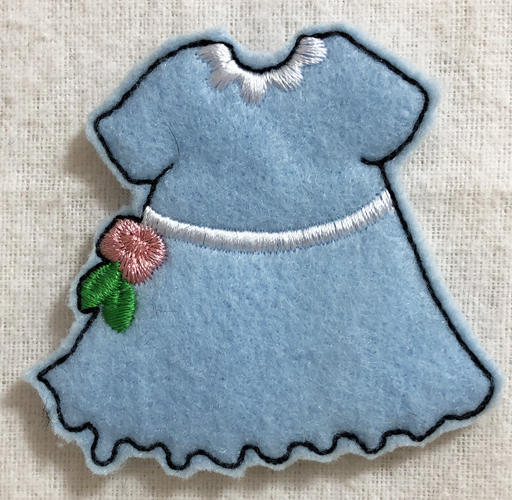
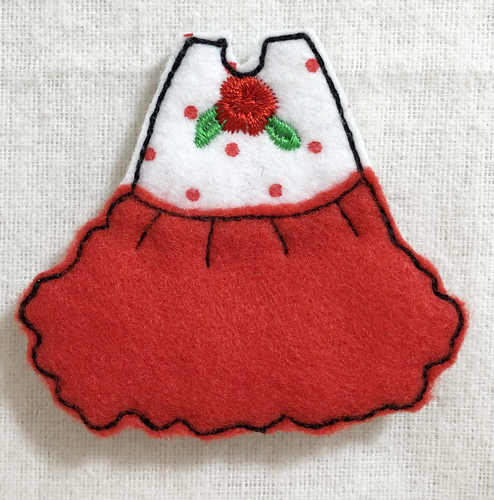
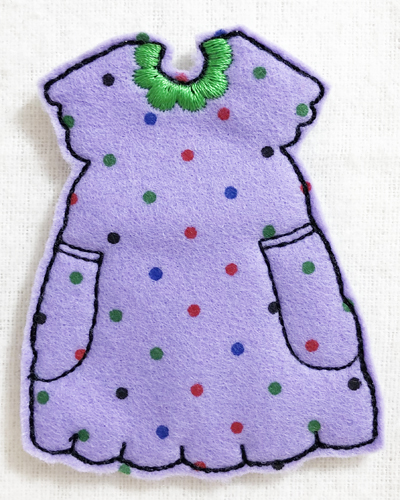
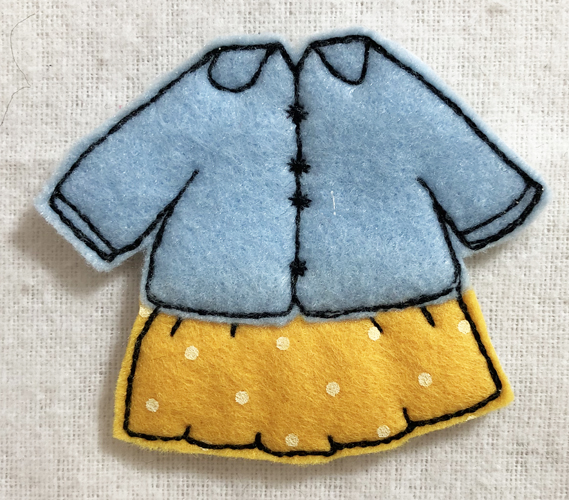
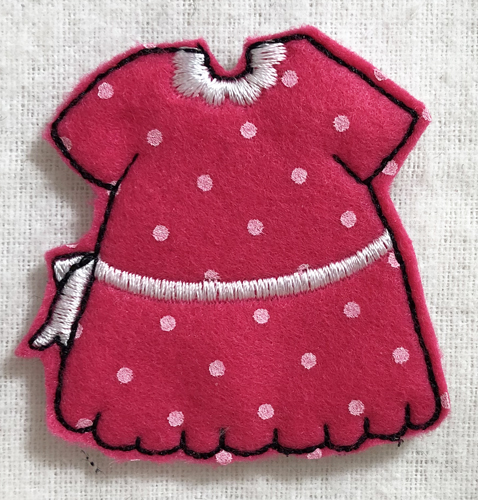
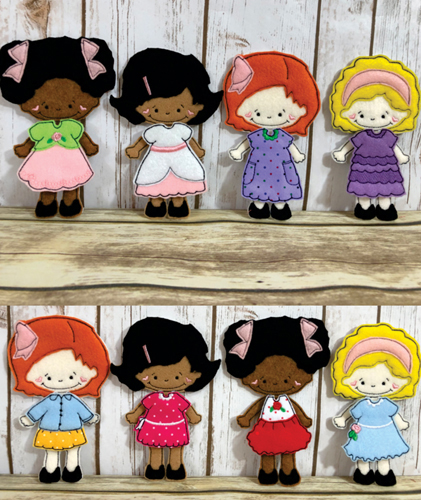
Each of these eight dresses can be made in 15 minutes or less for the darling ITH Small Felt Paperdolls. Mix up the felt colors for a limitless wardrobe.

Step of

Materials

Project Preview Video

Materials
  • 4” x 4” embroidery hoop
  • 3 ½” x 3 ½” of White craft felt for the back of each dress
  • Assorted scraps of craft felt of your choice for the dresses – largest scraps being 4” x 3 ½”
  • 2.5 ounce cut-away stabilizer
  • Spray adhesive

  • Designs used in this project

    Final Product: What You Will Create

    Preface:
    Use solid and print craft felt and change up the colors of the decorative threads to match your materials. Keep the outlines of the dresses in black thread as this will make them match the style of the Small Felt Paperdolls. The backs of the dresses are made from the regular craft felt and not the stiff craft felt that backed the dolls. You do not need to put Velcro® on the dresses. The loopy Velcro® used on the doll will hold the felt dresses themselves. The dress shown in the instructions is SFPD06, which is Small Felt Paperdoll Dress 2. All dresses are made in same manner though some only require one color of felt.


    Step 1:
    (Click Image to Enlarge)
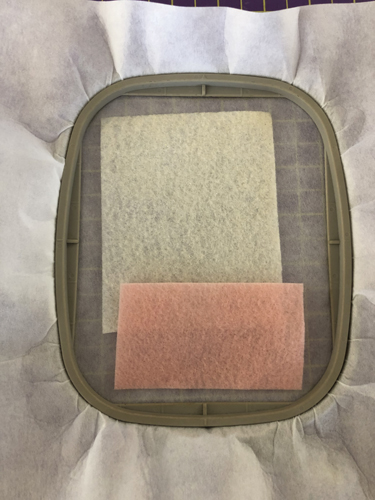
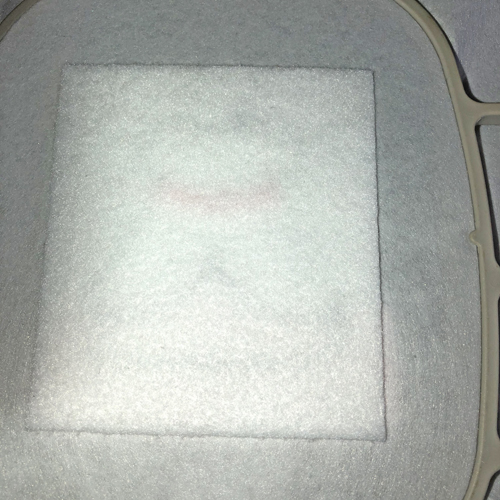
    Dress 2 for Small Felt Paperdoll (SFPD06). Cut the 3 felt squares:
    a. White 4 x 3 ½” for the back of the dress
    b. White Glitter Felt 3 ¼” x 3 ½” for the top of the dress
    c. Pink Felt 3 ½” x 2” for the underskirt


    Step 2:
    (Click Image to Enlarge)
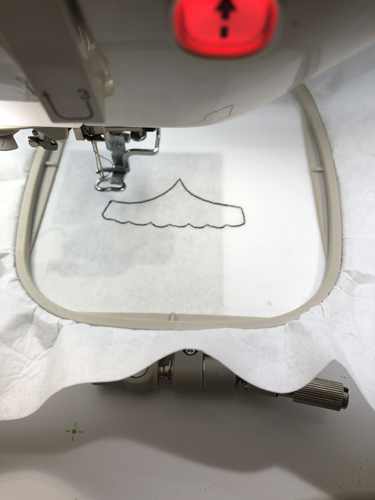
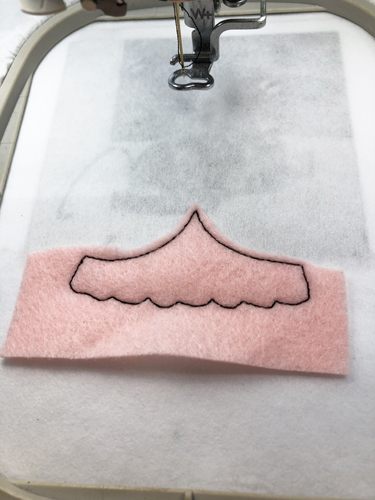
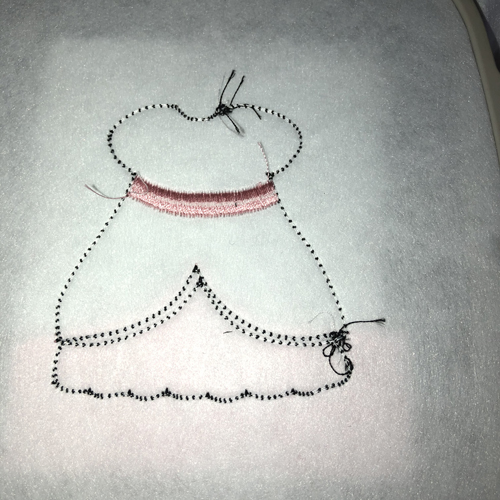
    Run the 1st color stop (CS 1) as a placement line for the underskirt. 


    Step 3:
    (Click Image to Enlarge)
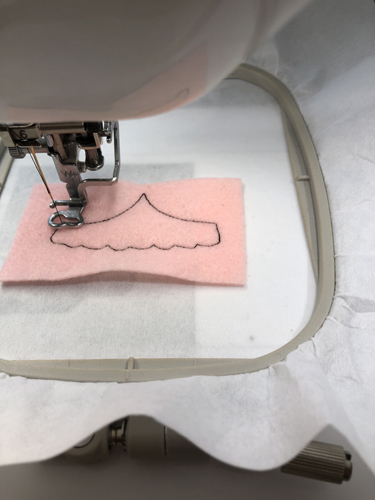
    Lay the pink felt on top of the placement lines having the felt exceed the placement lines by ½” on all sides. Run CS 2 to tack the underskirt down. You do not need spray adhesive to hold it place. If stitching a one-color dress skip to Step 9.


    Step 4:
    (Click Image to Enlarge)
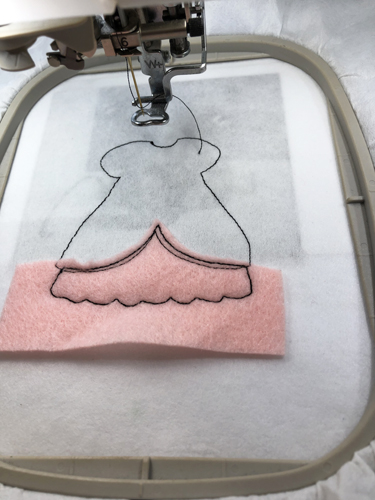
    Trim off the felt approximately 1/8” on the side that will be covered by a second color of felt for all of the two-color dresses. Leave the remaining 3 sides of excess felt intact at this point.


    Step 5:
    (Click Image to Enlarge)
    Run CS 3 as a placement line for the second color of the dress. 


    Step 6:
    (Click Image to Enlarge)
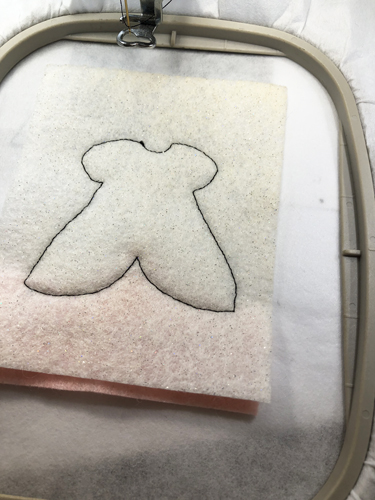
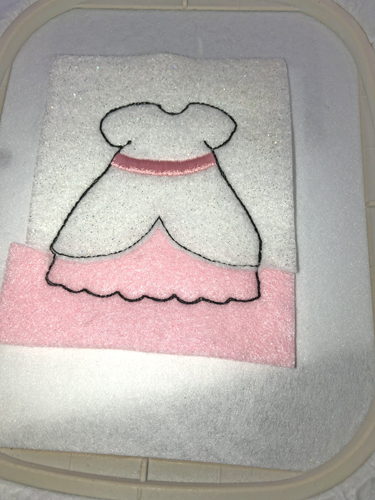
    Place the dress top felt over the new placement lines and run CS 4 to tack it down.


    Step 7:
    (Click Image to Enlarge)
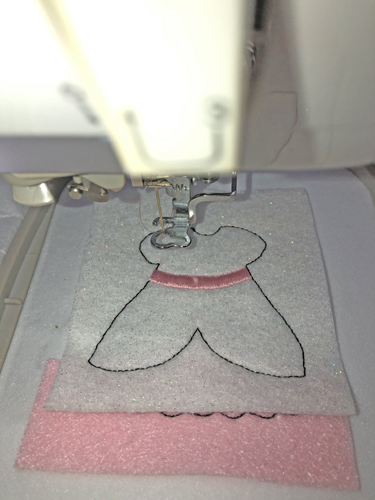
    Follow the color chart to embroider any colored details on the dress.


    Step 8:
    (Click Image to Enlarge)
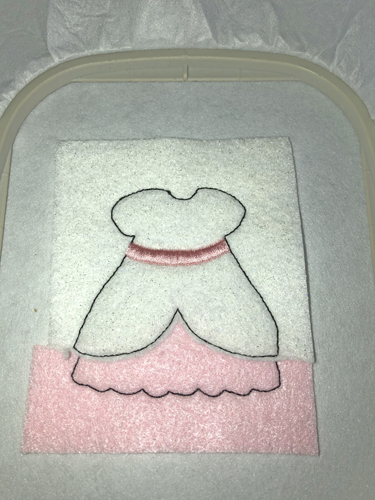
    Trim the top fabric across where it meets the 1st fabric. Leave the felt intact around the other three sides.


    Step 9:
    Remove the hoop from the machine, do not unhoop. Lay the hoop down on a flat surface.


    Step 10:
    Spray adhesive on the back side of the white felt back and position over the back of the dress.


    Step 11:
    (Click Image to Enlarge)
    Return the hoop to the machine and run the final tack down in black thread to complete the dress.


    Step 12:
    Trim through all layers of felt approximately 1/8th” from the tack down lines.


    Step 13:
    Dress 1 for Small Felt Paperdoll (SFPD05). For this dress cut felt:
    a. Top 2 ¾” x 2”
    b. Bottom 3 ½” x 2 ½”
    c. Back 3 ½” x 3 ½”


    Step 14:
    Dress 3 for Small Felt Paperdoll (SFPD07) For this dress cut felt:
    a. Front 3 ½” x 3 ¼”
    b. Back 3 ½” x 3 ¼”


    Step 15:
    Dress 4 for Small Felt Paperdoll (SFPD08) For this dress cut felt:
    a. Front 3 ½” x 3 ½”
    b. Back 3 ½” x 3 ½”


    Step 16:
    Dress 5 for Small Felt Paperdoll (SFPD09) For this dress cut felt:
    a. Top 2” x 2”
    b. Skirt 3 ½” x 2”
    c. Back 3” x 3 ½”


    Step 17:
    Dress 6 for Small Felt Paperdoll (SFPD10) For this dress cut felt:
    a. Front 3 ½” x 3”
    b. Back 3 ½” x 3”


    Step 18:
    Dress 7 for Small Felt Paperdoll (SFPD11) For this dress cut felt:
    a. Jacket 3 ½” x 2 ½”
    b. Skirt 3” x 1 ½”
    c. Back 3” x 3 ½”

    (Click Image to Enlarge)


    Step 19:
    Dress 8 for Small Felt Paperdoll (SFPD12) For this dress cut felt:
    a. Front 3 ½” x 3”
    b. Back 3 ½” x 3”


    Step 20:
    All the dresses will fit all the ITH Small Felt Paperdolls. Have fun making wardrobes for each doll.

    For the love of embroidery…
    Pat Williams
    Meet the Author: Pat Williams
    Pat Williams
    Award winning Digitizer, Embroidery Educator, Author and a Consultant to the Industry, Pat Williams has 30 years of experience in the embroidery industry. Pat has won multiple awards for her digitizing expertise including the 2007 Impressions Awards Grand Championship, Best of Show as well as the 1st and 2nd Place Awards. Pat’s love of digitizing has afforded her the opportunity to write numerous articles for Impressions magazine in the United States and Images Magazine in Europe. In 2001 Pat was named “Embroidery Educator of the Year.” For many years Pat taught digitizing seminars at the ISS Shows in Long Beach, CA and for Compucon software. She now resides in Tucson, AZ.
    More From This Author
    Link is Broken, Please check the URL
    Exclusive Embroidery Offers!
    Copyright © {{ currentDate | date:'yyyy'}} - EmbroideryDesigns.com
    GET 50% OFF! ×