Border OptionsHugging border, circle, square, or rectangle — with a 3mm satin stitch.
Backing OptionsAvailable with iron-on, sew-on, or velcro backing.
Fast ShippingShipped quickly from the USA.
Free Online Tools
Powerful embroidery utilities that save time and prevent costly mistakes.
Stitch AssistantRECOMMENDED
Get the exact stabilizer, machine settings, needle, and thread color sequence for every embroidery design you purchase — based on that design's stitch density, dimensions, and color count.
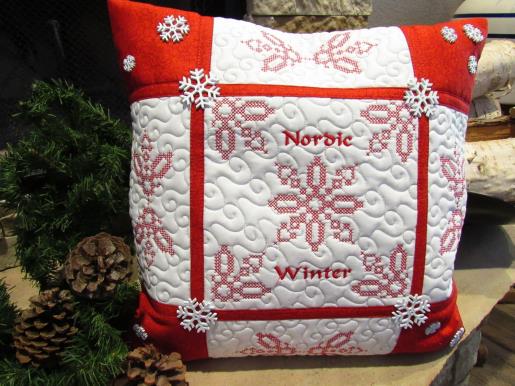
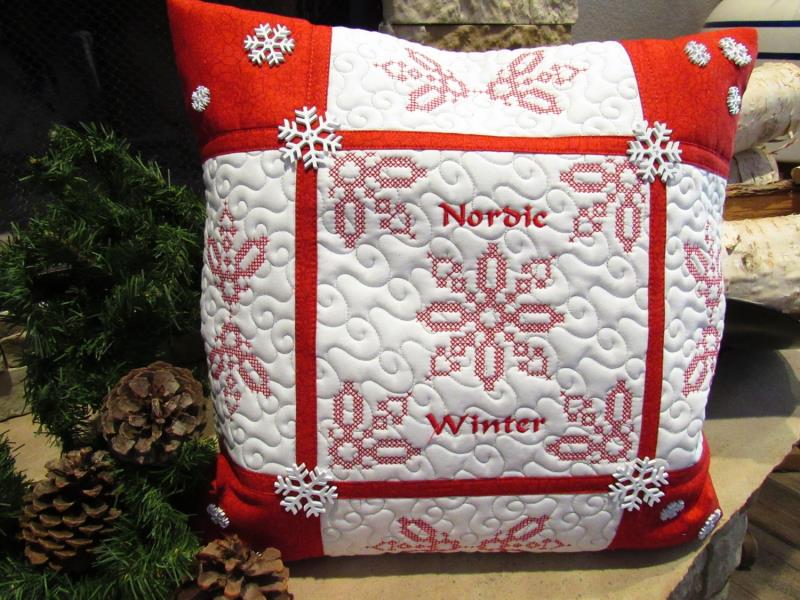
The embroidered sections of the pillow were set up in embroidery software and stitching in a 9.5” square hoop. The fabrics and batting were cut larger than needed then cut down to size. The sections were butted together and stitched. The red fabric was used for the binding, corners, and pillow back with zipper insert. Snowflake buttons complete the pillow.
Step 1:
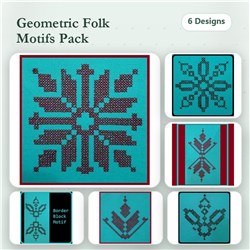
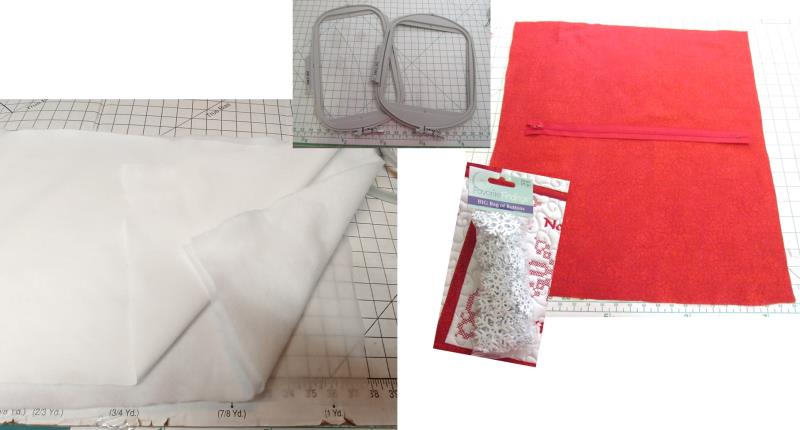
Read through the instructions thoroughly before beginning and assemble all the materials needed to complete the project. Remember, fabrics and batting were cut larger to begin with and then cut down to size after the sections were stitched. There are many beautiful designs in the collection. For this pillow TFD2702 was used for the pillow center, TFD2706 for the corners in the center, and design TFD2704 was copied, mirrored and used for the sides. All the sections were quilted with Sulky Holloshimmer thread first, and then the cross stitching was done—all set up in the software and stitched in the hoop. Press the fabrics well using spray starch. Note: if you do not have embroidery software, the setup steps can be done on most newer style machines, including a fill pattern for quilting. Check the machine manual for instructions for creating a quilting pattern and adding and doing the design layout.
(Click Image to Enlarge)
Step 2:
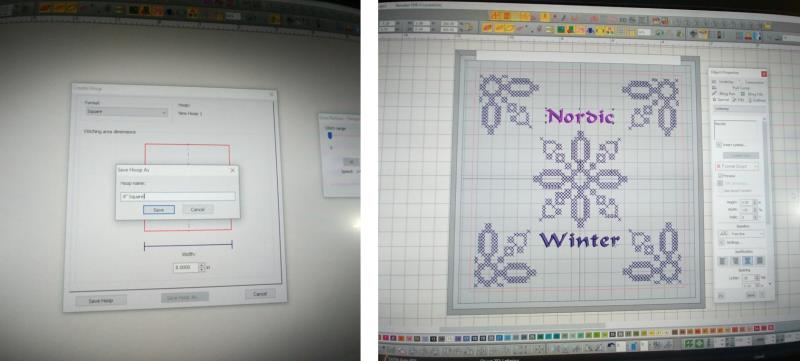
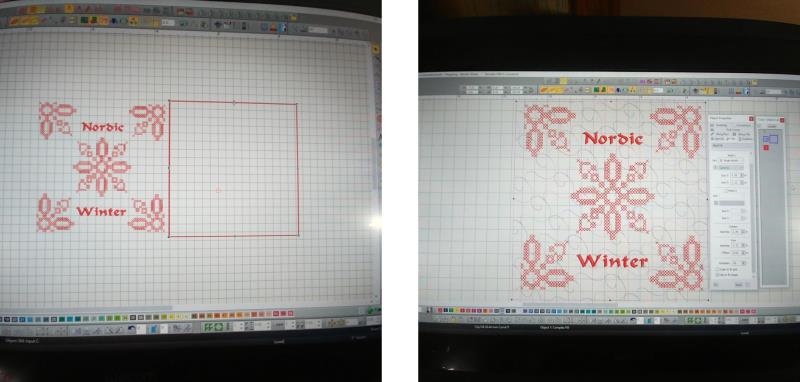
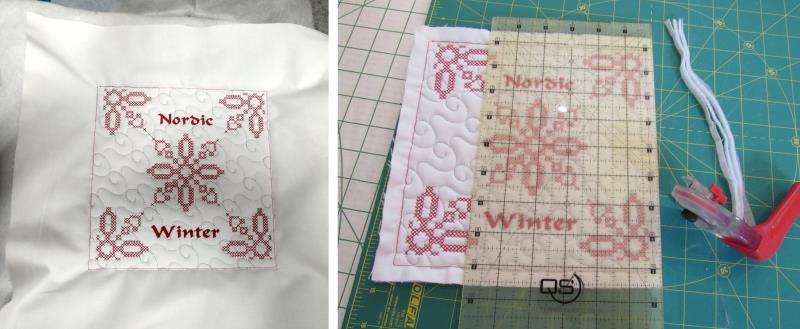
Begin by setting up everything in software. Create the machine hoop if one is not already set up in the software. Create an 8” square outline. Import and center design TFD2702 in the middle of the square. Import design TFD2706 and place them approximately ½” inside each corner with the points toward the center. Create the words Nordic Winter and position them above and below the center design as shown. Save the file.
(Click Image to Enlarge)
Step 3:
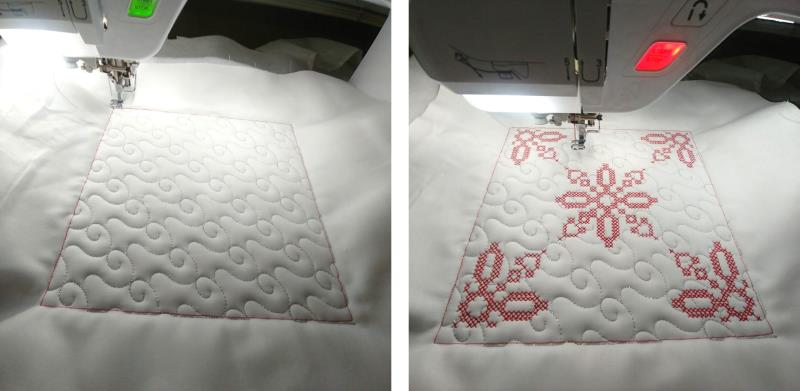
Create another 8” outline and then fill it with a motif fill that would resemble swirling wind. Each software package is different, so work with the fill pattern to create a quilting layout you like. Re-sequence the patterns: first would be the outline (tackdown), next the quilting fill motif, and then the cross stitching and text. Save the file.
(Click Image to Enlarge)
Step 4:
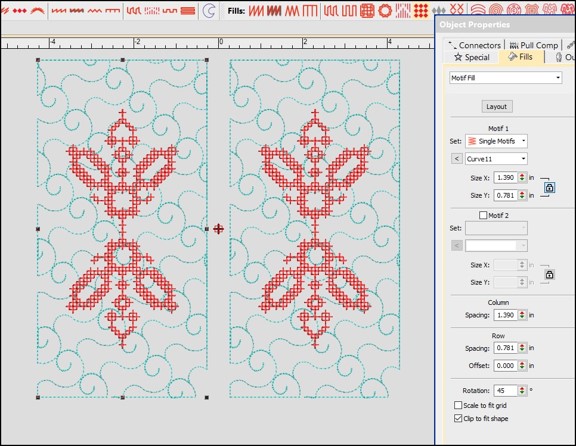
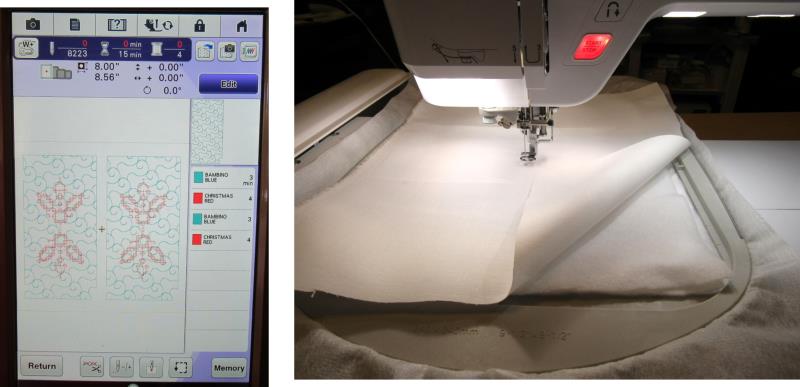
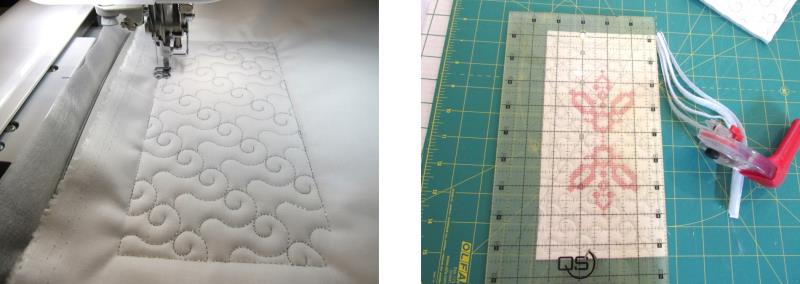
Now create the side designs using design TFD2704. First create an outline 8” x 4”. Import the design, copy, mirror, and center it in the outline. Create a motif fill the same as the pillow center fill. Re-sequence so the outline stitches first (tack down), quilting fill, and then the cross stitching. Repeat this two times to fit the hoop. Save the file. Note: this file will be stitched twice.
(Click Image to Enlarge)
Step 5:
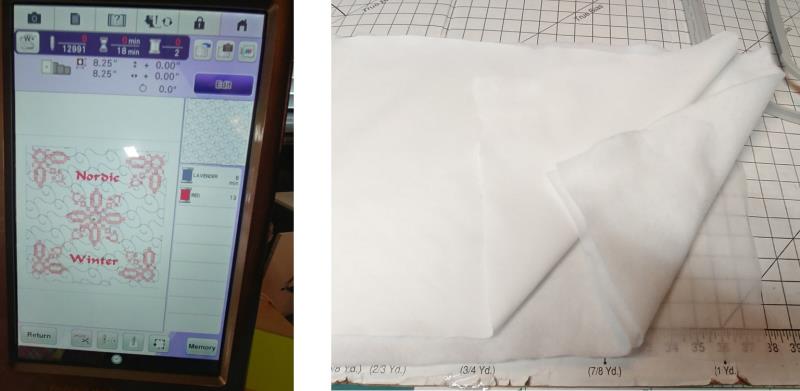
Export the files for stitching and load them on the machine. Cut the white fabric and two batting pieces to fit the hoop (approx. 11” x 11”).
(Click Image to Enlarge)
Step 6:
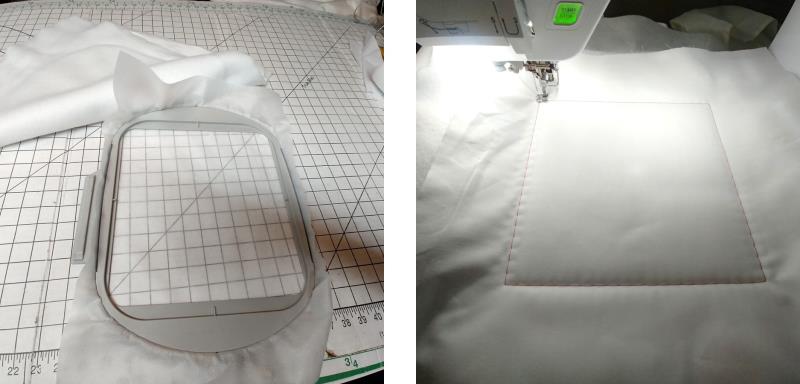
Hoop a piece of polymesh stabilizer and then place the two pieces of batting on top and the piece of white cotton on top of the batting. Place the hoop on the machine. Stitch the first color (outline tackdown).
(Click Image to Enlarge)
Step 7:
Stitch Color 2, the quilting design using the Sulky Holloshimmer thread (you may have to slow down the machine). Change to the red thread and stitch the cross stitching and text.
(Click Image to Enlarge)
Step 8:
Remove the fabric from the hoop and trim all the edges to ¼” beyond the outer most stitching line.
(Click Image to Enlarge)
Step 9:
Now repeat the steps of cutting the fabric, hooping and stitching for the side pieces.
(Click Image to Enlarge)
Step 10:
On the second set, mirror the design. Stitch and then trim the pieces leaving ¼” seam allowance beyond the outer most stitching line of the design.
(Click Image to Enlarge)
Step 11:
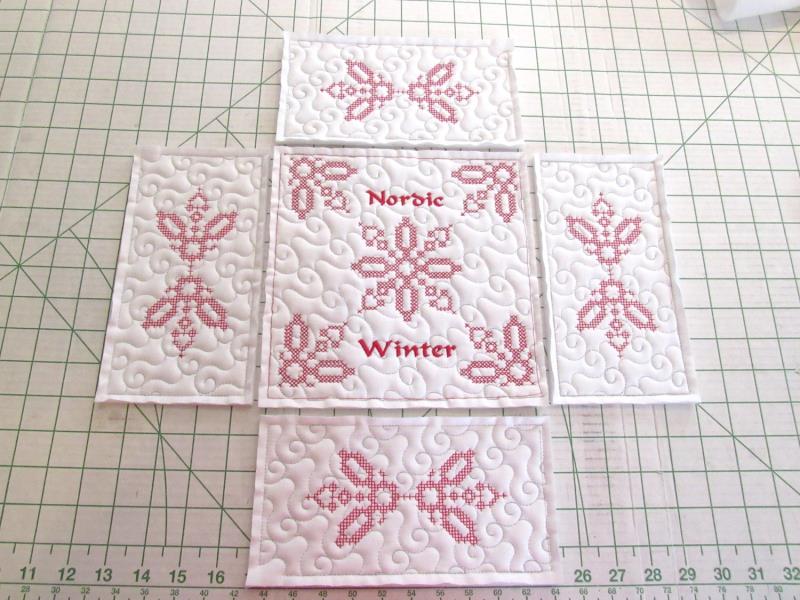
This is what you should have now. Notice the swirls on the side pieces point toward the center, this is because the second set was mirrored.
(Click Image to Enlarge)
Step 12:
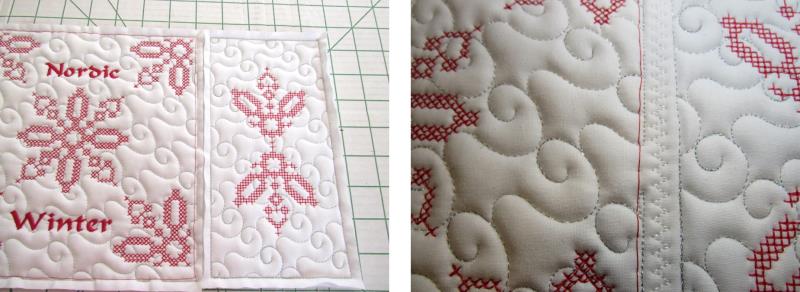
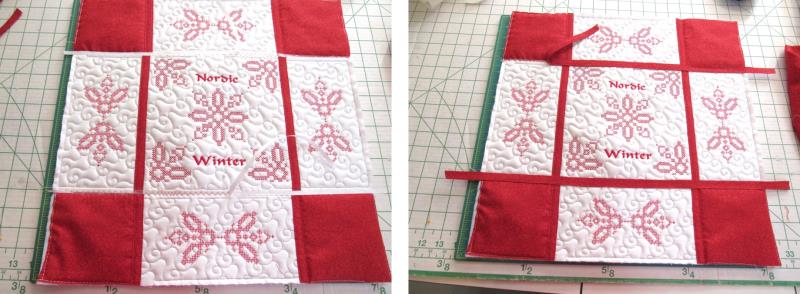
Now butt the left and right side pieces to the center and stitch them together with a three-step zig zag.
(Click Image to Enlarge)
Step 13:
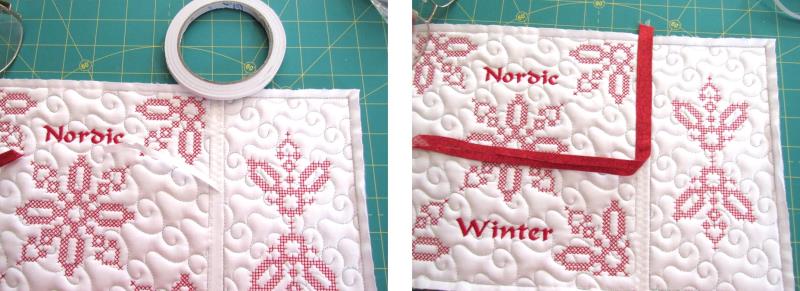
Next will be to cover the zig-zag seam allowance with binding strips.
(Click Image to Enlarge)
Step 14:
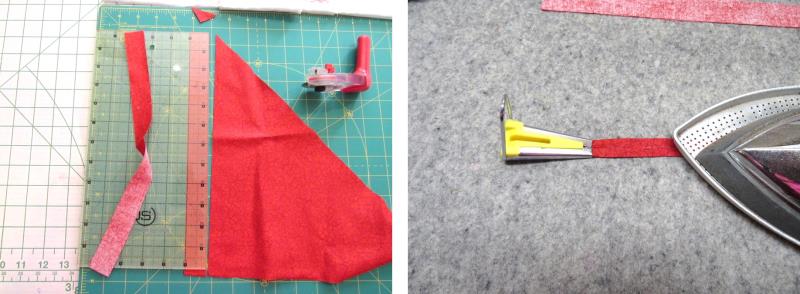
Cut 1” strips and using a ½” bias binding tool, press the long cut edges to the center.
(Click Image to Enlarge)
Step 15:
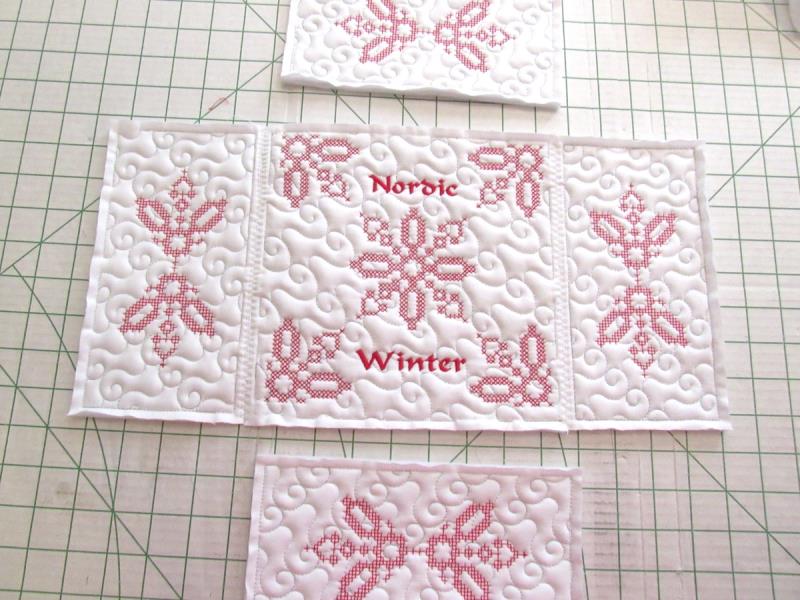
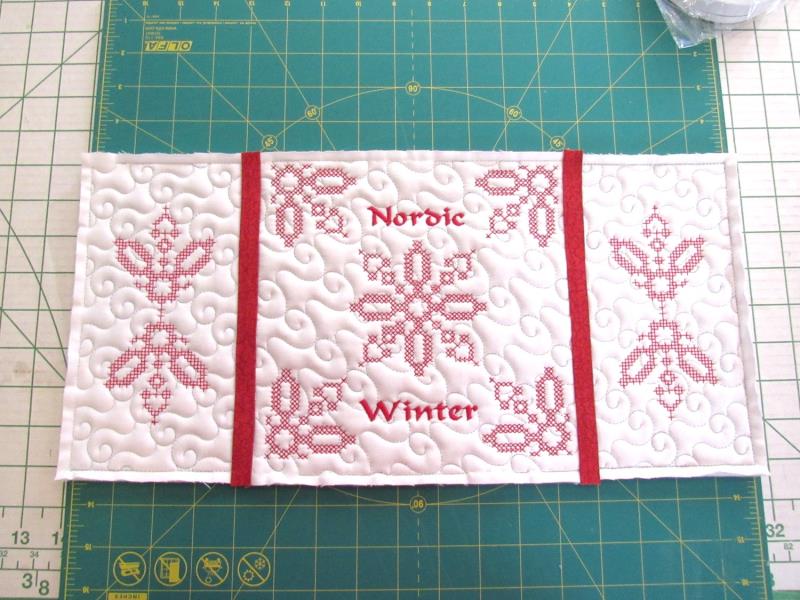
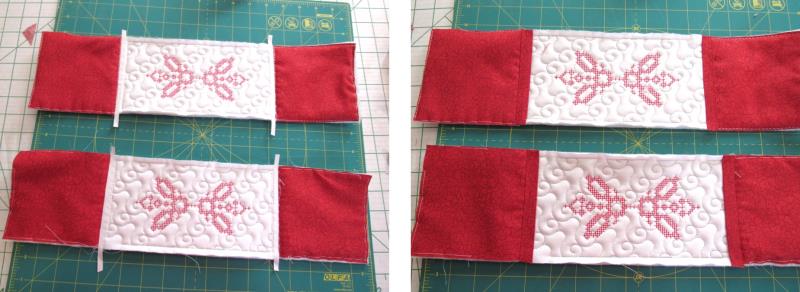
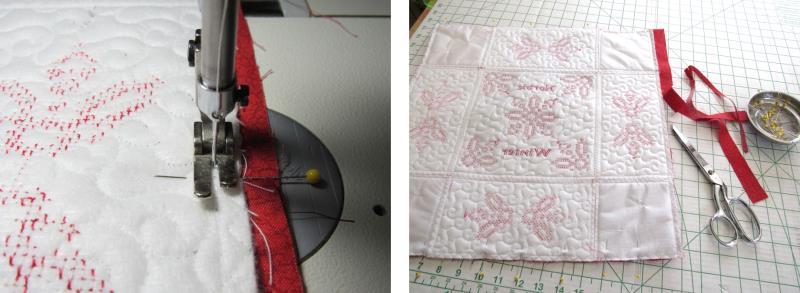
Using the double-sided embroidery tape, cut and position the binding strips over the seam allowance. Edge stitch the strips in place along each edge.
(Click Image to Enlarge)
Step 16:
Start with them a little longer and then trim them after they are stitched down.
(Click Image to Enlarge)
Step 17:
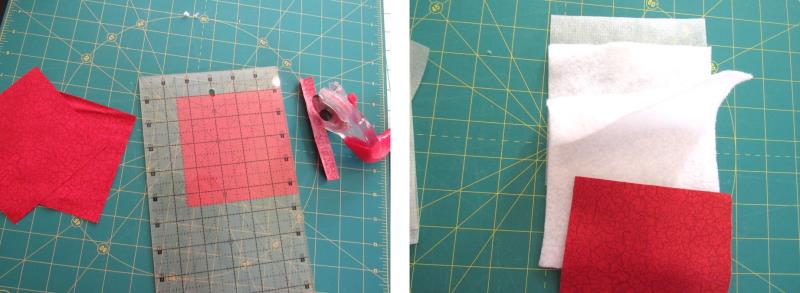
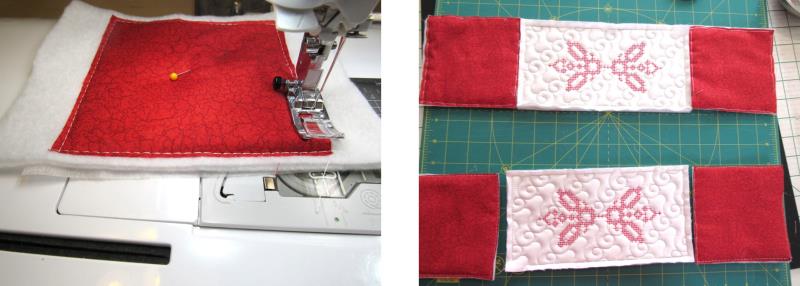
Now cut the corner pieces. You will need 4 poly mesh stabilizer, 8 batting, and 4 red squares. Again, cut these larger than needed (about 5” square), and after stitching them to the top and bottom embroidered pieces, they will be cut down to size.
(Click Image to Enlarge)
Step 18:
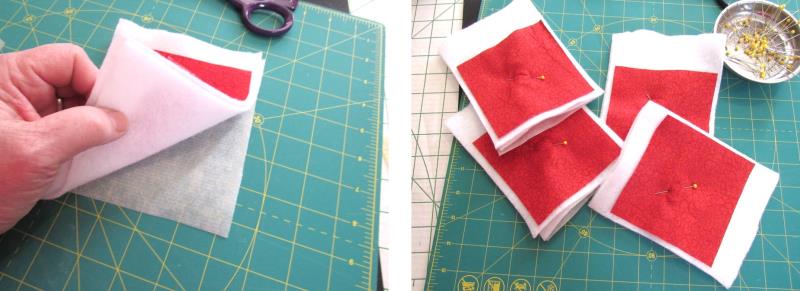
Layer the corners as follows: polymesh, two batting squares, and then the red square on top; pin the layers together.
(Click Image to Enlarge)
Step 19:
Baste each square through all layers. Butt a square to the left and right of the top and bottom embroidered squares and then use the triple zig-zag to stitch them together. Trim them to size (the length should be the same as the center section, and the width the same as the top/bottom embroidered section.
(Click Image to Enlarge)
Step 20:
Place strips of embroidery tape down and then place down binding strips over the seam allowances and edge stitch them down along each edge. Trim the strips even with the top and bottom of the sections.
(Click Image to Enlarge)
Step 21:
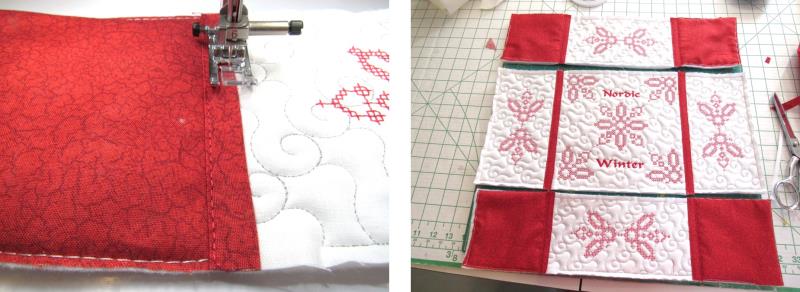
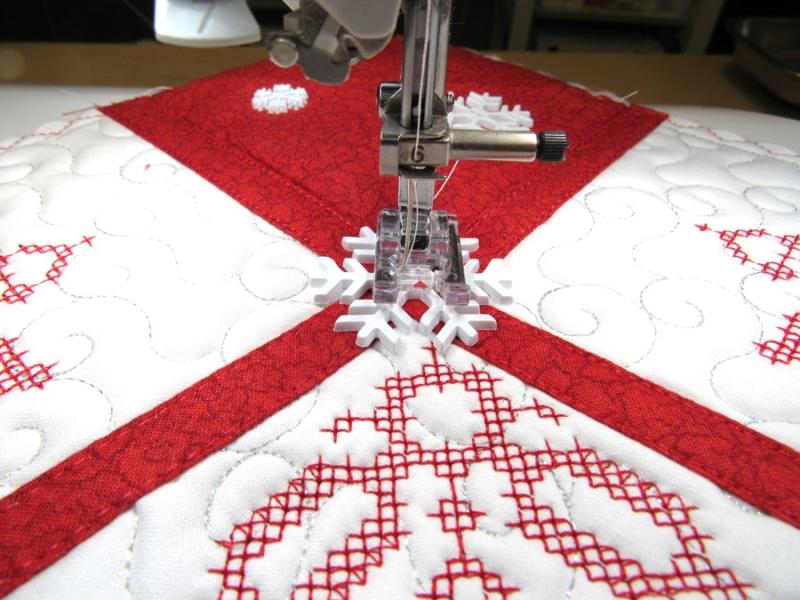
The edge stitching is best done with a 3.0-3.5mm stitch length and the red embroidery thread. Use a clear foot to see the stitching as it is being done. Now the top and bottom sections will be added to the center sections in the same manner.
(Click Image to Enlarge)
Step 22:
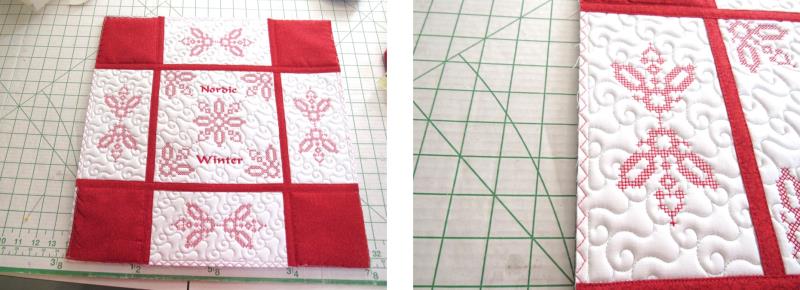
Butt the sections together and stitch them together using the triple zig-zag.
(Click Image to Enlarge)
Step 23:
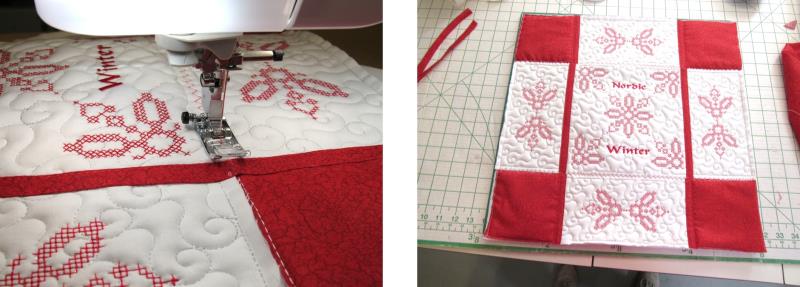
Place strips of embroidery tape down over the seam allowances and then place down the binding strips over the seam allowances.
(Click Image to Enlarge)
Step 24:
Edge stitch the binding pieces in place.
(Click Image to Enlarge)
Step 25:
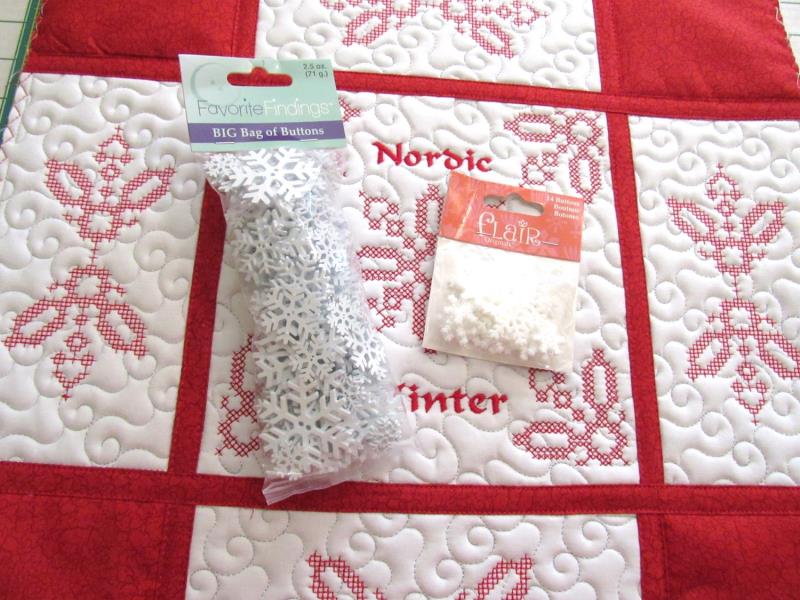
Choose the snowflake buttons you’d like for your pillow. I chose the ones on the left (purchased at JoAnn fabrics).
(Click Image to Enlarge)
Step 26:
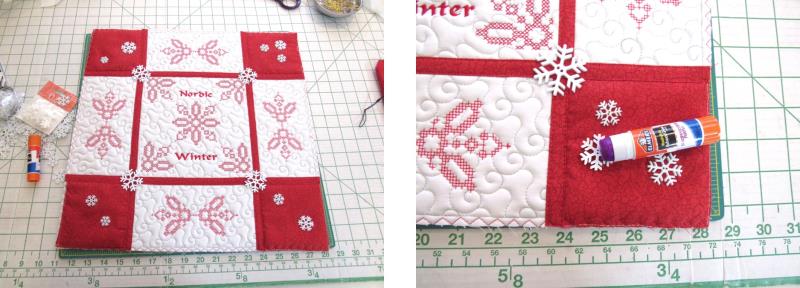
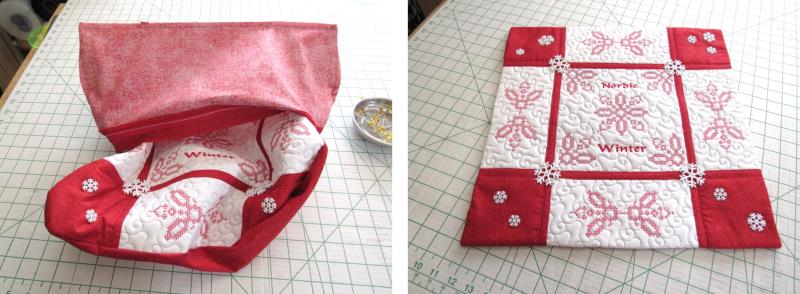
Place the buttons as desired around the pillow, placing the large snowflake buttons over the intersecting binding corners. Use a dab of glue stich on the back of the button to hold it in place for stitching.
(Click Image to Enlarge)
Step 27:
Follow the machine instruction manual for sewing the buttons in place, using white embroidery thread.
(Click Image to Enlarge)
Step 28:
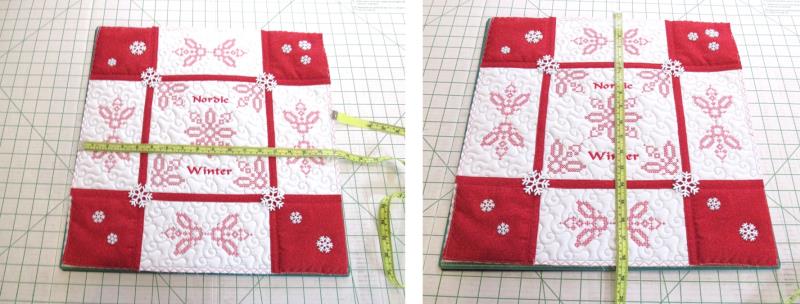
Now measure the pillow top width and length (this one measures approximately 17.5” square.
(Click Image to Enlarge)
Step 29:
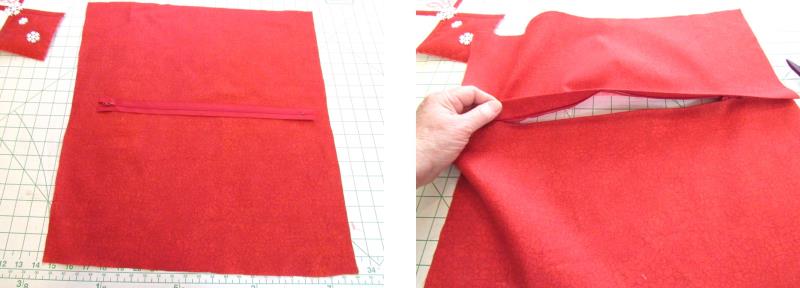
Cut the backing 2” wider and 4” longer than needed. Use your favorite method for installing the zipper in the center of the fabric.
(Click Image to Enlarge)
Step 30:
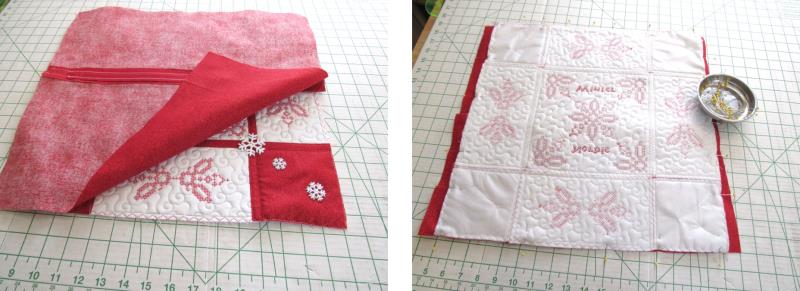
With right sides together, place the fabric back over the top. Pin the sections together.
(Click Image to Enlarge)
Step 31:
Stitch the top to the bottom using the outer most stitching line of the embroidered sections as a guide. Keep the needle just inside the stitching line. Trim the backing fabric to match the top.
(Click Image to Enlarge)
Step 32:
Turn the pillow cover right side out through the zipper opening forming the corners and pressing the seam edges.
(Click Image to Enlarge)
Step 33:
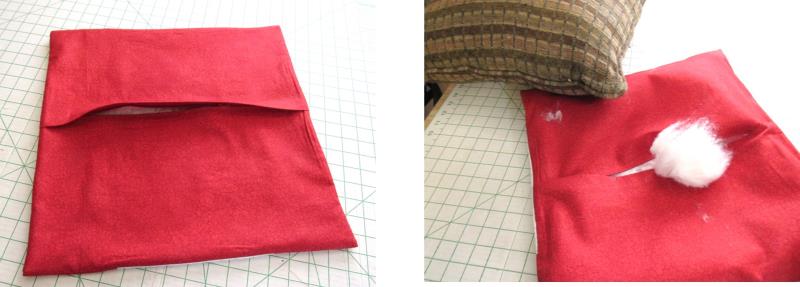
If using a pillow insert, place the pillow in through the zipper opening. If using fiber-fil, stuff the corners first, then the sides, and then the rest of the pillow. Stuff until the pillow is soft, but firm.
(Click Image to Enlarge)
Step 34:
Congratulations on completing the Nordic Winter Pillow! You are sure to enjoy this pillow for many winters to come.
Ramona Baird has been in the embroidery industry for over 23 years. She and her husband owned a commercial and retail embroidery store in Arizona for many years. She is an experienced digitizer having been mentored by award-winners Pat Williams and Lindee Goodall. Ramona is a contributor to “Creative Machine Embroidery” magazine having 5 covers to her credit. Ramona has worked for Wilcom America and served many years as Education Director for the American Sewing Guild. With a degree in fashion design, she is able to design and execute patterns which Pat Williams says are “out of the box” in creativity and application. Ramona likes to challenge the boundaries of embroidery and bring new and exciting designs, ideas, and projects to EmbroideryDesigns.com. She wants embroiderers of all levels to increase their skills and enjoyment in using their embroidery machine for gift-making and personal pleasure.