Stitch N Shape Lite, double-sided fusible, 13" x 25
Wet N Stick
1 1/2" wide grosgrain ribbon, 12 1/2"
Embroidery Design: "Stitch" from Loralie Designs' Fancy Cats Collection
Floriani embroidery threads
Floriani variegated thread for quilting
Non-stick press sheet
3/4" button
4 gallon-size zipper freezer bags
4 quart-size zipper freezer bags
4 zipper sandwich bags
Assorted small zip bags (optional)
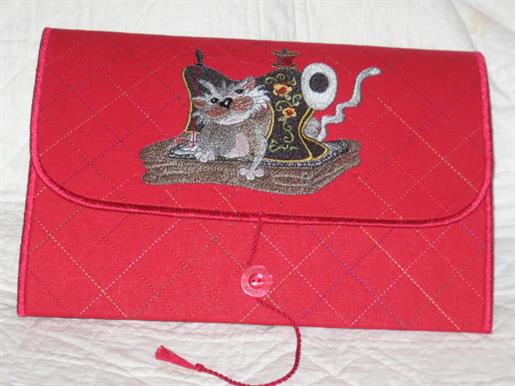
Final Product: What You Will Create
Step 1:
Lay the Stitch N Shape Lite on the non-stick press sheet and place the
body fabric right side up on the Stitch N Shape. Press to fuse.
Step 2:
Trim the fused unit to measure 12" x 24". Mark the embroidery location centered side to side and 3" above one end.
Step 3:
Hoop a piece of Wet N Stick and activate the adhesive. Position the
marked embroidery location at the hoop center and press to adhere. TIP:
Be sure to turn the fabric so most of the Stitch N Shape is to the
left, not under the machine arm. It's also a good idea to baste the
fabric to the hooped stabilizer before embroidering.
Step 4:
Stitch the embroidery design. When the design is complete, tear the excess stabilizer away from the fabric.
Step 5:
Lay the embroidered piece face down on the ironing surface and cover with the lining fabric, face up. Press to fuse.
Step 6:
Turn the project over and trim the lining to match the body fabric and stabilizer.
Step 7:
Trace around a spray starch can or similar object to round all four corners. Trim away the excess fabric and stabilizer.
Step 8:
With variegated thread in both needle and bobbin, quilt through all
layers. Work from edge to edge, avoiding the embroidery area, to create a
diamond grid, or free motion quilt if you prefer.
Step 9:
Set the machine for a zigzag stitch 5.0mm wide and 1.4mm long. With
matching thread in needle and bobbin, stitch around the entire bag
perimeter. Locate the stitch so the left needle swing falls in the
fabric and the right swing falls just outside the fabric edge.
Step 10:
Inspect the project and trim any fibers that poke through the zigzag stitching.
Step 11:
Change the machine settings to 6.0mm wide and 0.3mm long. Test to be
sure this setting makes a smooth satin zigzag, with no gaps or areas of
bunching, and adjust the stitch length if necessary.
Step 12:
Stitch around the perimeter again to overcast and finish the edges.
Step 13:
(Click Image to Enlarge)
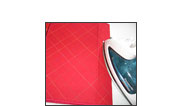
Fold the non-embroidered end of the clutch to the wrong side, 7" from
the end, and steam press firmly to set a crease. Fold again, 9" from the
end, and press to make a second crease 2" beyond the first.
Step 14:
Separate the bags into two groups. Arrange each group with the largest
bags on the bottom and the bag tops staggered. Using the largest bags'
width as a guide, smaller bags can be arranged almost side by side.
Step 15:
(Click Image to Enlarge)
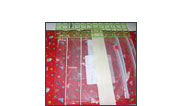
Lay the first group of bags on the clutch lining with the bag tops
toward the embroidered end. The top of the largest bag should be about
8" above the nearest crease, and the bag bottoms should extend into or
even beyond the area between the creases. Use tape to hold the bags in
place temporarily.
Step 16:
Lay the second group of bags on the lining with their tops near the end
without embroidery. The bag bottoms will overlap the first group.
Step 17:
(Click Image to Enlarge)
Use a permanent marker to draw a line across the bags, midway between
the pressed creases. With variegated thread and a straight stitch 3.0mm
long, stitch from edge to edge through all layers, including the bags.
Step 18:
(Click Image to Enlarge)
Remove the tape and carefully trim away the bag bottoms near the
stitching, so they do not extend beyond the pressed creases. Do not cut
away the bag's upper portions (the parts with the zippers). Fold bags
out of the way as necessary to trim the bags underneath.
Step 19:
Press under 1/2" on each end of the 12 1/2" ribbon.
Step 20:
Lay the ribbon between the creases, on top of the bags. If desired, slip
a few tiny plastic bags - the sizes commonly used for jewelry, sewing
machine accessories, etc. - under the ribbon edge to provide storage for
small notions. Edgestitch all around with the 3.0mm straight stitch,
securing the ribbon and bags.
Step 21:
Sew a 3/4" button to the clutch right side, centering it 6" from the end without embroidery.
Step 22:
Cut four 1-yard lengths of coordinating embroidery floss. Tie together with a knot at each end.
Step 23:
Twist the floss until it begins to kink. Grasp the midpoint and fold the
floss in half, matching the knotted ends. Allow the floss to untwist
against itself, making a twisted cord. Tie the already knotted ends
together to secure the cord.
Step 24:
(Click Image to Enlarge)
Measure 9" from the folded end and tie a knot. Trim the twisted cord 1" below the knot (for a total length of 10")
Step 25:
(Click Image to Enlarge)
Untwist the ends below the knot and brush to make a small tassel.
Stitch the cord's folded end to the clutch flap just
below the embroidery. Wind the loose cord around the button to hold the
notions clutch closed.
Rebecca Kemp Brent regularly designs projects on behalf of RNK Distributing, the supplier of Floriani Embroidery Products. She is a designer, educator, and freelance author with vast experience in the field of embroidery. She is a regular contributor to Creative Machine Embroidery, Quilting & Embroidery, Paper & Embroidery, and Holiday Embroidery magazines, among others. She has designed several collections of machine embroidery designs for Sudberry House, plus the 2-4-6-8 Pocket Bag Collection pattern. Her career stems from a Ph.D. from the University of Tennessee, Knoxville, with concentrations in Textiles and Clothing and Educational Curriculum and Instruction. With a 30-year career in teaching sewing, Rebecca often appears these days as a teacher at consumer and trade conferences and events and has been organizing and presenting monthly sewing and embroidery clubs at local dealership since 1996.