Live Chat
Embroidery Designs
Welcome, Embroiderer
Login
Plaid Christmas hoop

Plaid Christmas hoop Embroidery Project

By   Kylie Burke   on   December 02, 2020
  • SKILL LEVELBeginner
  • TIME REQUIRED01:00
Description

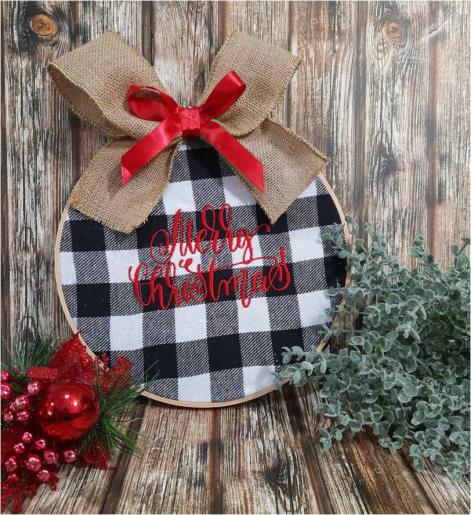
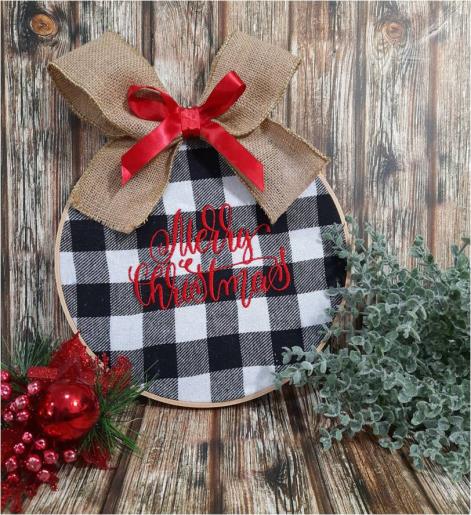
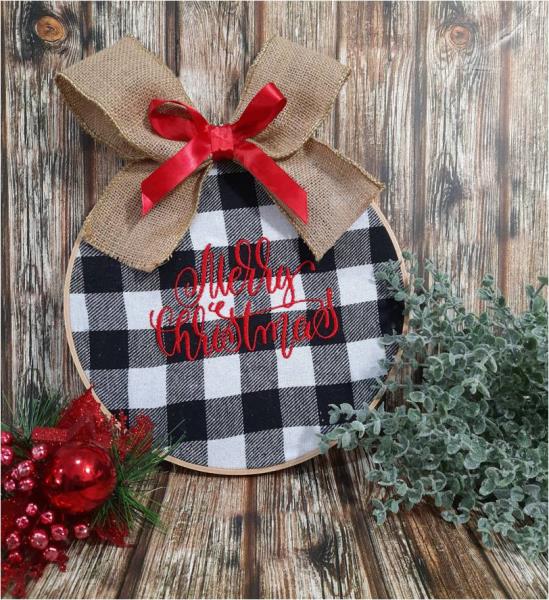
Plaid is popular this holiday season, and a simple Merry Christmas design creates this unique Christmas hoop to go with any decor.

Step of

Materials

Project Preview Video

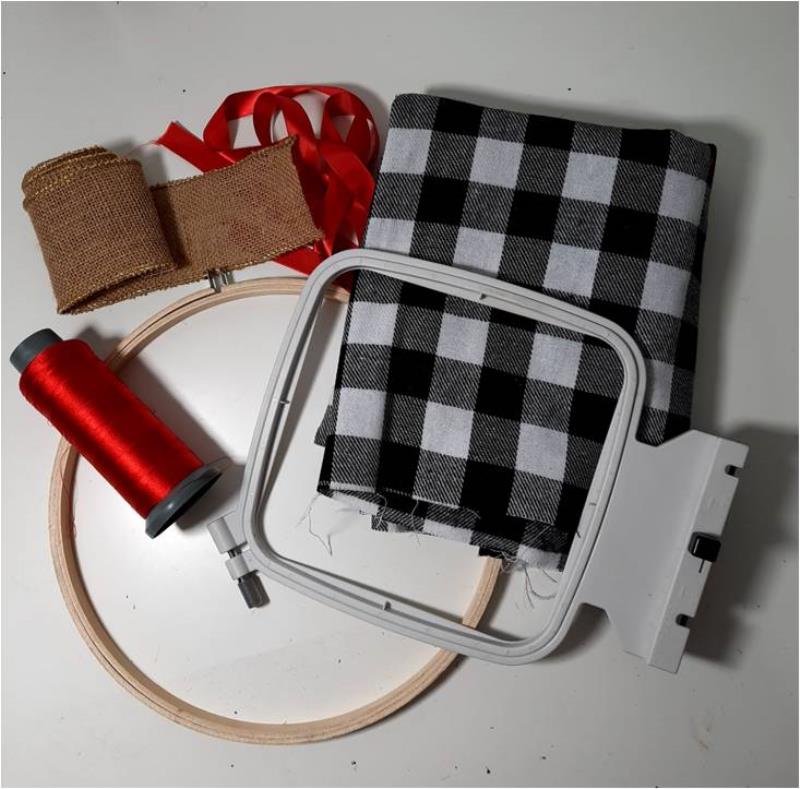
Materials
  • 9” wooden hoop
  • 13” square of Black and white plaid cotton fabric
  • Red embroidery thread
  • 4” hoop
  • Tearaway stabilizer
  • Spray adhesive
  • Hot glue gun
  • 28” of 2 ½” wide wired hessian ribbon
  • 19” of ¾” red satin ribbon

  • Designs used in this project

    Final Product: What You Will Create

    Preface:
    I used the largest design file for this projectI used the largest design file for this project


    Step 1:
    Gather the materials and read through the instructions before beginning. Have a copy of the color sequence on hand to refer to.

    (Click Image to Enlarge)


    Step 2:
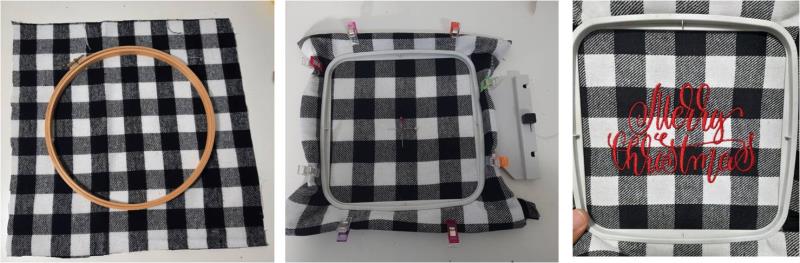
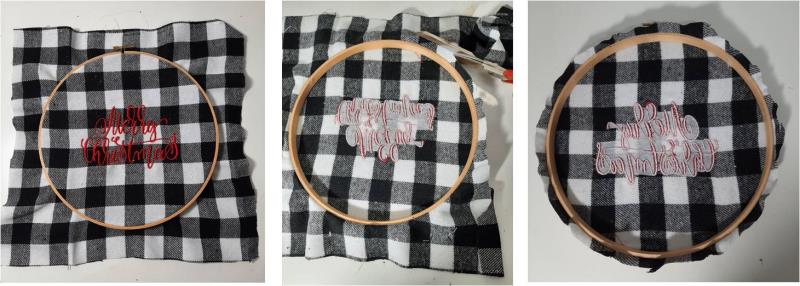
    I cut my plaid fabric 13” square to allow enough room around the hoop, which then gets trimmed away. Mark the centre of the fabric. Apply spray adhesive to the back of the plaid fabric and secure it to the stabilizer. I use the spray adhesive so the plaid does not move during the stitch out, otherwise the plaid lines will warp. Hoop the joined stabilizer and fabric together. Stitch out the design. Unhoop and tearaway the stabilizer

    (Click Image to Enlarge)


    Step 3:
    Position the fabric on the wooden hoop and secure the 2 hoop sections together, ensuring the fabric is taught but not pulling to tight. Trim away the excess fabric on the back, leaving approx 10mm around the hoop. 

    (Click Image to Enlarge)


    Step 4:
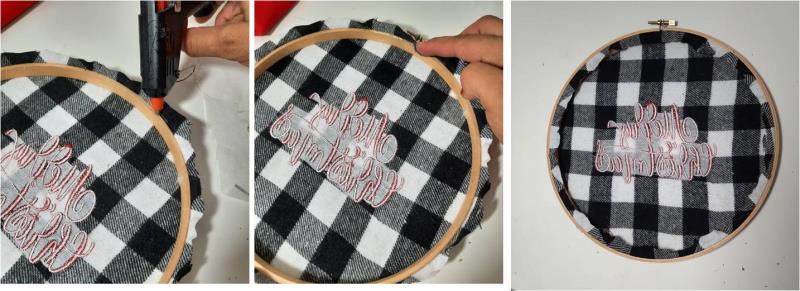
    Use your hot glue gun to glue along the wooden hoop and fold over the fabric to secure in place, continue all the way around the hoop.

    (Click Image to Enlarge)


    Step 5:
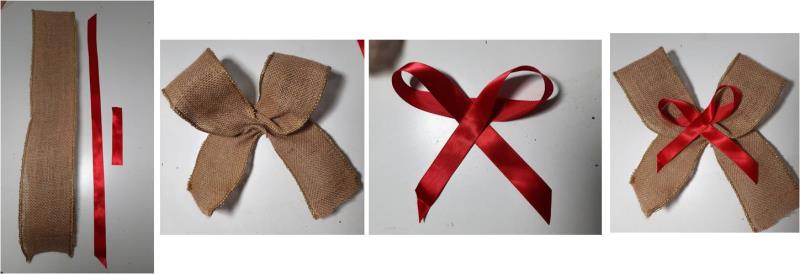
    Cut the satin ribbon into 1 x 16” length and 1 x 3” length. Form a bow with the wired hessian ribbon and long piece of satin ribbon and apply the satin bow to the hessian with the hot glue gun. Don’t worry too much about how “pretty” they look just yet and as you play with them to get the look you desire. 

    (Click Image to Enlarge)


    Step 6:
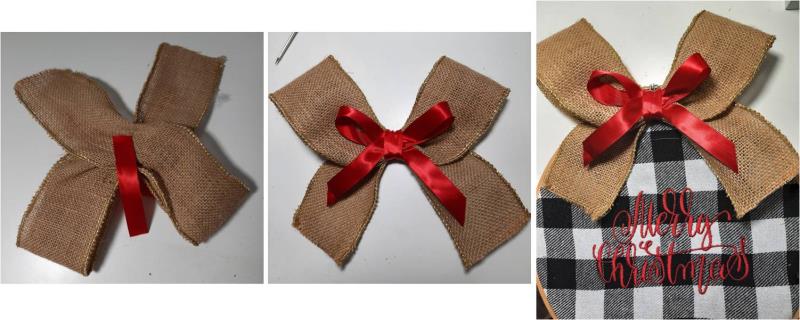
    With the short piece of satin ribbon secure it to the back with the hot glue then wrap it around the centre of the 2 bows, pull it tight to gather the bow in the middle then secure it at the back with hot glue. Now you can adjust the bows as needed, using the wired hessian to form your bow. Then glue the bow to the top of the hoop at the front. 

    (Click Image to Enlarge)


    Step 7:
    Your unique piece is now complete and makes the perfect addition to your Christmas decor

    (Click Image to Enlarge)

    Meet the Author: Kylie Burke
    Kylie Burke
    Kylie is based in Australia and loves creating and sharing her unique pieces.
    More From This Author
    Link is Broken, Please check the URL
    Exclusive Embroidery Offers!
    Copyright © {{ currentDate | date:'yyyy'}} - EmbroideryDesigns.com
    GET 50% OFF! ×