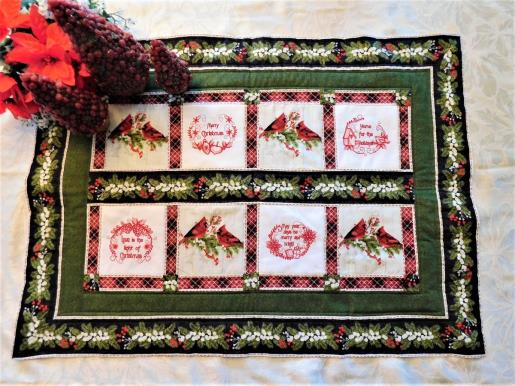
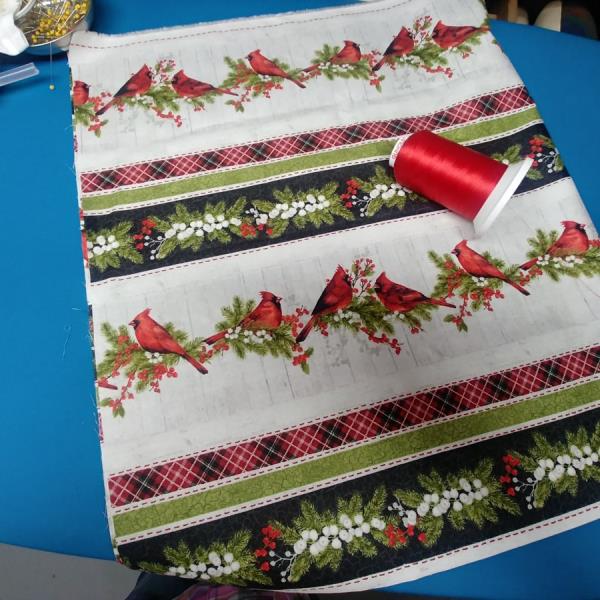
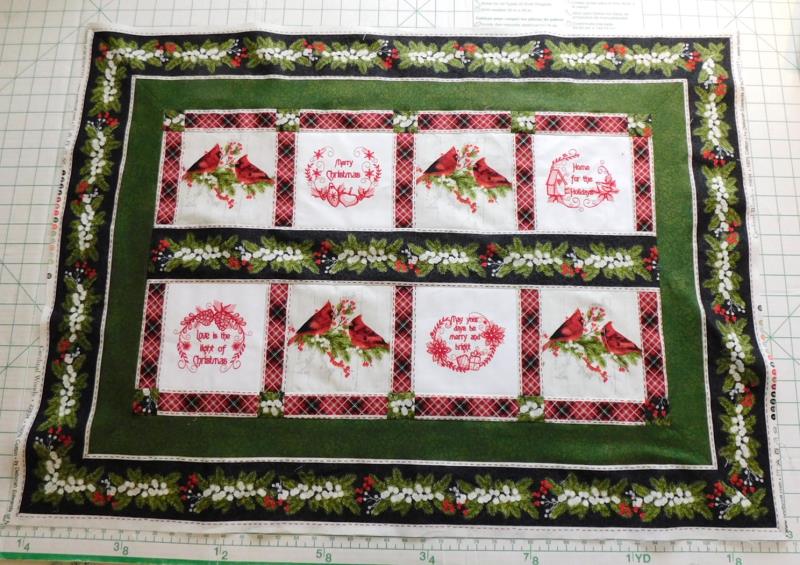
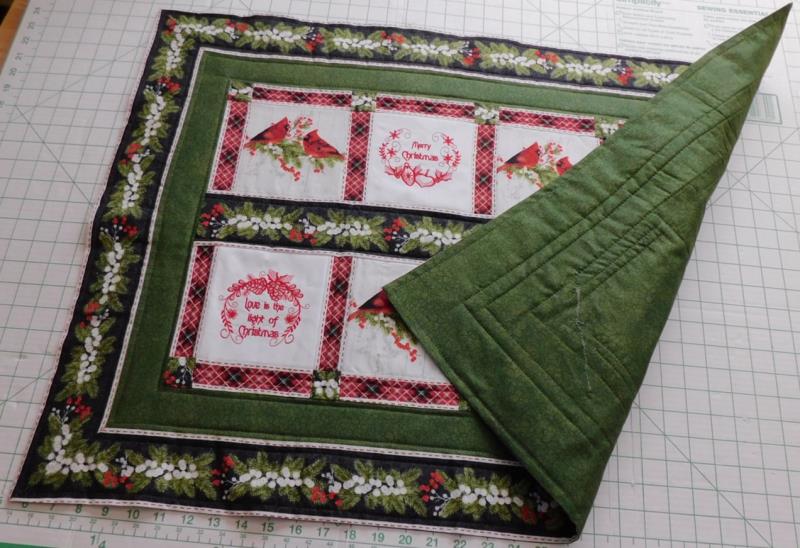
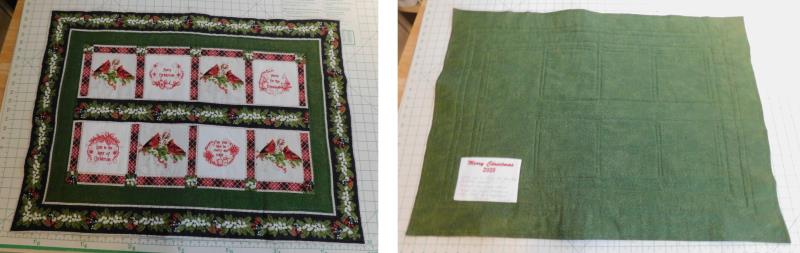
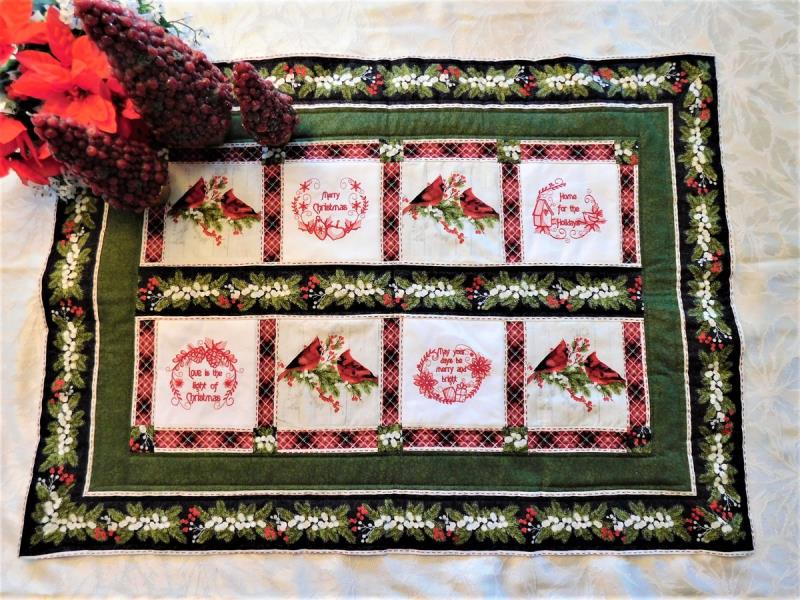
| Preface: | | This project uses a print fabric with cardinals, a plaid border and a berry boarder. I actually ordered two yards of fabric to make sure I had enough; careful planning is needed to cut out everything. Everything is fussy cut to fit. Measurements are given, but because of the way the fabric is printed, you may have to adjust the measurements. There are 10 designs in the design pack, so choose four that you like or make the table mat bigger by using more designs and then, of course, adjust the measurements for all the sashings, corner stones, and borders. This project does take some time but is well worth it to have very special table mat for Christmas time. |
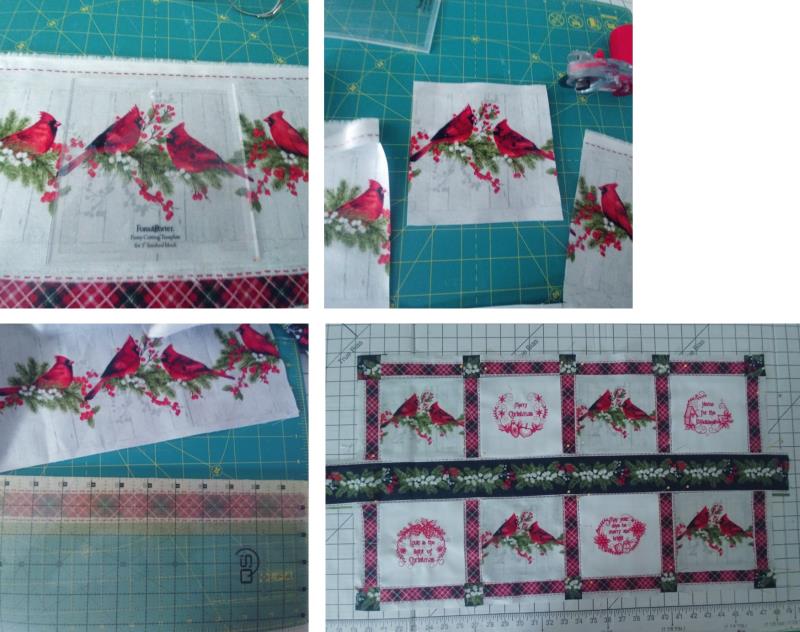
Step 1: | Very carefully read through the instructions before beginning and assemble all the materials needed to complete the project. Make note of the layout of the printed patterns on the fabric. Plan and make judicious use of the fabric. I found I cut pieces as I needed them instead of cutting them all out at once. Be sure to allow enough length of the berry borders for the outer borders of the table mat. You will find irregularities in the printing, so I found it best to cut as I went along. I also found the borders were not printed on grain so on the outer edges they rippled a bit. | 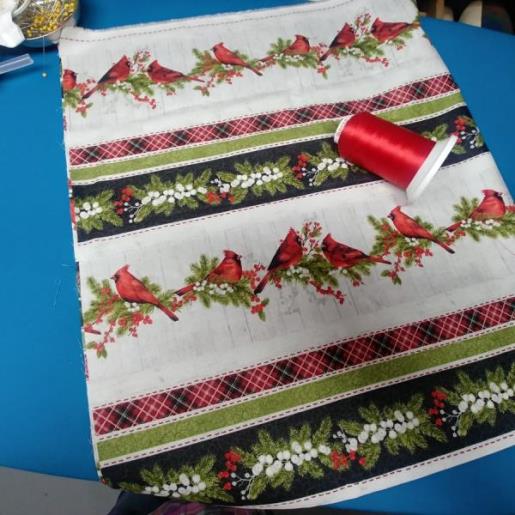 (Click Image to Enlarge) |
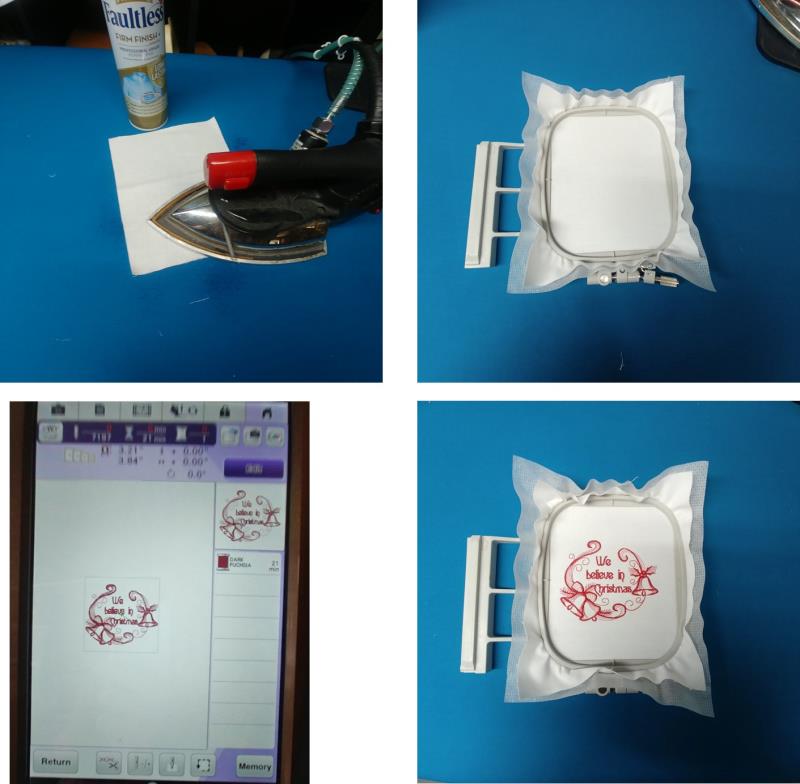
Step 2: | Press the white squares with spray starch and hoop one piece with a layer of poly mesh stabilizer. Load the first chosen design on the machine and stitch it with the red thread. | 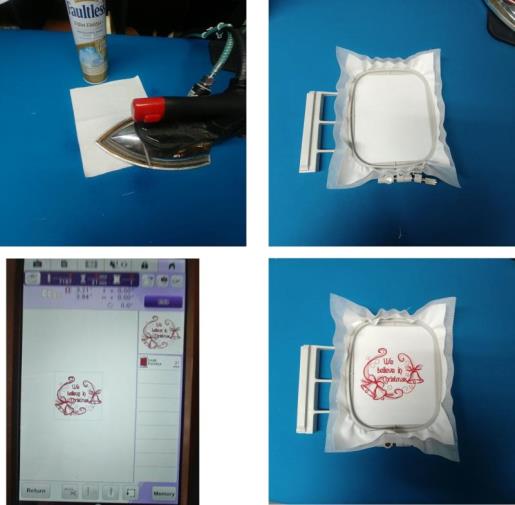 (Click Image to Enlarge) |
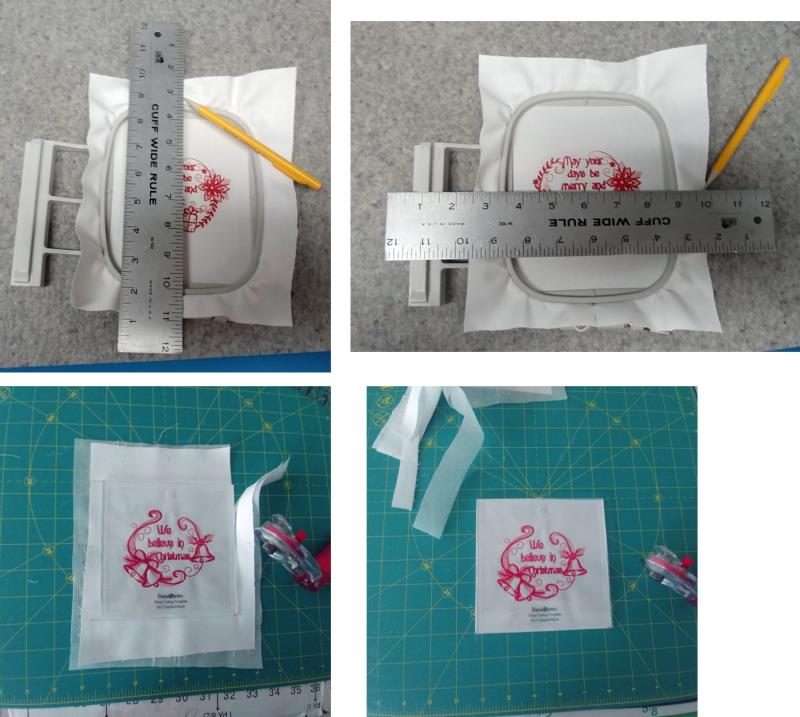
Step 3: | To help with squaring up the piece to cut it, use the tick marks on the hoop to mark the outer edge of the fabric as shown. | 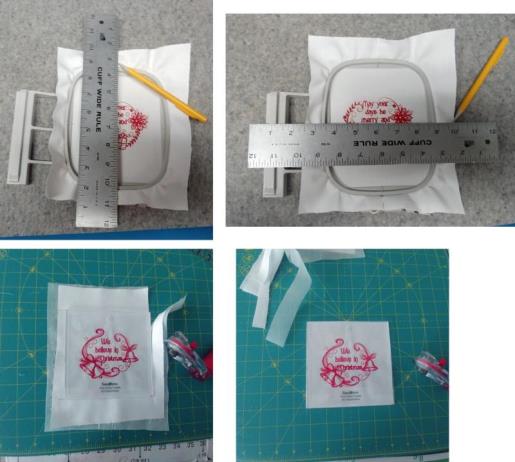 (Click Image to Enlarge) |
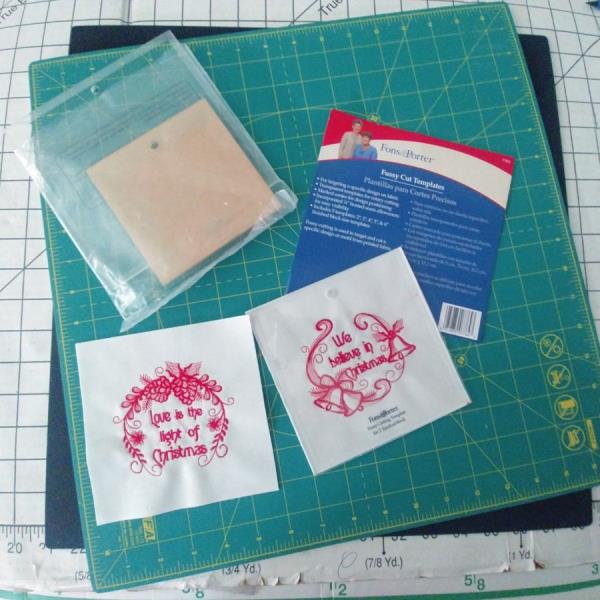
Step 4: | Remove the hoop from the fabric and use the 5” Fussy Cut template to cut the piece to size; the tick marks will help in aligning the template to the fabric. | 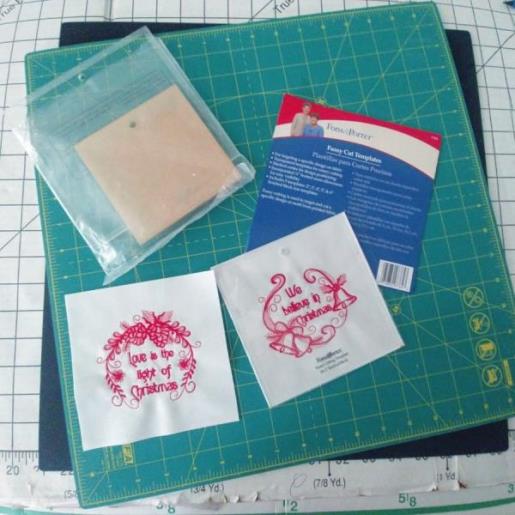 (Click Image to Enlarge) |
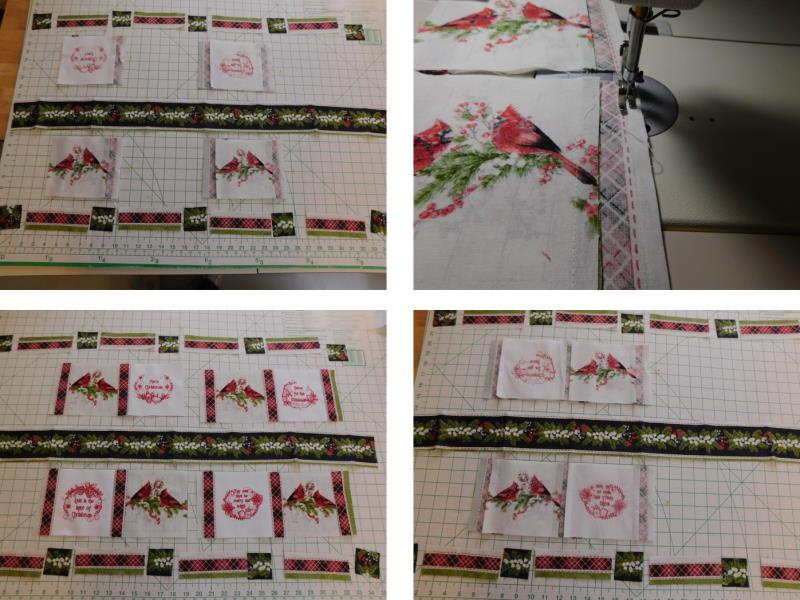
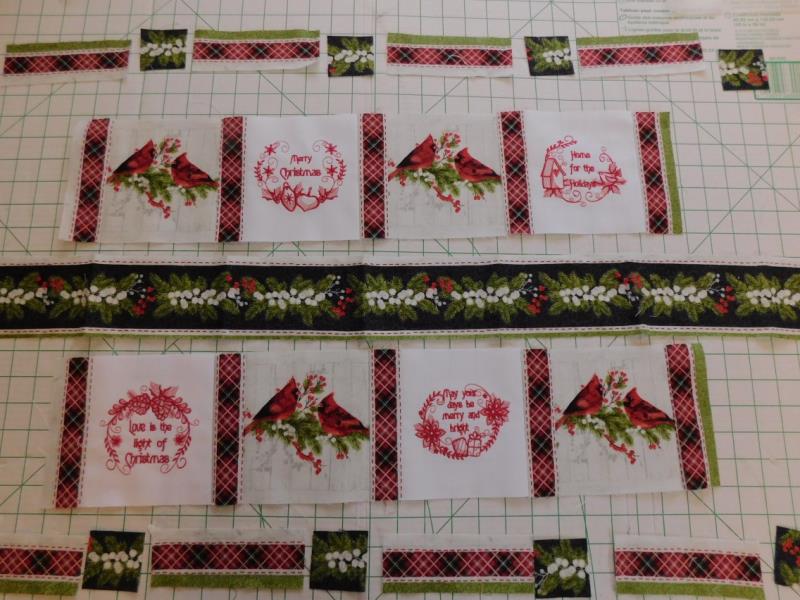
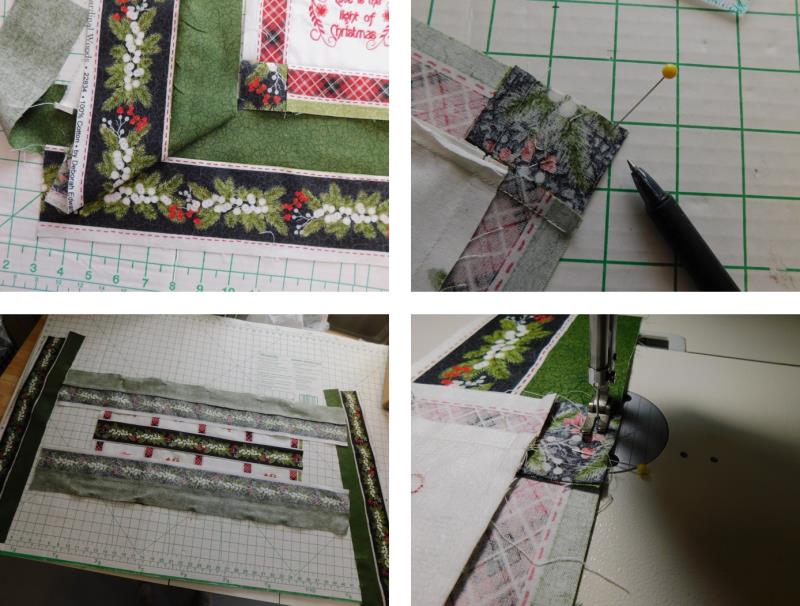
Step 5: | Stitch four more squares and cut them to size. Now using the same template, cut out four cardinal squares. Using a gridded ruler, cut out the plaid sashing. Align the ruler to the top of the printed area (not the dotted line) and cut ½” away for a seam allowance. Cut 18 sashing pieces, approximately 2” wide. Measure the width of the sashing pieces and cut 10 corner stone squares, fussy cutting them, too. These should be about 2” square. The photo on lower the right is the layout so far. A berry border was cut, again, ½” away from the outside edges of the print for a seam allowance on each side. | 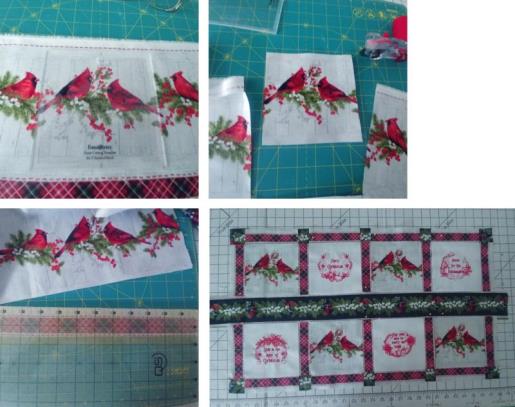 (Click Image to Enlarge) |
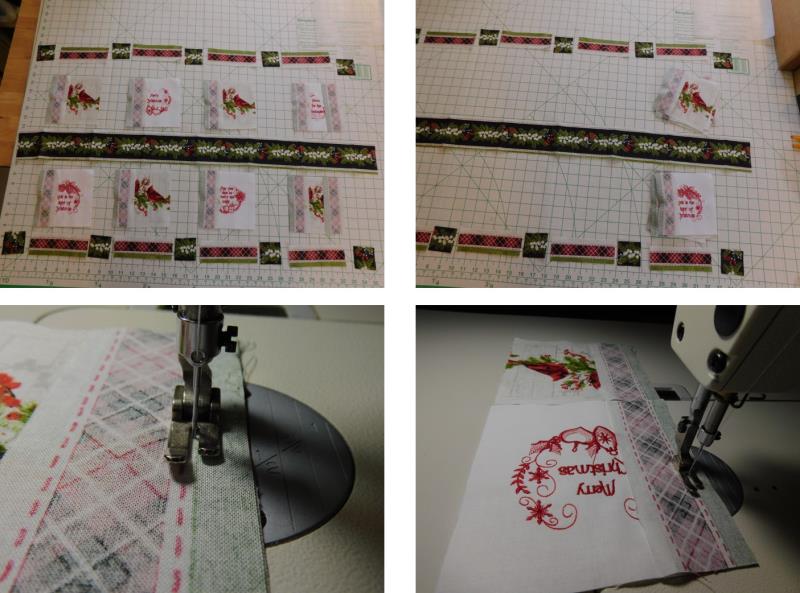
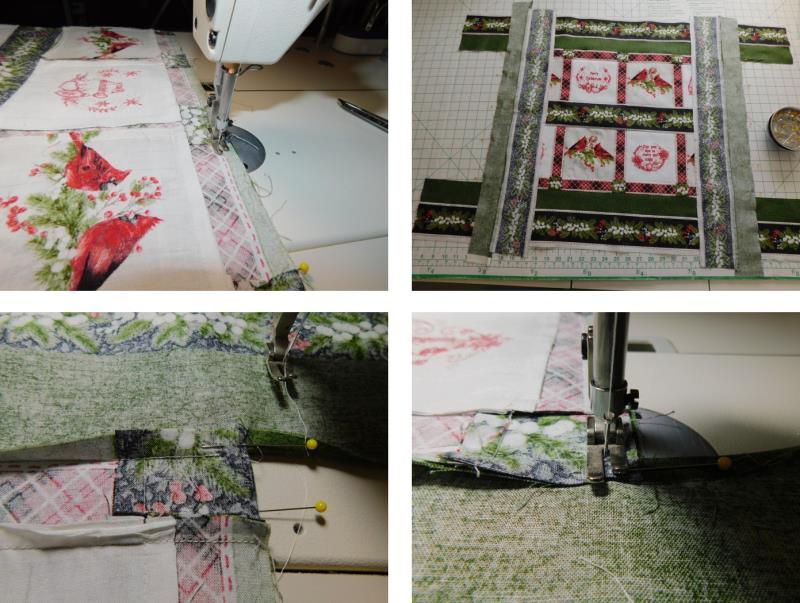
Step 6: | To begin assembly, lay the left sashing pieces right side together along the left side of the 5” squares. The end squares will have two sashing pieces. Pin the sashing pieces in place and then stack them up to stitch them. Stitch the sashing to the squares. I stitched just to the left of the green that was in the seam allowance. Those dotted lines are inconsistently placed, so a little fudging in the stitching is required. Sew the sashing to the squares chaining one after the other. | 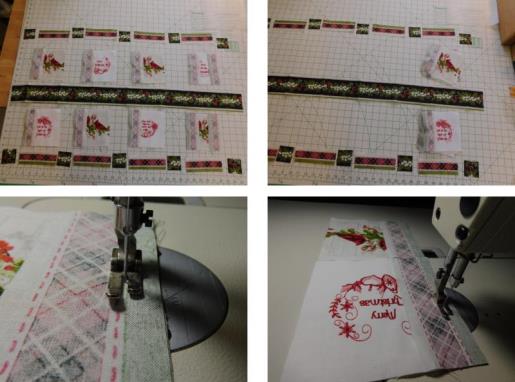 (Click Image to Enlarge) |
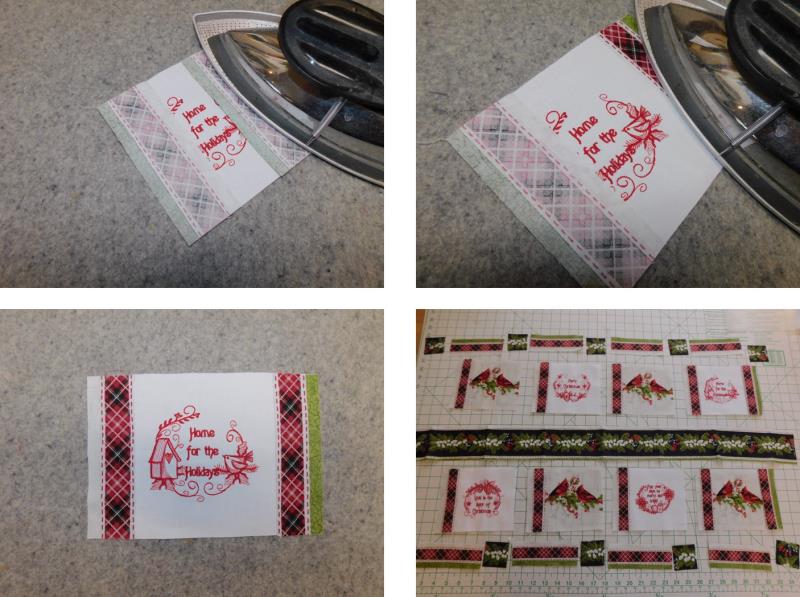
Step 7: | Cut the squares apart and then press to set the seam and then press the sashing open. Repeat pressing and then lay the squares out again. | 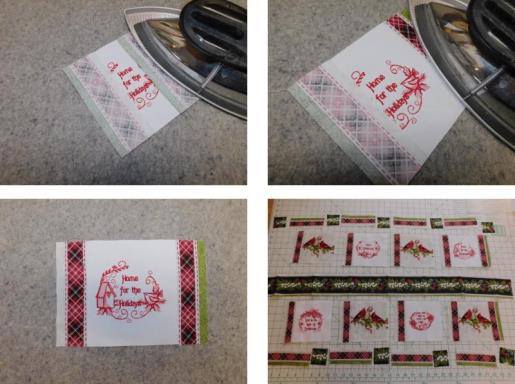 (Click Image to Enlarge) |
Step 8: | Now place the neighboring squares right sides together and stitch them. This time, I used the left side of the presser foot along the outer edge of the plaid and sewed the seam. Press the seams. Place the squares down again in order and to finish up joining the squares. Place the sets, right sides together, and pin. Sew the seams and press. | 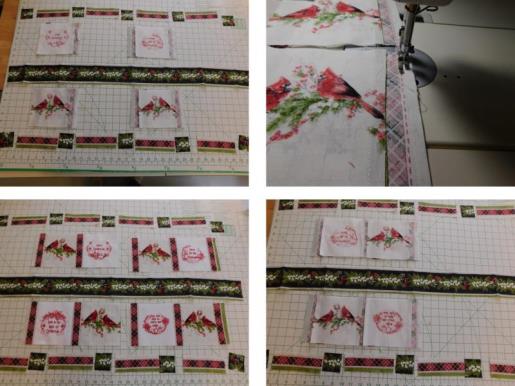 (Click Image to Enlarge) |
Step 9: | The top and bottom rows of squares are joined. Now will be time to join the corner stones and top and bottom sashing pieces. | 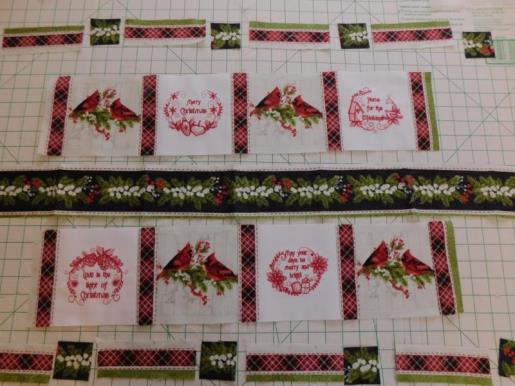 (Click Image to Enlarge) |
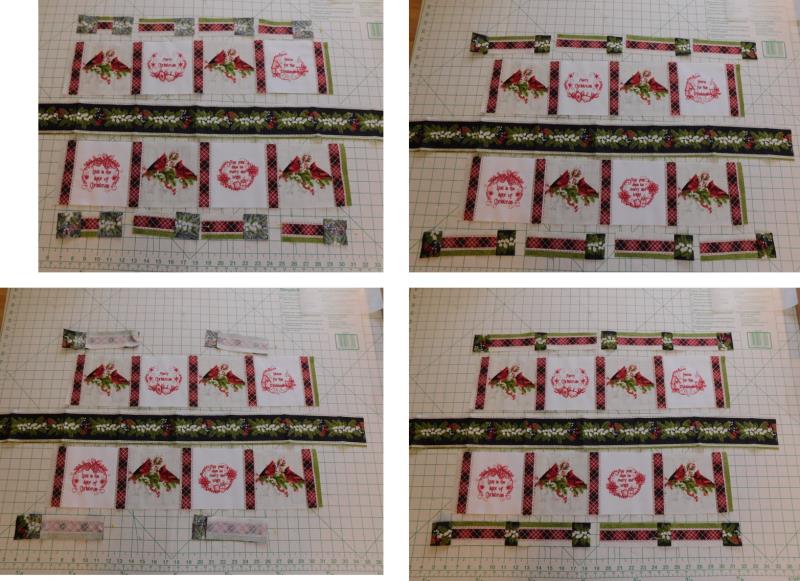
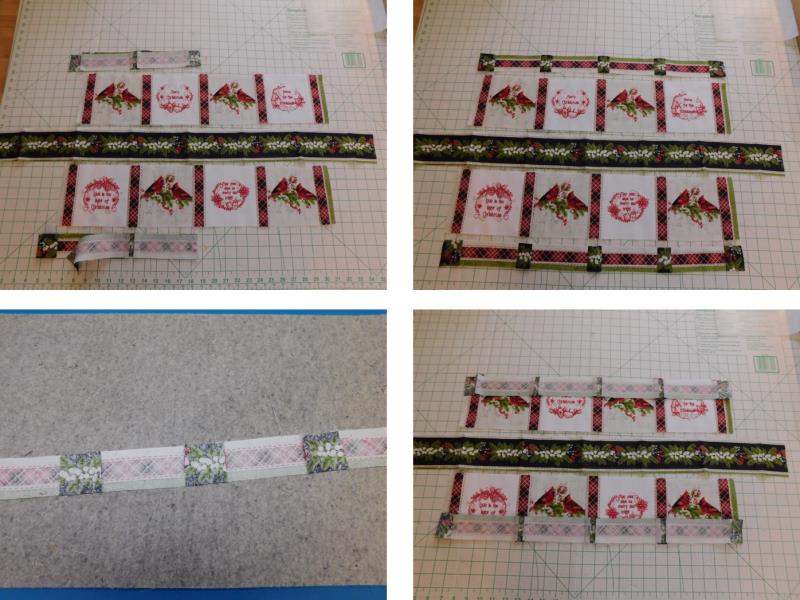
Step 10: | Lay the corner stones on top of the top and bottom sashing pieces as shown, stitch them using the same seam allowance used to stitch the sashing pieces to the blocks, and press the seams toward the sashing pieces. Lay neighboring sashing pieces, right sides together, stitch them, and press. | 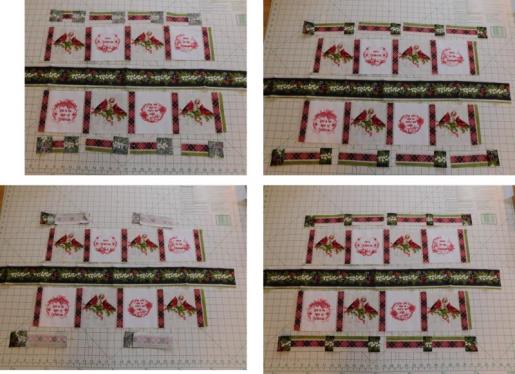 (Click Image to Enlarge) |
Step 11: | To finish, place the top sections together and the bottom sections together, stitch, and press. To finish the center all that is left is to join the top and bottom rows to the blocks and add the center border. Place the top and bottom sashing rows to the tops and bottoms of the squares. | 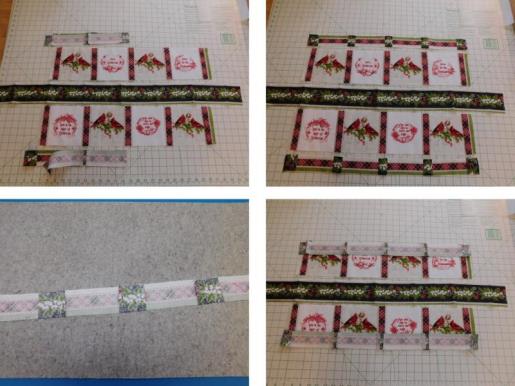 (Click Image to Enlarge) |
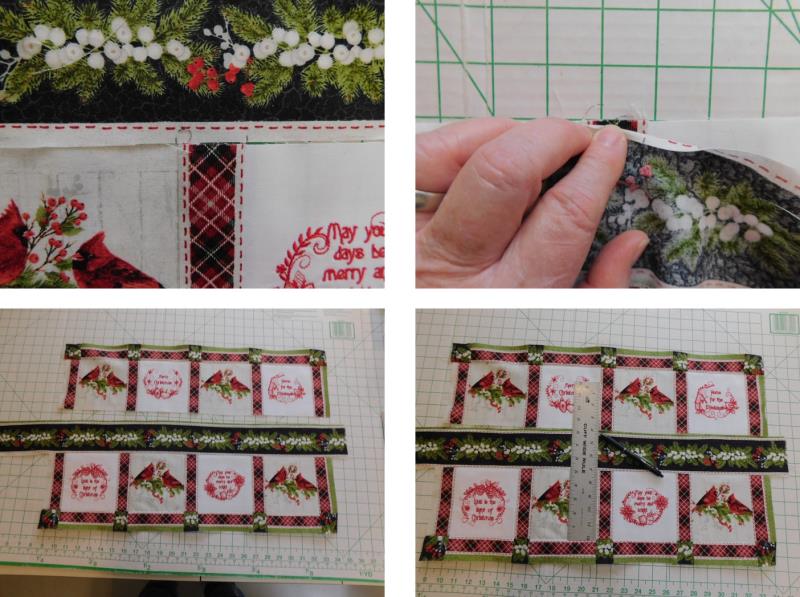
Step 12: | Lock the seams together and pin. Press the seams. Now for the border. Use a ruler to help align the squares. The sashing needs to align from top to bottom. | 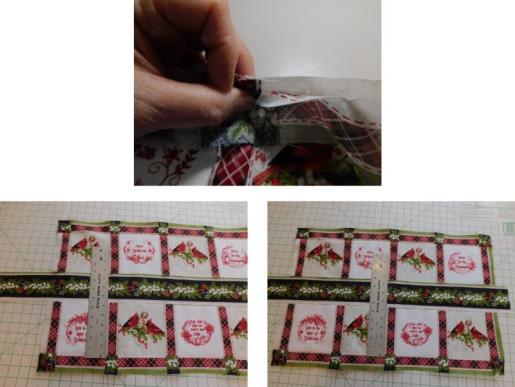 (Click Image to Enlarge) |
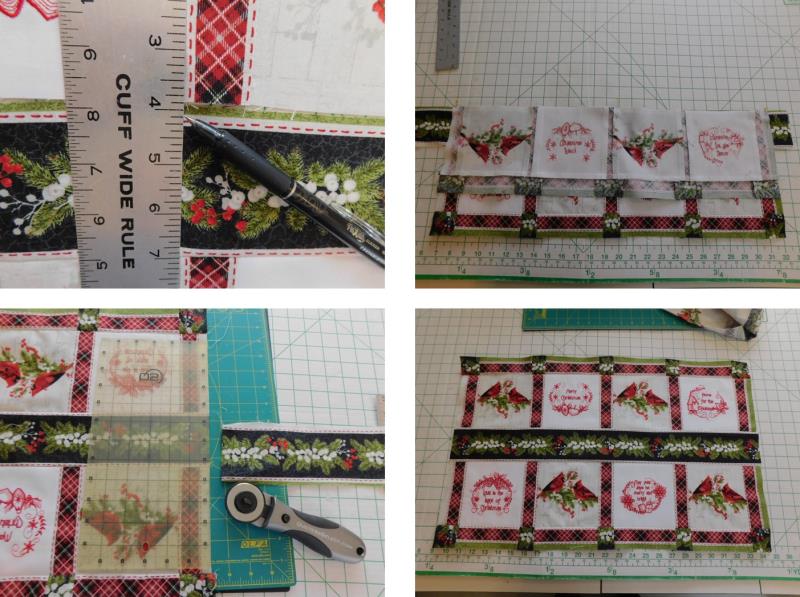
Step 13: | Using the ruler as shown in the previous photo, place tick marks with a pencil where the seams will join to the border top and bottom. Begin with the bottom row and join the border, pinning the tick marks to the seams. Stitch the seam and press. Now do the same for joining the bottom of the top row, to the top of the center border piece. | 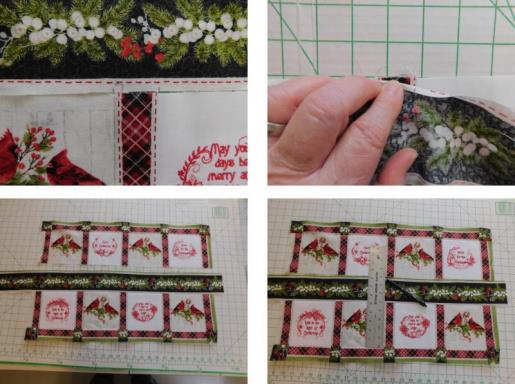 (Click Image to Enlarge) |
Step 14: | Use the ruler and draw a tick mark where the seam should meet the top of the border. Place right sides together, pin, stitch, and press. Use a ruler to trim off the ends of the border and now the center portion is finished. | 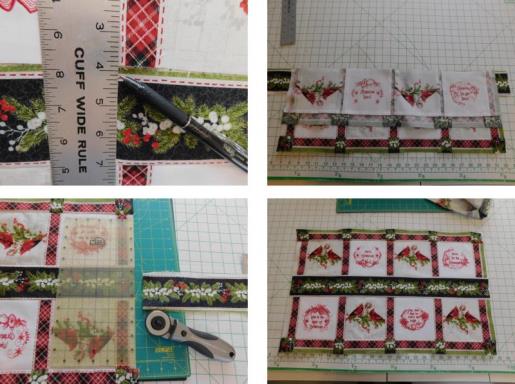 (Click Image to Enlarge) |
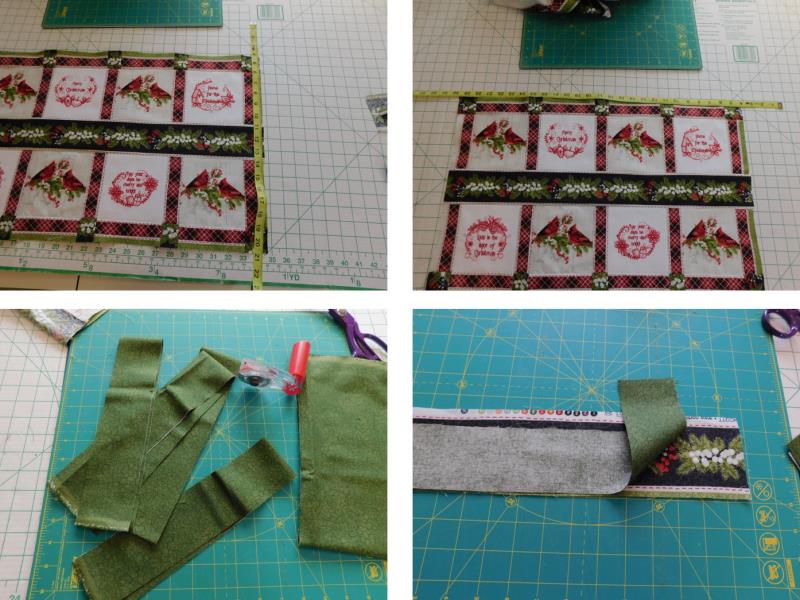
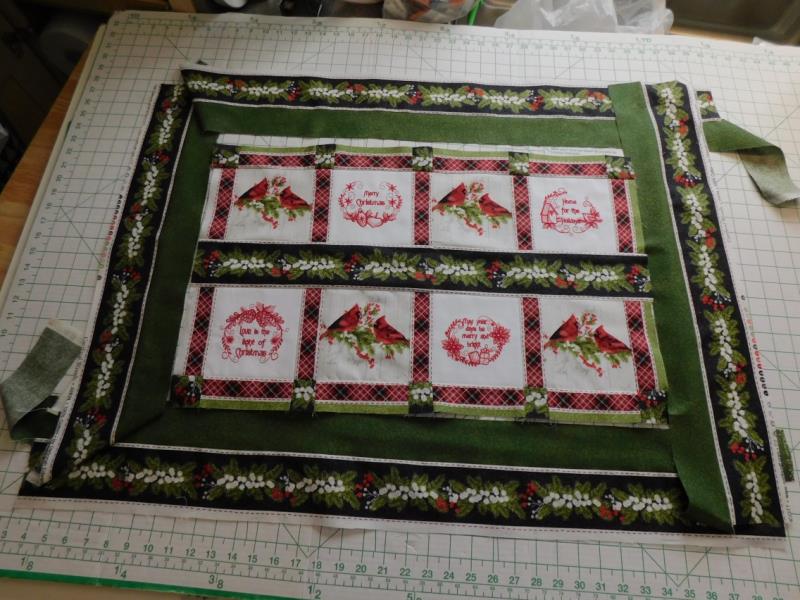
Step 15: | Measure the length and width of the center portion. Depending upon how you would like to apply the border pieces will depend upon the length the remaining pieces need to be cut. I decided to sew the border pieces together and then miter the corners, so I added and extra 10” to the measurement of the border pieces. For the inside borders, cut 4- 2.5” strips on the cross grain and press them with spray starch. Pin and sew the green strips, right sides together, to the border pieces. Use the same technique of using the presser foot as a guide for stitching. Repeat for the remaining three border pieces. | 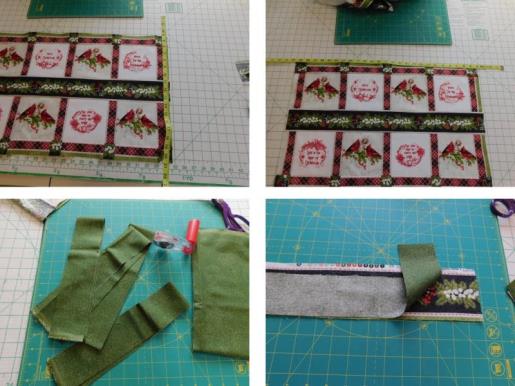 (Click Image to Enlarge) |
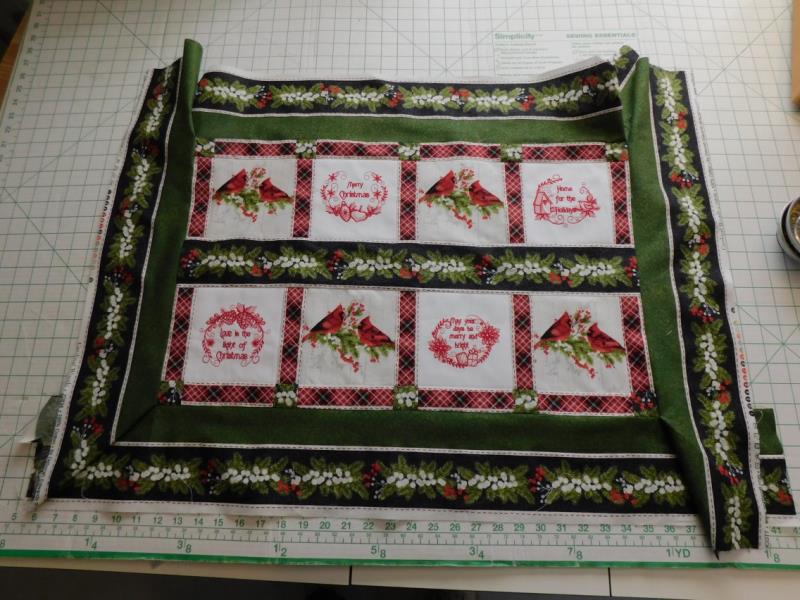
Step 16: | Lay the border pieces around the center and prepare to sew the borders to the center of the top. | 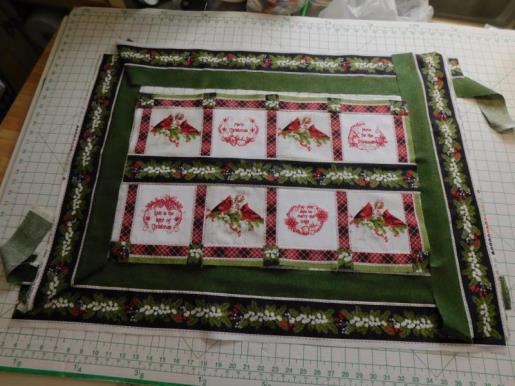 (Click Image to Enlarge) |
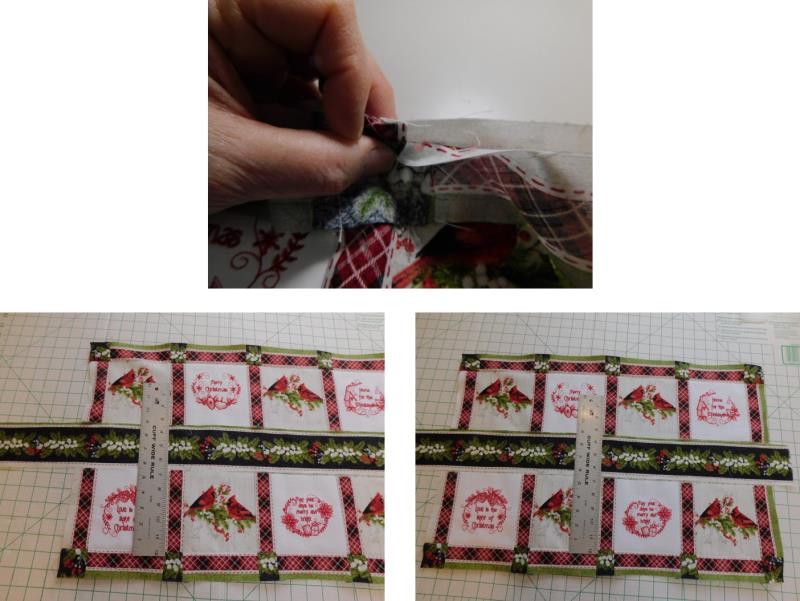
Step 17: | If mitering the corners of the border the stitching needs to stop the distance of the seam allowance from the corner. Measure and mark this amount (for me this was just over ¼”). When stitching on the borders, the stitching can not go past this mark. Repeat marking the other three corners. Place the top and bottom borders, right sides together, on top of the center piece. Stitch the borders beginning just about a thread inside the corner mark. | 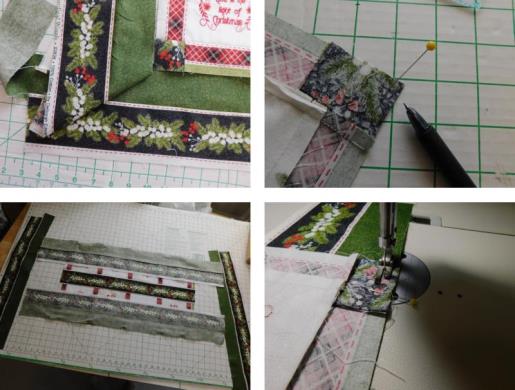 (Click Image to Enlarge) |
Step 18: | Repeat stitching the other border and then press the seams toward the green border. Next, lay the left and right borders right sides together on top of the center and pin them in place. Fold back the seam allowance of the previously stitch borders so you can readily see where to begin and end the stitching. Press each seam toward the green border. | 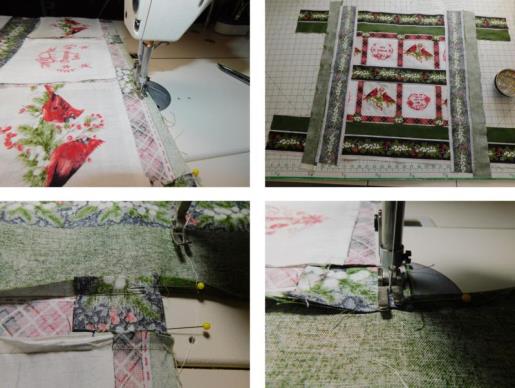 (Click Image to Enlarge) |
Step 19: | The last step to complete the top is to miter the corners. | 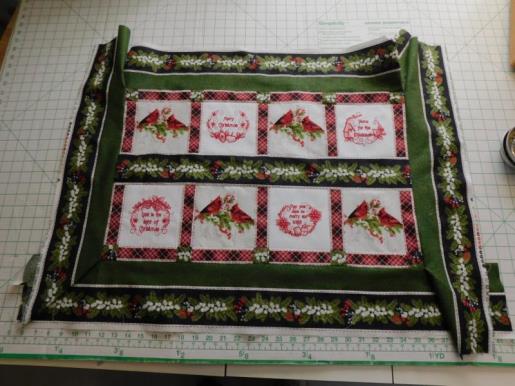 (Click Image to Enlarge) |
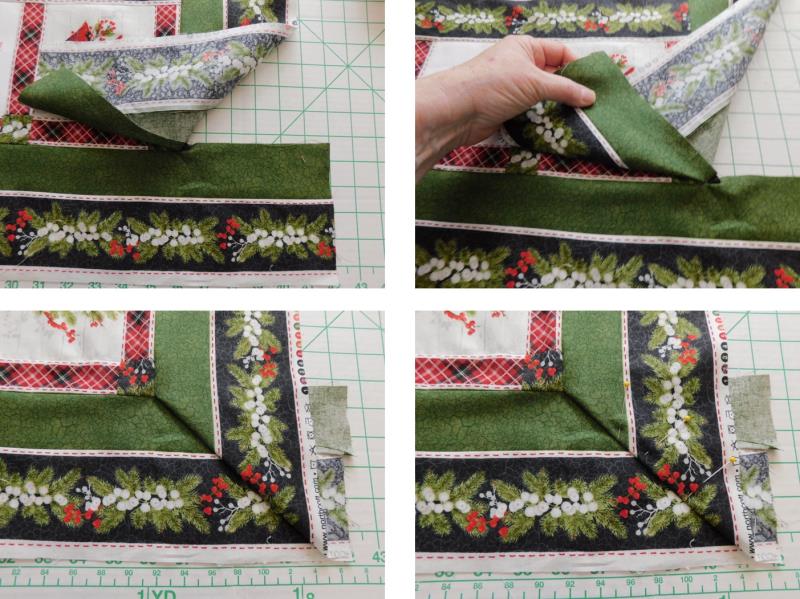
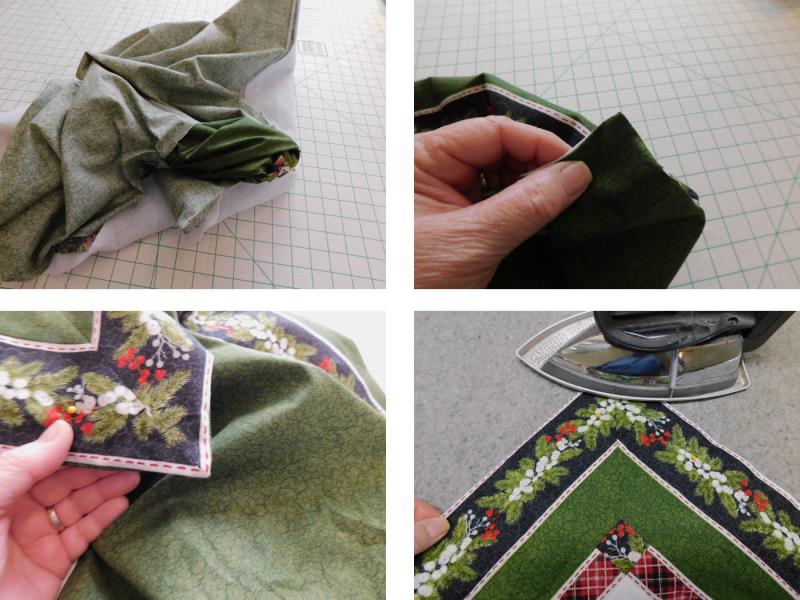
Step 20: | Begin at the lower right corner. Lay the bottom border out flat and turn the adjoining right border back at a 45-degree angle. If needed, fuss with the miter to get the angle to lie correctly. It is helpful to place pins through the pieces while doing this. | 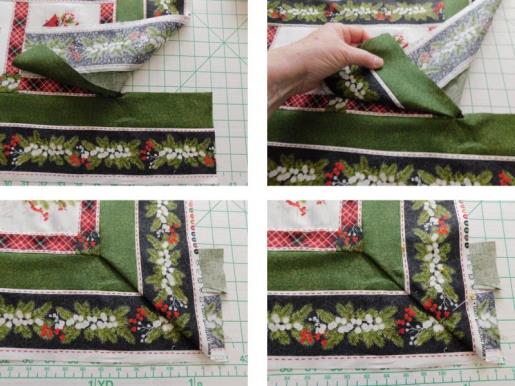 (Click Image to Enlarge) |
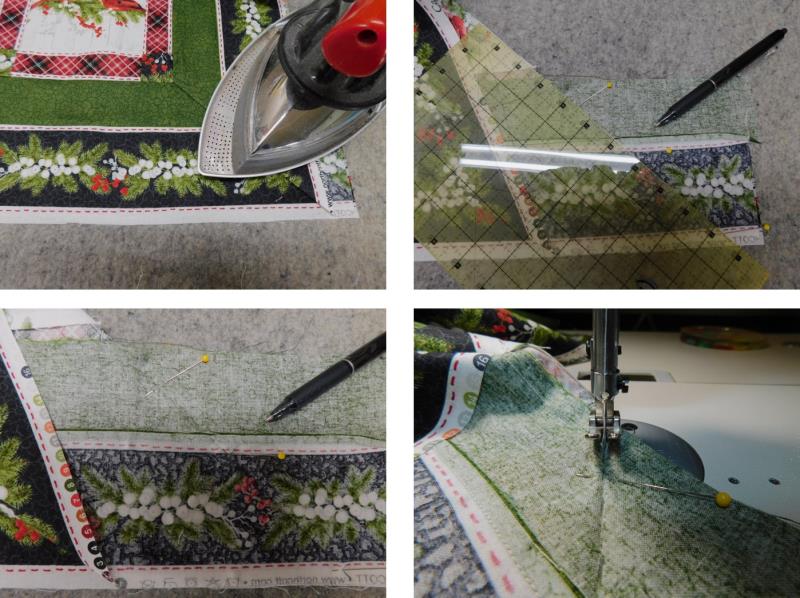
Step 21: | Carefully press a light crease in. Fold back the top border and then mark in the stitching line on top of the crease line on the back side of the fabric. Pin the pieces together. Begin just about a thread inside the corner intersecting threads, stitch forward a couple of stitches, back stitch (do not go past that corner stitching), | 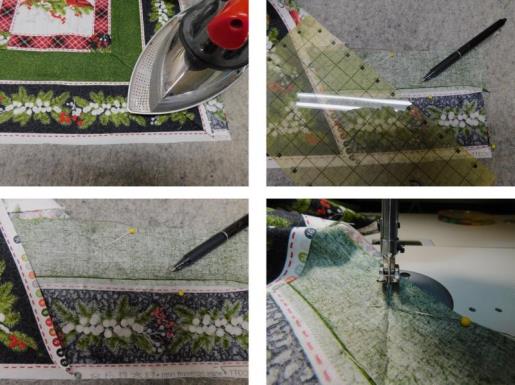 (Click Image to Enlarge) |
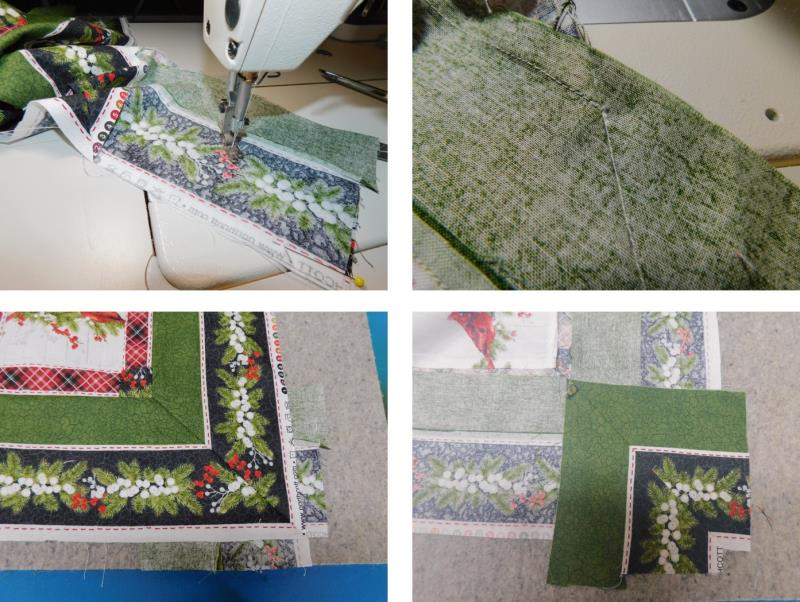
Step 22: | and then stitch the seam as marked. Before trimming, open up the seam and check to be sure the corners and seams meet as they should and that there is no puckering at the beginning corner. Set the seam and then press it open. | 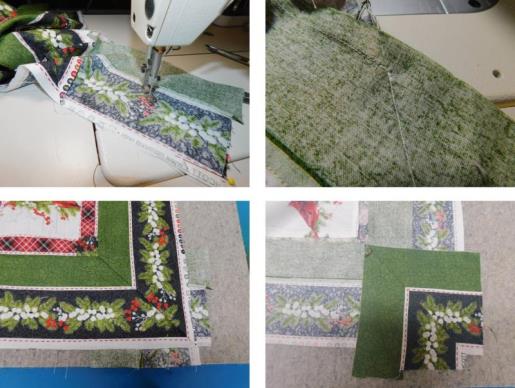 (Click Image to Enlarge) |
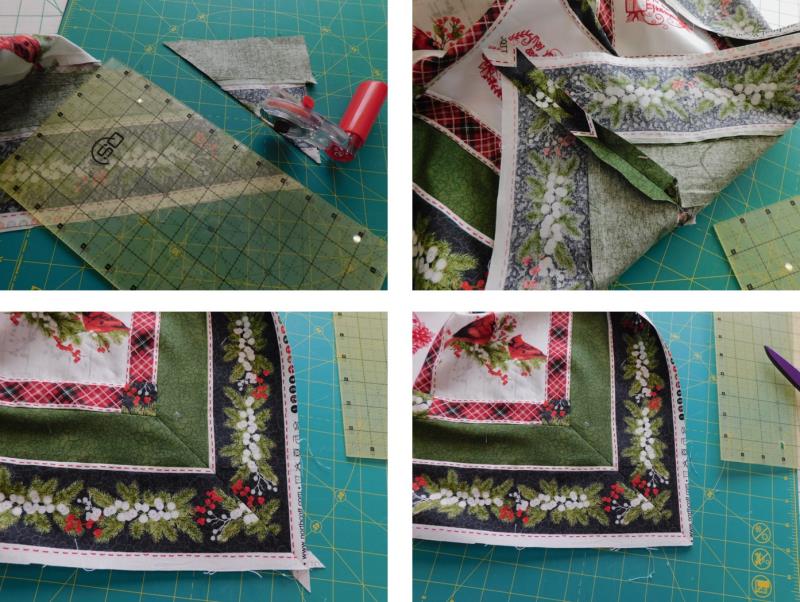
Step 23: | Trim the seam allowance to ½”. Trim off the dog ears at the lower edge of the corner. The first mitered edge for the border is completed. Repeat the steps to miter the remaining three corners. | 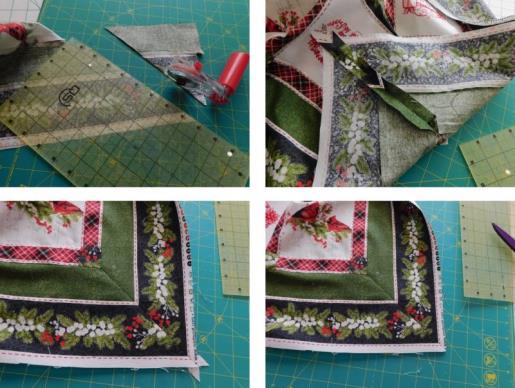 (Click Image to Enlarge) |
Step 24: | The top is completed. Now measure the completed pieces for the fleece batting and the backing piece and begin to think about how you will quilt the piece. | 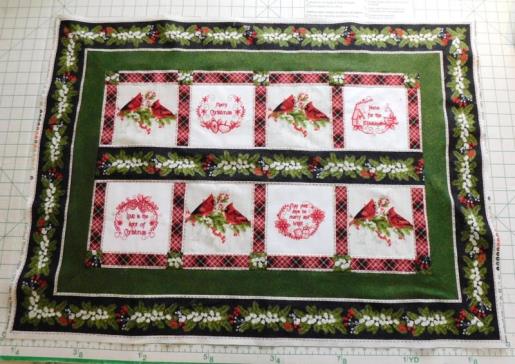 (Click Image to Enlarge) |
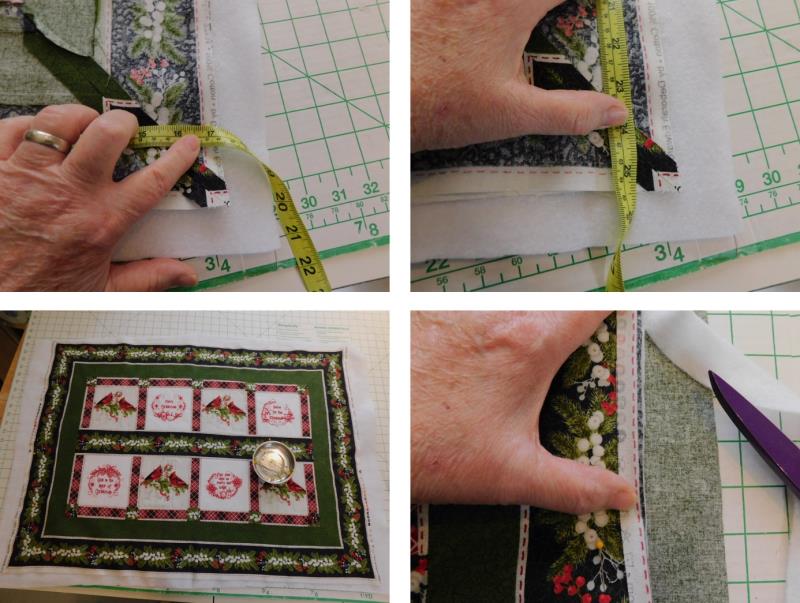
Step 25: | Measure the width and length of the top and cut a piece of batting about 1” larger all the way around. Pin the top to the batting all throughout the quilt top. Decide now how the quilt will be finished. Will you quilt and bind it, or will you use the turning method which is how I decided to finish this quilt. For that method, there should be no batting in the seam allowance so turn back along what will be the stitching line and trim the batting right next to that fold; do this on all four sides. | 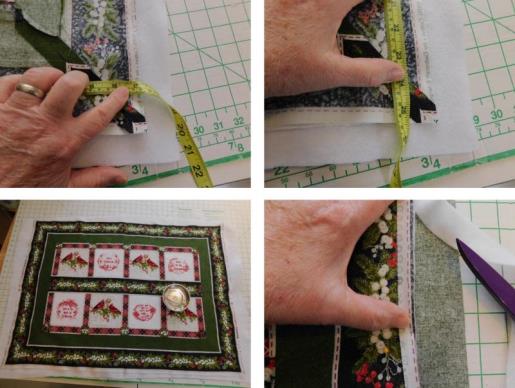 (Click Image to Enlarge) |
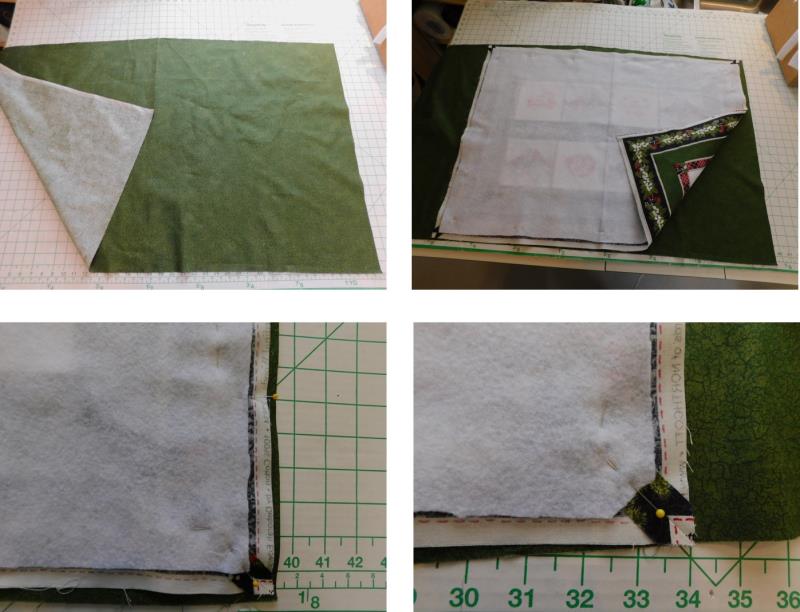
Step 26: | Cut a piece of backing 1” larger than the measured quilt top all the way around. Place the backing right side up. Now place the pinned top right side down on top of the backing, centering it. Pin the backing and top together around the outer edges. | 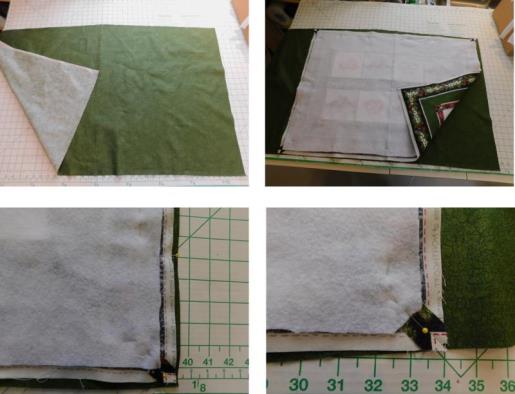 (Click Image to Enlarge) |
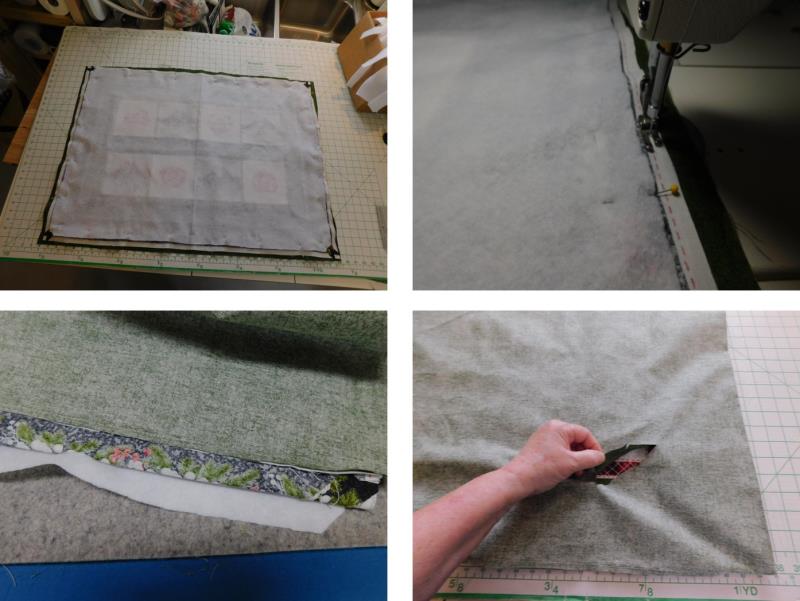
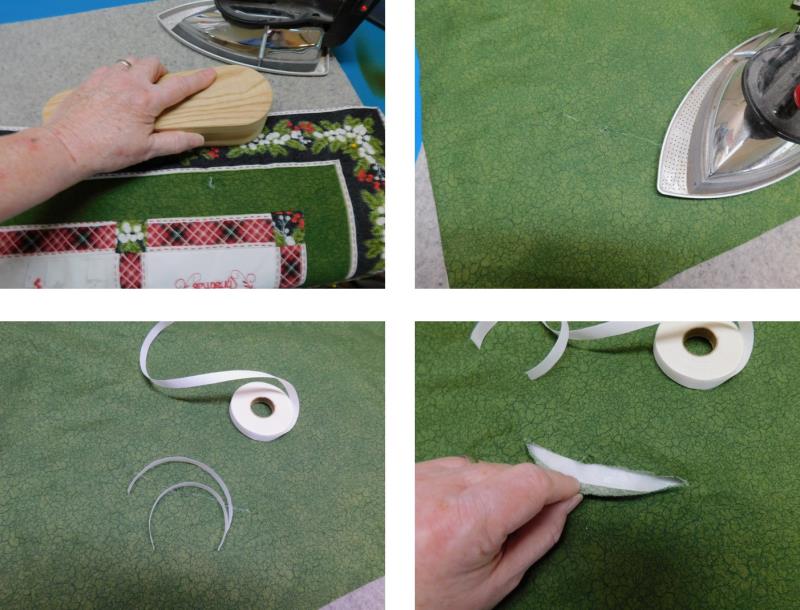
Step 27: | Make sure everything is smooth and ready to be stitched all the way around. I like to stitch the sides and then press those seams toward the front. Then I corner-wrap the edges and stitch the top and bottom seams and press those toward the top. To be able to turn the table runner to the right side, cut the smallest slit possible on the lower portion of the back fabric (it will be sealed and quilt label placed over it to hide it later on). | 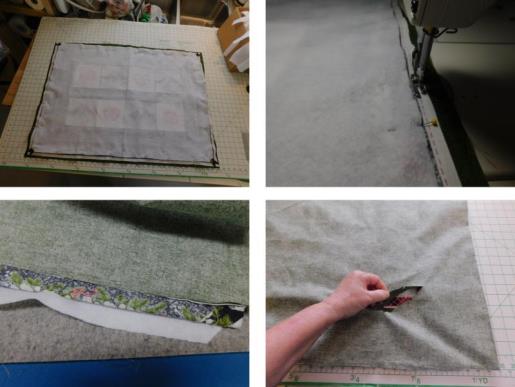 (Click Image to Enlarge) |
Step 28: | Very carefully turn the table runner to the right side, forming the corners and pressing them. | 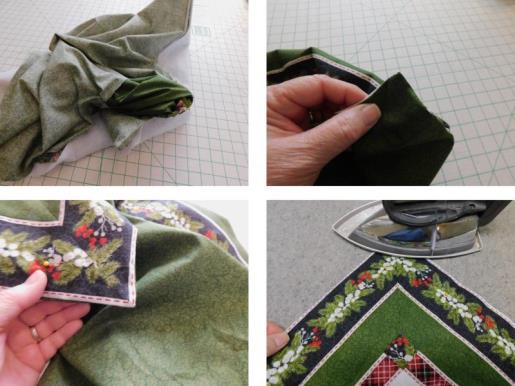 (Click Image to Enlarge) |
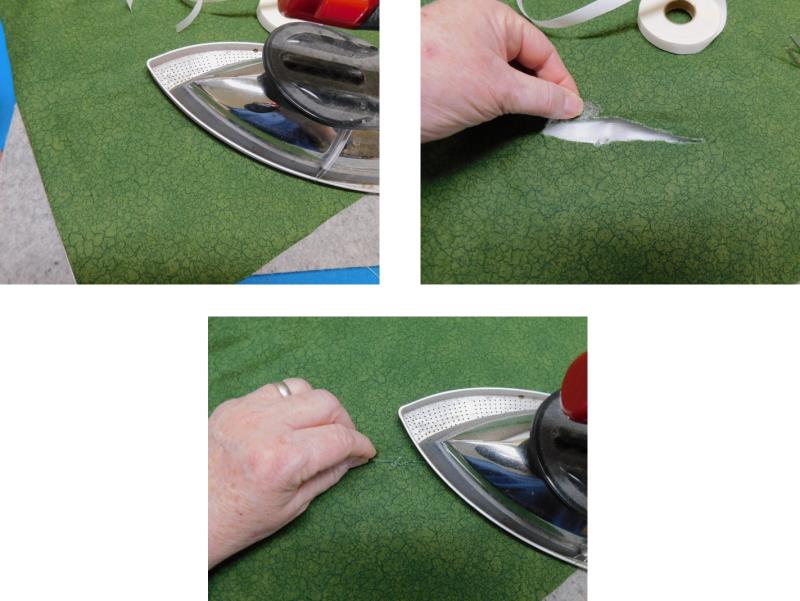
Step 29: | When pressing the outer edge seams and corners, it is helpful to use a tailor’s clapper if you have one. Turn the table runner to the back side, bring the slit edges together and lightly press. Cut two pieces of fusible tape slightly longer than the slit. Remove the paper from one and slip it under one side of the slit. | 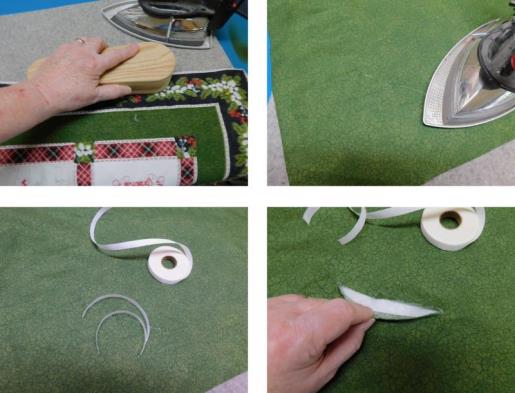 (Click Image to Enlarge) |
Step 30: | Follow the manufacturer’s directions for fusing the fabric down. Now lift up the remaining side of the slit, place down the other piece of fusible and bringing the cut edge to the first, press and fuse the tape to hold the cut edges in place. | 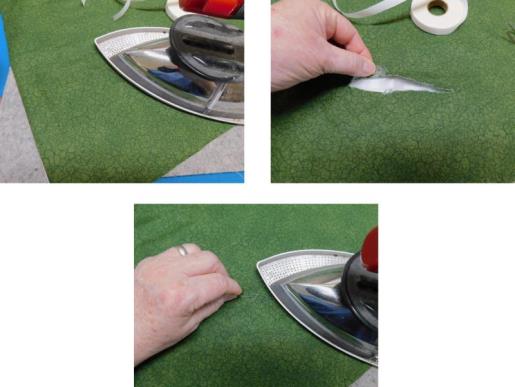 (Click Image to Enlarge) |
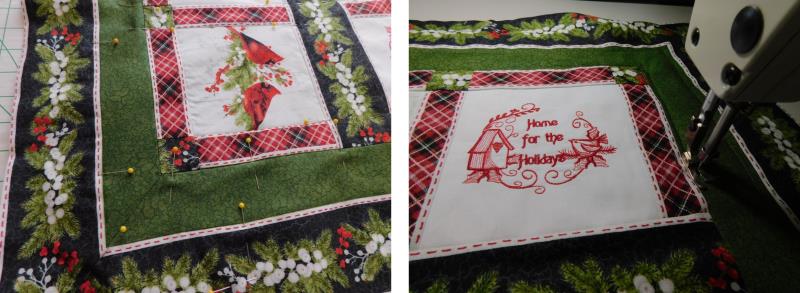
Step 31: | Now quilt the table runner as desired. Because I have to pop this in the mail, I chose to just do some straight stitching around the border and sashing edges so I could complete it quickly. | 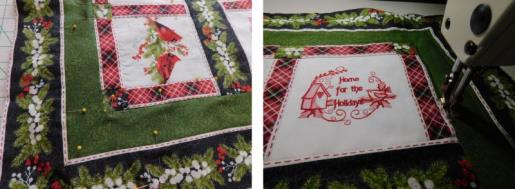 (Click Image to Enlarge) |
Step 32: | Now all that is left is to attach the label. | 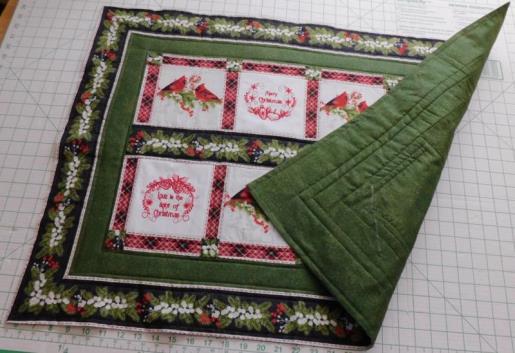 (Click Image to Enlarge) |
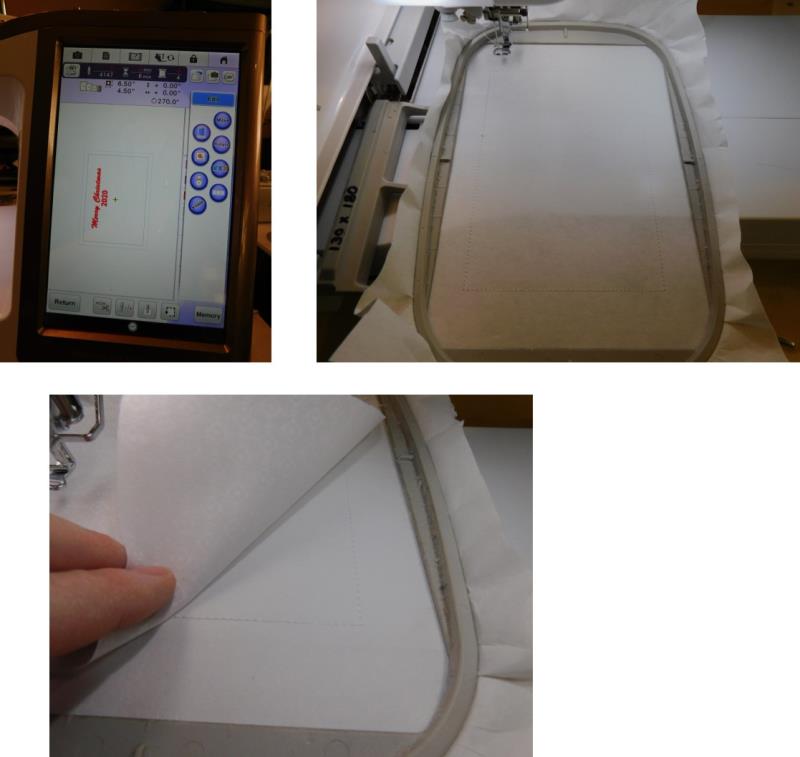
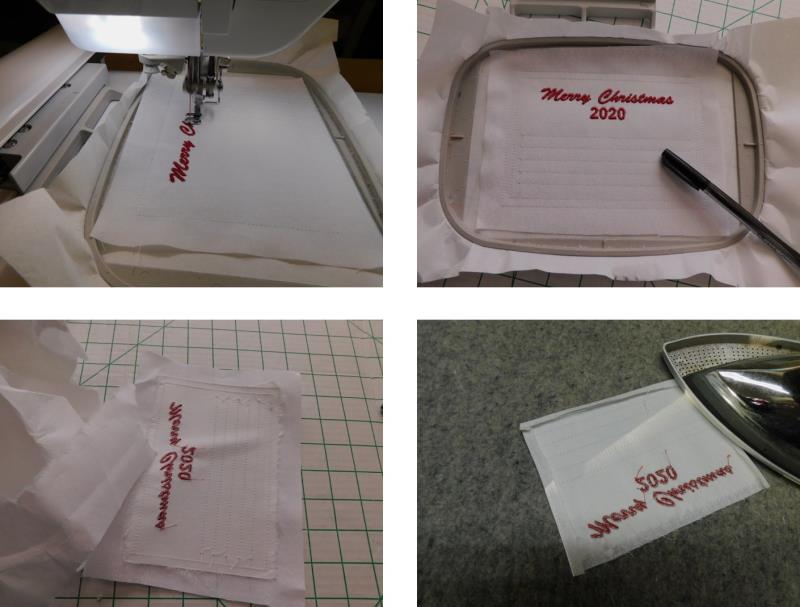
Step 33: | Load the Christmas 2020 quilt label design on the machine and rotate it to fit in the hoop. Hoop one layer of tearaway. Stitch color 1, the placement line. Place down the fabric over the placement line. | 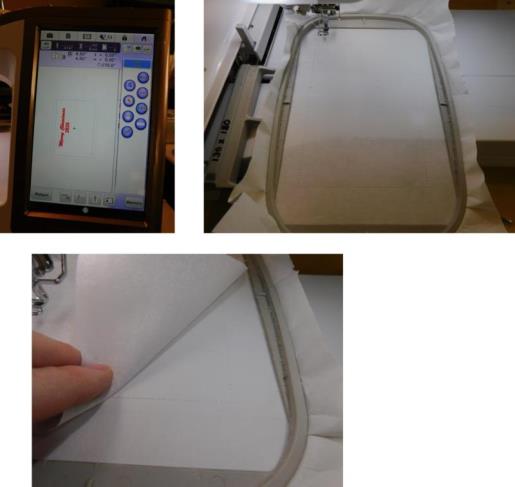 (Click Image to Enlarge) |
Step 34: | Color 2 will tack down the fabric. Continue stitching following the color sequence. Remove the embroidery from the hoop and tear away the outer edges of the stabilizer. Cut along the outer most stitching line and then fold back the seams and press along the inner stitching line (color 2). Use a permanent marking pen to write a sentiment on the label and don’t forget to sign your name! | 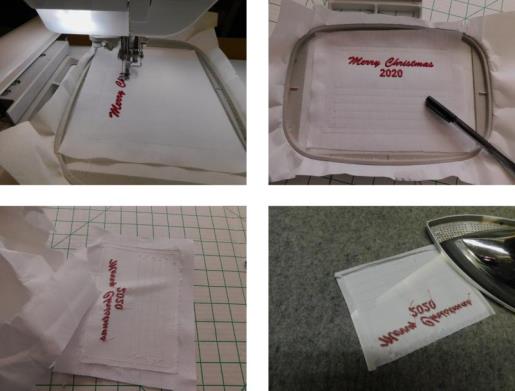 (Click Image to Enlarge) |
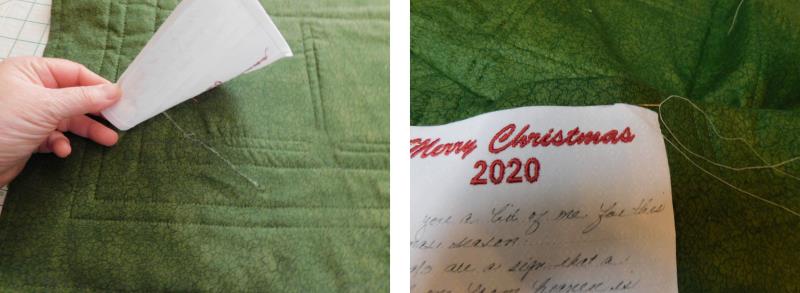
Step 35: | Place and pin the label over the slit on the back of the table runner. Hand stitch the label in place. | 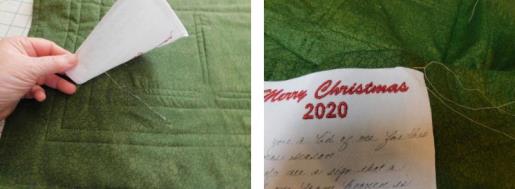 (Click Image to Enlarge) |
Step 36: | The table runner is completed. | 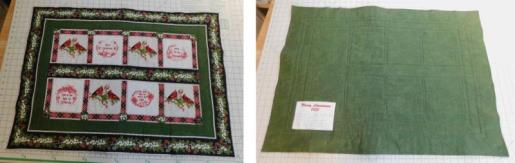 (Click Image to Enlarge) |
Step 37: | Congratulations! You’ll have a gift to give or a table runner to keep which will be used year after year. | 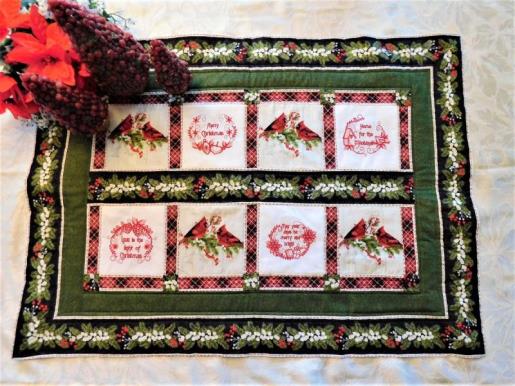 (Click Image to Enlarge) |
|