Border OptionsHugging border, circle, square, or rectangle — with a 3mm satin stitch.
Backing OptionsAvailable with iron-on, sew-on, or velcro backing.
Fast ShippingShipped quickly from the USA.
Free Online Tools
Powerful embroidery utilities that save time and prevent costly mistakes.
Stitch AssistantRECOMMENDED
Get the exact stabilizer, machine settings, needle, and thread color sequence for every embroidery design you purchase — based on that design's stitch density, dimensions, and color count.
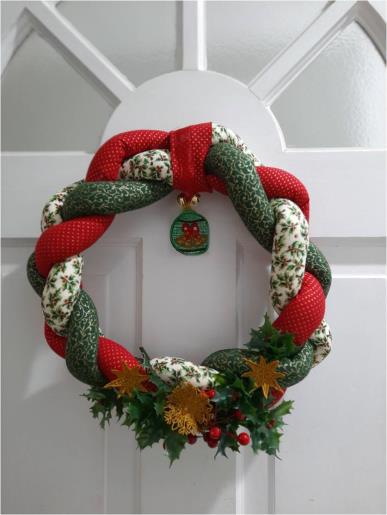
Craft a stunning Christmas wreath using freestanding lace elements to enhance your holiday decor. This braided wreath is perfect for adding festive charm to your door. Step-by-step instructions are included.
For FSL always wind your bobbin with the same color embroidery thread as you will see both sides of the lace. For the Jingle Bell Ornament, I used the largest size, for the star and snowflake I used the 2” size.
Step 1:
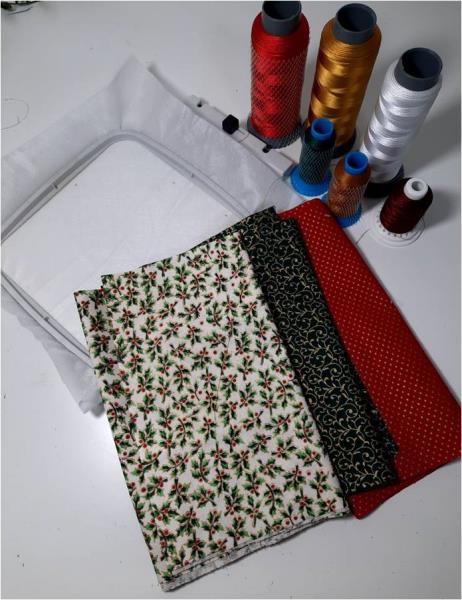
Gather the materials and read through the instructions before beginning. Have a copy of the color sequence on hand to refer to.
(Click Image to Enlarge)
Step 2:
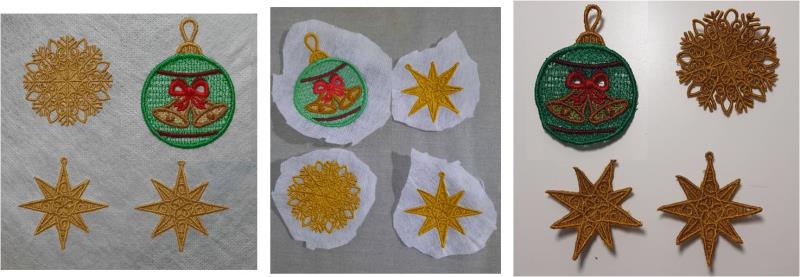
Hoop the stabilizer and load the 4 designs for one hooping. Stitch out the FSL designs. Once complete, unhoop the designs and loosely cut away the water soluble stabilizer. Then follow manufactuers instructions on how to dissolve the stabilizer. Allow designs to dry, then press flat.
(Click Image to Enlarge)
Step 3:
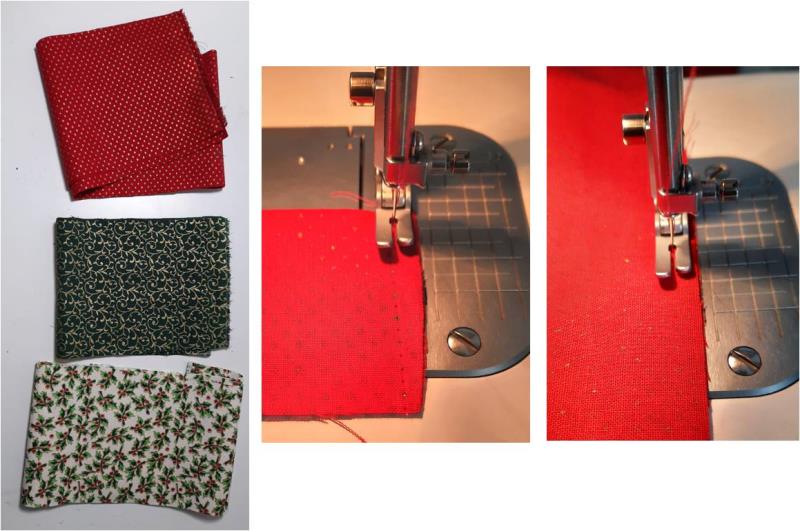
From the 3 printed fabrics, cut a strip 4 ¾” wide x 45” for each print. 45” is generally the width of most cotton fabrics, you wouldn’t want anything shorter than this length. Fold the strip in half width wise and stitch across the short edge then all the way down the long edge using a 1/4” seam.
(Click Image to Enlarge)
Step 4:
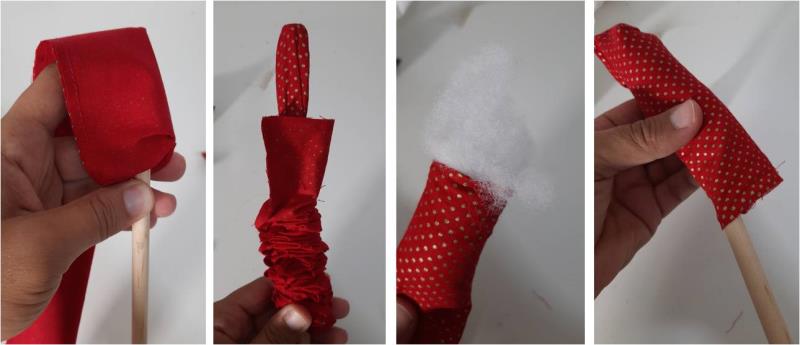
I have used a piece of wooden dowel to turn the strip through as it is quite long. start to fill with the polyester filling, ensuring the tube is full but not too firm. Use the dowel to push the filling to the bottom of the tube as you go.
(Click Image to Enlarge)
Step 5:
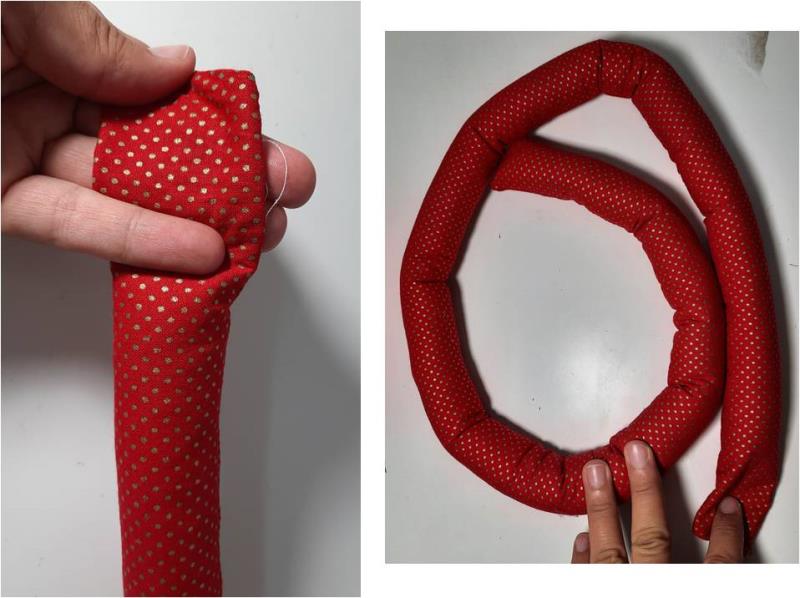
Fill the tube, leaving approx 1” unfilled at the end
(Click Image to Enlarge)
Step 6:
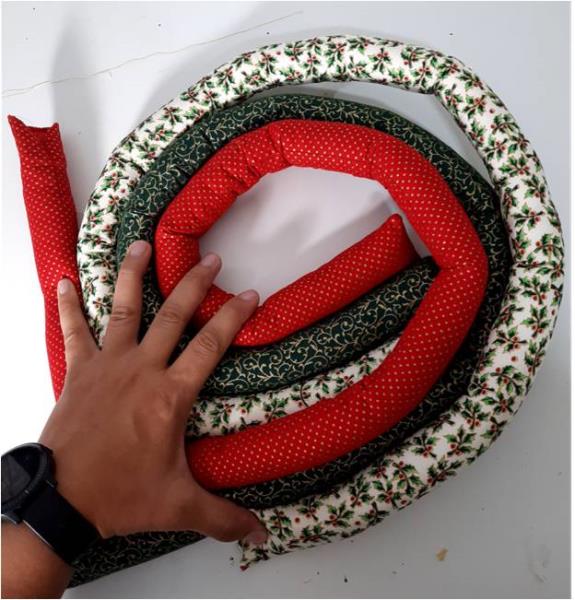
Fill the remaining 2 tubes so all 3 are full.
(Click Image to Enlarge)
Step 7:
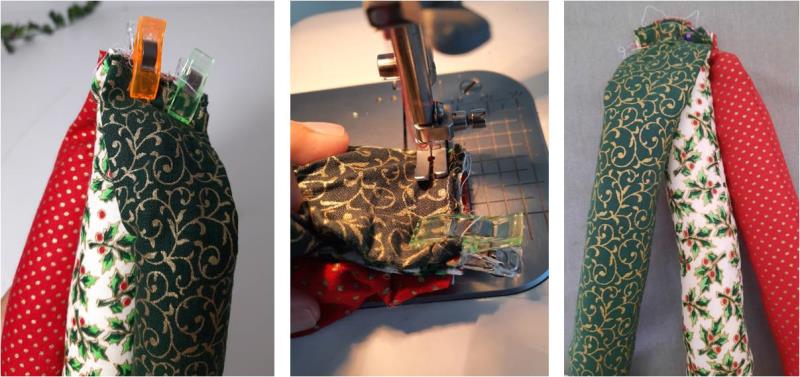
Match all open ends of tubes and pin together. Stitch across to secure the 3 together.
(Click Image to Enlarge)
Step 8:
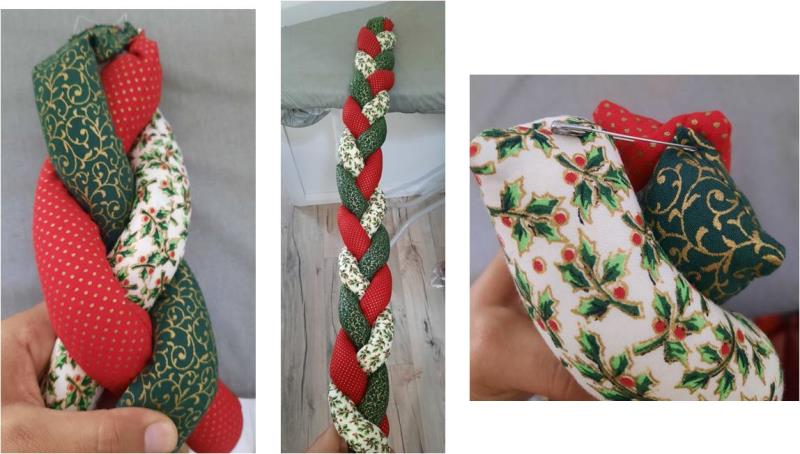
Start to plait the tubes together, ensuring it is a firm plait but not too tight so it can form a circle. At the end, secure the 3 tubes together with a safety pin for now so avoid it unraveling
(Click Image to Enlarge)
Step 9:
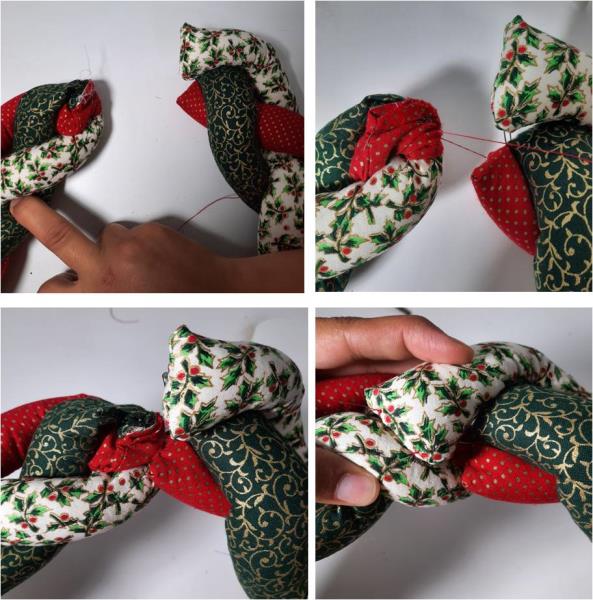
Form a circle and join the ends together. I hand stitched each strip to its matching end
(Click Image to Enlarge)
Step 10:
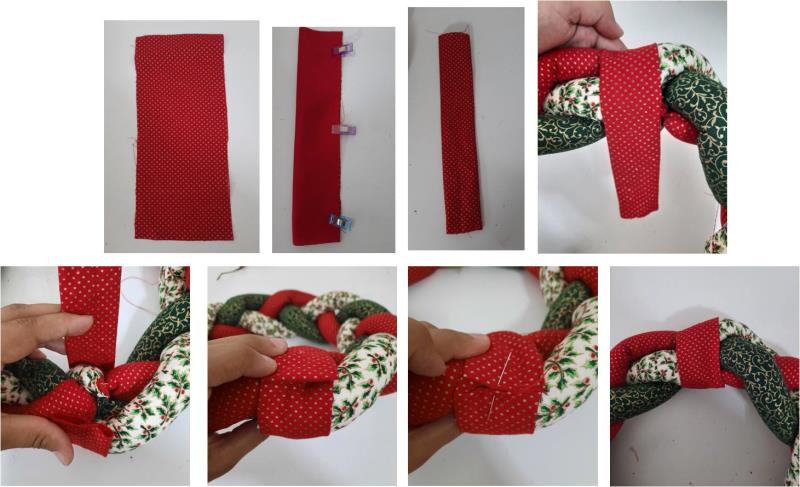
Now cut another strip from one of the patterned fabrics, 4” x 9”. Fold it in half widthwise and stitch down the long edge to form a tube. Turn it right side out and press flat with the seam at the centre back. Wrap it around the join of the wreath to cover the joining seams. Hand stitch that tube together.
(Click Image to Enlarge)
Step 11:
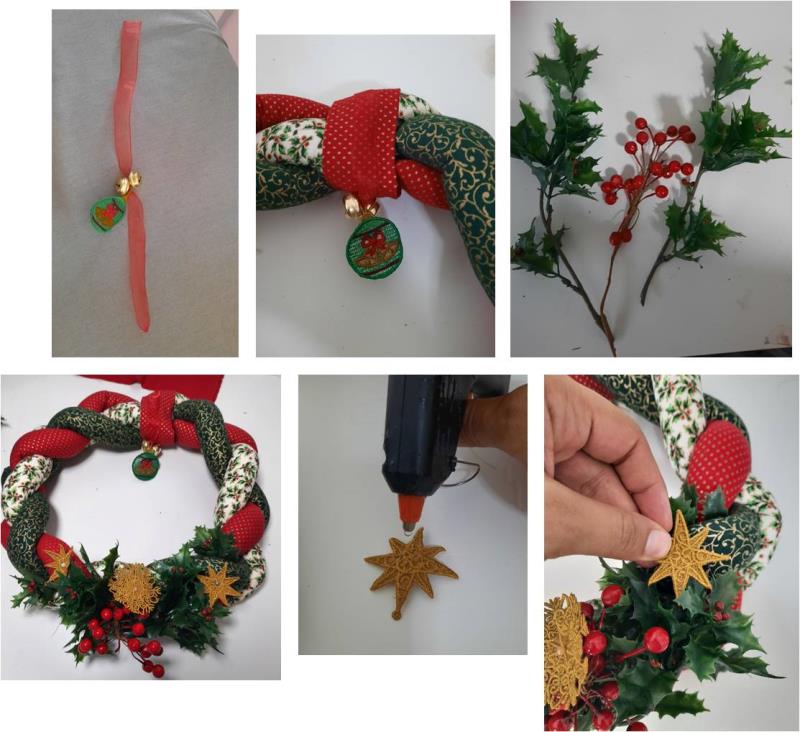
Thread the 2 gold bells and the FSL Jingle Bell onto the organza ribbon then wrap the ribbon around the top of the wreath, over the wrap which covers the joins, and tie together to secure in place. Use the decorative Christmas greenery to decorate the bottom of the wreath, you can simply weave the stems through the plait of the wreath and hot glue gun in place. Then hot glue gun the stars and snowflake in place on the greenery.
(Click Image to Enlarge)
Step 12:
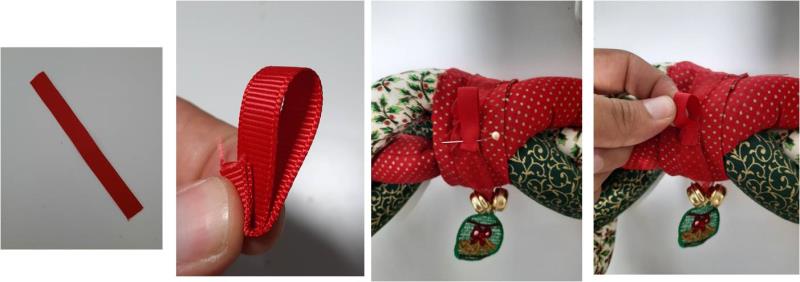
If you need a loop on the back of your wreath, to hang it, simply cut a 3” piece of 10mm wide grosgrain ribbon. Fold it in half, then fold up 10mm. pin it to the back of the wreath and hand stitch in place.
(Click Image to Enlarge)
Step 13:
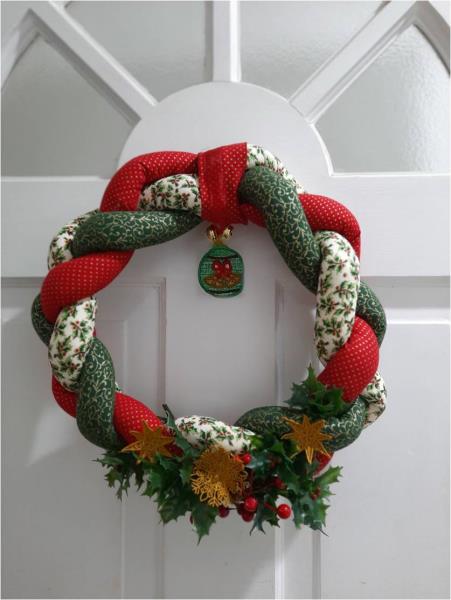
Your unique Christmas Plaited Wreath is now complete and ready to hang on your door as a beautiful Christmas welcome into your home.