Border OptionsHugging border, circle, square, or rectangle — with a 3mm satin stitch.
Backing OptionsAvailable with iron-on, sew-on, or velcro backing.
Fast ShippingShipped quickly from the USA.
Free Online Tools
Powerful embroidery utilities that save time and prevent costly mistakes.
Stitch AssistantRECOMMENDED
Get the exact stabilizer, machine settings, needle, and thread color sequence for every embroidery design you purchase — based on that design's stitch density, dimensions, and color count.
Celebrate the season with this Applique Thanksgiving Blessings Table Topper, featuring a 'Quilt As You Go' method. Perfect for adding a festive touch to your dining table, it showcases a heartfelt Thanksgiving message. Step-by-step instructions are included.
Step
of
Applique Thanksgiving Blessings Table Topper
By Marisa Littleton
Thanksgiving Blessing...Let us come before him with Thanksgiving. A seasonal design available in 5 sizes. Size 4.94"x6" was used for this project. A sewing machine is needed to finish this project. A 1/4" seam line was used for all sewing. A 'Quilt As You Go' (QAYG) project that can be used as a table topper or wall hanging. Finished measurements may vary slightly from person to person. Border strips have been cut longer to allow for the difference. You may prefer to measure before cutting the border strips.
Step 1:
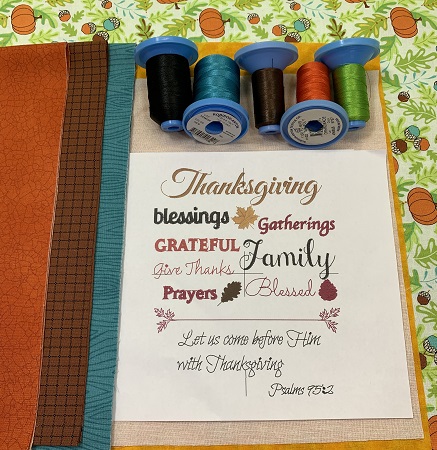
Read all directions before beginning the project. Gather the materials for the project. Prepare the fabric. Iron the fabric. Cut the fabric using the following sizes:
Fabric 1: One 12"x12" piece of neutral fabric for center (yellow).
Fabric 2: Four 1.5"x 14" strips of coordinating fabric (blue).
Fabric 3: Four 2.5"x16" strips of fabric (printed).
Fabric 4: Four 2"x18" strips brown textured fabric.
Fabric 5: Four 3"x22" strips of green blender fabric.
Fabric 6: Four 1.5"xWidth of Fabric (WOF) binding fabric.
Fabric 7: One 24"x24" piece of coordinating fabric (backing).
Step 2:
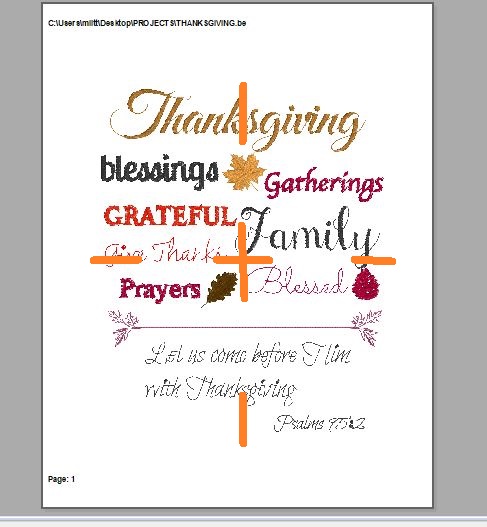
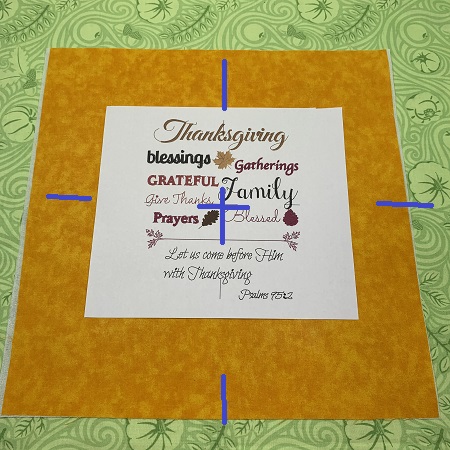
A template is a printout of the design from an embroidery software program. The template is the actual size of the design which makes a great visual tool. The vertical and horizontal axis on the template provides perfect placement of the embroidery designs. Embrilliance 'Essentials' embroidery software program was used to make the design template. Print a design template.
(Click Image to Enlarge)
Step 3:
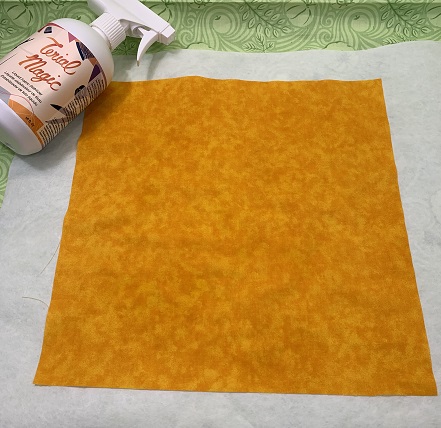
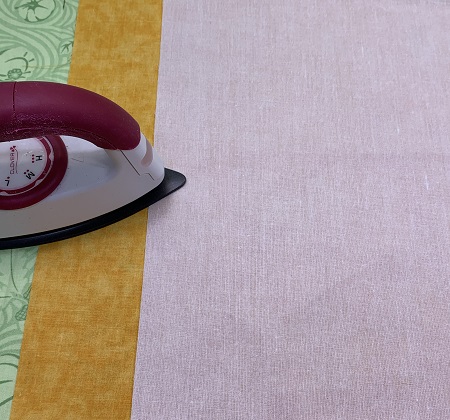
Spray the front and back of the 12"x12" fabric piece with Terial Magic. Fabric will be damp. Place a piece of cutaway stabilizer on your iron surface. (The stabilizer or old sheet must be larger than the fabric pieces.) Iron the fabric piece dry. The fabric will be very stiff and paper thin.
NOTE:Terial Magic is a spray-on fabric stabilizer that makes the fabric more paper-like, stable, but not too stiff to cut or sew. Great for low to no fray on fabrics with more precision for cutting and stitching.
Step 4:
Follow the package directions on the Pellon SF101 super flex interfacing to bond it to the 12"x12" piece of fabric.
Step 5:
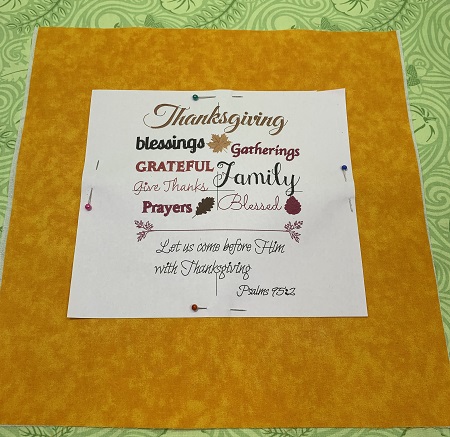
Use the design template as a placement tool on the 12"x12" piece of fabric. Match the center points on the design template and fabric. Use the vertical and horizontal axis as guide points. Pin the template in place on the fabric.
Step 6:
Hoop one piece of No Show mesh stabilizer. Float the 12"x12" piece of fabric on the stabilizer. Use a light mist of 505 Temporary spray to hold the fabric in place on the stabilizer.
Step 7:
Load the design onto the machine. Attach the embroidery hoop. Check the needle and bobbin. If using a design template for placement, carefully remove the template from the top of the fabric. Stitch the design.
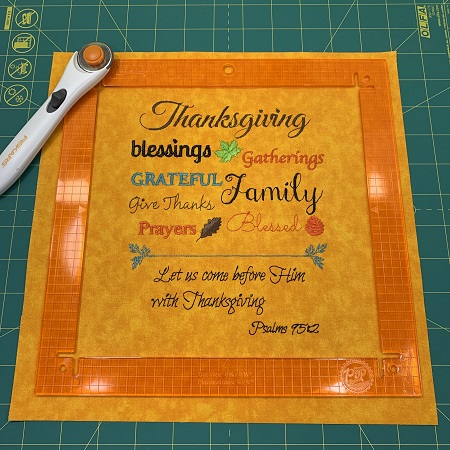
Trim the finished design block to 10.5"x10.5". A Kimberbell Orange Pop ruler was used to square the block.
Step 8:
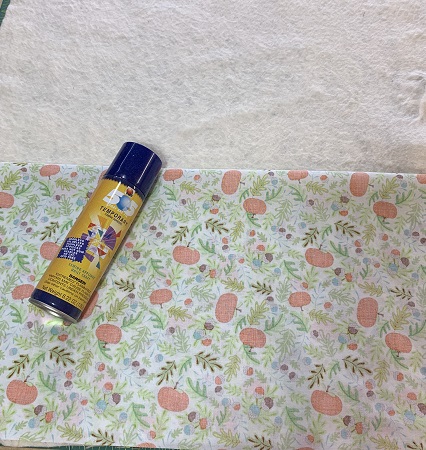
Lay the 24"x24" piece of low nap batting on a flat surface. The surface of the batting needs to be smooth. Lightly mist the top of the batting with 505 Temporary Adhesive spray. Fold the 24"x24" piece of cotton fabric in half with right sides together. Cover one side of the batting with the 24"x24" piece of backing fabric. Fold the other side of the cotton fabric down onto the batting. The fabric surface needs to be smooth and wrinkle free.
Step 9:
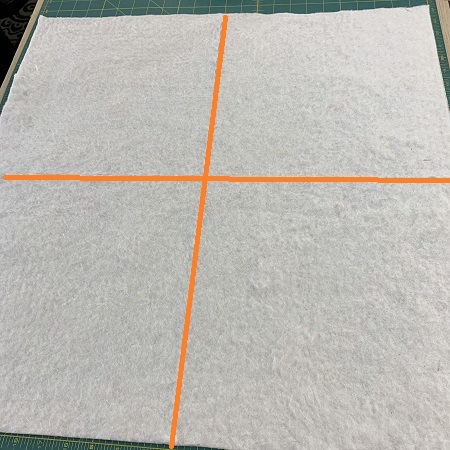
Lay the backing fabric on a flat surface so that the batting is facing you. Find the middle of each side of the 24"x24" square. Draw a line from side to side from each mid point using a fabric marker.
Step 10:
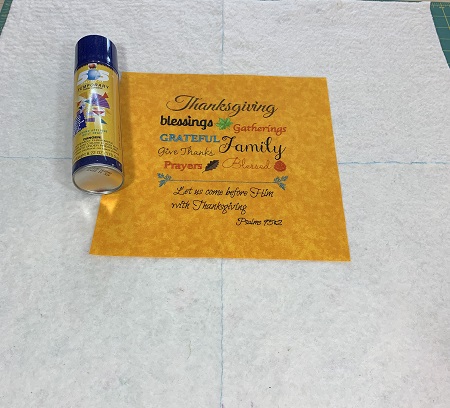
Lightly mist the center of the batting with 505 Temporary Adhesive spray. Center the 10.5"x10.5" embroidered piece on the batting. Make sure the fabric surface is smooth & wrinkle free.
Step 11:
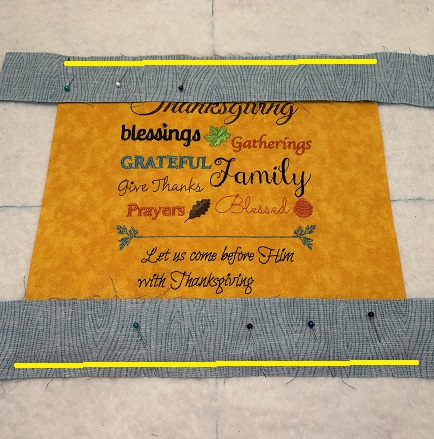
A Quilt As You Go (QAYG) technique will be used when sewing the border strips on the topper. Place a 1.5"x14" strip on two opposite sides of the center block. Pin in place. Sew a 1/4" seam along the edge.
Step 12:
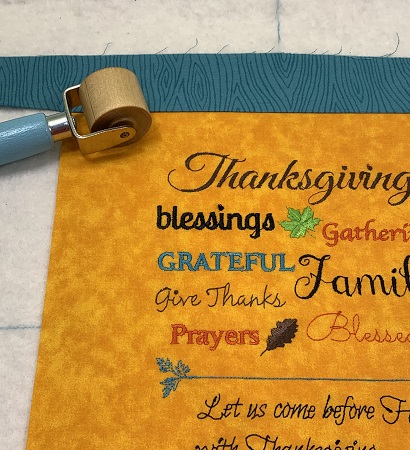
Fold the fabric strip back. Run a pressing tool along the seam line.
Step 13:
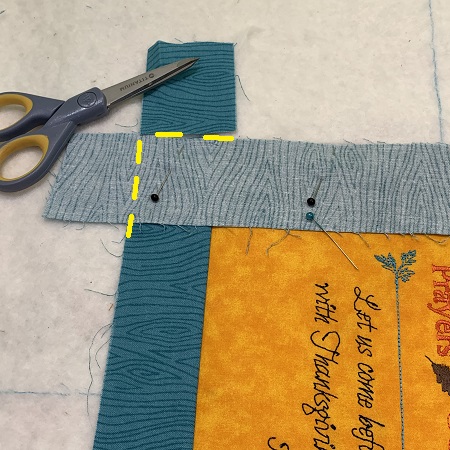
Place the matching strips on the remaining sides of the block. Stitch a 1/4" seam. Fold the strip back and press down. Trim excess fabric off of the ends of each strip.
Step 14:
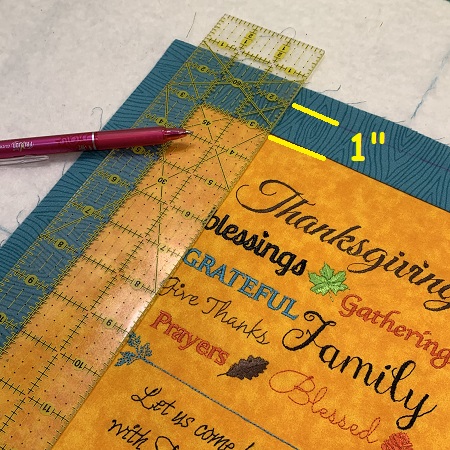
Draw a line 1" from the seam line of the first fabric strip.
Step 15:
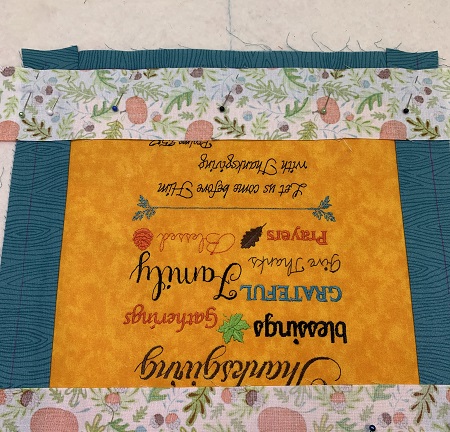
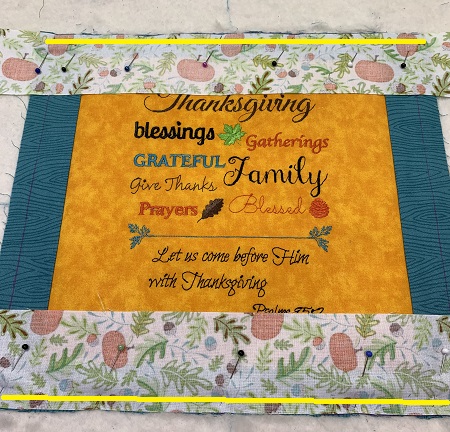
Pin the 2.5"x16" strip of fabric on the lines on opposites sides of the block.
Step 16:
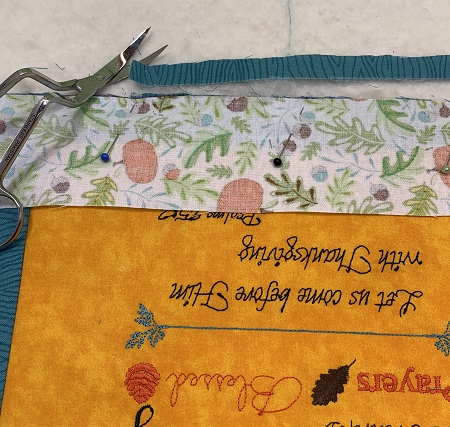
Trim excess fabric along the line if needed.
Step 17:
Sew a 1/4" seam along the sides. Press along the seam line.
Step 18:
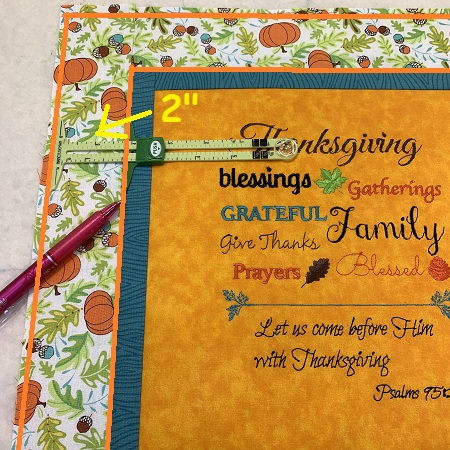
Sew the two matching strips on the remaining sides using a 1/4" seam. Press the seam line. Trim the fabric strips if needed. Measure and mark the fabric 2" from the seam line.
Step 19:
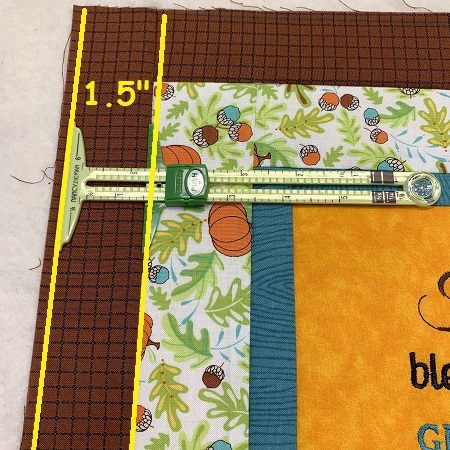
Sew the 2"x18" brown strips to the topper just like you did the other strips. Use a 1/4" seam. Measure and mark the fabric 1.5" from the seam line.
Step 20:
Sew the 3"x22" green strips to the topper with a 1/4" seam. Press the seam line. Square the sides of the topper.
Step 21:
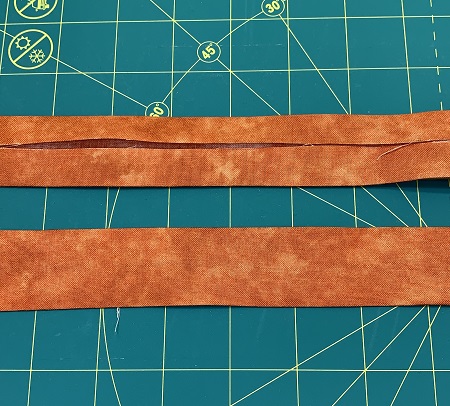
Sew the four 1.5"x24" strips of binding fabric together shortest end to shortest end with a 1/4" seam. Fold the strip in half and press on the fold line. Open the fabric strip and fold the raw edges toward the center crease line. Press with an iron.
Step 22:
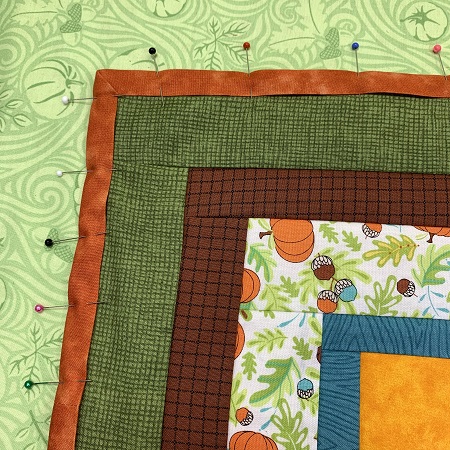
Pin the binding to the topper. Topstitch the binding to the topper.
Step 23:
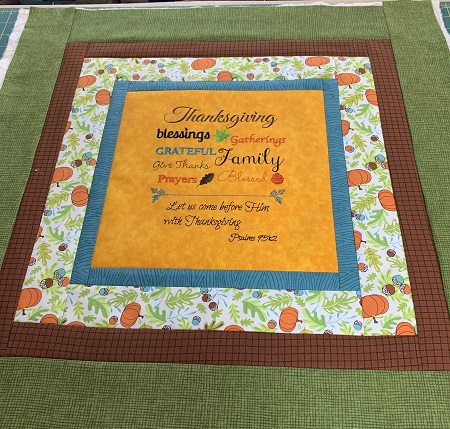
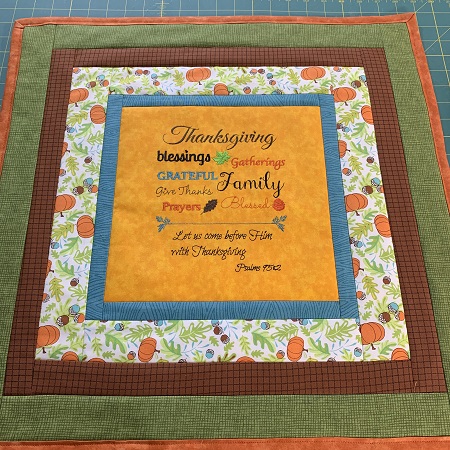
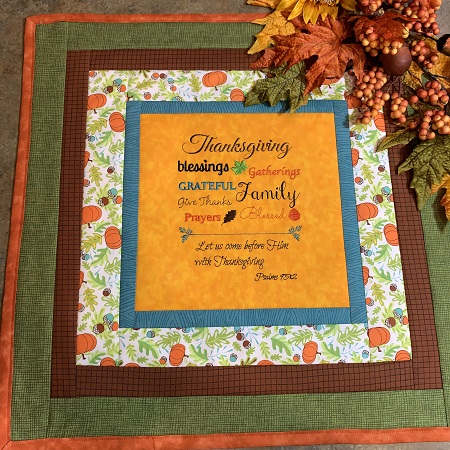
Congrats! You made a QAYG Thanksgiving Blessing table topper! You could easily add a sleeve on the back of the table topper so it could be used as a wall hanging also.
Marisa Littleton is a retired educator with a love for teaching and learning. Interests include machine embroidery, hand embroidery, quilting, cooking, and antiques.