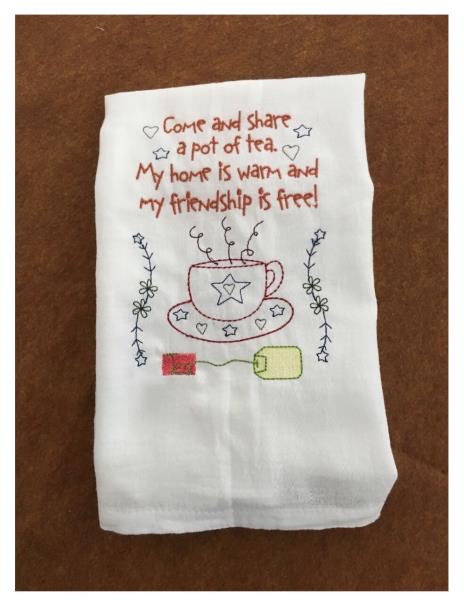
Vintage Inspired Kitchen Tea Towels

Vintage Inspired Kitchen Tea Towels Embroidery Project

By   Linda Mills   on   November 18, 2020
  • SKILL LEVELBeginner
  • TIME REQUIRED00:45
Description

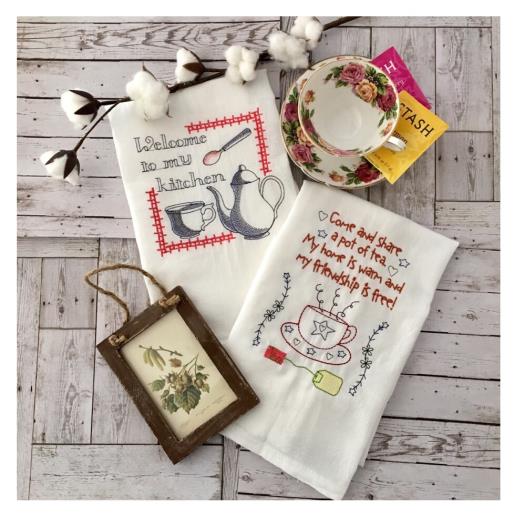
Practical and decorative embroidered kitchen “tea” towels inspired with a tea party in mind.

Step of

Materials

Project Preview Video

Materials
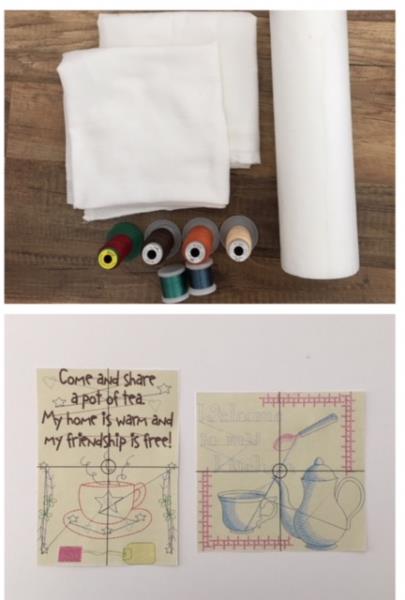
  • FLOUR SACK KITCHEN TOWELS (2)
  • EMBROIDERY THREAD
  • CUT AWAY STABILIZER
  • AIR ERASABLE FABRIC MARKING PEN
  • HOOP SIZE 9” X 9”
  • TEMPORARY ADHESIVE SPRAY (505)

  • Designs used in this project

    Final Product: What You Will Create

    Preface:
    A tutorial for the beginner embroiderer who has an understanding of the basic of machine embroidery. Embroidering of vintage style embroidery designs onto flour sack towels with a simple and easy to follow instructions to help one enhance their basic skills, confidence and knowledge. Embroidery designs used: Shared Tea, and  Sketched Kitchen Welcome has 3 sizes available and the 5.88" x 5.57"
    was used in this tutorial. 


    Step 1:
    Gather all supplies and review instructions before beginning. The 45 minute allocated project time is for one embroidered towel. Print out embroidery design(s) paper templates

    (Click Image to Enlarge)


    Step 2:
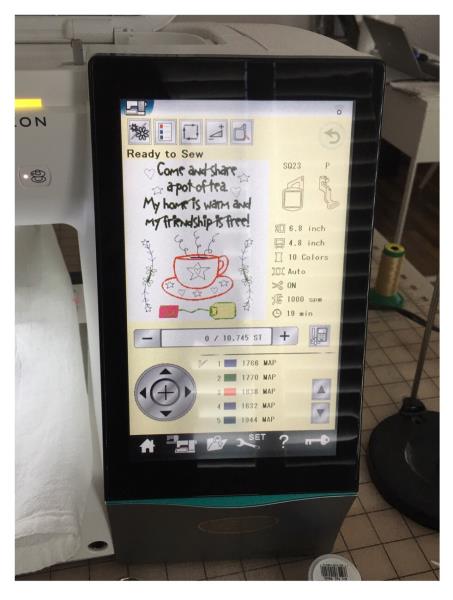
    Load embroidery design into your machine per your machine’s instructions.

    (Click Image to Enlarge)


    Step 3:
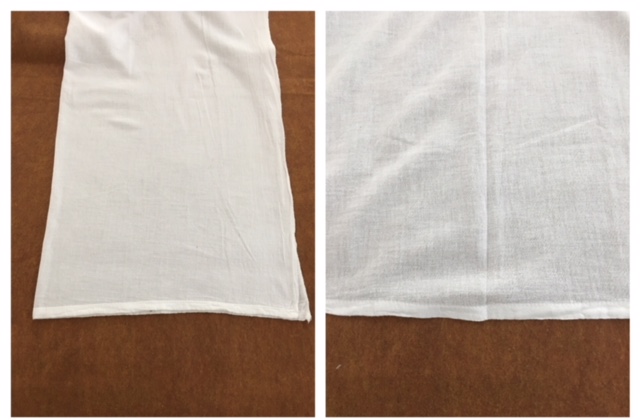
    Iron press towels. Most flour sack towels are square in size.  Find center of towel by folding in half. Fingertip press to make a center crease. 

    (Click Image to Enlarge)


    Step 4:
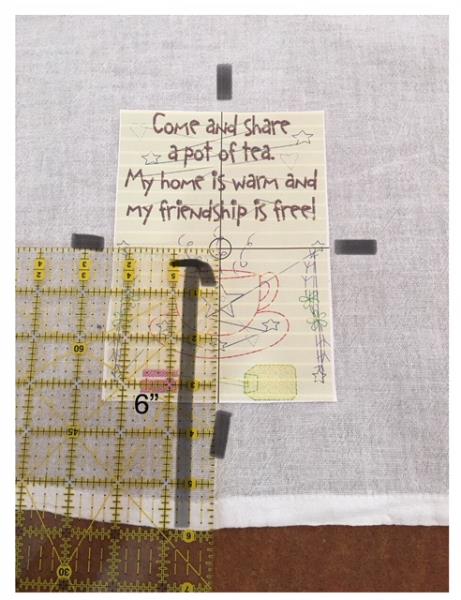
    Center position your Shared Tea design paper template atop your flour sack towel 6” up from bottom edge of towel to center of design. ( refer to picture) mark axis points as shown.

    (Click Image to Enlarge)


    Step 5:
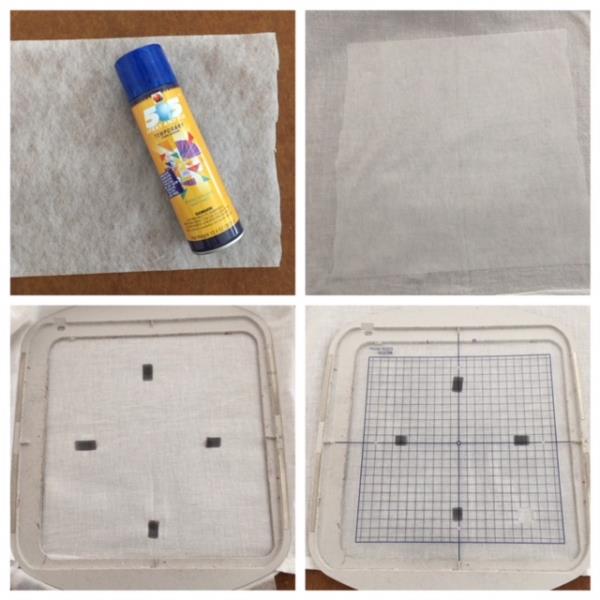
    Cut a piece of stabilizer larger than embroidery design and to cover design stitch out area on towel. Spray temporary adhesive spray (505) atop stabilizer and place on back of towel over design stitch out area. Fingertip press to secure. Center and hoop both layers by matching marked axis points on towel to axis
    point markings on your hoop.( opt: Use your hoop grid to help center)

    (Click Image to Enlarge)


    Step 6:
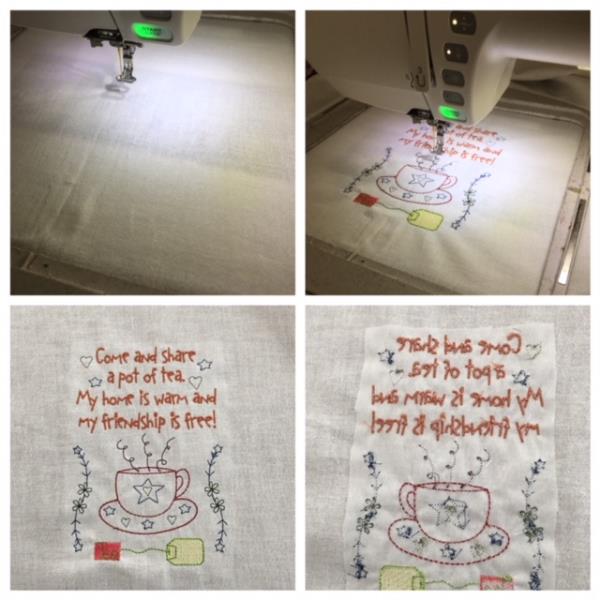
    Attach prepared hoop to your machine. Confirm center needle placement. Refer to embroidery design
    thread color chart. Begin the embroidering process.
    Embroidering complete. Remove hoop. Cut and trim all jump stitches and thread ends. Front and back. Cut away stabilizer from back. Approx. ¼” – ½” away from stitched design.

    (Click Image to Enlarge)


    Step 7:
    Iron press. You are done! Congrats! Repeat embroidering steps 2 through 6 for your second
    Vintage Inspired “Tea” Towel with the embroidery design  Sketched Kitchen Welcome for a set of 2.

    (Click Image to Enlarge)

    Meet the Author: Linda Mills
    Linda Mills
    Linda loves to create by sharing her different sewing and machine embroidery techniques so others can utilize their machines to the fullest
    More From This Author
    Link is Broken, Please check the URL
    Exclusive Embroidery Offers!
    Copyright © {{ currentDate | date:'yyyy'}} - EmbroideryDesigns.com
    GET 50% OFF! ×