Border OptionsHugging border, circle, square, or rectangle — with a 3mm satin stitch.
Backing OptionsAvailable with iron-on, sew-on, or velcro backing.
Fast ShippingShipped quickly from the USA.
Free Online Tools
Powerful embroidery utilities that save time and prevent costly mistakes.
Stitch AssistantRECOMMENDED
Get the exact stabilizer, machine settings, needle, and thread color sequence for every embroidery design you purchase — based on that design's stitch density, dimensions, and color count.
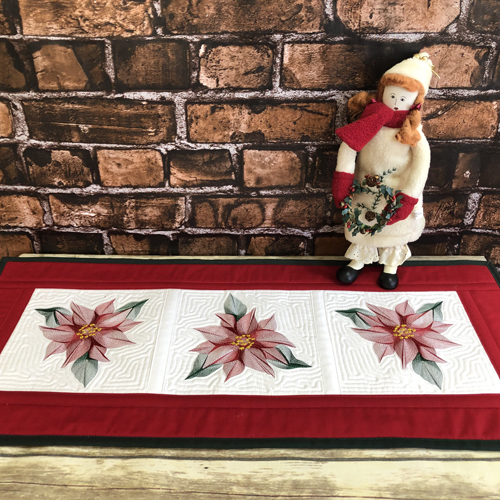
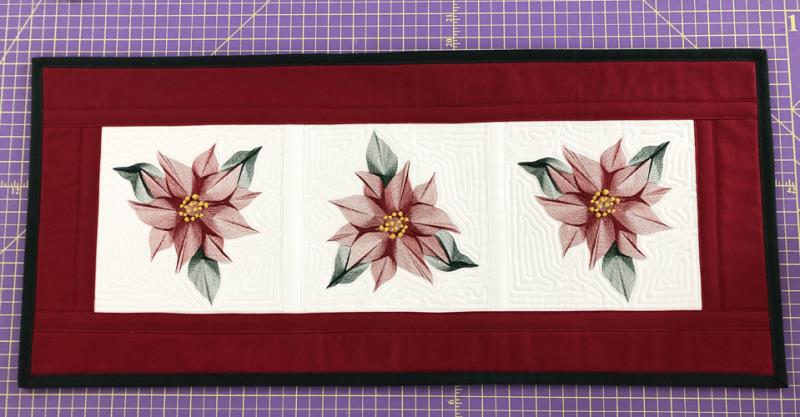
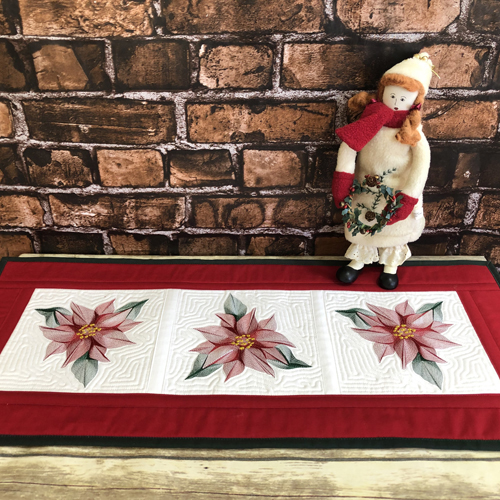
Create a beautiful poinsettia table runner with this quilting project. Featuring stunning floral designs, this runner is perfect for adding a festive touch to any table setting. Borders and sashing are completed with your sewing machine. Step-by-step instructions are included.
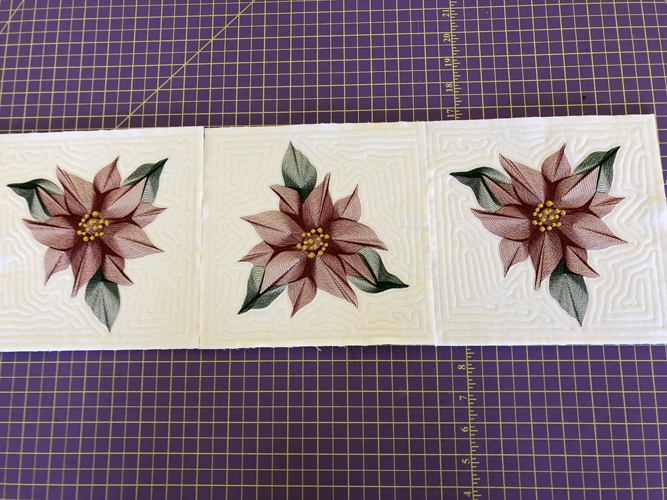
The vertical flipping of the middle block of this table runner adds to the motion reflected in this stunning table runner. The three poinsettia blocks are stitched and quilted in the hoop. The borders and sashing are added at your sewing machine. Due to the stitch type used to create these lovely dimensional poinsettias there is a trim between most of the leaves and petals, so make sure your trimmers are turned on.
Step 1:
(Click Image to Enlarge)
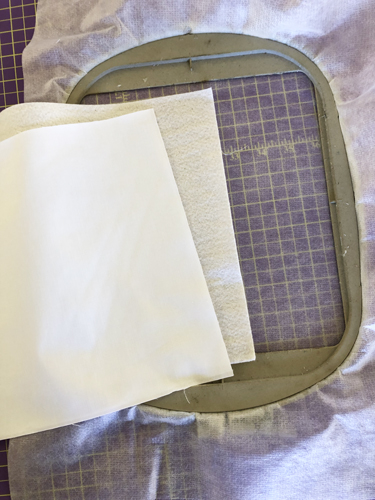
For each poinsettia block cut two 10” squares of white Kona Cloth® and one 10” square of Battilizer®. Tautly hoop no-show stabilizer in your hoop.
Step 2:
(Click Image to Enlarge)
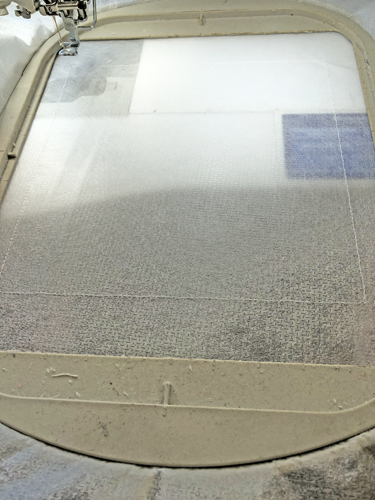
Run the 1st color-stop (CS) in white as a placement line.
Step 3:
(Click Image to Enlarge)
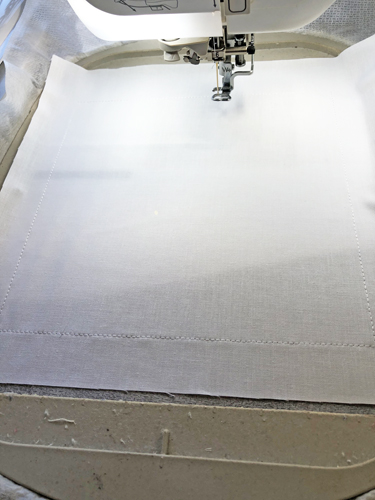
Spray adhesive on one side of a 10” square of white Kona Cloth” and position over the placement lines so that the fabric exceeds the placement lines by at least ½” on all sides. Run CS 2 in white to tack down the fabric.
Step 4:
(Click Image to Enlarge)
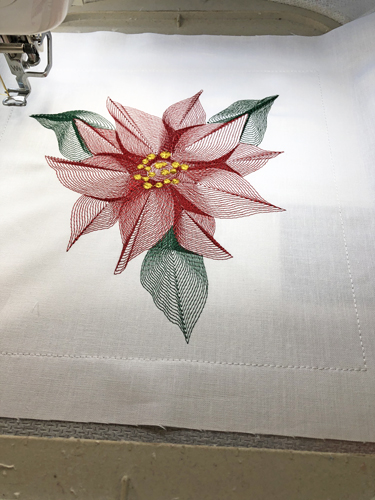
Follow the color chart for CS 3, 4, and 5 to stitch the poinsettia in green, red and gold.
Step 5:
(Click Image to Enlarge)
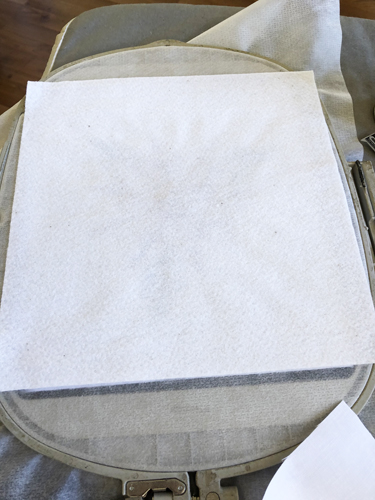
Before you stitch the last color stop, remove the hoop from the machine. Do not unhoop. Lay the hoop face down on a flat surface. Spray adhesive on a 10’ square of Battilizer® or low loft batting, position it over the placement lines on the back of the work so that the Batting exceeds the placement lines by ½” on all sides. Spray adhesive on a 10” square of Kona Cloth® and place it over the batting.
Step 6:
(Click Image to Enlarge)
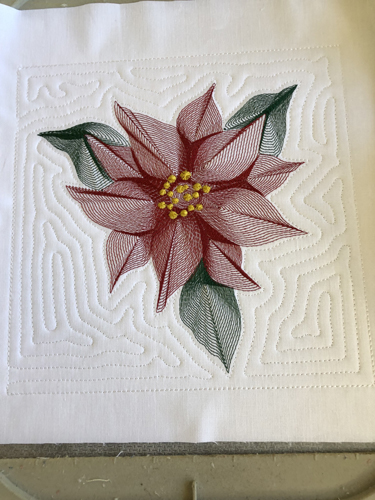
Return the hoop to the machine and run the final CS in white thread to tack down and quilt the block.
Step 7:
(Click Image to Enlarge)
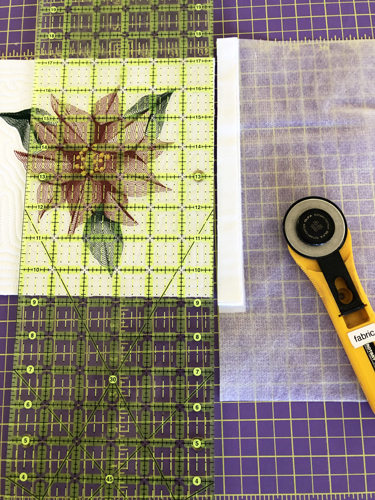
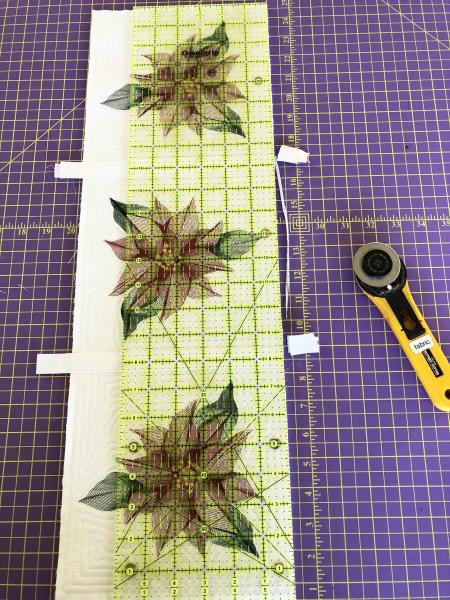
Remove the block from the hoop. Align the ¼” mark of a see-through ruler along the outline stitches of the block and trim all sides to a ¼” seam allowance.
Step 8:
Repeat Steps 1 through 7 twice. Lay your completed blocks out flipping the middle block vertically so they do not all look like the same block. You could turn the middle block in any direction you desire, but flipping it vertically keeps the quilting stitches aligned nicely from block to block.
(Click Image to Enlarge)
Step 9:
(Click Image to Enlarge)
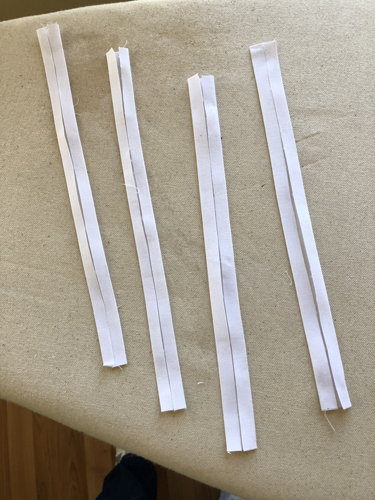
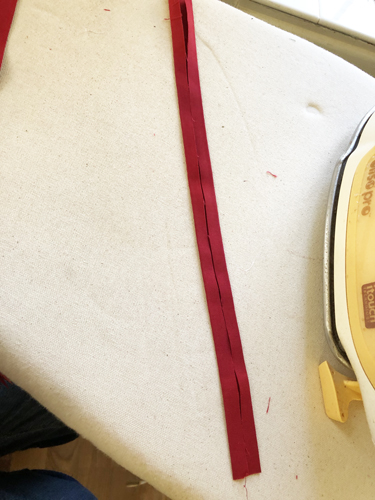
For sashing cut two strips of white Kona Cloth® 10” x 1 ½” and two strips 10” x 1 ¼”. Spray the strips with Magic Sizing. Press the long edges of the strips into the center and press. Keep the narrow and wider strips separate. The narrow strips will be stitched to the back of the blocks, the wider strips will be used on the front of the blocks.
Step 10:
(Click Image to Enlarge)
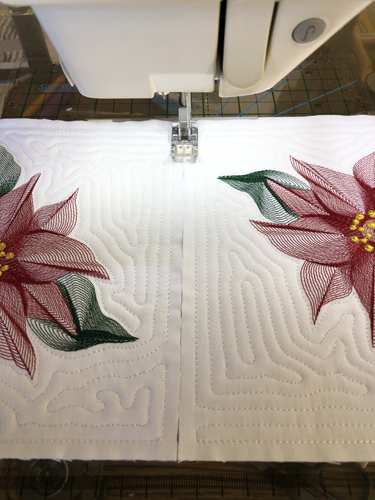
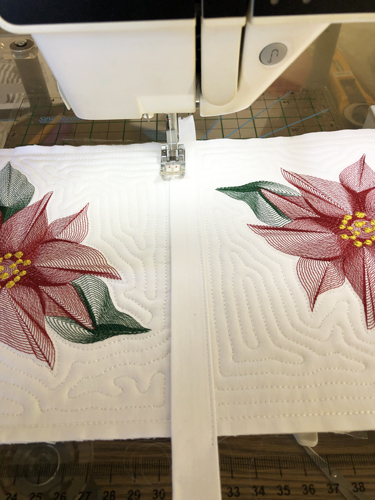
Load invisible thread in the top and bobbin of your sewing machine. Align the side edges of two blocks without gaps or overlaps. Set your machine for a wide zigzag stitch, about 5.5” if that is an option and with the spacing of the zigzag 4mm to 5mm apart. Zigzag the two blocks together. Attach the third block in the same fashion.
Step 11:
(Click Image to Enlarge)
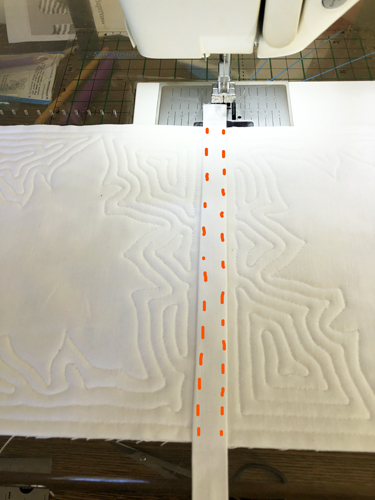
Center narrow sashing strips face down over the zigzag seams on the back of the table runner. Stitch down both sides of the sashing with a 3mm length regular straight stitch.
Step 12:
(Click Image to Enlarge)
Turn the table runner right side up. Center the wider sashing strips over the zigzagged seams and stitch down both sides with the straight stitch.
Step 13:
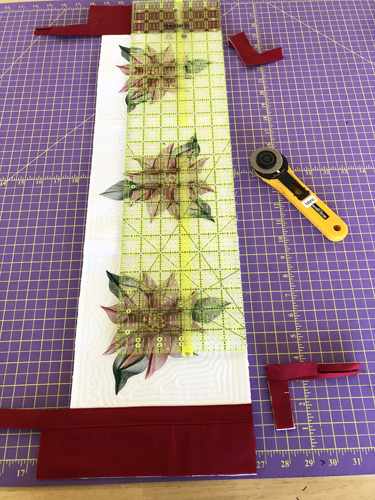
Trim off the excess sashing strips while squaring up your table runner blocks.
(Click Image to Enlarge)
Step 14:
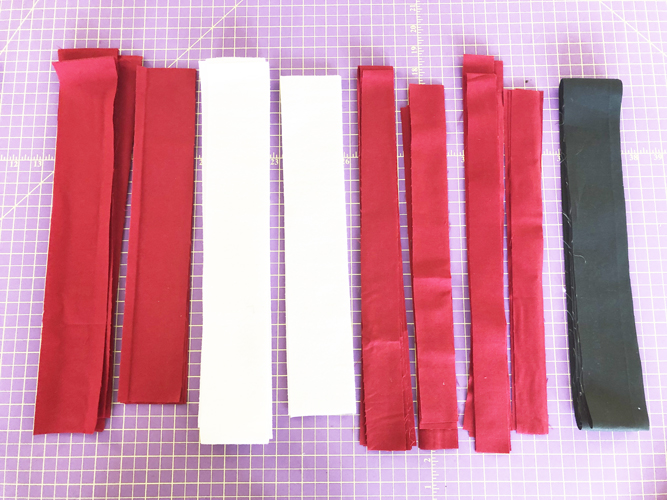
For the borders and sashing cut from Red quilting cotton:
a. 4 strips 2 ½” x 31” for top and bottom borders b. 4 strips 2 ½” x 10” for side borders c. 2 strips 1 ½” x 31” for top and bottom sashing d. 2 strips 1 ¼” x 31 for side sashing
For the borders cut from Battilizer® or low loft batting:
a. 2 strips 2 ½” x 31” b. 2 strips 2 ½” x 10”
For binding strips from Fir Green quilting cotton
a. 3 strips 2 ¼” wide across the width of the fabric.
(Click Image to Enlarge)
Step 15:
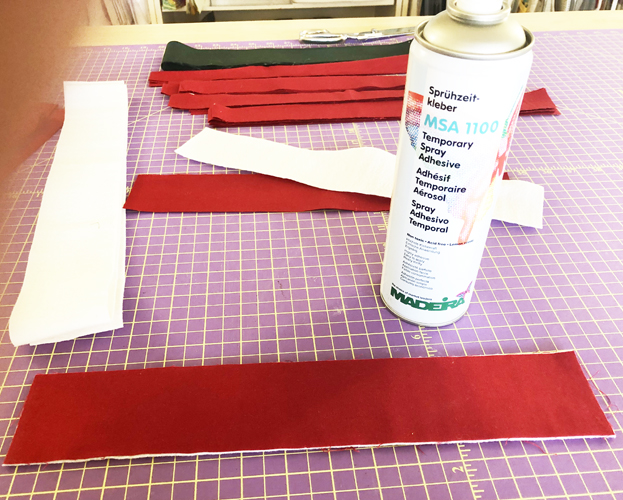
Make quilt sandwiches from the fabric and the Battilizer® by spraying one side of the Battilizer® with adhesive spray, align a corresponding fabric strip right side up over the sprayed Battilizer®. Spray the second side of the Battilizer® with adhesive spray and align a second corresponding piece of the fabric over it. Do this for all the border strips.
(Click Image to Enlarge)
Step 16:
(Click Image to Enlarge)
Spray the sashing strips with spray starch and press the long edges into the center of the strips. Keep the narrow strips separate from the wider ones as the narrow strips are sewn to the back of the table runner and the wider ones will be sewn to the front.
Step 17:
(Click Image to Enlarge)
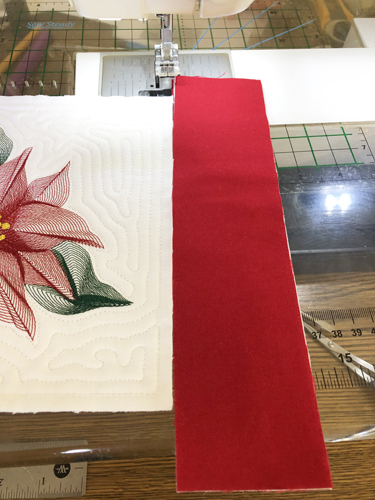
Having the top edge of the border strip about ½” above the side of the table runner, butt the side border strips to the table runner sides and join with a zigzag stitch.
Step 18:
(Click Image to Enlarge)
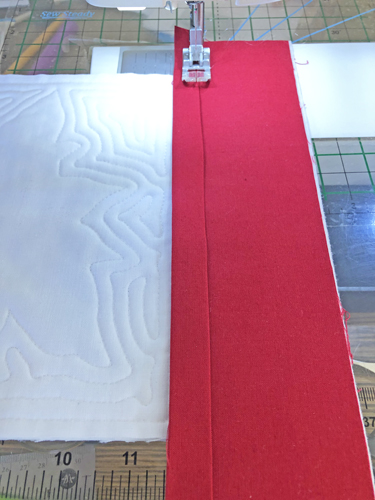
Stitch the 10” narrow red sashing strips to over the zigzag seams that join the borders to the table runner on the back of the table runner. Then stitch the wider red 10” sashing strips over those seams on the front of the table runner.
Step 19:
(Click Image to Enlarge)
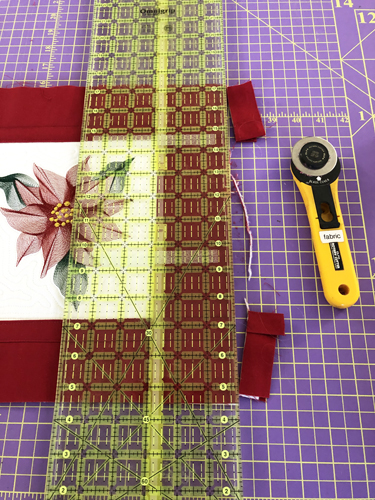
Trim the top and bottom of the borders and sashing strips even with the table runner.
Step 20:
(Click Image to Enlarge)
Stitch the top and bottom borders and stitch the back and then front sashings to table runner as you did the side borders in Steps 17 and 18. Trim the top and bottom borders as in Step 19.
Step 21:
Join the strips of green fabric and bind the table runner using your preferred method.
(Click Image to Enlarge)
Step 22:
Congratulations your Stunning Poinsettia Table Runner is complete. Enjoy!
Award winning Digitizer, Embroidery Educator, Author and a Consultant to the Industry, Pat Williams has 30 years of experience in the embroidery industry. Pat has won multiple awards for her digitizing expertise including the 2007 Impressions Awards Grand Championship, Best of Show as well as the 1st and 2nd Place Awards. Pat’s love of digitizing has afforded her the opportunity to write numerous articles for Impressions magazine in the United States and Images Magazine in Europe. In 2001 Pat was named “Embroidery Educator of the Year.” For many years Pat taught digitizing seminars at the ISS Shows in Long Beach, CA and for Compucon software. She now resides in Tucson, AZ.