Labor Day 10 Off 30
Live Chat
Embroidery Designs
Welcome, Embroiderer
Login
Pumpkin Monogrammed Linen Napkins

Pumpkin Monogrammed Linen Napkins Embroidery Project

By   Linda Mills   on   August 25, 2020
  • SKILL LEVELExperienced
  • TIME REQUIRED01:30
  • FINISHED SIZE16 x 16 inches
Description

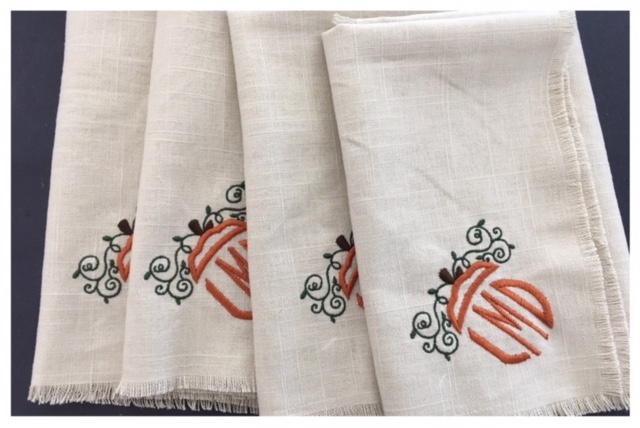
Get your Fall table ready for that special small gathering or just an everyday dinner with a personal touch of a pumpkin monogram design.

Step of

Materials

Project Preview Video

Materials
  • 1 YD LINEN FABRIC
  • MATCHING OR COORDINATING SEWING THREAD (1)
  • EMBROIDERY THREAD
  • TEAR AWAY STABILIZER
  • TEMPORARY ADHESIVE SPRAY
  • CHALK OR FABRIC AIR ERASE PEN
  • EMBROIDERY SOFTWARE PROGRAM

  • Designs used in this project

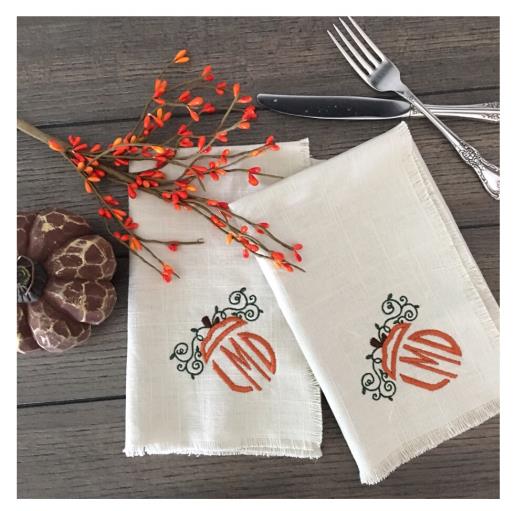
    Final Product: What You Will Create

    Preface:
    Time stated in this tutorial is for a set of 4 napkins. (One yard of linen fabric will make a set of 6 16"x 16” napkins). This tutorial will show you how to fringe the sides of a cut napkin to give it a finished look as well as adding a bit of Fall personalization with a pumpkin monogram design. Once you create the monogram design, the stitch out of each napkin will take approximately 10 min.@ 700 SPM (stitches per minute) Circle Monogram Font used in this tutorial is 1.50". The monogram is created under the pumpkin topper and then resized.  


    Step 1:
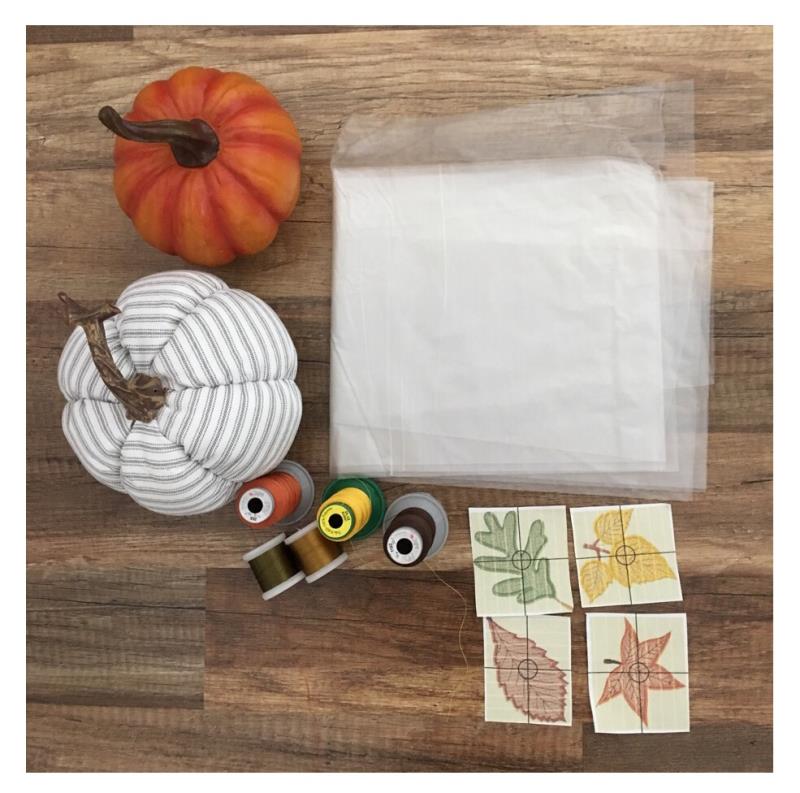
    Gather all supplies and review instructions before beginning. 

    (Click Image to Enlarge)


    Step 2:
    Fringing
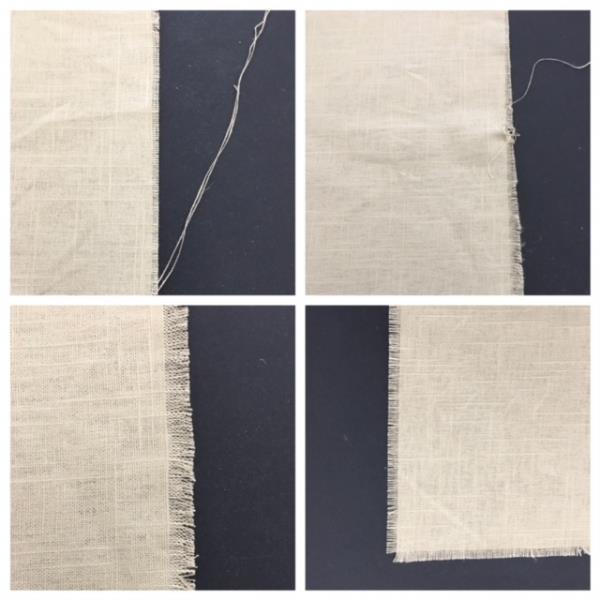
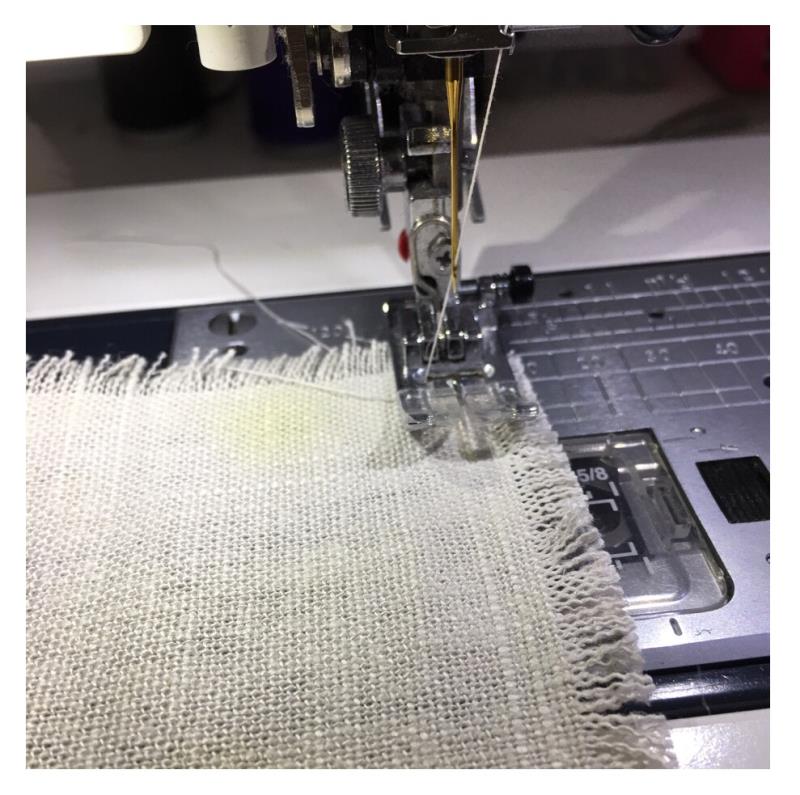
    Cut (4) 17” x 17” squares from your linen fabric. Finished size napkins will be 16” x 16”. This additional inch is allocated for fringing. Linen ravels pretty easily. Start on one end and pull threads until you get one continuous thread that that runs from one end to the other. Repeat this method on all sides of each cut napkin square. Trim down the fringe to ¼” in length. 

    (Click Image to Enlarge)


    Step 3:
    Top stitch ¼” from where the fringe begins on all four sides of napkin. This will help prevent any fraying when napkins are washed. Repeat for all cut fabric squares.

    (Click Image to Enlarge)


    Step 4:
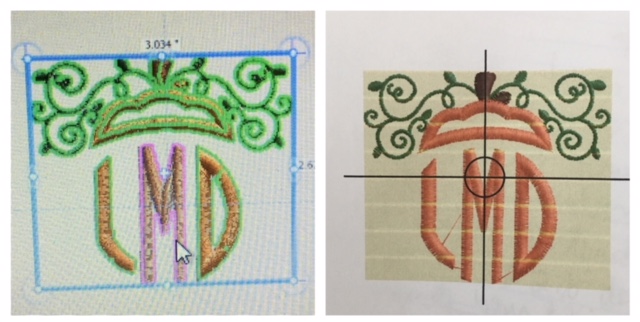
    Bring into your embroidery software program the pumpkin topper design and letters to create your pumpkin look monogram per your software program’s instructions. Resize pumpkin topper/letters to fit.
    ( Circle Monogram Font design is not a keyboard font you will need to bring in each letter individually) once you have created your pumpkin topper monogram you want to “group” and resize to a 3” x 2.6” design. Make any adjustments if you prefer a different size to be embroidered on your napkins. Print out a paper template. The circle monogram letters will form the pumpkin body.  

    (Click Image to Enlarge)


    Step 5:
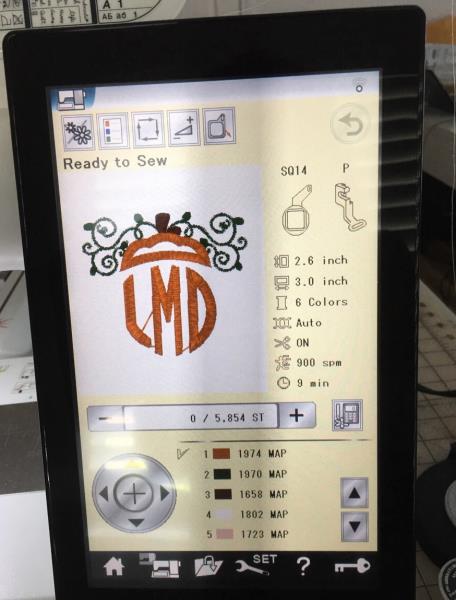
    Load your created monogram design into your machine. 

    (Click Image to Enlarge)


    Step 6:
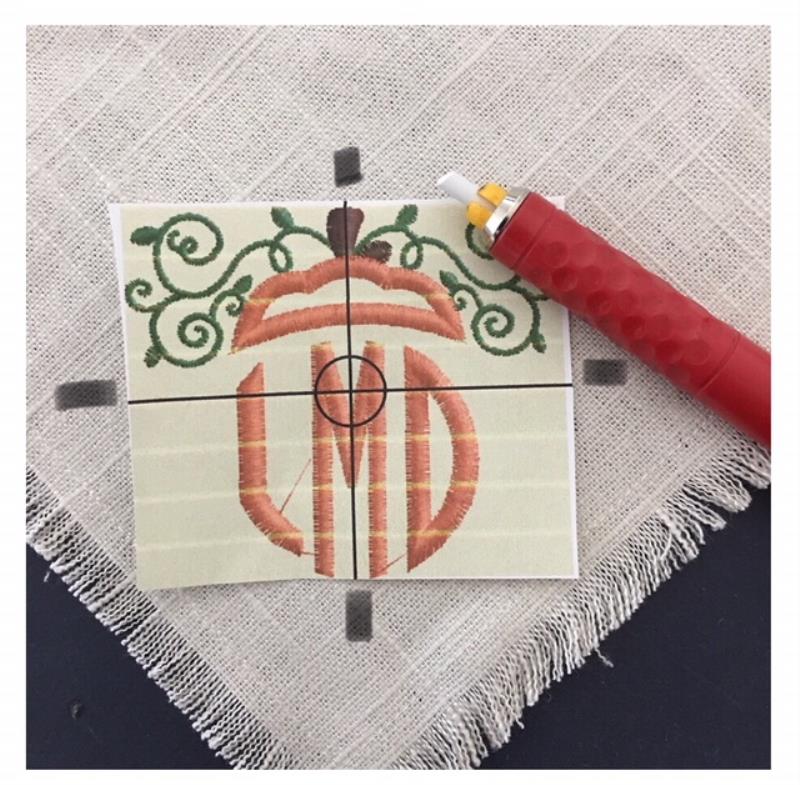
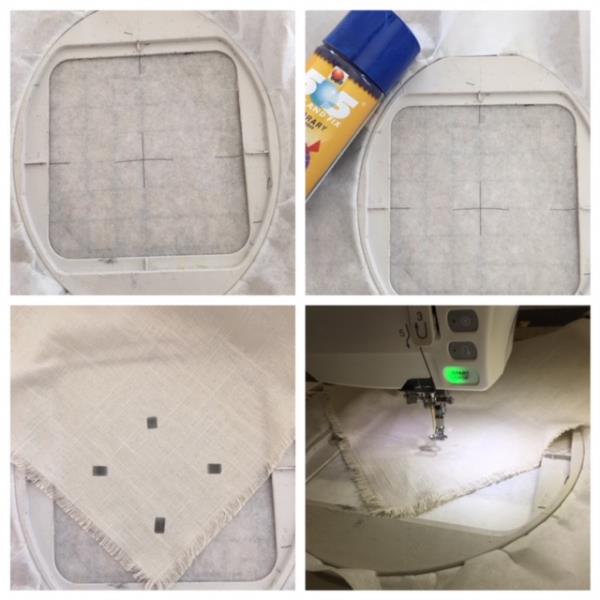
    Center paper template atop one of the napkin corners. 3” up from corner and 3”in from sides. Mark all axis points.

    (Click Image to Enlarge)


    Step 7:
    Cut and hoop a piece of stabilizer . Mark center crosshair and axis points directly onto stabilizer. Spray temporary adhesive spray. Center napkin atop stabilizer matching axis points. Fingertip press down to secure. Attach hoop to machine.Confirm center needle placement. Begin embroidering process. 
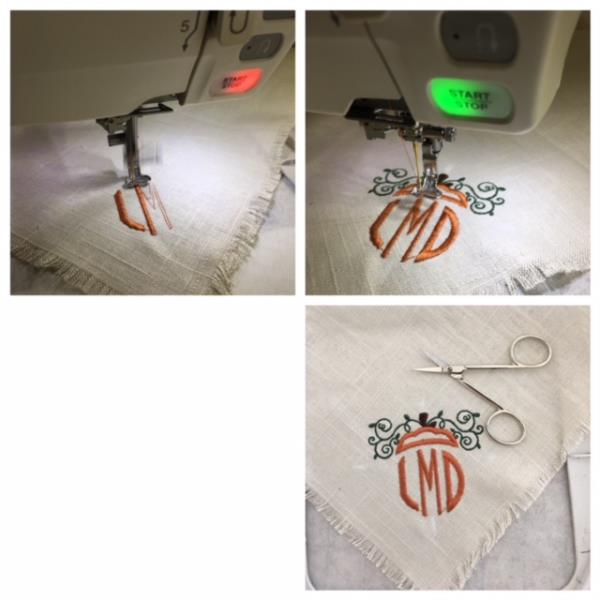
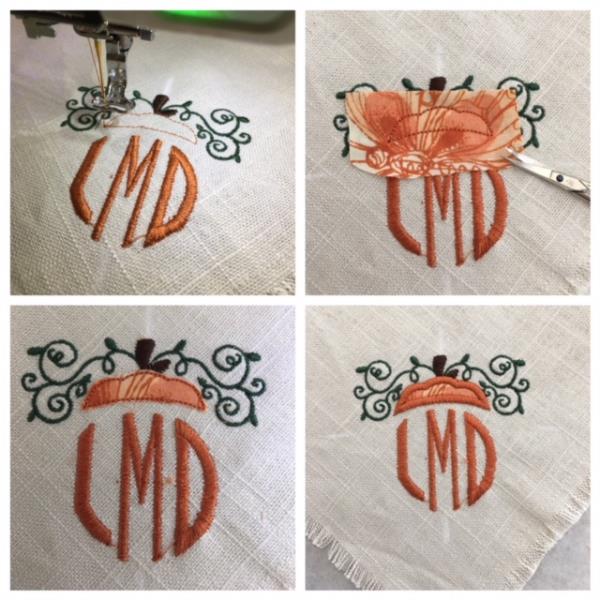
     *The Pumpkin Monogram Topper Design is an applique design but for this tutorial I wanted the linen fabric color to show through instead of covering with fabric. ) If you choose to stitch out as applique follow instructions in step 10. If not, just stitch out dielines using same thread color. 

    (Click Image to Enlarge)


    Step 8:
    Embroidering complete. Remove hoop. Cut/trim all jump stitches and loose thread ends.

    (Click Image to Enlarge)


    Step 9:
    Congrats! Your first monogrammed napkin is finished. Repeat steps 6 through 8 for the remainder of napkins to complete your set.

    (Click Image to Enlarge)


    Step 10:
    APPLIQUE
    The first dieline stitches the outline of the top of pumpkin. Cut and place a scrap piece of cotton fabric over outline to cover. The 2nd stitch tacks down fabric. Remove hoop from machine. Do not unhoop. Trim fabric close to your tack down stitch. Attach hoop. 3rd stitch finishes with a satin stitch. 

    (Click Image to Enlarge)

    Meet the Author: Linda Mills
    Linda Mills
    Linda loves to create by sharing her different sewing and machine embroidery techniques so others can utilize their machines to the fullest
    More From This Author
    Link is Broken, Please check the URL
    Exclusive Embroidery Offers!
    Copyright © {{ currentDate | date:'yyyy'}} - EmbroideryDesigns.com
    GET 50% OFF! ×