FSL Fall Leaves for Pumpkin Embellishment

FSL Fall Leaves for Pumpkin Embellishment Embroidery Project

By   Linda Mills   on   August 18, 2020
  • SKILL LEVELBeginner
  • TIME REQUIRED01:00
Description

Enhance your autumn décor with these freestanding lace fall leaves. Perfect for adorning fabric or resin pumpkins, these leaf embellishments bring a touch of seasonal charm to your home. Step-by-step instructions are included.

Step of

Materials

Project Preview Video

Materials
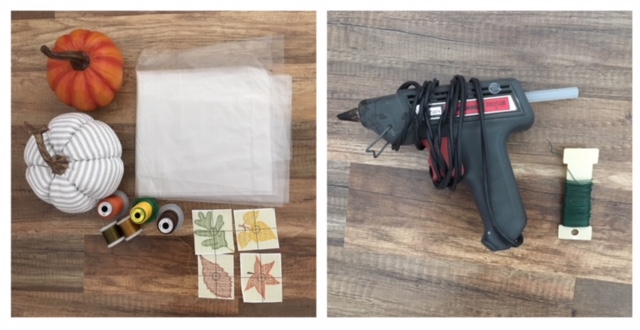
  • WATER SOLUBLE STABILIZER
  • EMBROIDERY THREADS ( FALL COLORS OF CHOICE)
  • 2 STORE PURCHASED FABRIC OR RESIN PUMPKINS ( PUMPKINS CAN BE PURCHASED AT ANY CRAFT STORE)
  • FLORAL WIRE
  • HOT GLUE GUN
  • WIRE CLIPPERS
  • PENCIL

  • Designs used in this project

    Final Product: What You Will Create

    Preface:
    A project tutorial for most beginner/some experience embroiderers in mind. Stitching out freestanding lace (FSL) leaves in Fall embroidery thread colors and adorning to store purchased pumpkins with the use of a glue gun. Stitch out as many or as few leaves as needed to embellish your pumpkin to your liking.  


    Step 1:
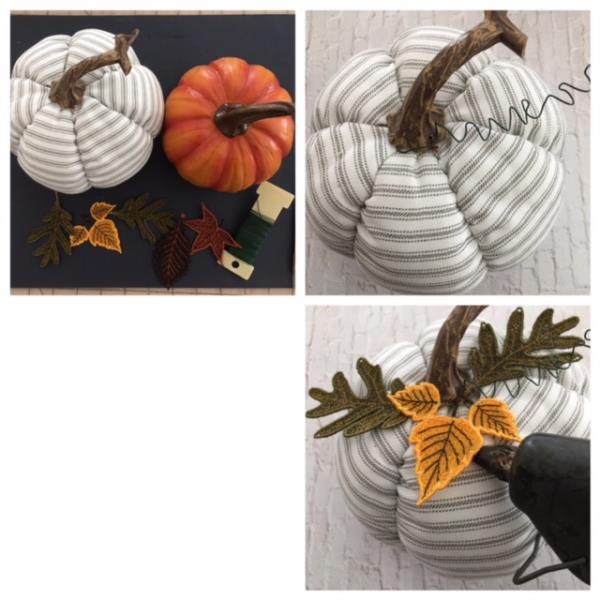
    Gather all supplies and review instructions before beginning. Print out paper design templates if needed for thread color review

    (Click Image to Enlarge)


    Step 2:
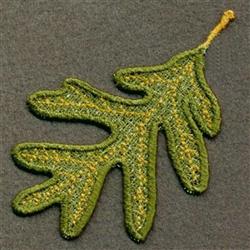
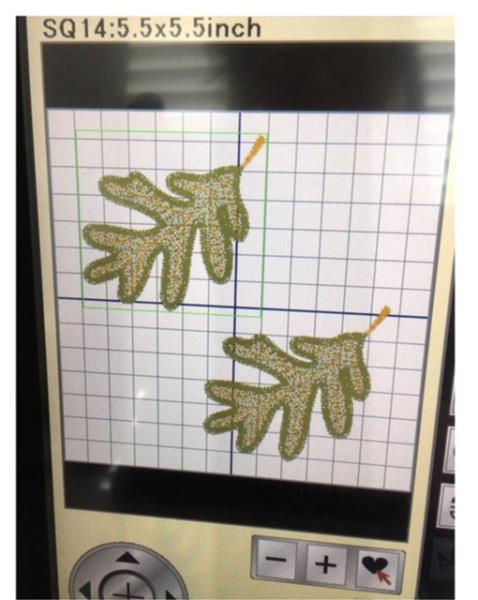
    Load the Oak Leaf design into your machine. Edit (per your machines instructions) to duplicate so that
    you can stitch out two at the same time. If you prefer you can stitch one at a time for multiples. 

    (Click Image to Enlarge)


    Step 3:
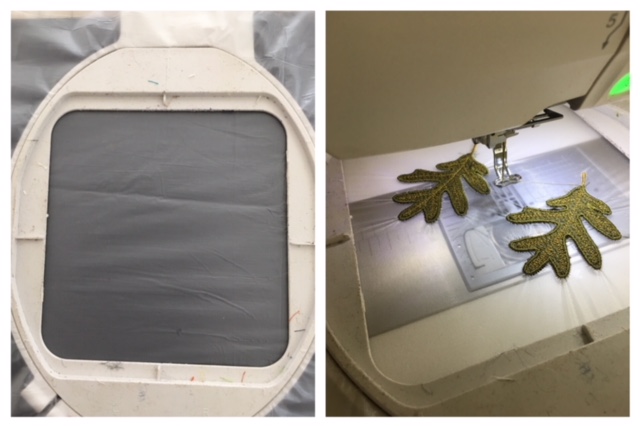
    Hoop two layers of water soluble stabilizer. Make sure your bobbin thread is the same color as your top primary thread color. Attach hoop to machine. Begin the embroidering process. Each design takes approximately 5 -8 minutes for stitch out based on 700 stitches per minute(spm) . Increase your SPM and time will be less. Repeat this step for the additional leaves. Make as many or as few leaves as desired. 

    (Click Image to Enlarge)


    Step 4:
    Cut and trim jump stitches and any loose thread ends. Remove water soluble stabilizer. Rinse your leaf pieces to remove excess stabilizer. Blot and lay on paper towel to dry. Allow to dry completely. After drying the leaves will be stiff. Time stated to complete this project does not include drying time. 
    Optional: Iron press lightly to help flatten. Make sure to use a pressing cloth to lay atop stitched out leaves. Repeat steps 3 and 4 for your additional leaves.
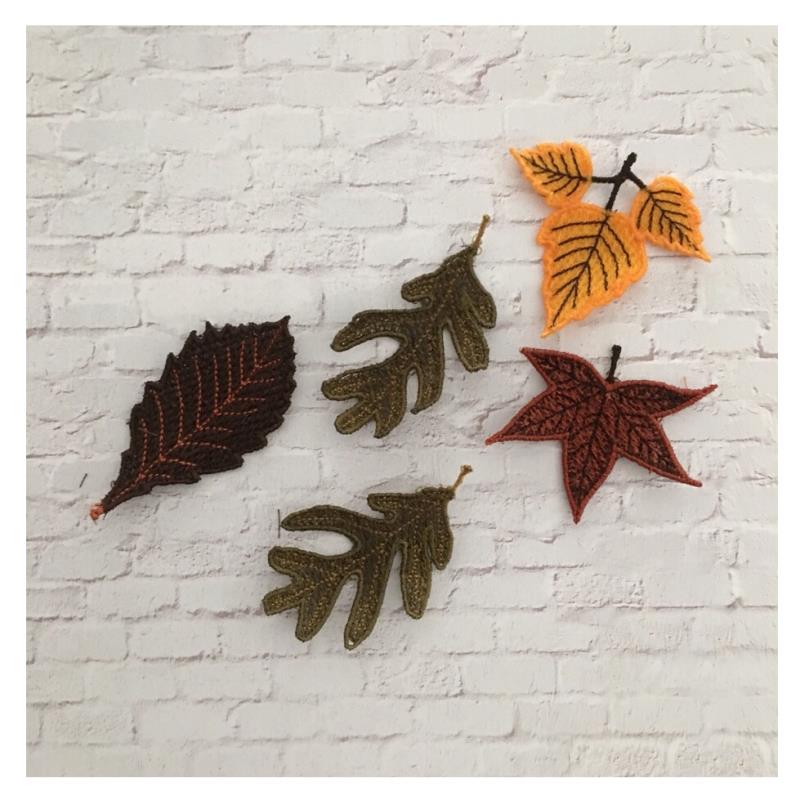
    **Nine leaves were stitched out for this project tutorial. Although picture shows 5 once I started embellishing my pumpkins, I knew I needed more.


    (Click Image to Enlarge)


    Step 5:
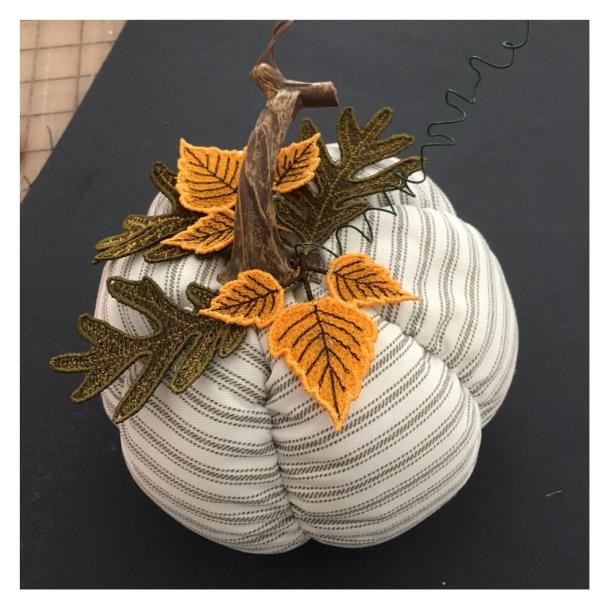
    Wrap a cut piece floral wire around pencil to create a curled stem. Make the stem as long or short as you like. Attach curled wire stem to base of pumpkin stem using your hot glue gun. Next add your leaves. Apply glue to back of leaves. Position and fingertip press down to secure.  There is no right or wrong way for placement of the leaves just use your creativity. Allow time for glue to dry. 

    (Click Image to Enlarge)


    Step 6:
    Great job! Your first embellished pumpkin is finished! Now on to the 2nd one!

    (Click Image to Enlarge)

    Meet the Author: Linda Mills
    Linda Mills
    Linda loves to create by sharing her different sewing and machine embroidery techniques so others can utilize their machines to the fullest
    More From This Author
    Link is Broken, Please check the URL
    Exclusive Embroidery Offers!
    Copyright © {{ currentDate | date:'yyyy'}} - EmbroideryDesigns.com
    GET 50% OFF! ×