Border OptionsHugging border, circle, square, or rectangle — with a 3mm satin stitch.
Backing OptionsAvailable with iron-on, sew-on, or velcro backing.
Fast ShippingShipped quickly from the USA.
Free Online Tools
Powerful embroidery utilities that save time and prevent costly mistakes.
Stitch AssistantRECOMMENDED
Get the exact stabilizer, machine settings, needle, and thread color sequence for every embroidery design you purchase — based on that design's stitch density, dimensions, and color count.
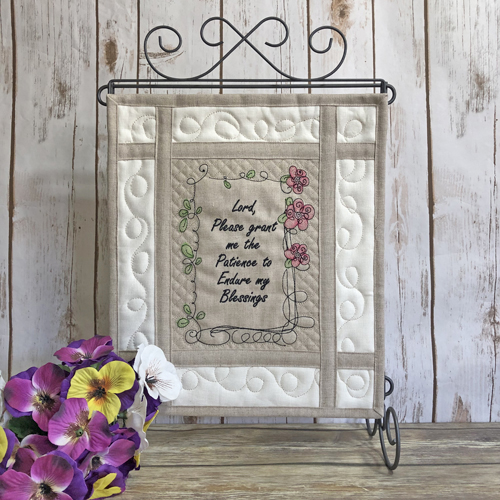
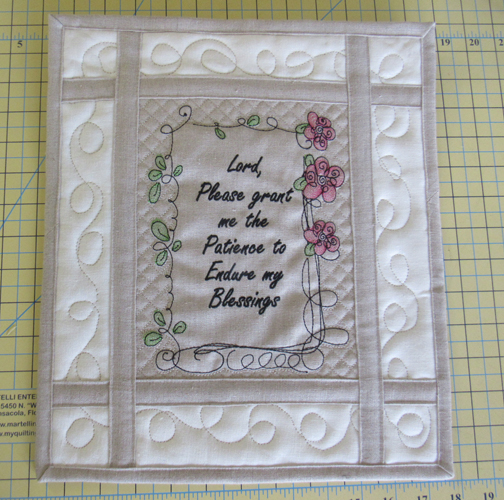
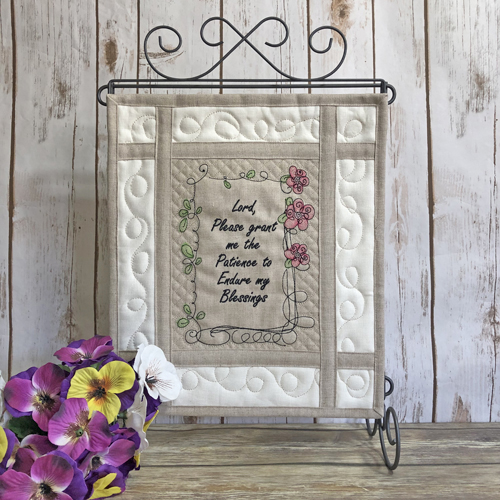
This mini quilt features a heartfelt prayer beautifully embroidered at the center, surrounded by an elegant free motion stitched border. Perfect for personal reflection or as a thoughtful gift, it adds a touch of serenity to any space. Step-by-step instructions are included.
Step
of
Quilt Prayer Mini Quilt with Free Motion Border
By Pat Williams
The sample is made up in linen for an extra serene look, but will also look nice made up in Kona Cloth. The borders have been quilted by using free motion embroidery at your sewing machine. This is an optional technique; the borders may be left unquilted. There are many videos for beginning free motion embroidery on Pinterest. If you have not attempted it yet, please watch some videos for further instruction.
Step 1:
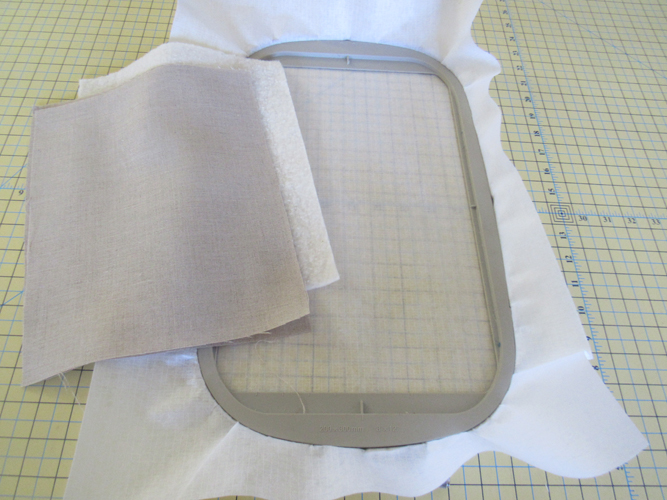
For the center block cut two 9” x 11” rectangles of the Natural Linen and 1 9” x 11” rectangle of batting. Tautly hoop the stabilizer in the embroidery hoop.
(Click Image to Enlarge)
Step 2:
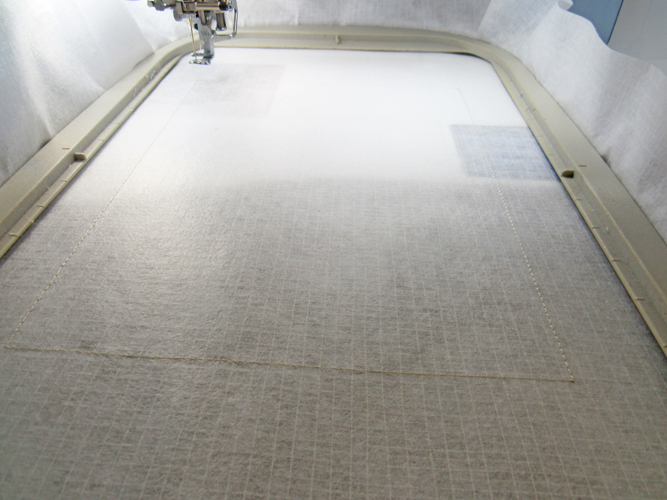
Run the first color stop (CS) in a neutral color as a placement line for the fabric.
(Click Image to Enlarge)
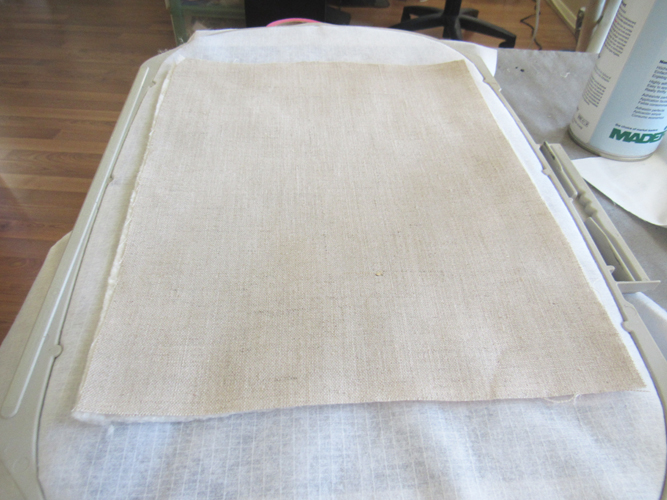
Step 3:
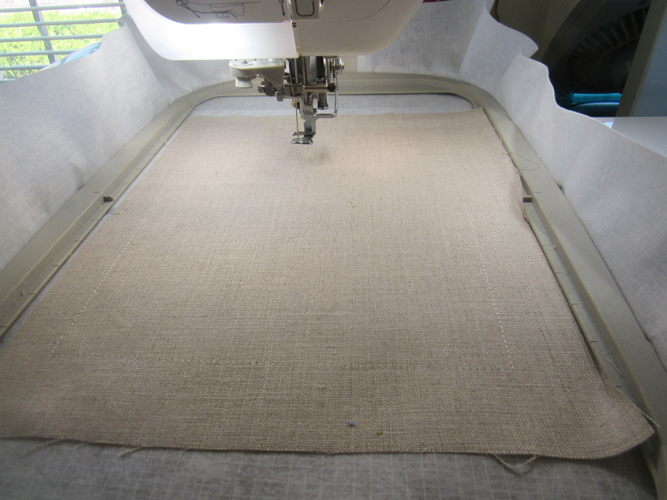
Spray adhesive on the back of a linen rectangle and position over the placement line so that the fabric exceeds the placement line by ½” on all sides.
(Click Image to Enlarge)
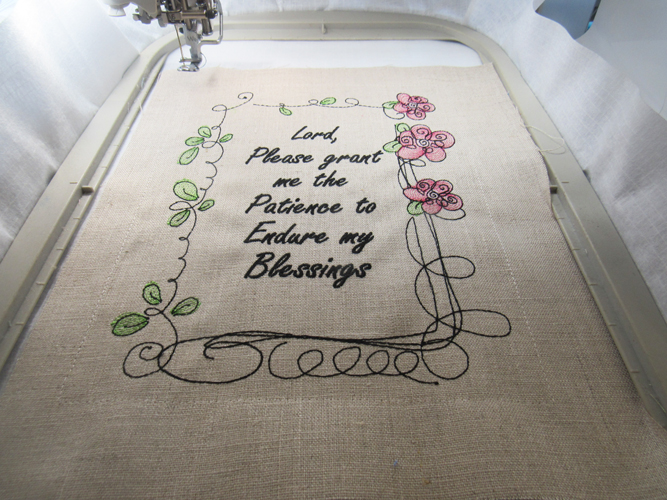
Step 4:
Follow the color chart through CS 7 to embroider the design.
(Click Image to Enlarge)
Step 5:
Remove the hoop from the machine, do not unhoop. Place the hoop face down on a flat surface. Spray the Battilizer® with adhesive and position over the placement lines so that the Battilizer® exceeds the placement lines by at least ½” on all sides. Spray the remaining linen rectangle with adhesive and align over the Battilizer®.
(Click Image to Enlarge)
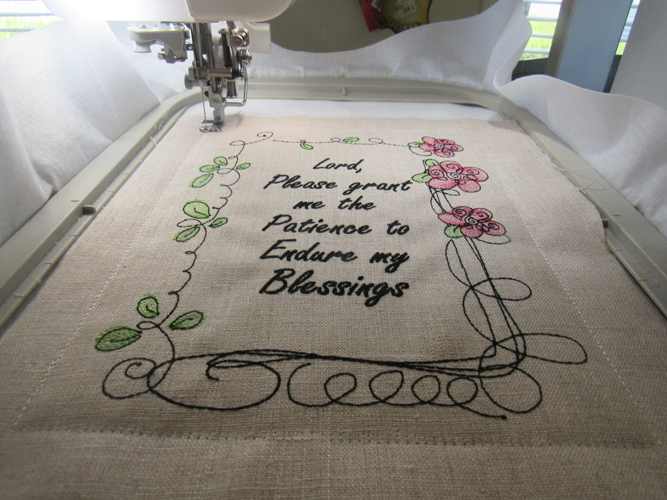
Step 6:
Return the hoop to the machine and run CS 8 in water-soluble threads to tack down the back batting and fabric.
(Click Image to Enlarge)
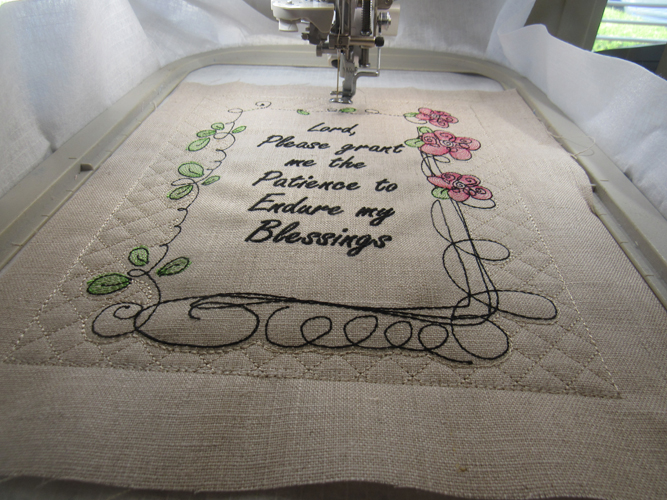
Step 7:
Run CS 9 to quilt the fabrics.
(Click Image to Enlarge)
Step 8:
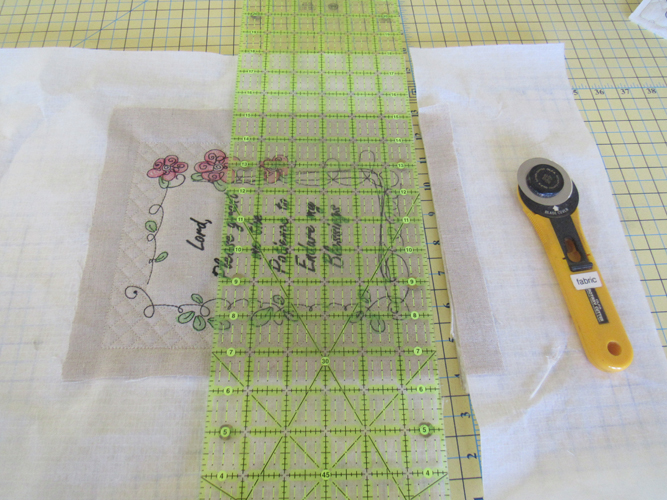
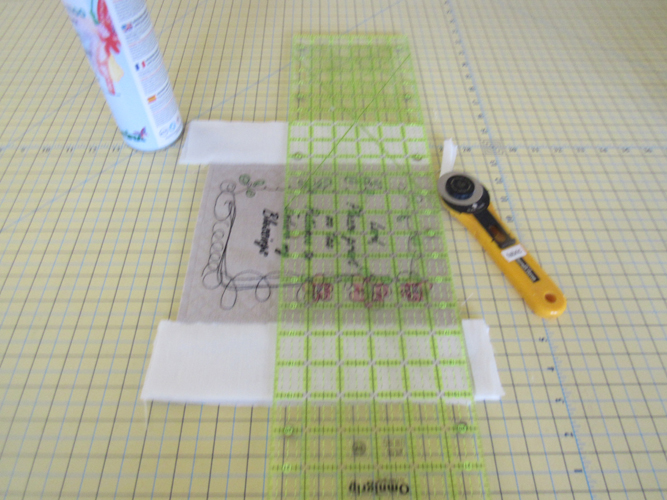
Remove the project from the hoop. Lay the ¼” mark along the tack down lines and trim all sides of the center block to have a ¼” seam allowance.
(Click Image to Enlarge)
Step 9:
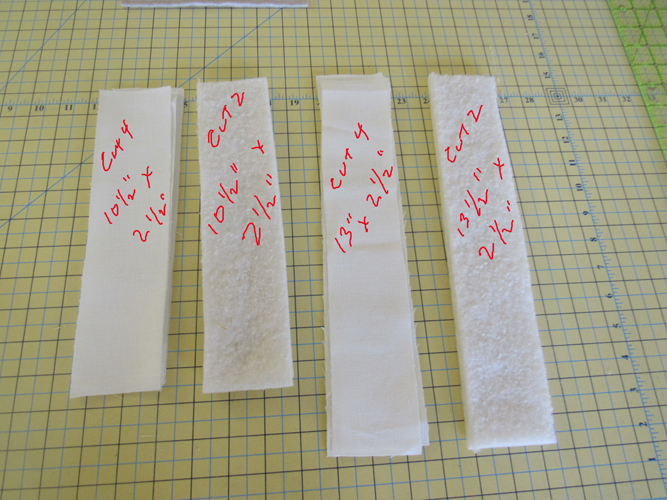
From white linen cut 4 border strips 10 ½” x 2 ½”; cut 4 border strips 13” x 2.5”; cut 2 Battilizer® strips 10 ½” x 2.5” and cut 2 Battilizer strips 13” x 2.5”.
(Click Image to Enlarge)
Step 10:
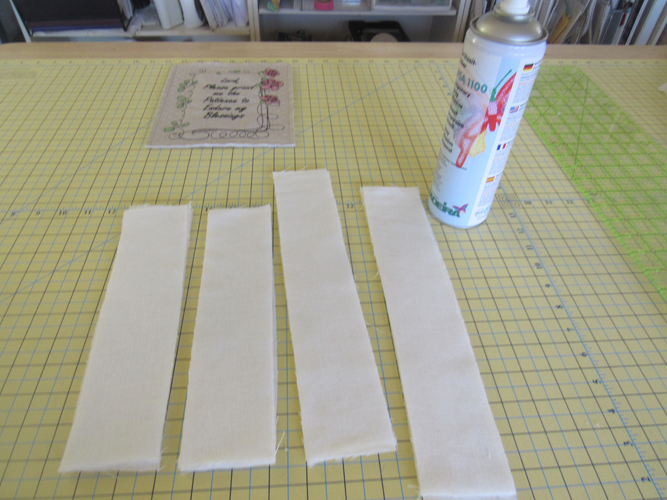
Make quilt sandwiches out of the border strips by spraying a Battilizer® strip with adhesive and aligning a corresponding fabric strip over it. Spray the other side of the Battilizer® with adhesive and aligning a second fabric strip over it. Repeat to make a total of 4 border quilt sandwiches.
(Click Image to Enlarge)
Step 11:
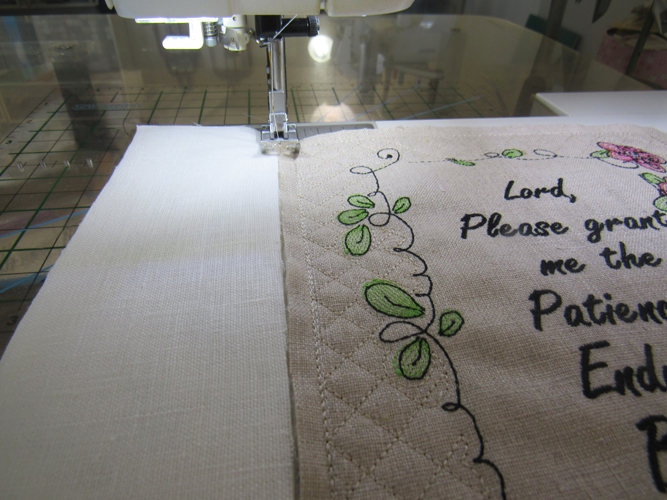
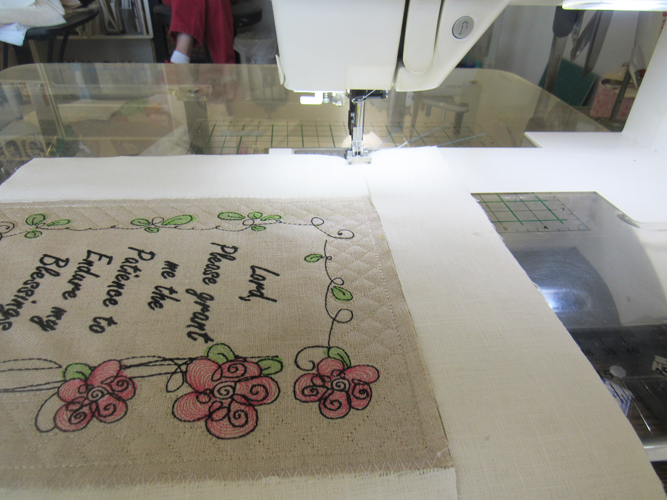
Load invisible thread in the bobbin and top of your sewing machine. Select a zigzag stitch approximately 5.5mm wide and with spacing of about 4.5mm. Butt the side border strips (10 ½” long) along the sides of the center block, having the border strip exceed the top and bottom of the center strip by about ½”. Without gaps or overlaps between the border strip and the center block zigzag the borders to the center block.
(Click Image to Enlarge)
Step 12:
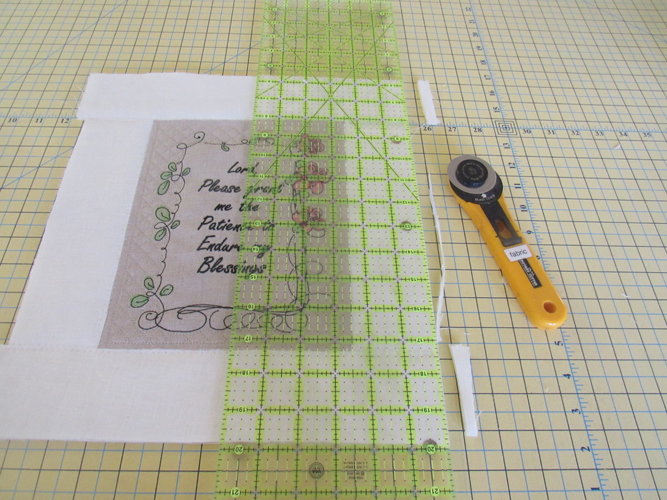
Trim the top and bottom of the border strips even with the center block.
(Click Image to Enlarge)
Step 13:
Attach the top and bottom borders in the same way.
(Click Image to Enlarge)
Step 14:
Trim the top and bottom borders even with the side borders.
(Click Image to Enlarge)
Step 15:
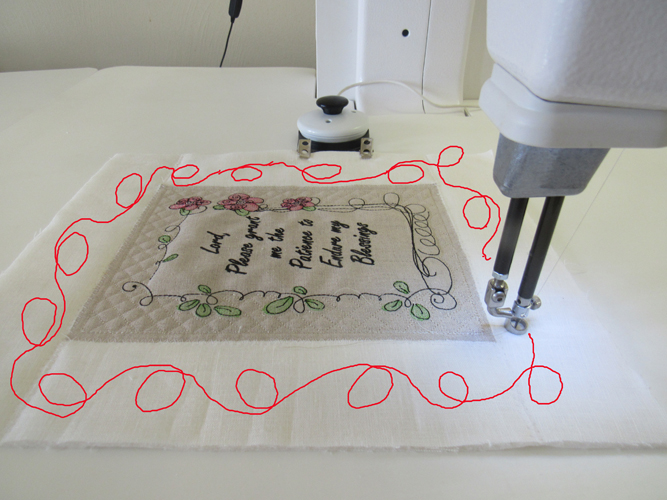
This step is optional. If you have not tried free motion quilting this is a great place to start. If you can lower the feed dogs on your sewing machine, you can free motion quilt. Check your manual to see how to lower your feed dogs and see if you have a free motion hooping foot for your machine. Peruse the many videos and sample beginner designs on youtube and Pinterest. Practice for about 5 minutes on a quilt sandwich made from scrap fabrics and then have a go at free motion quilting your borders.
(Click Image to Enlarge)
Step 16:
(Click Image to Enlarge)
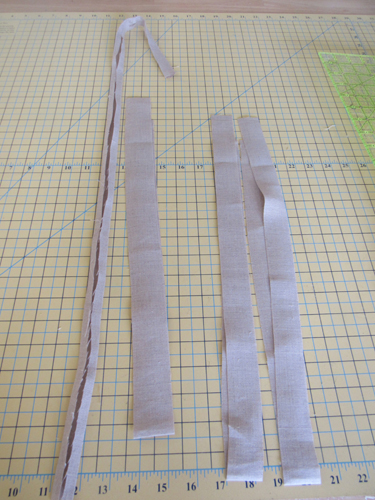
From the remainder of your Natural linen fabric cut two strips 1 ½” wide and about 32” long. Cut two strips 1 ¼” wide and about 32” long. You will need a total of 56” of each size strip. Fold the sides of the strips into the center and press and shown in this picture.
Step 17:
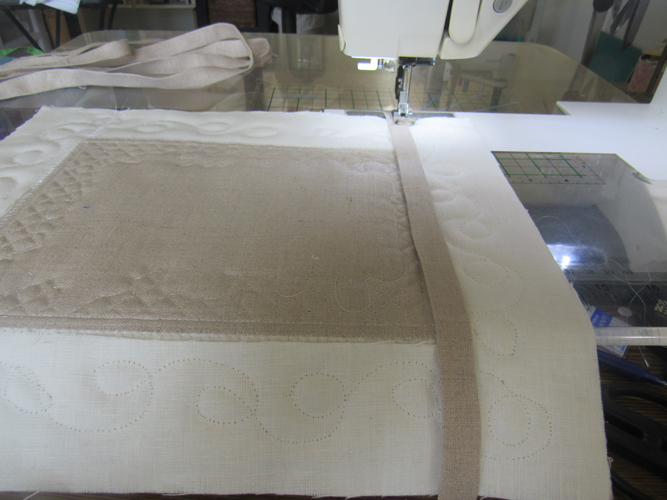
Lay the narrow strips across the top and bottom zigzag seams on the back of the mini quilt. Stitch down both sides of each strip with a straight stitch using invisible thread.
(Click Image to Enlarge)
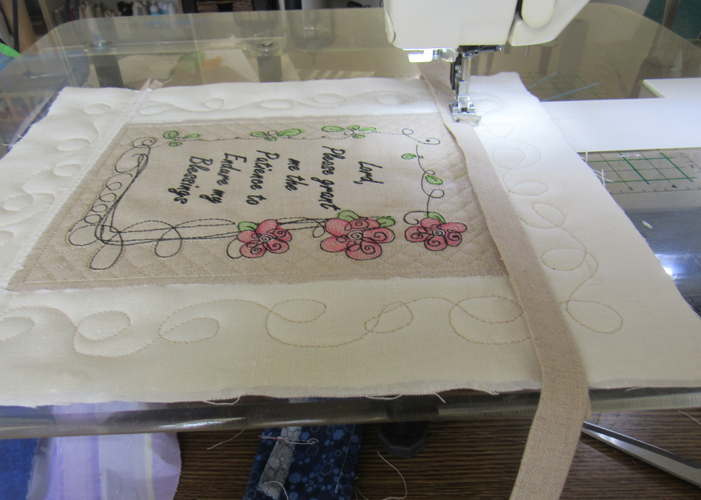
Step 18:
Turn the mini quilt right side up. Stitch the wider sashing over the top and bottom zigzag seams with a straight stitch and invisible threads.
(Click Image to Enlarge)
Step 19:
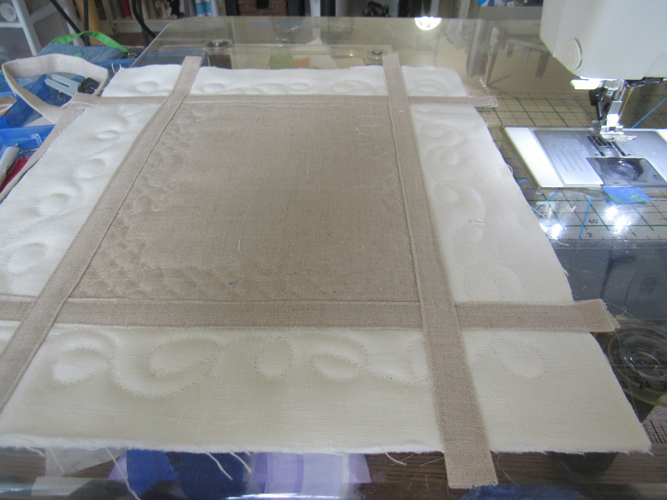
Turn the mini quilt face down. Stitch the narrow sashing strips over the vertical seams in the same manner. Then turn the mini quilt face up and stitch the wider sashing strips over the vertical zigzag seam on the front.
(Click Image to Enlarge)
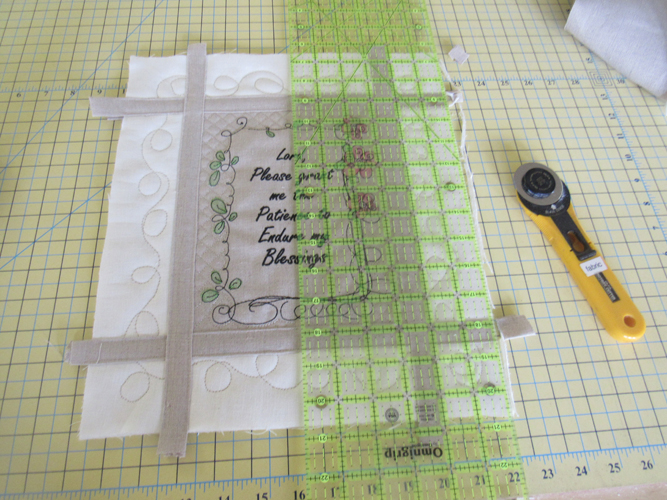
Step 20:
Trim the excess sashing strips from the mini quilt while squaring it up.
(Click Image to Enlarge)
Step 21:
Though I normally cut my binding strips 2 ¼” wide I chose to cut the binding strips for this project 2 ½” wide due to the slightly thicker weight of the linen. Cut two binding strips your preferred width and bind using your favorite method. If you do not have a favorite method see our article Binding Small Embroidery Projects.
Step 22:
(Click Image to Enlarge)
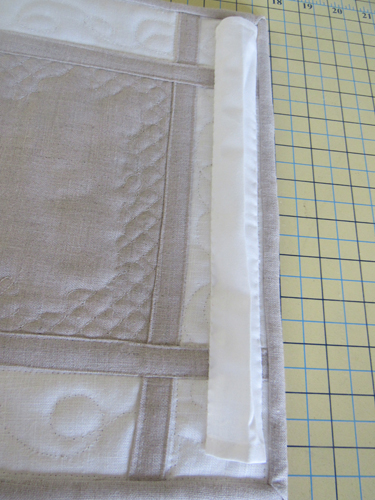
Attach a hanging sleeve ½” below the top of the mini quilt. In this case the made from an 12 ¼” x 3 ½” strip of white Kona Cloth®. If you need help with this please see our article Attaching a Hanging Sleeve to a Mini Quilt.
Step 23:
Congratulations your Grant me Patience Mini Quilt is complete!
Award winning Digitizer, Embroidery Educator, Author and a Consultant to the Industry, Pat Williams has 30 years of experience in the embroidery industry. Pat has won multiple awards for her digitizing expertise including the 2007 Impressions Awards Grand Championship, Best of Show as well as the 1st and 2nd Place Awards. Pat’s love of digitizing has afforded her the opportunity to write numerous articles for Impressions magazine in the United States and Images Magazine in Europe. In 2001 Pat was named “Embroidery Educator of the Year.” For many years Pat taught digitizing seminars at the ISS Shows in Long Beach, CA and for Compucon software. She now resides in Tucson, AZ.