{{superHeaderAds.title}}
Live Chat
Embroidery Designs
Welcome, Embroiderer
Login
Quilted Book Sleeve
{{mainImageAlt || (productInfo._source && productInfo._source.name) || ''}}

Quilted Book Sleeve Embroidery Project

By   Linda Mills   on   June 12, 2020

PROJECT DETAILS

SKILL LEVEL
Intermediate
TIME REQUIRED
01:45
Description

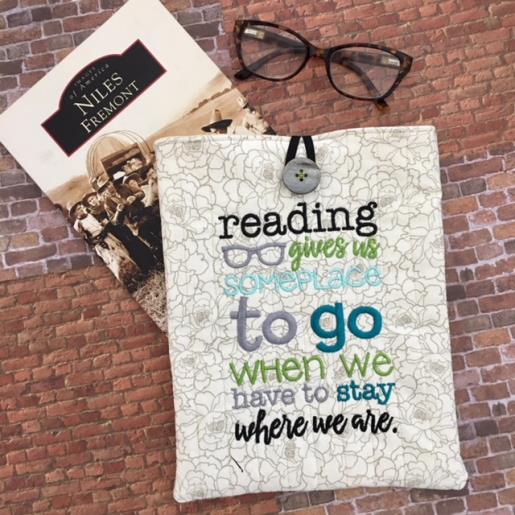
A quilted book sleeve to help protect the pages of your books from getting bent and creased when traveling or just on the go.

Project Preview Video

Materials
  • 2 FAT QUARTERS (COORDINATING)
  • COTTON BATTING 24” X 20”
  • SEWING THREAD
  • EMBROIDERY THREAD
  • ¼” ELASTIC ( 4” STRIP)
  • (1) BUTTON 1”
  • TEMPORARY ADHESIVE SPRAY
  • TEAR AWAY STABILIZER
  • CHALK OR AIR ERASE FABRIC PEN
  • QUILT GUIDE BAR (OPT)

  • Designs used in this project

    Final Product: What You Will Create

    Preface:
    If you love reading and take your books everywhere then this book sleeve project is for you. Simple to follow tutorial showing how to easily quilt your fabric by stitching a straight line as well as adding a lining with ease. The embroidery design adds a lighthearted charm. Look for other embroidery designs on the ED website to personalize for gift giving.


    Step 1:
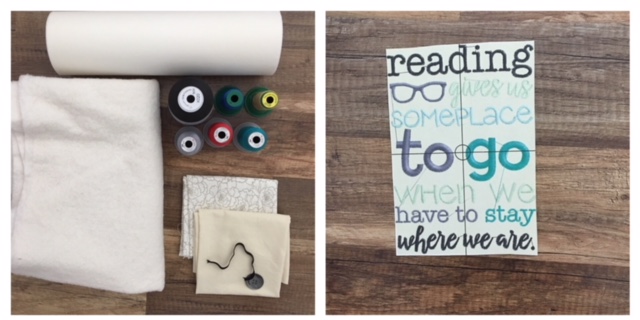
    Gather all supplies and review instructions before beginning. Print out paper template of embroidery design. This tutorial is for a 6.5” x 9.5” size book. 

    (Click Image to Enlarge)


    Step 2:
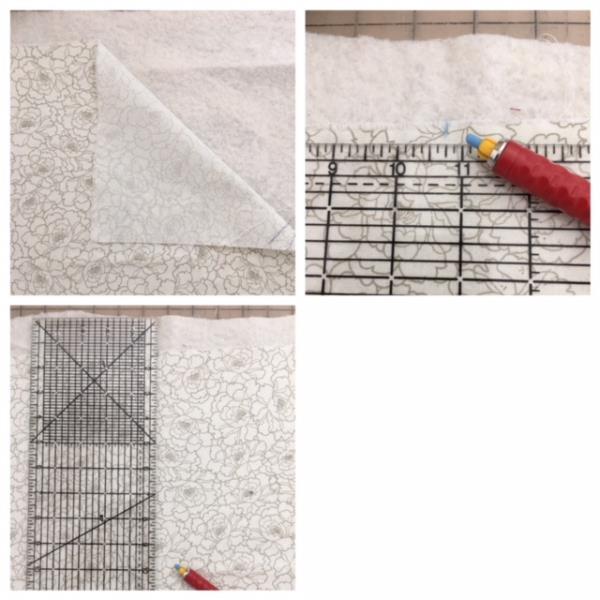
    Lightly spray temporary adhesive spray atop your cut batting .place your outer fat quarter fabric on top. Fingertip press and smooth out wrinkles. ( most fabric quarters measure 18” x 22”) the cotton batting should extend out approx. 1” from your fabric edges.  Center mark top and bottom on the 22” length sides. Draw a straight line all the way down from the top center marking to the bottom.

    (Click Image to Enlarge)


    Step 3:
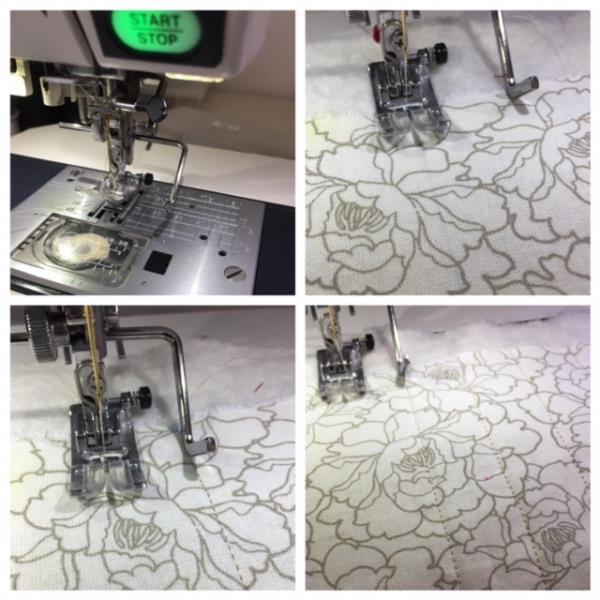
    If you are using a quilt guide bar … attach per your machines instructions for row spacing of 1”. If you are not using a quilt guide bar draw lines 1” apart ( top to bottom) making rows, across the front of your outer fabric. Sew onto the first line drawn. Place quilt guide bar atop sewn line and sew the next line. Continue until all lines are completed across the outer fabric. For those with drawn lines continue to sew on the rows of drawn lines until completed.

    (Click Image to Enlarge)


    Step 4:
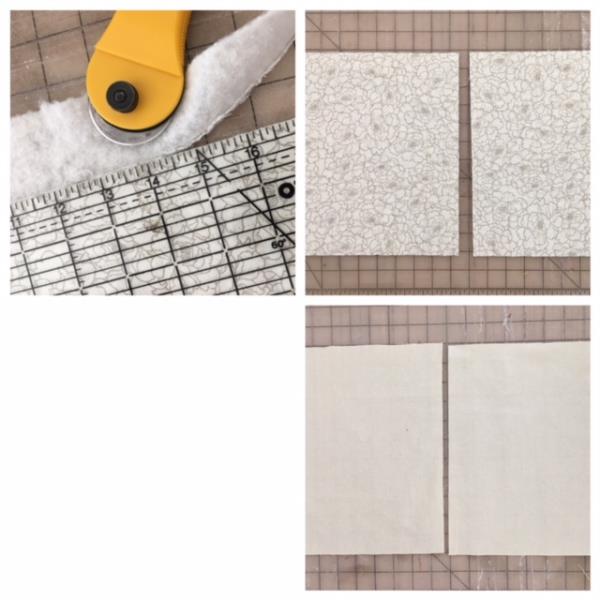
    Trim excess batting all around edges. Cut two 9” x 11” keeping sewn quilt lines vertical. Cut two 9” x 11” from your lining fabric.  

    (Click Image to Enlarge)


    Step 5:
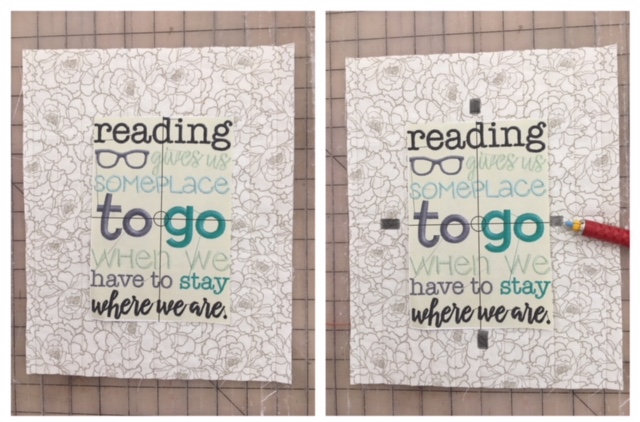
    Center place your paper embroidery design template on top of one of your outer quilted pieces. Mark axis points top/bottom/sides.

    (Click Image to Enlarge)


    Step 6:
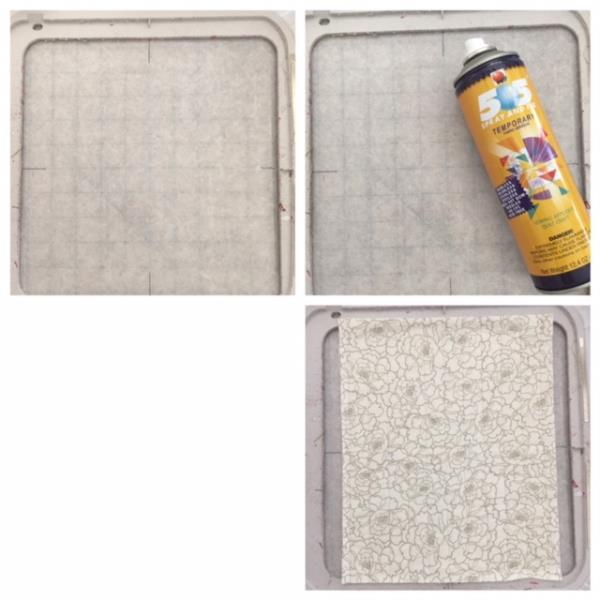
    Cut and hoop stabilizer. Mark axis points directly onto stabilizer. Spray temporary adhesive atop stabilizer. Center place outer panel matching axis points.  

    (Click Image to Enlarge)


    Step 7:
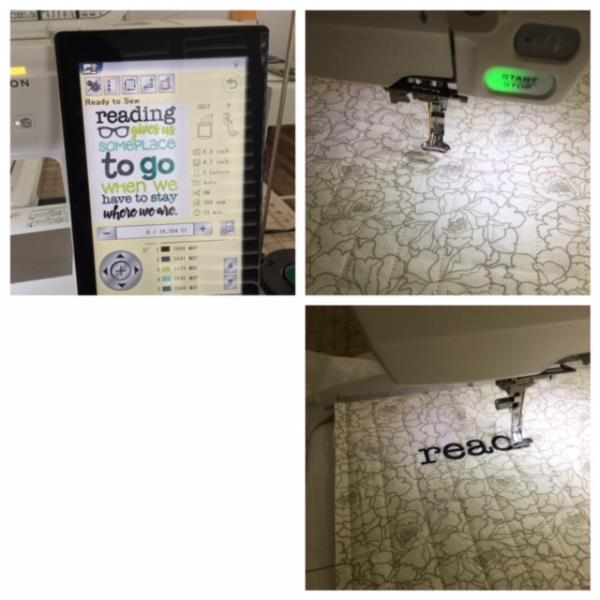
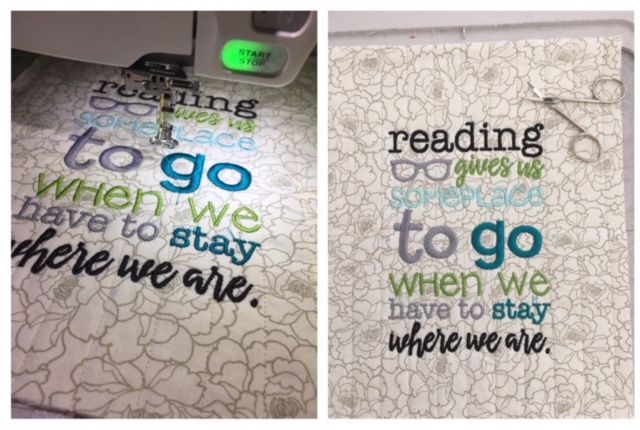
    Load design into your machine. Attach prepared hoop. Confirm center needle placement. Follow design thread color chart of use thread colors to coordinate with your fabric. Embroider design.

    (Click Image to Enlarge)


    Step 8:
    Embroidering complete. Remove hoop. Cut and trim all jump stitches and loose thread ends. Remove stabilizer.  

    (Click Image to Enlarge)


    Step 9:
    ATTACHING ELASTIC
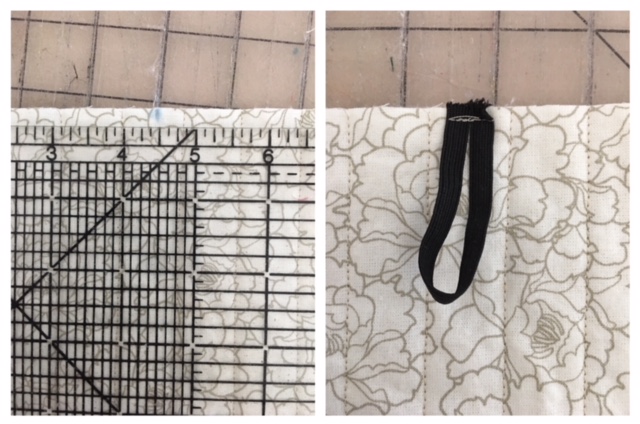
    Center mark the back outer at top edge. Place your cut 4” elastic at top edge. Stitch in place.

    (Click Image to Enlarge)


    Step 10:
    CONSTRUCTION OF BOOK SLEEVE
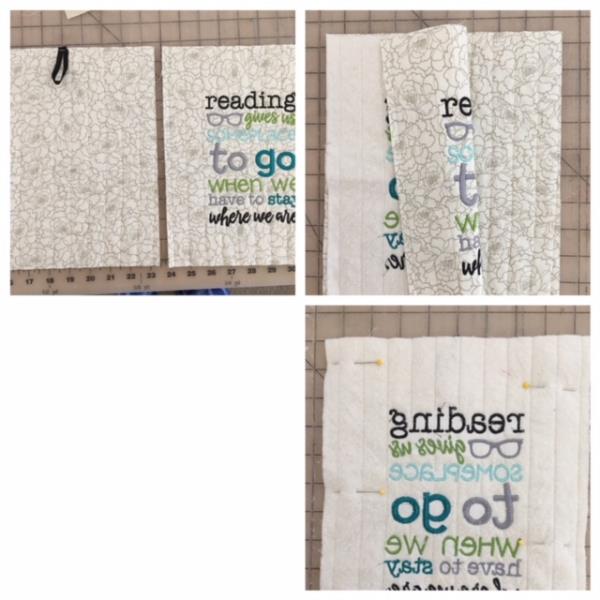
    Place right sides together front and back outer panels. Pin in place.

    (Click Image to Enlarge)


    Step 11:
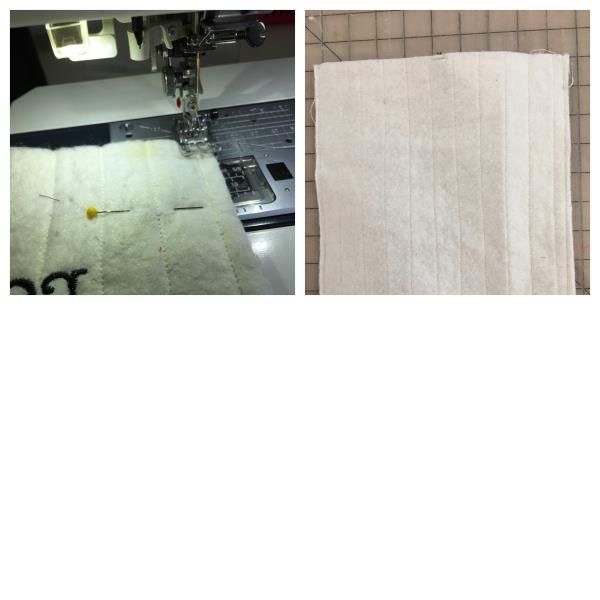
    Stitch both sides and bottom using ¼” seam allowance. Remove pins. Trim bottom corners. Turn right side out.  

    (Click Image to Enlarge)


    Step 12:
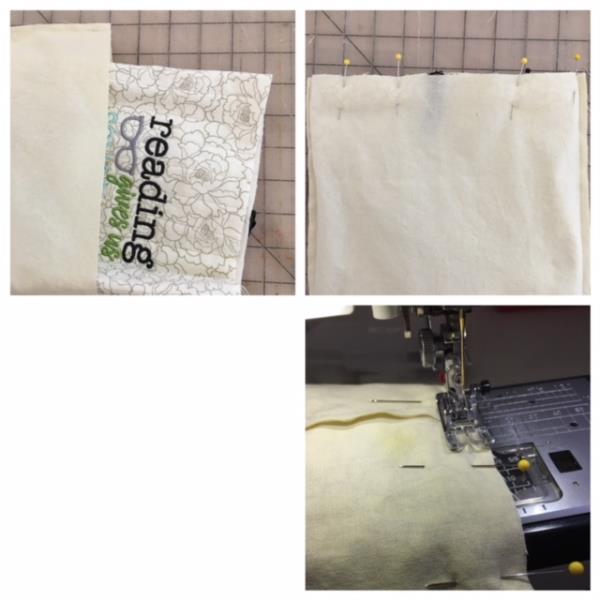
    Repeat step for your lining pieces. Leave a 2” opening at bottom for turning. Do not turn right side out. Insert front sewn book sleeve into lining. Right sides together. Match side seams and top edges. Pin in place. Stitch around all top edges using ¼” seam allowance. Make sure your elastic is not sticking up.

    (Click Image to Enlarge)


    Step 13:
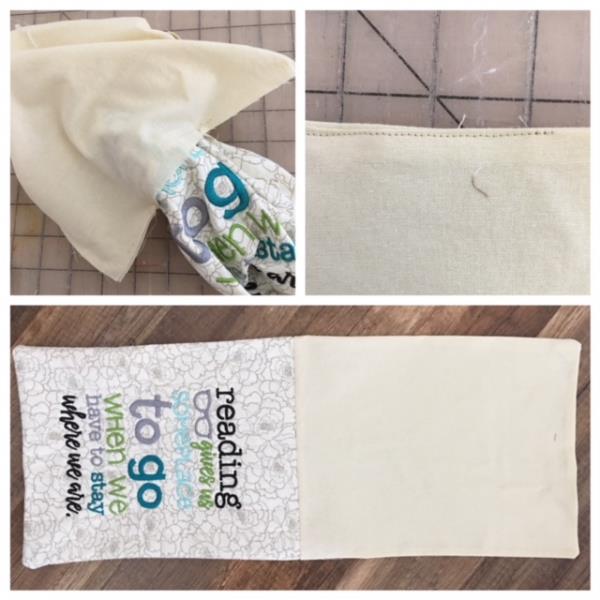
    Pull outer sleeve though opening. Iron press if needed. Stitch opening close. Push lining down into sleeve. Iron press top edge. Top stitch all around top edge. 

    (Click Image to Enlarge)


    Step 14:
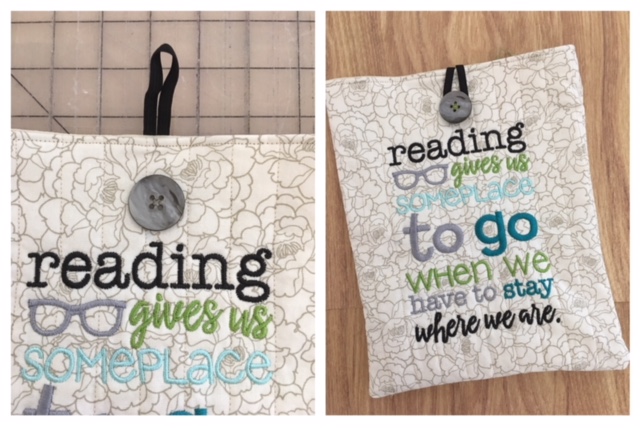
    Hand stitch button onto the front. Center and line up with elastic strap. And your are done!!! Congrats! 

    (Click Image to Enlarge)

    Meet the Author: Linda Mills
    Linda Mills
    Linda loves to create by sharing her different sewing and machine embroidery techniques so others can utilize their machines to the fullest
    More From This Author
    Link is Broken, Please check the URL
    Exclusive Embroidery Offers!
    Copyright © {{ currentDate | date:'yyyy'}} - EmbroideryDesigns.com
    GET 50% OFF! ×