Border OptionsHugging border, circle, square, or rectangle — with a 3mm satin stitch.
Backing OptionsAvailable with iron-on, sew-on, or velcro backing.
Fast ShippingShipped quickly from the USA.
Free Online Tools
Powerful embroidery utilities that save time and prevent costly mistakes.
Stitch AssistantRECOMMENDED
Get the exact stabilizer, machine settings, needle, and thread color sequence for every embroidery design you purchase — based on that design's stitch density, dimensions, and color count.
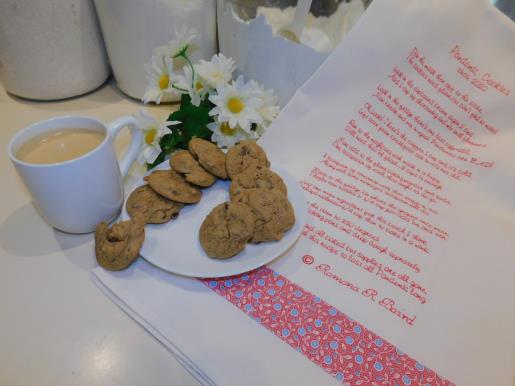
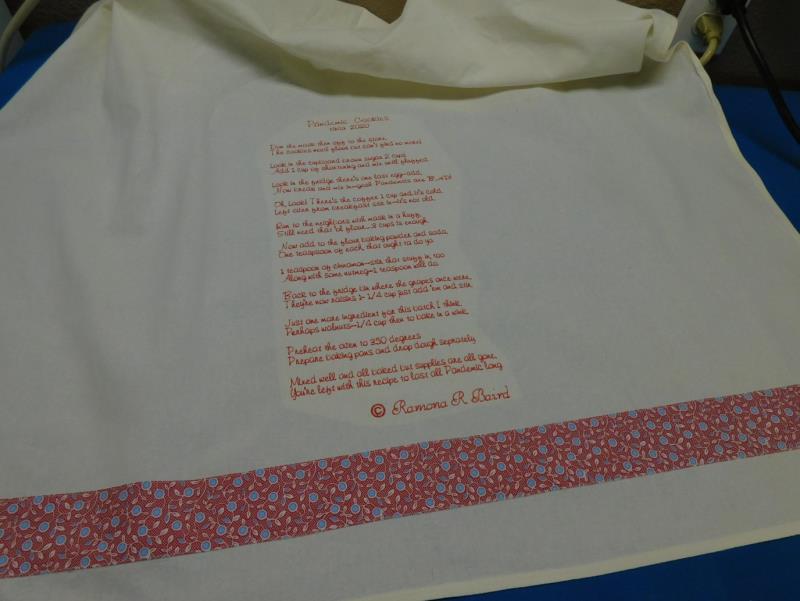
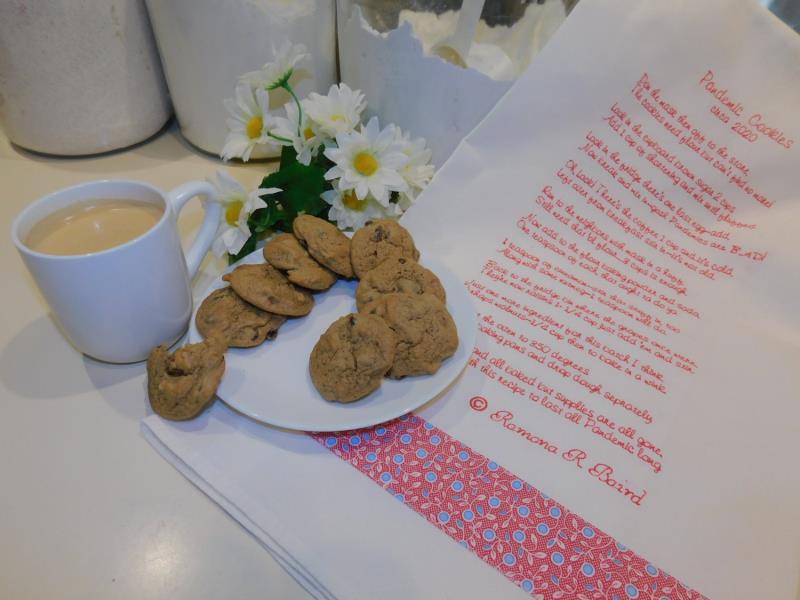
Craft a delightful kitchen towel featuring a recipe for delicious cookies. Perfect for adding charm to your baking space or gifting to a baking enthusiast. Step-by-step instructions are included.
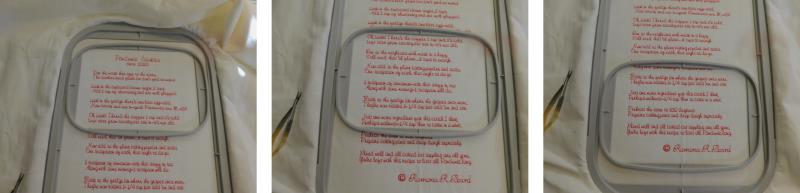
The Pandemic Cookies Recipe design is a very large design, so be sure you have a hoop to fit the size. However, you will see in Step 10, that by turning the design sideways and splitting it up in embroidery software, it can be done in three hoopings by splitting it up in embroidery software.
Step 1:
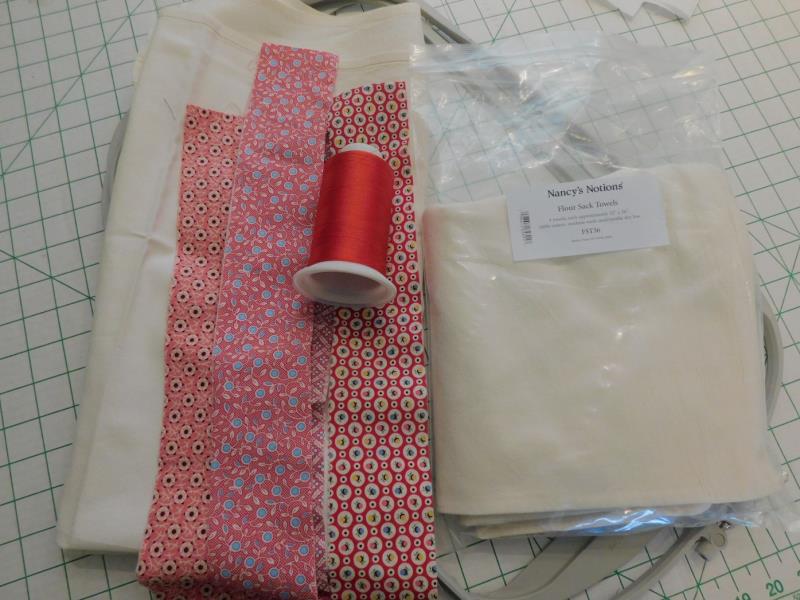
Read through the instructions thoroughly before beginning and assemble all the materials needed to complete the project. The towel used for the project was purchased from Nancy’s Notions (FST36) and measures approx..32” x 36”. The fabric strip was from a jelly roll set of 1930’s calico, and measured 2 ½” x 45”.
(Click Image to Enlarge)
Step 2:
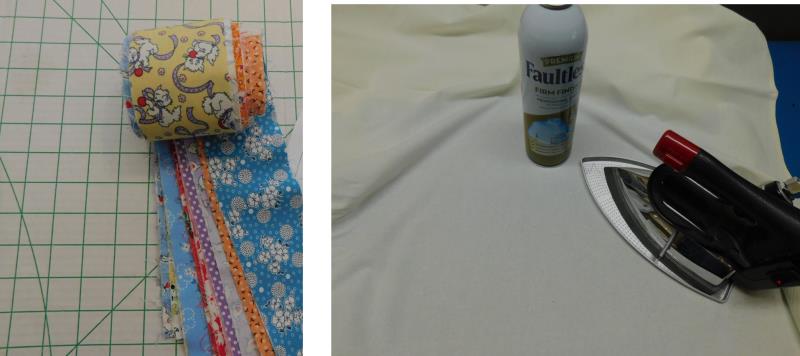
Coordinate thread and the fabric strip. Press the towel well using spray starch. Spray and press at least three times to make the towel fairly stiff.
(Click Image to Enlarge)
Step 3:
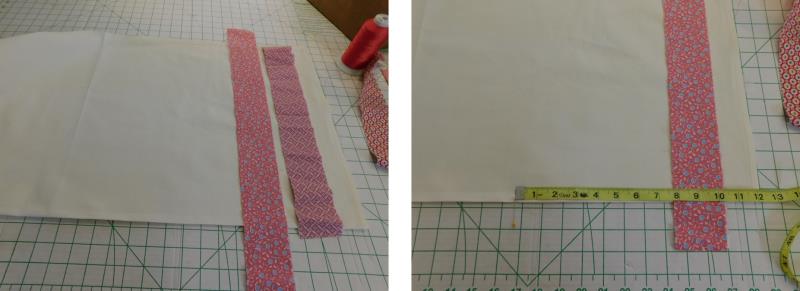
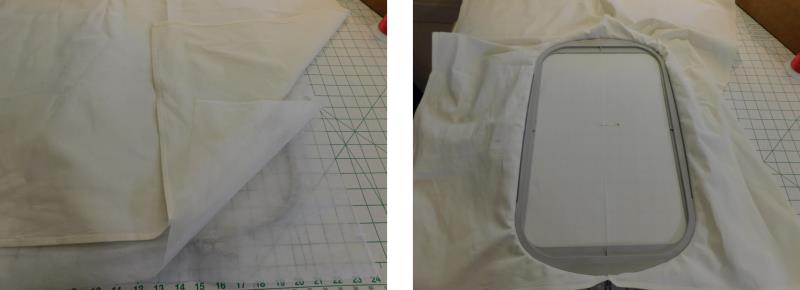
Fold the towel in half lengthwise. Audition fabric strips to see what you would like to use. More than one strip can be used if you prefer. In the end, the fabric strip will be sewn below the bottom of the embroidery about 1”. So, measure up the amount needed to mark the center alignment point; for this project it was 12” up from the bottom of the towel.
(Click Image to Enlarge)
Step 4:
Center and hoop the fabric with two layers of water-soluble stabilizer.
(Click Image to Enlarge)
Step 5:
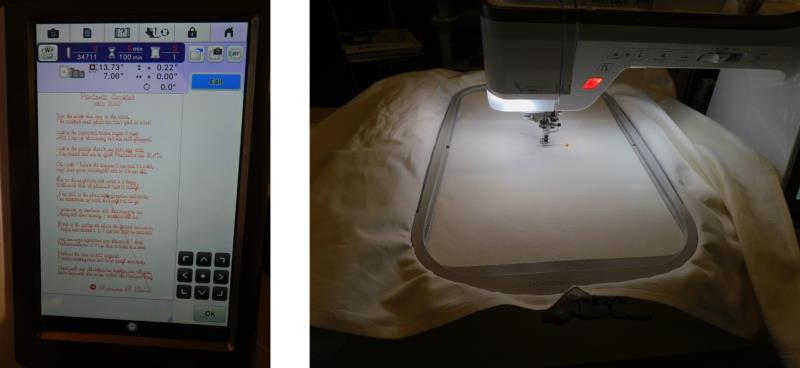
Load the design on the machine. Note: if splitting the design to fit a 5” x 7” hoop, in software split the design into three sections, loading each design, aligning, and rehooping as required. Align the needle to the center point as marked.
(Click Image to Enlarge)
Step 6:
When stitching such a large piece of fabric, check to be sure none of the fabric is underneath the hoop when the hoop is placed on the machine. Stitch the design.
(Click Image to Enlarge)
Step 7:
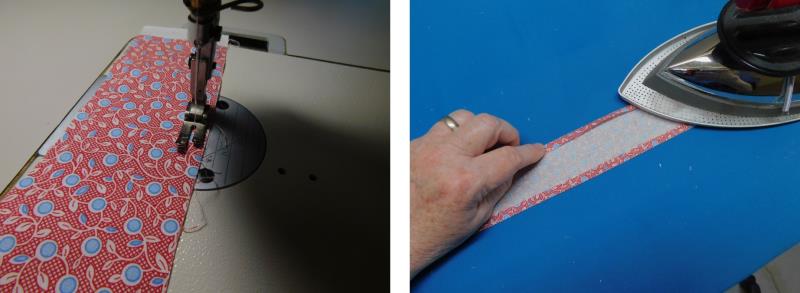
While the design stitches, prep the fabric strip. Fold under ¼” on both long sides of the strip. If a ¼” basting stitch is sewn on each side first, the thread gives a nice line to turn on.
(Click Image to Enlarge)
Step 8:
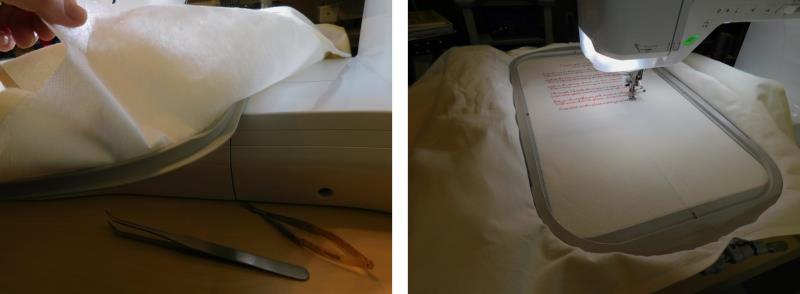
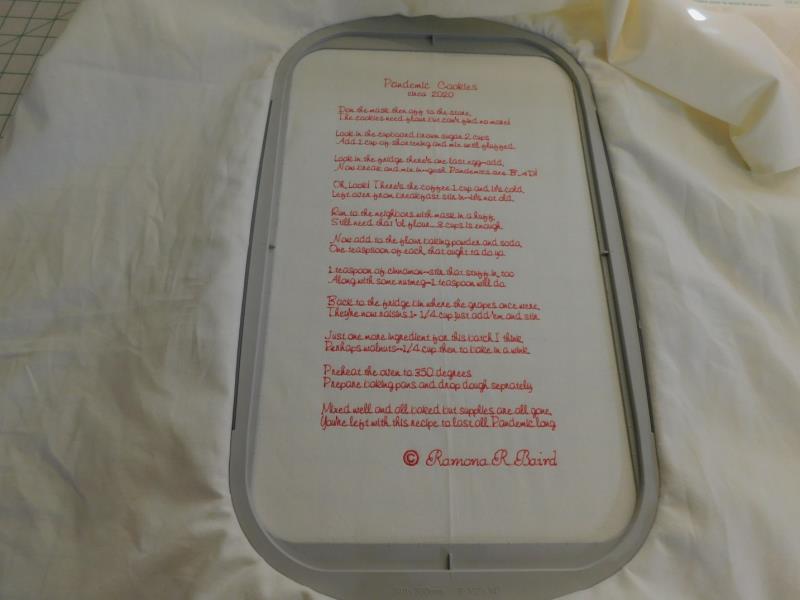
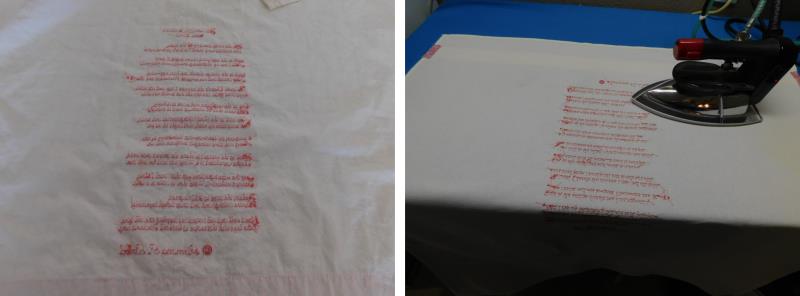
Here is the design after it has finished stitching. It can be left like this or a little bit of trimming done.
(Click Image to Enlarge)
Step 9:
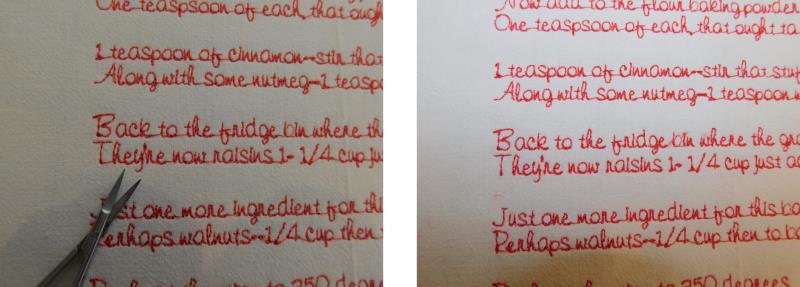
Here is a closeup of the design as is on the left. There are connecting threads between the words. These were left in otherwise there would have been almost 300 trims on the back of the towel. If you’d like ot clean it up a little, just use very small, sharp curved nippers to clip the threads between the words as shown on the right. Do not clip the threads on the back, these threads will help keep the tie in threads in place between the words. Do any trimming with the fabric still in the hoop. The tension makes trimming easier.
(Click Image to Enlarge)
Step 10:
If using a 5” x 7” hoop, the design should be able to be split into three hoopings as shown. Save each as a separate file, rehoop and stitch each file.
(Click Image to Enlarge)
Step 11:
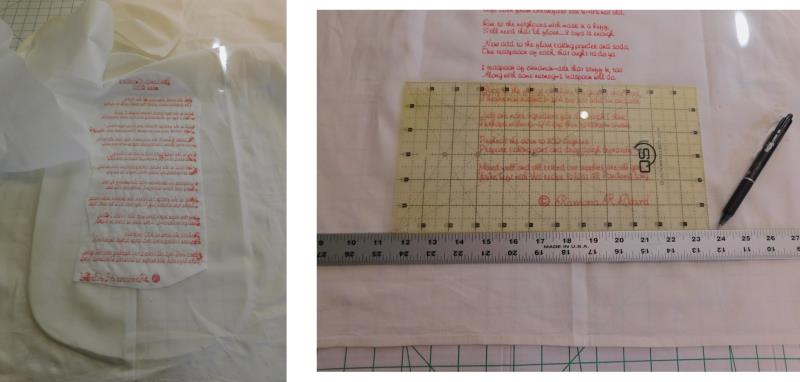
Trim the excess stabilizer from the back of the towel. Using a gridded ruler, square a line 1” below the bottom line of the design, all the way across the towel.
(Click Image to Enlarge)
Step 12:
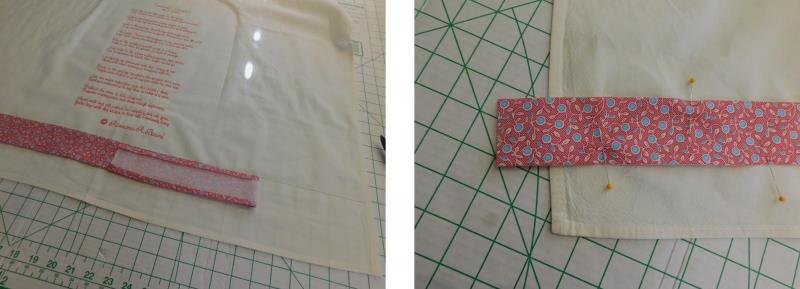
Center the strip of fabric on the towel, with the top of the strip along the line just drawn. Leave 1” on each end of the strip and trim the rest.
(Click Image to Enlarge)
Step 13:
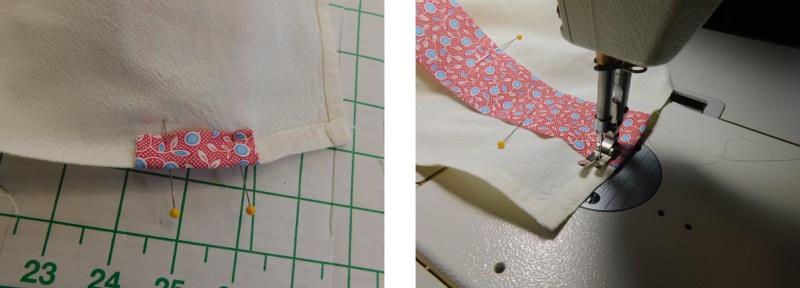
Double fold the strip on each end and pin to the back of the towel. Stitch the strip in place. Begin at the middle of one edge.
(Click Image to Enlarge)
Step 14:
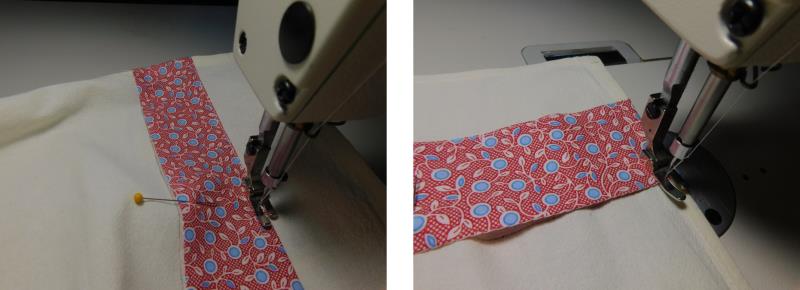
Pivot at the edge and edge stitch the long edge.
(Click Image to Enlarge)
Step 15:
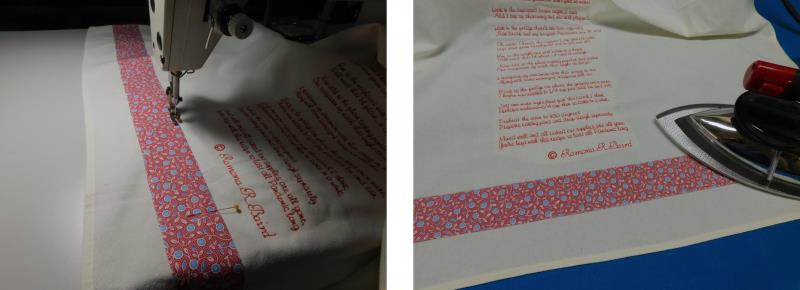
Pivot at the other end, sew up the other short edge, pivot again and sew the remaining long edge. Press the towel when finished.
(Click Image to Enlarge)
Step 16:
All that is left is to rinse out the stabilizer and press the towel again. Rinse out the stabilizer according to the manufacturer’s directions
(Click Image to Enlarge)
Step 17:
and press the towel again from the wrong side.
(Click Image to Enlarge)
Step 18:
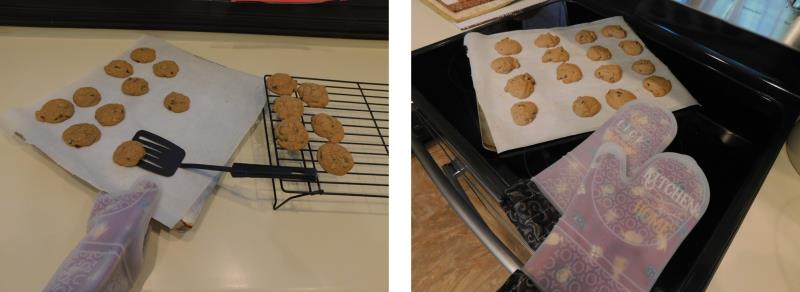
Mix up and bake the cookies. The recipe stitched on the towel: Heat oven to 350 degrees. Cream together 1c. shortening with 2c. brown sugar. Add 1 egg and mix. On slow speed mix in 1c cold coffee. To 3c. flour add 1t. baking powder, 1t. baking soda, 1t. cinnamon, and 1t. nutmeg. Stir into the wet mixture just until blended. Stir in 1 ¼ c. raisins and 1/4c. walnuts. Drop onto prepared baking sheet and bake approx. 8-10 minutes. For a softer rounder cookie, add an additional ¼ c. of flour. For an additional project, do the Silicone Mitts project!
(Click Image to Enlarge)
Step 19:
Congratulations on completing the Pandemic Cookie Recipe Towel. Bake up the cookies, and relax with a fresh cup of coffee and enjoy!
Ramona Baird has been in the embroidery industry for over 23 years. She and her husband owned a commercial and retail embroidery store in Arizona for many years. She is an experienced digitizer having been mentored by award-winners Pat Williams and Lindee Goodall. Ramona is a contributor to “Creative Machine Embroidery” magazine having 5 covers to her credit. Ramona has worked for Wilcom America and served many years as Education Director for the American Sewing Guild. With a degree in fashion design, she is able to design and execute patterns which Pat Williams says are “out of the box” in creativity and application. Ramona likes to challenge the boundaries of embroidery and bring new and exciting designs, ideas, and projects to EmbroideryDesigns.com. She wants embroiderers of all levels to increase their skills and enjoyment in using their embroidery machine for gift-making and personal pleasure.