{{superHeaderAds.title}}
Live Chat
Embroidery Designs
Welcome, Embroiderer
Login
Calming Dream Pillow Pockets
{{mainImageAlt || (productInfo._source && productInfo._source.name) || ''}}

Calming Dream Pillow Pockets Embroidery Project

By   Linda Mills   on   May 28, 2020

PROJECT DETAILS

SKILL LEVEL
Beginner
TIME REQUIRED
01:00
FINISHED SIZE
5.5 x 4 inches
Description

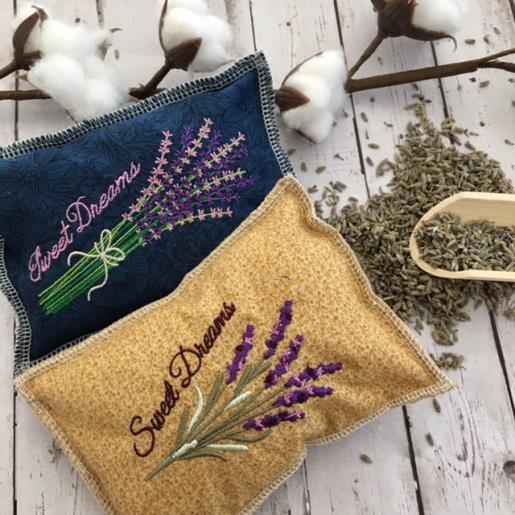
A Calming Dream Pillow pocket filled with dried lavender flowers to tuck into your pillowcase for a relaxing nap.

Project Preview Video

Materials
  • FAT QUARTERS OR SCRAP COTTON FABRIC CUT TO SIZE 4.5” X 6”
  • MUSLIN OR WHITE COTTON SCRAP FABRIC CUT SIZE 3” X 10”
  • DRIED LAVENDER FLOWERS
  • EMBROIDERY THREAD
  • CUT AWAY STABILIZER
  • TEMPORARY ADHESIVE SPRAY
  • POLYESTER FIBERFILL (Handful)
  • SERGER MACHINE (OPT)
  • SEWING THREAD FRAY CHECK

  • Designs used in this project

    Final Product: What You Will Create

    Preface:
    Cut two 4.5 “x 6” cotton fabric. Add a Sweet Dreams embroidery design for a quaint appeal, then fill pocket with lavender flowers or calming herbs.  These make great gifts or add to your B and B room for your guests to experience a relaxing nights sleep. 


    Step 1:
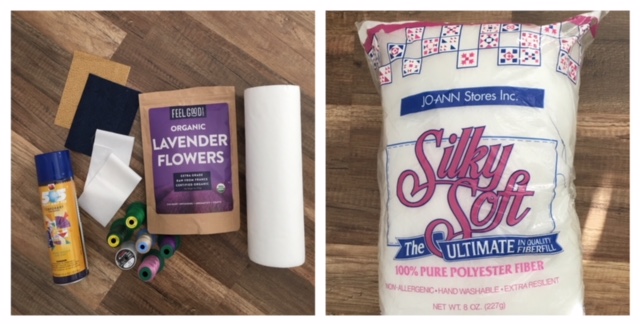
    Gather all supplies and review instructions before beginning. Time stated is for one pillow pocket.  

    (Click Image to Enlarge)


    Step 2:
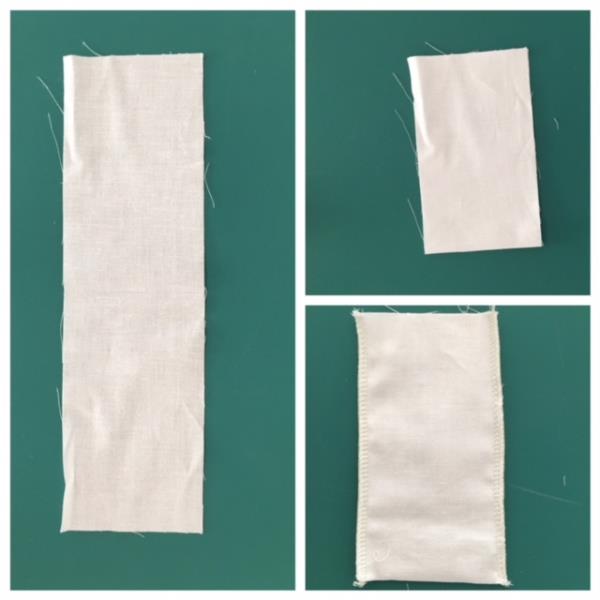
    Cut (2) cotton fabric 4.5” x 6”. ( front and back of pillow)  Cut (1) muslin fabric strip 3” x 10”. ( Pocket for dried lavender)


    Step 3:
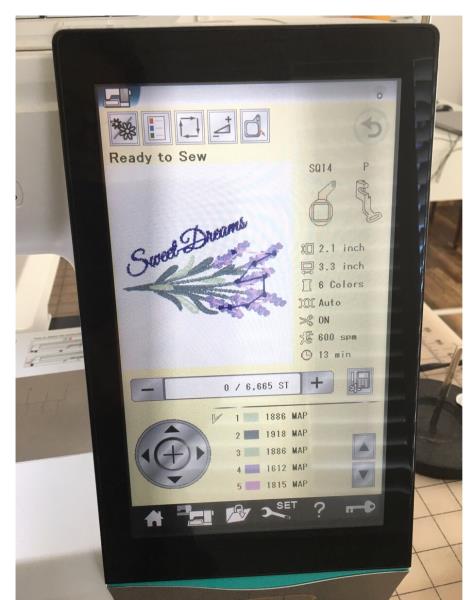
    Load embroidery design “ Sweet Dreams” into your machine.

    (Click Image to Enlarge)


    Step 4:
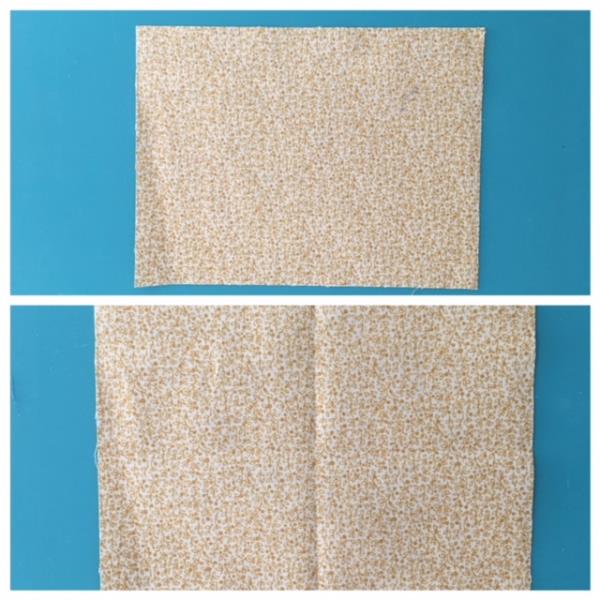
    Fingertip press front cut cotton fabric by folding in half and then half again. This will leave a folded crosshair. 

    (Click Image to Enlarge)


    Step 5:
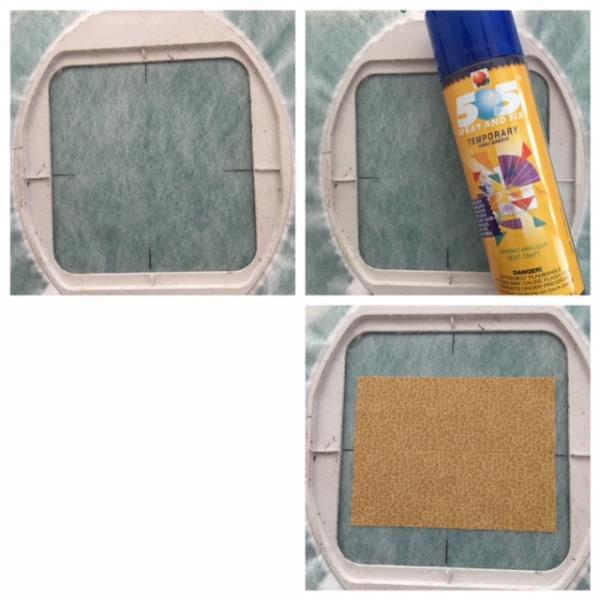
    Cut and hoop cutaway stabilizer. Mark axis points directly onto stabilizer. Lightly spray temporary adhesive spray. Lay front cotton fabric on top matching up axis points from folded crosshair and marked points. 

    (Click Image to Enlarge)


    Step 6:
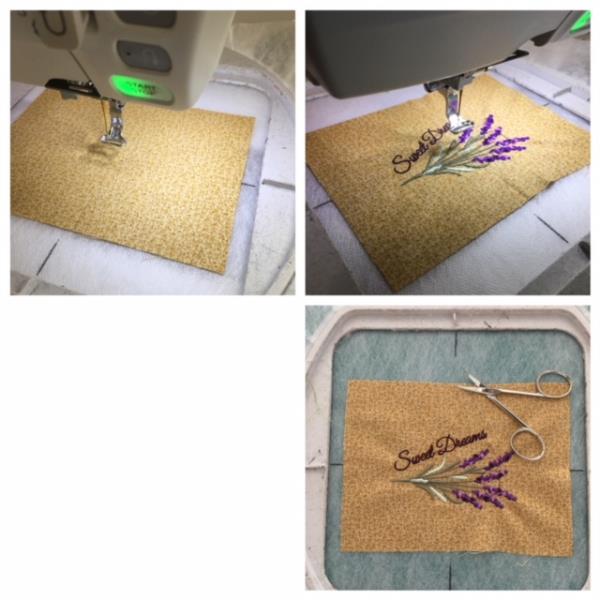
    Attach hoop to machine. Confirm center needle placement. Begin embroidering process. ( design will take approx 15 min to stitch out at 800 SPM and with thread changes) Embroidering complete. Remove hoop from machine. Cut and trim all jump stitches and loose thread ends. Cut away stabilizer from back.

    (Click Image to Enlarge)


    Step 7:
    Fold your muslin strip in half. Serge or zig zag side seams. This will form a pocket. 

    (Click Image to Enlarge)


    Step 8:
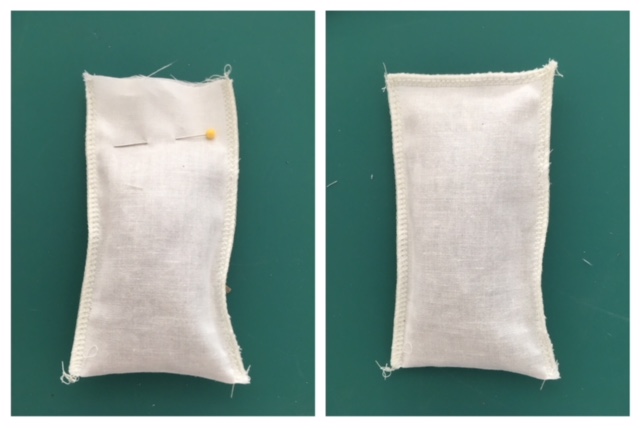
    Fill pocket with dried lavender flowers. Leaving approx 1” from top and pin. (this pinning method is used to hold dried flowers back when stitching top close so that they do not fall into the stitching area) Serge or zig zag top to close. Remove pin.  

    (Click Image to Enlarge)


    Step 9:
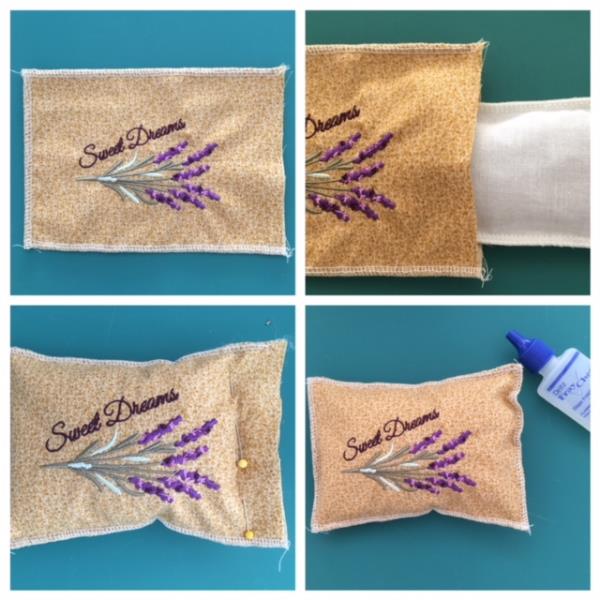
    Place your front ( embroidered) and back cut cotton fabric wrong sides together. Serge or zigzag top, bottom and side. Leaving one side open to insert filled pocket. Add a handful of polyester fiberfil around the lavender filled pocket to add “fluff “ to your pillow . Pin in place. Serge/zig zag opening to close. Remove pins.  Use a small drop of fray check on corners.  

    (Click Image to Enlarge)


    Step 10:
    Woohoo! Congrats! Your Calming Dream Pillow pocket is complete. Now let's get ready to make the next one!   

    (Click Image to Enlarge)

    Meet the Author: Linda Mills
    Linda Mills
    Linda loves to create by sharing her different sewing and machine embroidery techniques so others can utilize their machines to the fullest
    More From This Author
    Link is Broken, Please check the URL
    Exclusive Embroidery Offers!
    Copyright © {{ currentDate | date:'yyyy'}} - EmbroideryDesigns.com
    GET 50% OFF! ×