Slip On Journal Book Cover

Slip On Journal Book Cover Embroidery Project

By   Linda Mills   on   May 07, 2020
  • SKILL LEVELSome Experience
  • TIME REQUIRED01:00
Description

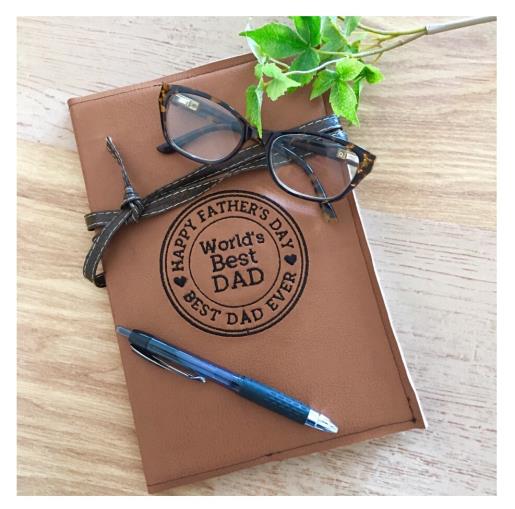
This faux leather slip on journal book cover adorned with “Worlds Best Dad” embroidery design is a perfect way to say “You’re the best Dad” on Father’s Day.

Step of

Materials

Project Preview Video

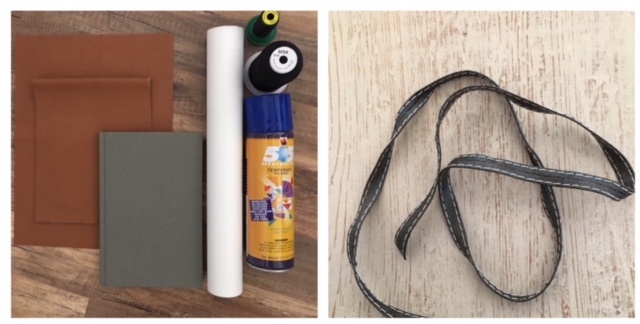
Materials
  • FAUX LEATHER/VINYL
  • EMBROIDERY THREAD
  • TEAR AWAY STABILIZER
  • TEMPORARY ADHESIVE SPRAY
  • SEWING THREAD
  • HARD COVER JOURNAL BOOK
  • TEFLON FOOT (optional)
  • WONDER CLIPS OR SMALL BINDER CLIPS
  • ¾ YD CORDING ( FOR TIE)
  • CHALK PEN

  • Designs used in this project

    Final Product: What You Will Create

    Preface:
    A faux leather slip on book cover tutorial for which measuring instructions can easily be adjusted to fit any size book. Add an embroidery design on the front to personalize along with a cording to wrap around for closure.  


    Step 1:
    Gather all supplies and review instructions before beginning. 

    (Click Image to Enlarge)


    Step 2:
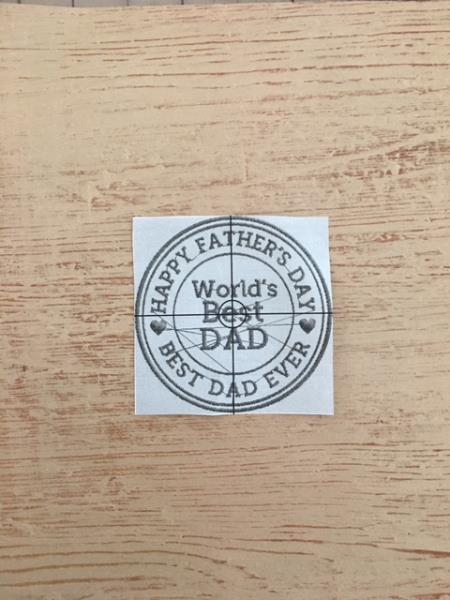
    Print out paper template of embroidery design for review. 

    (Click Image to Enlarge)


    Step 3:
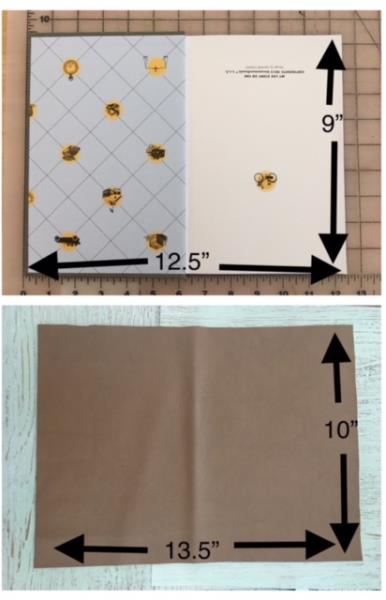
    Cut your faux leather/vinyl based on your book measurements adding approx 1” for size. To measure open book.  The book used for this tutorial was measured as  12.5" x 9".  Fabric cut 13.5" x 10".

    (Click Image to Enlarge)


    Step 4:
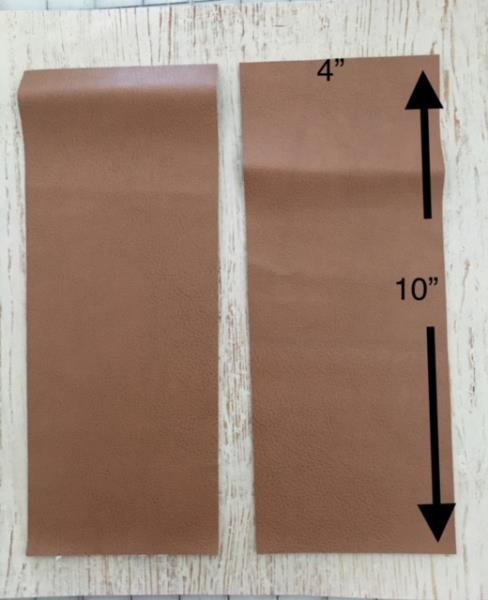
    Cut two pieces of faux leather/vinyl for the inside flaps. 4” width by your cut cover piece length.  The length cut for this tutorial was 10”. 

    (Click Image to Enlarge)


    Step 5:
    To find placement of embroidery design.
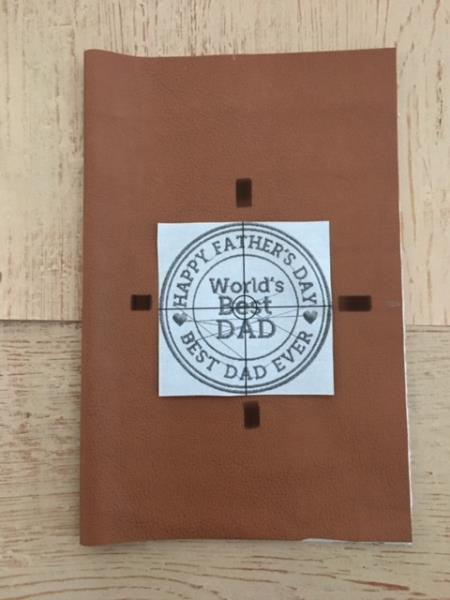
    Fold your front cover faux leather/vinyl piece in half (width)and center your paper template design. Mark axis points using your chalk pen. 

    (Click Image to Enlarge)


    Step 6:
    Load embroidery design into your machine. 


    Step 7:
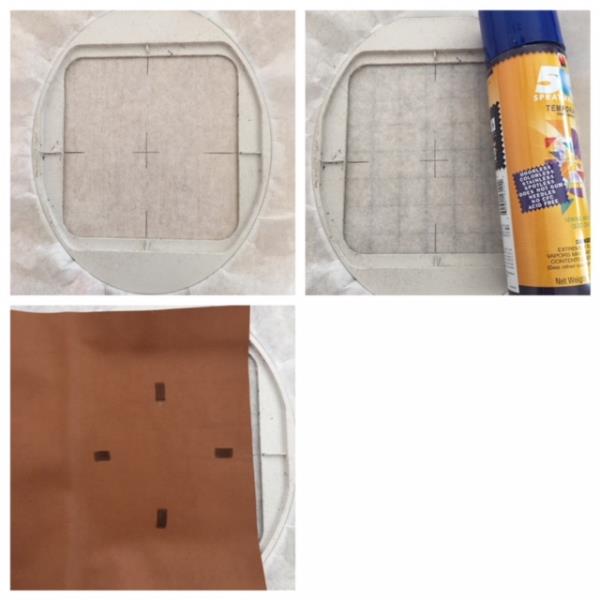
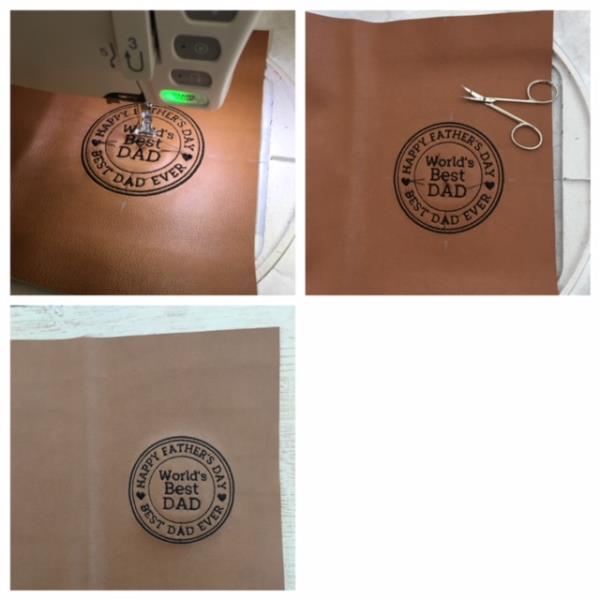
    Cut and hoop a piece tear away stabilizer. Mark center cross hair and axis points. Light spray temporary adhesive spray. Center place by matching axis points to hoop markings. 

    (Click Image to Enlarge)


    Step 8:
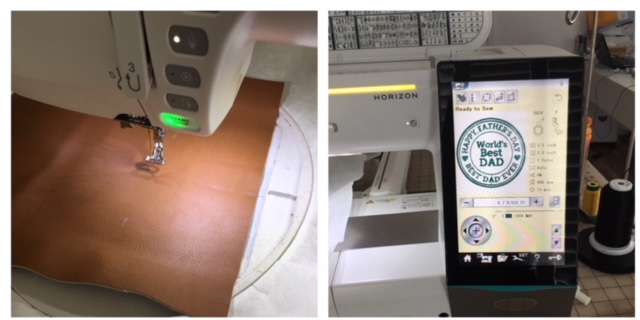
    Attach hoop to your machine and confirm center needle placement.  (optional: enlarge design size if needed to 3.5” x 3.5” per your machine’s edit instructions. )

    (Click Image to Enlarge)


    Step 9:
    Begin the embroidering process. When complete. Cut and trim all jump stitches and loose thread ends from front and back. Tear away stabilize. Use a moistened cloth to remove chalk marking. 

    (Click Image to Enlarge)


    Step 10:
    Stitching the Inner Flaps
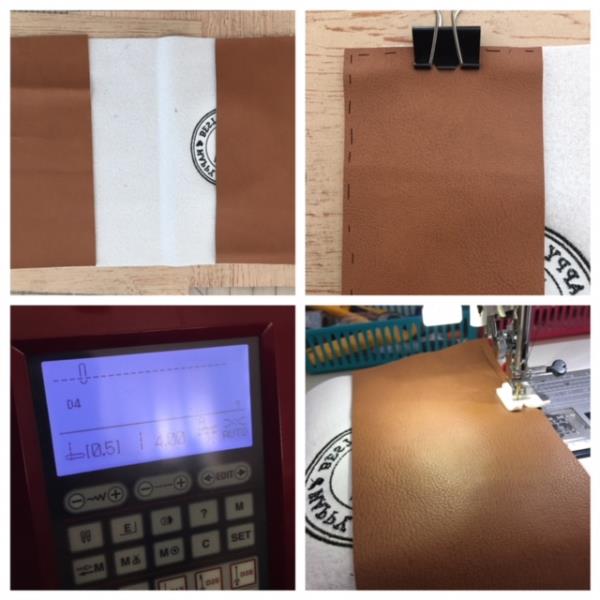
    Attach your Teflon foot. This foot makes it easier to stitch on faux leather/vinyl with out sticking. ( if you are not using a Teflon foot you can use gift wrapping tissue, parchment paper to float under your foot so that it does not stick to the faux leather/vinyl when stitching. ) 


    Step 11:
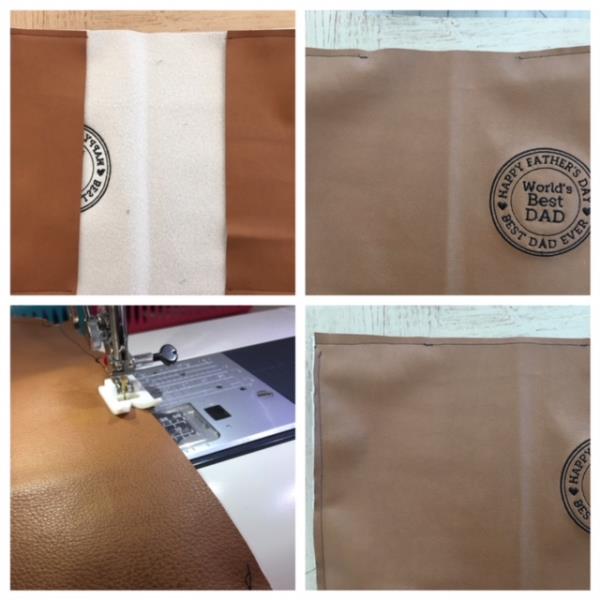
    Place the flap pieces at each side of front cover, wrong sides together, matching up sides. Use clips to hold in place as pins will leave puncture holes. Stitch side and top and bottom using 1/8” ( topstitch) seam allowance. Vinyl faux leather has a sticky surface and will resist feeding under the presser foot. Lengthen your stitch length as this will help. ( test for stitch length using a scrap piece of your faux leather/vinyl fabric)  If you are not using a Teflon foot , use a type of gift wrapping tissue to place atop fabric and under the foot to stitch in place as this will assist in feeding the faux leather/vinyl smoothly under the pressure foot.   

    (Click Image to Enlarge)


    Step 12:
    There will be a stitch line gap where flaps were stitched. You can leave or close the gap by top stitching. 

    (Click Image to Enlarge)


    Step 13:
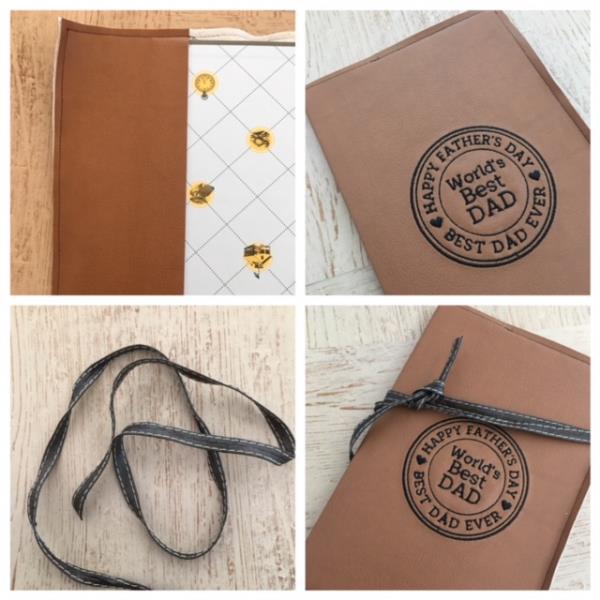
    Insert your book cover into the flaps. Wrap your cording twice around the book and knot.  Viola! You did it! Way to go!  Your Slip On Journal Book Cover is complete!

    (Click Image to Enlarge)

    Meet the Author: Linda Mills
    Linda Mills
    Linda loves to create by sharing her different sewing and machine embroidery techniques so others can utilize their machines to the fullest
    More From This Author
    Link is Broken, Please check the URL
    Exclusive Embroidery Offers!
    Copyright © {{ currentDate | date:'yyyy'}} - EmbroideryDesigns.com
    GET 50% OFF! ×