{{superHeaderAds.title}}
Live Chat
Embroidery Designs
Welcome, Embroiderer
Login
ITH Boho Chic Fabric Wristlets/Key Fobs
{{mainImageAlt || (productInfo._source && productInfo._source.name) || ''}}

ITH Boho Chic Fabric Wristlets/Key Fobs Embroidery Project

By   Pat Williams   on   July 31, 2025

PROJECT DETAILS

SKILL LEVEL
Some Experience
TIME REQUIRED
00:25
FINISHED SIZE
1 x 5.5 inches
Description

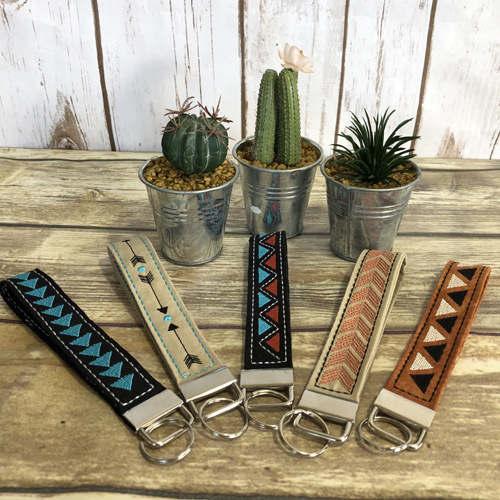
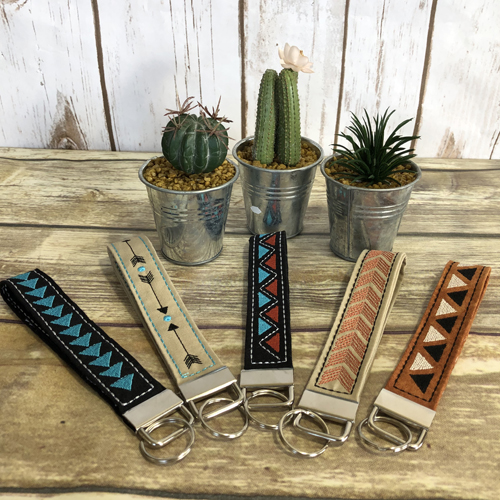
Fabric wristlets and key fobs are so easy to make and can be attached to your keys, a wristlet bag and or even attached to a thumb drive that you want to keep track off. The Boho Chic designs are all embroidered as part of the project.

Project Preview Video

Materials
  • For Each Wristlet
  • 12” x 7” embroidery hoop or larger
  • Two Pieces of quilting cotton 2” wide by 12” long
  • 1 Piece of dress makers fusible interfacing 1” wide by 12” long
  • Crisp Tear-away Stabilizer to fit the hoop
  • 1” Key Fob hardware (Amazon)
  • 1” Key Fob pliers (Amazon)
  • Spray Adhesive
  • Cellophane tape

  • Designs used in this project

    Final Product: What You Will Create


    Step 1:
    Cut two strips of quilting cotton 2” x 12”, Cut 1 strip of fusible interfacing 1” x 12”.
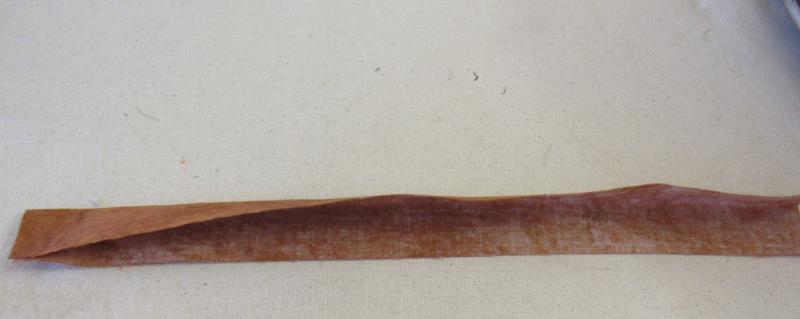
    Take one strip of the fabric and fold it in half lengthwise. Finger crease to find the center, but do not press in this crease.

    (Click Image to Enlarge)


    Step 2:
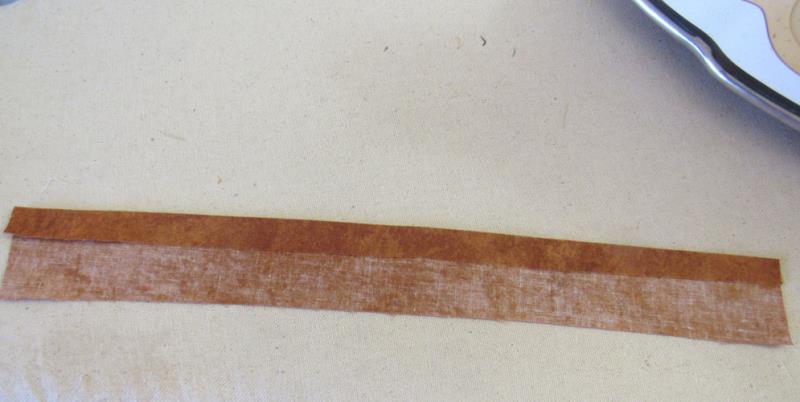
    Fold in one lengthwise edge to meet the finger crease and press.

    (Click Image to Enlarge)


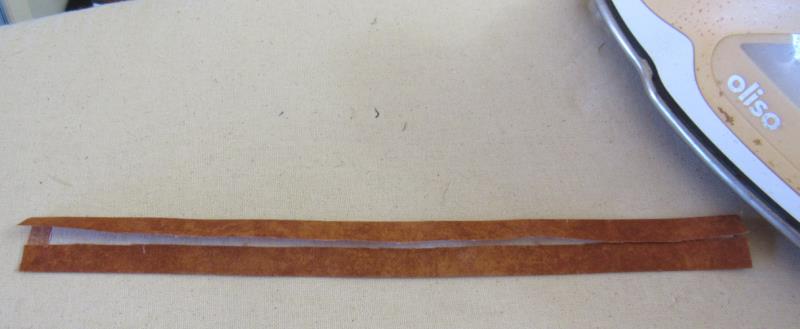
    Step 3:
    Slip the interfacing fusible side down under the folded crease and press it into place.

    (Click Image to Enlarge)


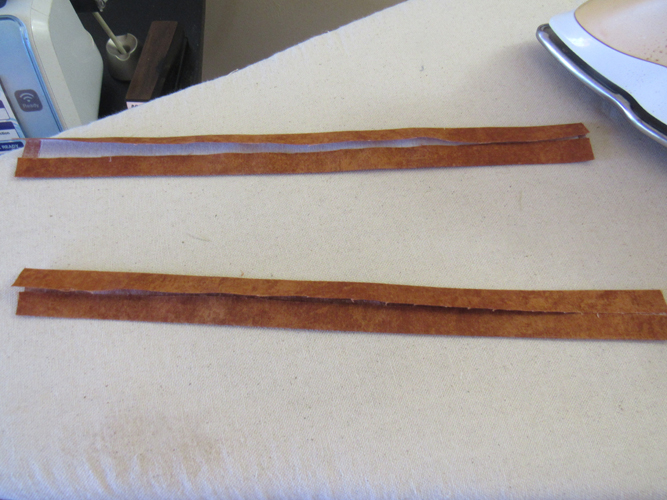
    Step 4:
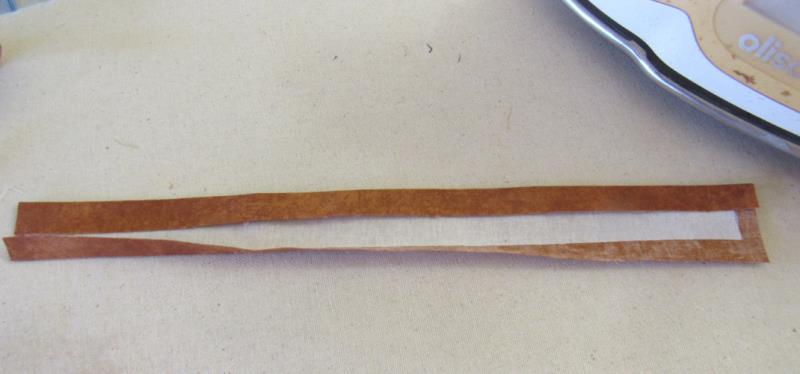
    Fold the other edge of the fabric over the interfacing and press.

    (Click Image to Enlarge)


    Step 5:
    Fold and press the second strip of fabric without adding interfacing.

    (Click Image to Enlarge)


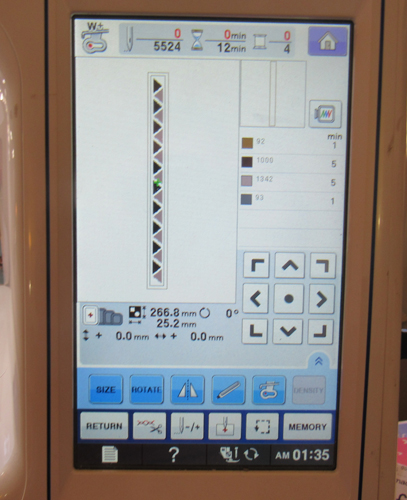
    Step 6:
    If necessary for your machine rotate the design 90 degrees to have the design match the orientation of your hoop.


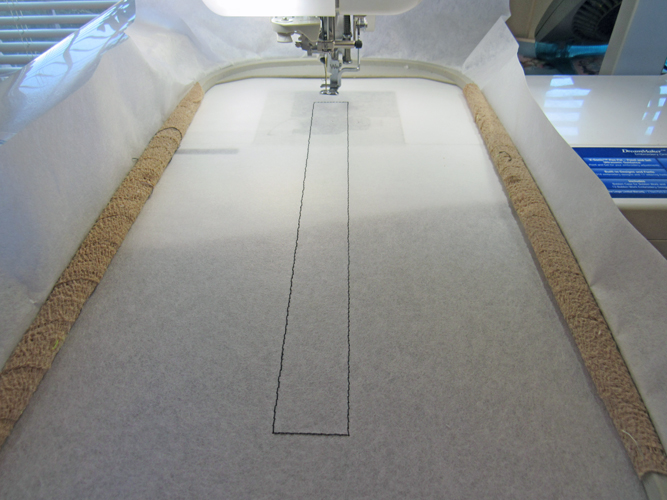
    Step 7:
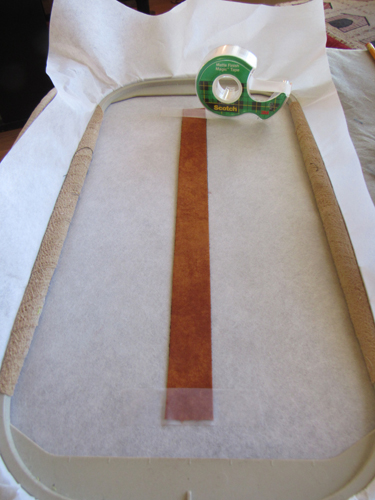
    Tautly hoop the stabilizer in your hoop, run the first color-stop (CS 1) as a placement line for your fabric.

    (Click Image to Enlarge)


    Step 8:
    (Click Image to Enlarge)
    Remove the hoop from the machine, do not unhoop. Spray the placement line area with adhesive spray. Carefully align the fabric strip with the interfacing exactly between the placement stitches. The ends of the fabric strip should exceed the bottom and top of the placement line by .75”. Tape down the bottom and top ends of the strip with cellophane tape.


    Step 9:
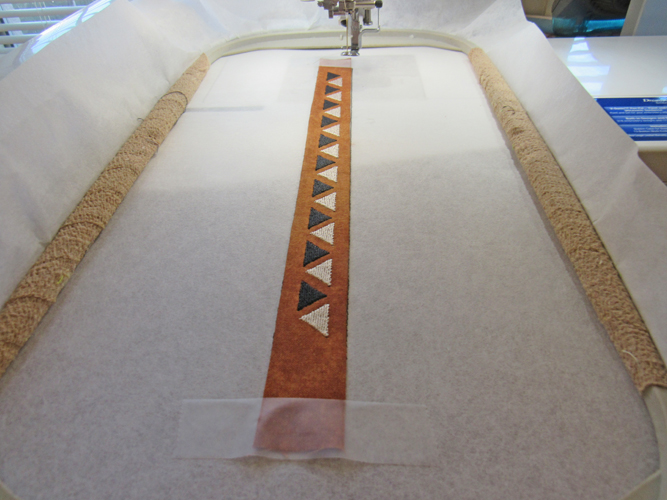
    Follow the color chart to embroider the design – do not run the last CS yet.

    (Click Image to Enlarge)


    Step 10:
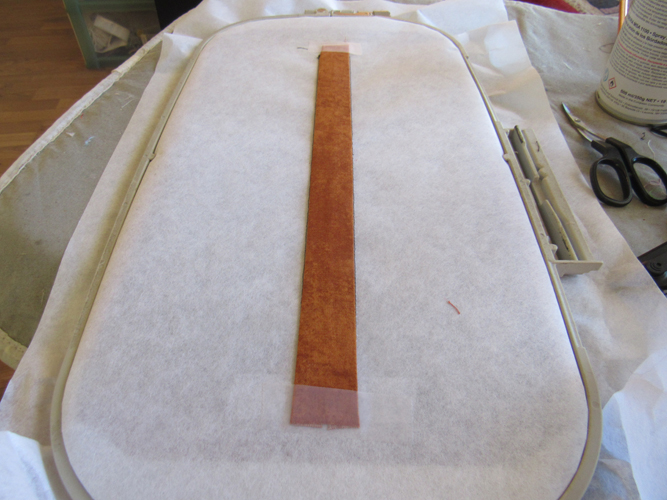
    Remove the hoop from the machine, do not unhoop. Lay the hoop face down on a flat surface, spray adhesive on the back of the stabilizer over the tack down lines. Position the back strip and tape down the ends as you did the front strip.

    (Click Image to Enlarge)


    Step 11:
    (Click Image to Enlarge)
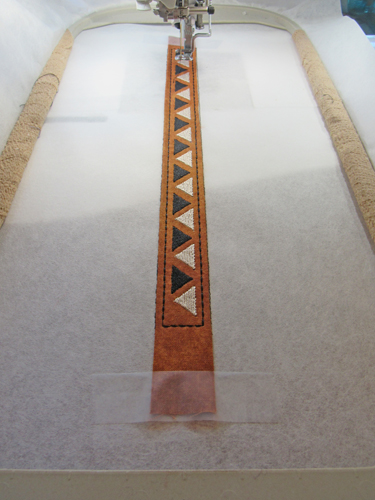
    Return the hoop to machine and run the final CS to tack the fabrics together.


    Step 12:
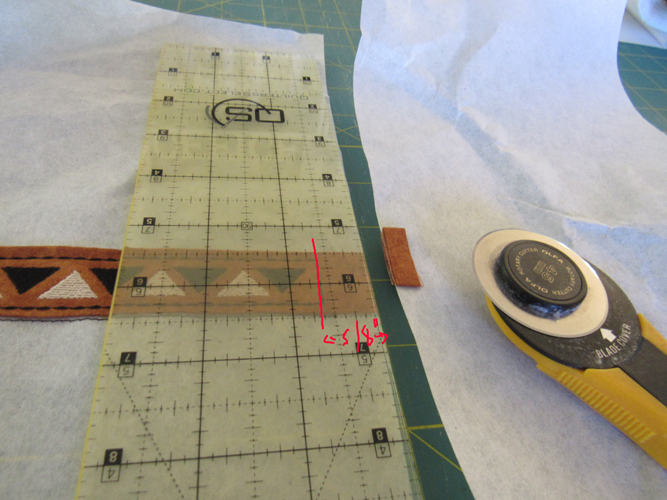
    Remove the project from the hoop. Lay the 5/8th” make of a see-through ruler over the final stitching at the ends of the strap and trim the ends to 5/8th”.

    (Click Image to Enlarge)


    Step 13:
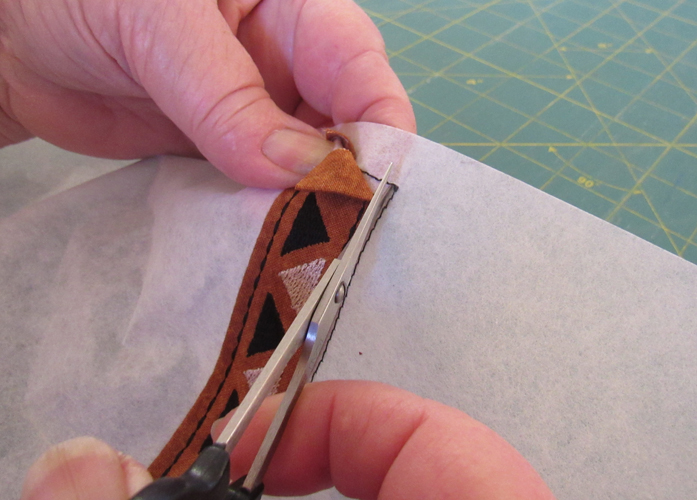
    It is easier to tear away the stabilizer if you lift the top of the strap and snip the top of the placement line on the stabilizer.

    (Click Image to Enlarge)


    Step 14:
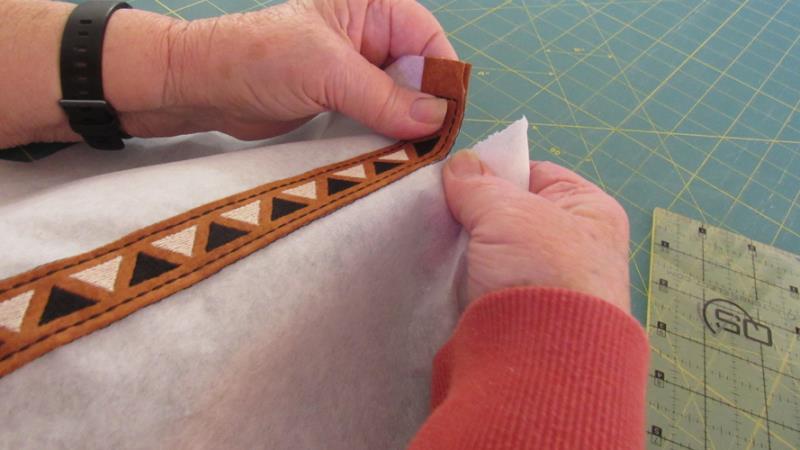
    Tear away the stabilizer all the way around the strap – removing the stabilizer right up to the final stitching lines down each side of the strap.

    (Click Image to Enlarge)


    Step 15:
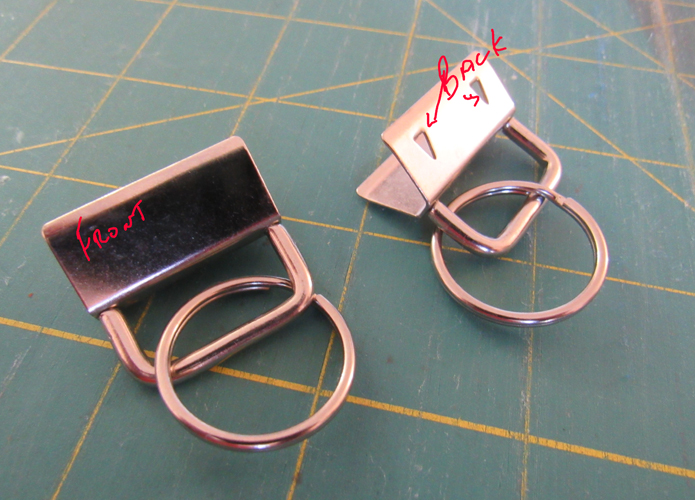
    This picture is of two pieces of key fob hardware. They are pictured together to show you that each piece of hardware has a front and a back. When applying the hardware to the strap you will want to make sure to position the front of the hardware to the front of the strap.

    (Click Image to Enlarge)


    Step 16:
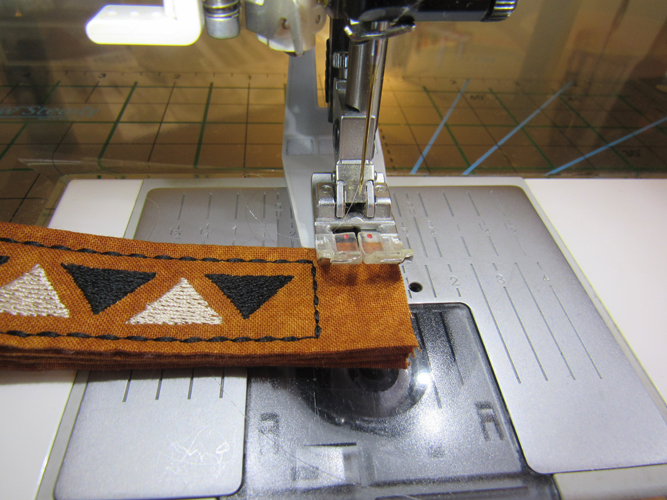
    Fold the strap in half aligning the top and bottom edges wrong sides together. Stitch the ends together using a scan ¼” seam to keep them aligned when attaching the hardware.

    (Click Image to Enlarge)


    Step 17:
    (Click Image to Enlarge)
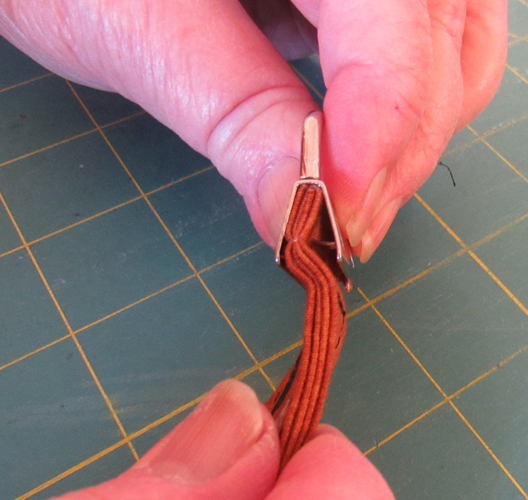
    You may find it easier to insert the strap into the hardware if you lightly squeeze the two sides of the hardware a little closer together. The hardware comes with a split circular ring attached. It is also easier to work with the hardware if you remove that ring first.


    Step 18:
    Insert the strap into the hardware all the way to the top of the hardware. Make sure your sides are even and that you have the front of the hardware to the side of the strap that you want to be the front.

    (Click Image to Enlarge)


    Step 19:
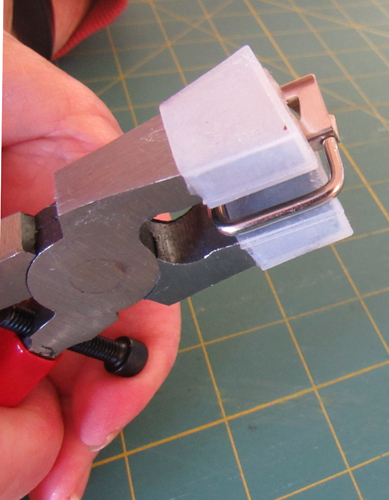
    Squeeze the hardware from each side over the strap.

    (Click Image to Enlarge)


    Step 20:
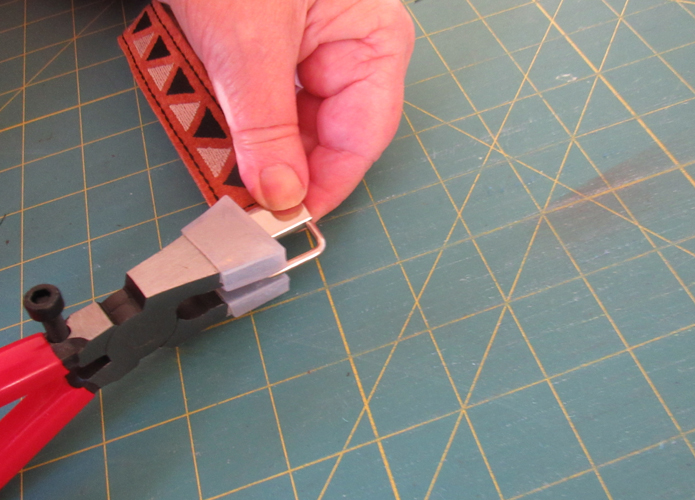
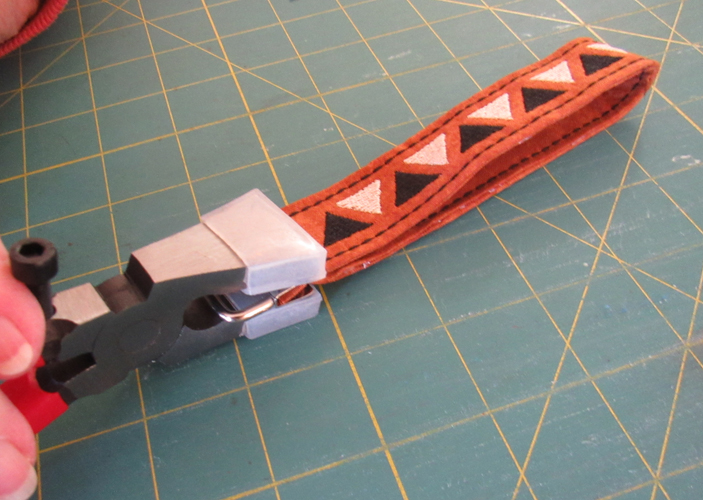
    Cover the hardware with the pliers from the end to give a final squeeze to the project.

    (Click Image to Enlarge)


    Step 21:
    Reattach the split ring to the hardware and your Boho Chic Wristlet/Key Fobs are complete! These make great gifts and craft fair items.

    For the love of embroidery…
    Pat Williams
    Meet the Author: Pat Williams
    Pat Williams
    Award winning Digitizer, Embroidery Educator, Author and a Consultant to the Industry, Pat Williams has 30 years of experience in the embroidery industry. Pat has won multiple awards for her digitizing expertise including the 2007 Impressions Awards Grand Championship, Best of Show as well as the 1st and 2nd Place Awards. Pat’s love of digitizing has afforded her the opportunity to write numerous articles for Impressions magazine in the United States and Images Magazine in Europe. In 2001 Pat was named “Embroidery Educator of the Year.” For many years Pat taught digitizing seminars at the ISS Shows in Long Beach, CA and for Compucon software. She now resides in Tucson, AZ.
    More From This Author
    Link is Broken, Please check the URL
    Exclusive Embroidery Offers!
    Copyright © {{ currentDate | date:'yyyy'}} - EmbroideryDesigns.com
    GET 50% OFF! ×