{{superHeaderAds.title}}
Live Chat
Embroidery Designs
Welcome, Embroiderer
Login
Earrings Case For Traveling
{{mainImageAlt || (productInfo._source && productInfo._source.name) || ''}}

Earrings Case For Traveling Embroidery Project

By   Kylie Burke   on   March 03, 2020

PROJECT DETAILS

SKILL LEVEL
Some Experience
TIME REQUIRED
01:30
Description

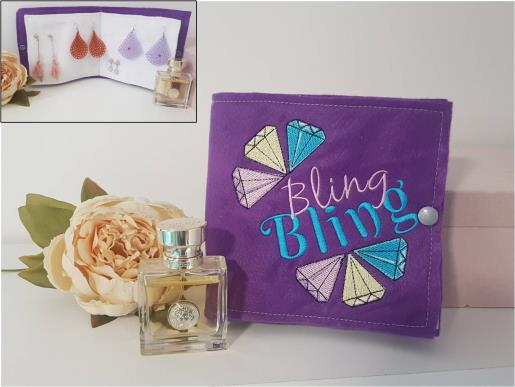
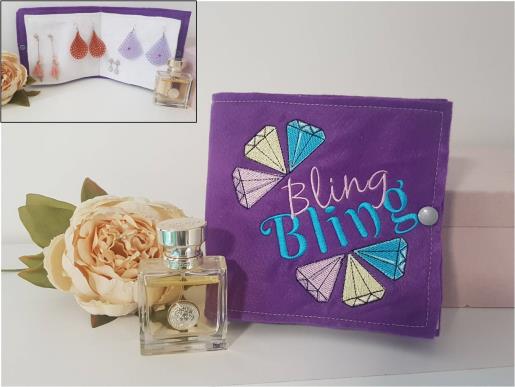
Wanting to keep your bling protected whilst travelling? This earrings case is just what you need. Fill it up with your favorite earrings whilst keeping them protected.

Project Preview Video

Materials
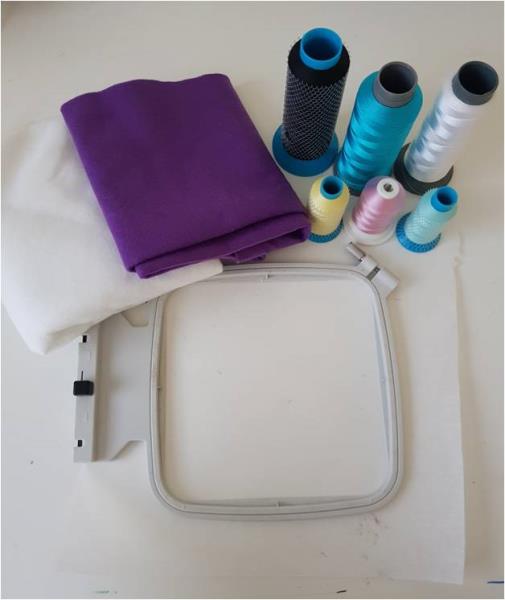
  • 2 pieces of purple felt 13” x 5 ¾”
  • 2 pieces of white felt 11 ½” x 5 ¼”
  • Medium /heavy weight sew in interfacing 12 ½” x 5 ¼”
  • Embroidery threads
  • Tearaway stabilizer

  • Designs used in this project

    Final Product: What You Will Create

    Preface:
    I have also included the links to the 2 FSL earring designs which I have displayed in this case, they are a beautiful stitch out and look great when you use metallic thread!
    Need more space? By repeating step 4, you could add as many pages as you wish to your case. 


    Step 1:
    Gather the materials and read through the instructions before beginning. Have a copy of the color sequence on hand to refer to.

    (Click Image to Enlarge)


    Step 2:
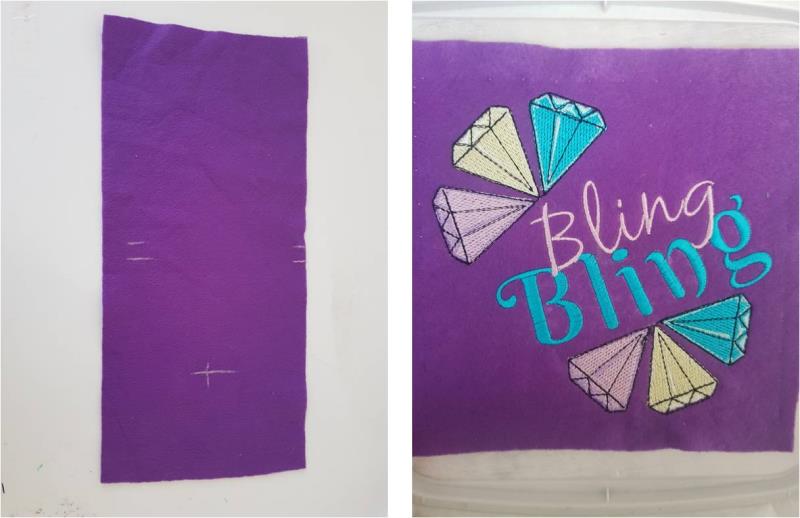
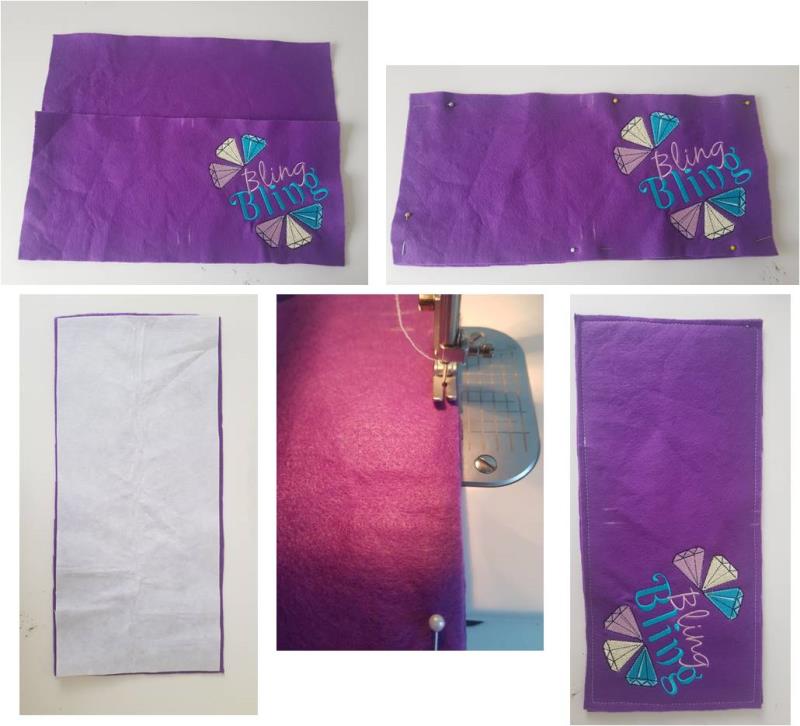
    On one piece of purple felt, measure along the long edge and mark at 6 ¼” and 6 ¾”. The ½” gap, represents the fold section of the case. On the right side of the panel, which will be the front of the case, mark the centre (horizontally and vertically) to indicate the centre of the embroidery design. Stitch out the design

    (Click Image to Enlarge)


    Step 3:
    Once stitched out, lay the blank piece of purple felt down, lay the interfacing over this then top with the embroidered panel. The interfacing is slightly smaller than the felt for a reason, it is so it does not show around the edge of the case. Pin all 3 layers together and stitch around using a ¼” allowance. 

    (Click Image to Enlarge)


    Step 4:
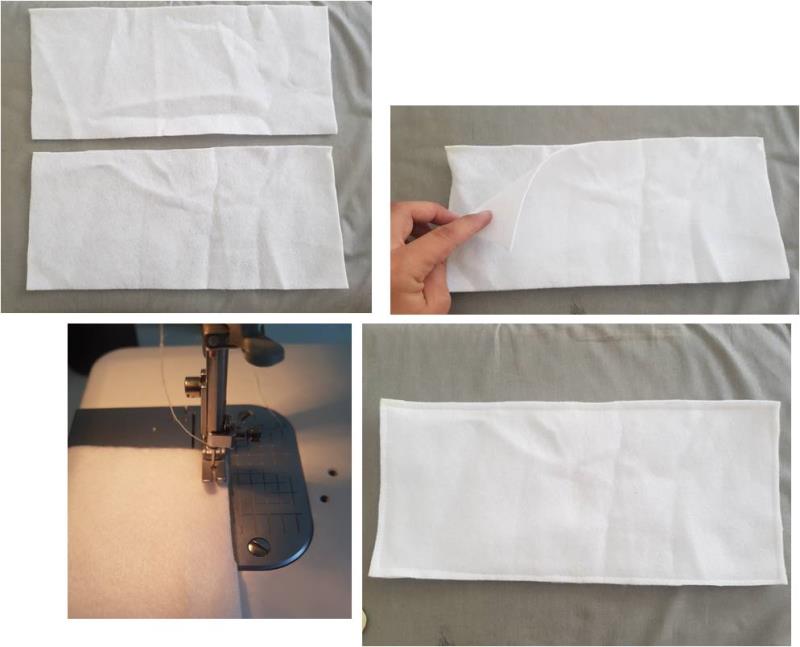
    Lay both pieces of white felt together, pin all around and stitch together using a ¼” allowance. Measure across the long edge of the white felt and mark halfway at 5 ¾”, draw a vertical line down the width of the white felt.

    (Click Image to Enlarge)


    Step 5:
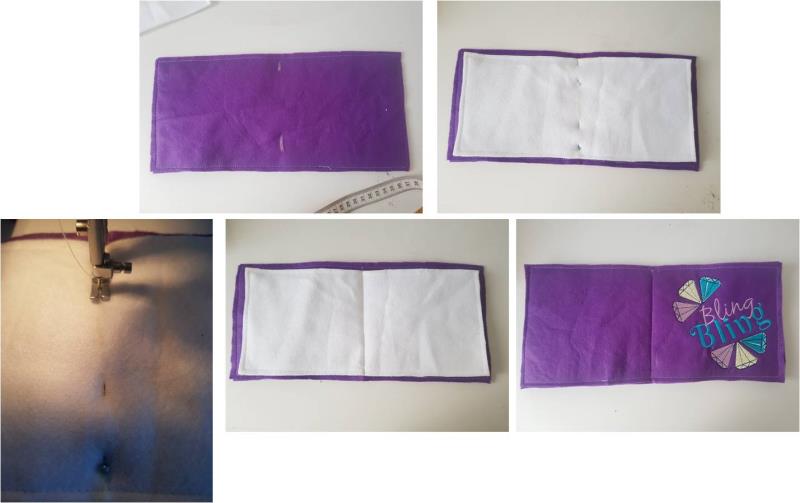
    Now lay the white felt inside the purple case and centre. Pin the white felt to the purple case, along the line you have marked. Stitch it in place, going through all layers. I have chosen to use a snap closure for my case, you could also use a button/elastic closure or 2 pieces of ribbon to tie together. 

    (Click Image to Enlarge)


    Step 6:
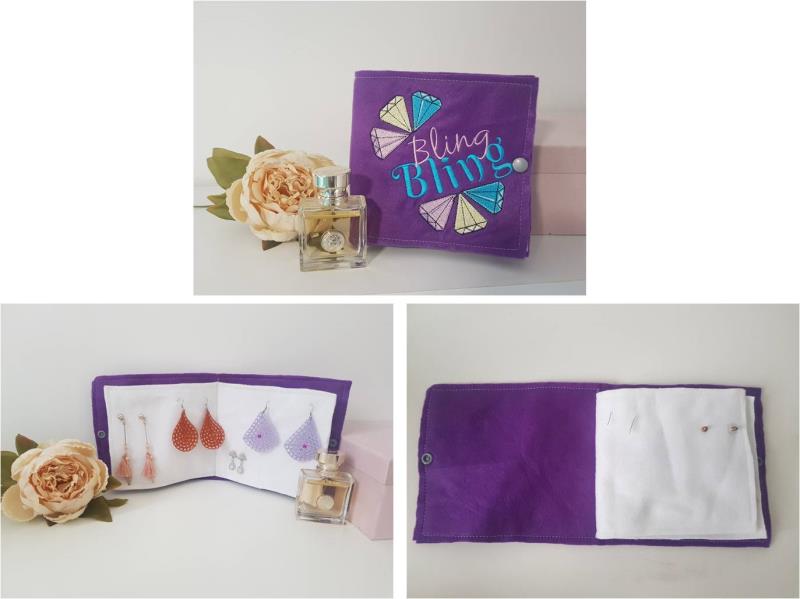
    Your Earrings travel case is now complete. It is perfect for protecting your earrings whilst you travel.

    (Click Image to Enlarge)

    Meet the Author: Kylie Burke
    Kylie Burke
    Kylie is based in Australia and loves creating and sharing her unique pieces.
    More From This Author
    Link is Broken, Please check the URL
    Exclusive Embroidery Offers!
    Copyright © {{ currentDate | date:'yyyy'}} - EmbroideryDesigns.com
    GET 50% OFF! ×