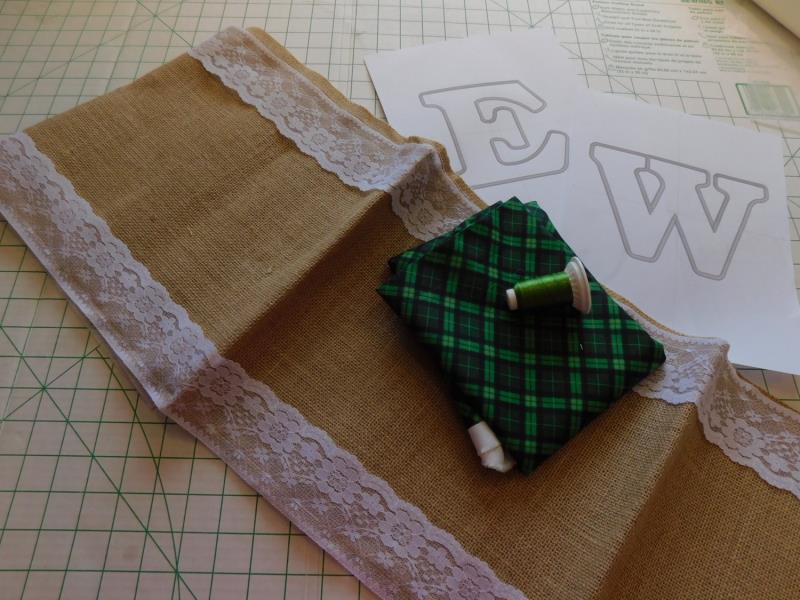
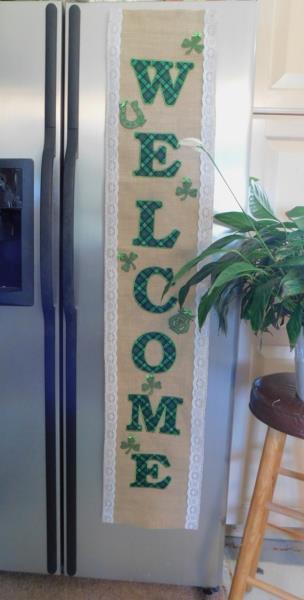
| Preface: | | The banner is done in two steps. The FSL designs are stitched first and while those are drying, the applique on the banner is stitched. A burlap table runner, edged in lace, is the perfect backdrop for the stitching. Use the banner on a refrigerator as was done for the project, or place a dowel in the casing and hang it at the front door. |
Step 1: | Read through the instructions thoroughly before beginning and assemble all the materials needed to complete the project. Print out the letters—be sure the crosshair is printed to aid in alignment and trimming of the banner. Select an embroidery thread that will coordinate with the fabric. |  (Click Image to Enlarge) |
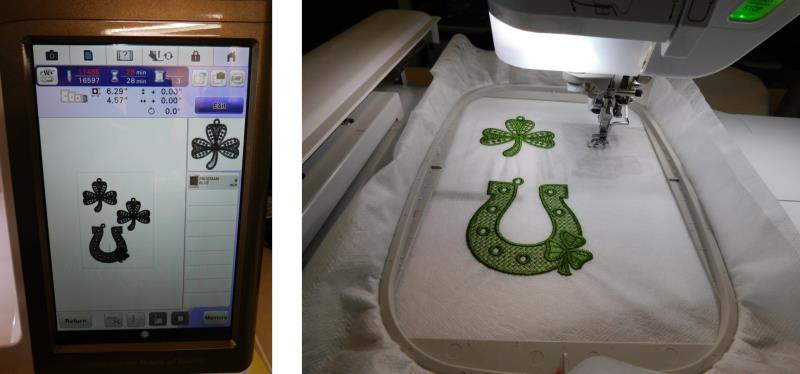
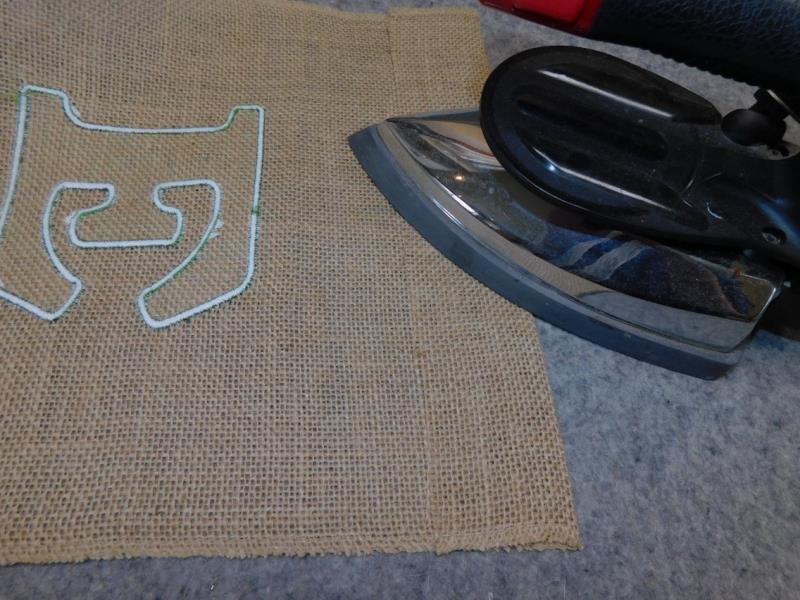
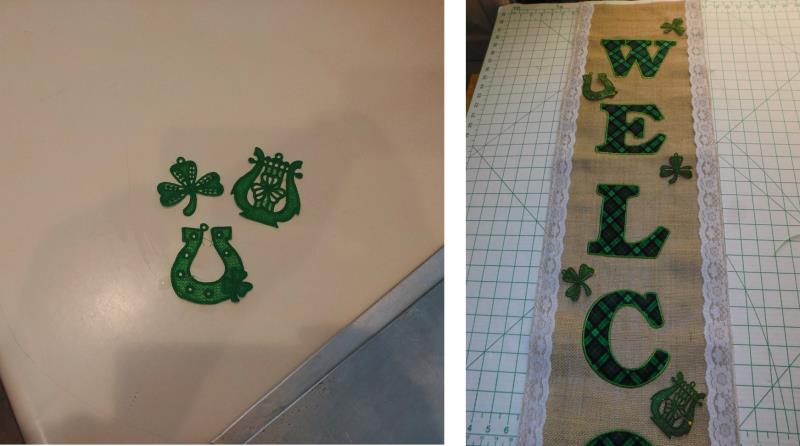
Step 2: | Stitch the FSL designs first—while those dry, the applique portion of the project will be done. If there is a large hoop for your machine, you may be able to “gang” up two or three designs in one hooping—just be sure to leave space between the designs. Use two layers of fibrous water-soluble stabilizer and the green thread that will be used for stitching the applique. Stitch 5- clover, and one each of the horseshoe and lyre. While these are stitching, work on prepping the fabrics for the applique. As the FSL pieces have finished stitching, rinse away the stabilizer and lay them flat to dry. |  (Click Image to Enlarge) |
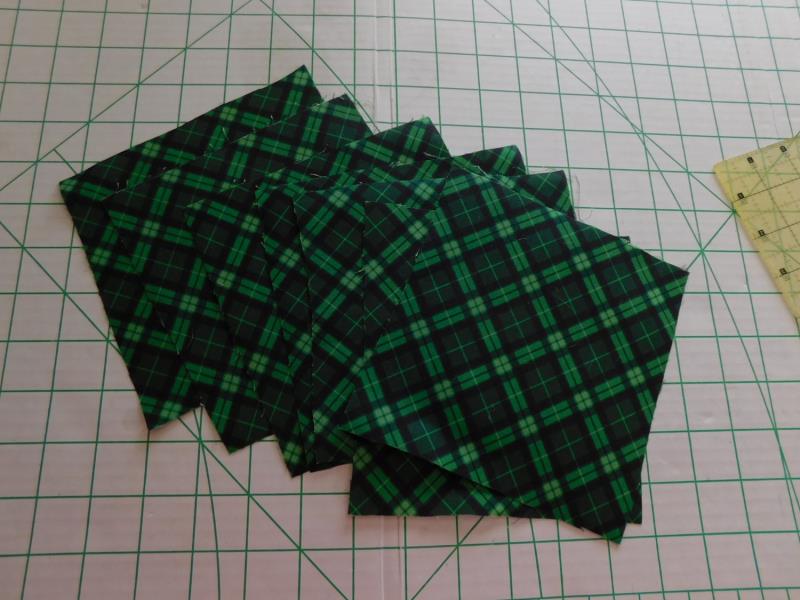
Step 3: | Press the squares of plaid fabric well with spray starch. The fabric is printed with the plaid on the diagonal, so the grain will run up and down in the letters. |  (Click Image to Enlarge) |
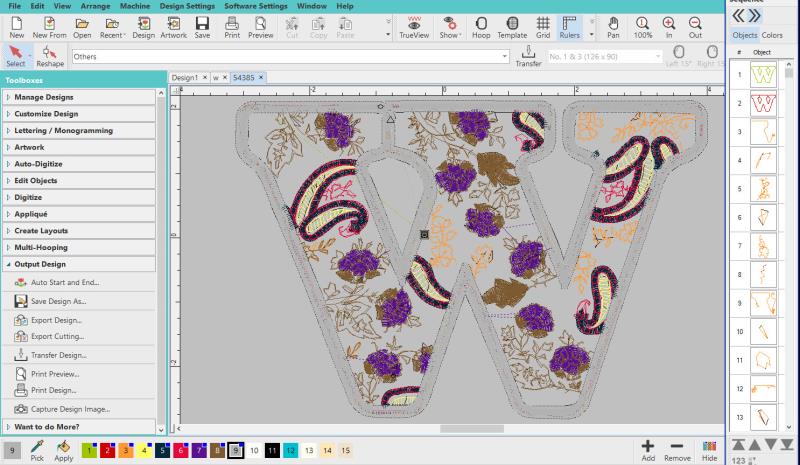
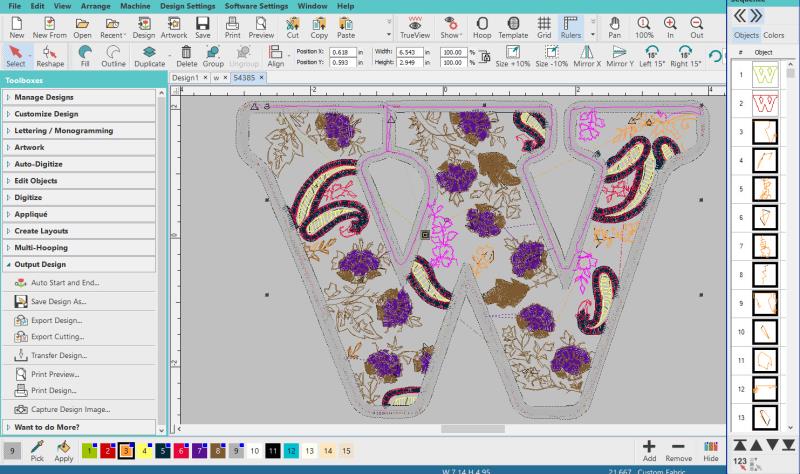
Step 4: | The applique letter designs selected have little flowers and leaves in them—for this project, they need to be removed so only the placement line, tack down line, and satin cover stitch remain. You could find another set of letter appliques that are just letter shapes, but I really liked the shapes of these letters. Open up embroidery editing software. For this project, Hatch software is used (www.hatchbeginners.com). Open the letter W first and Save As a new file with a new name (i.e. W applique). Open up the sequence docker and all the objects in the letter will appear. |  (Click Image to Enlarge) |
Step 5: | There are two ways to delete unwanted objects. Find the objects that need to be removed and click on them (black boxes show they have been selected) and then hit delete on the keyboard. Go through the entire list and delete everything that is not needed for stitching. |  (Click Image to Enlarge) |
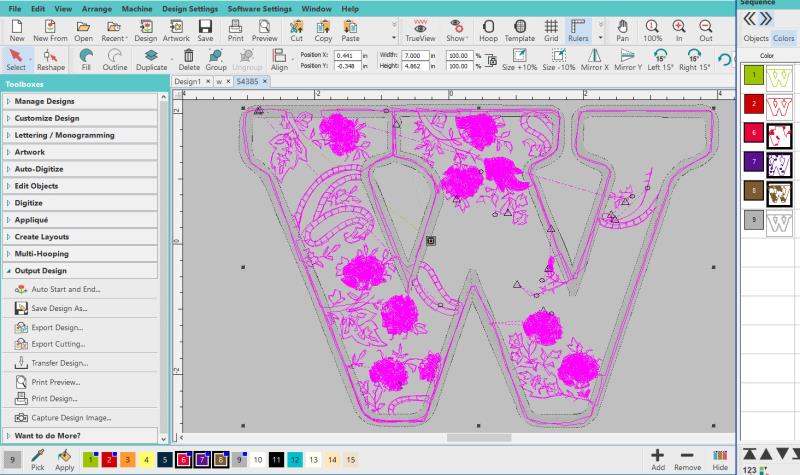
Step 6: | The second—and probably easier-way to deleted unwanted colors is to choose the color tab and select the colors with the objects to be deleted, and then hit delete on the computer keyboard. |  (Click Image to Enlarge) |
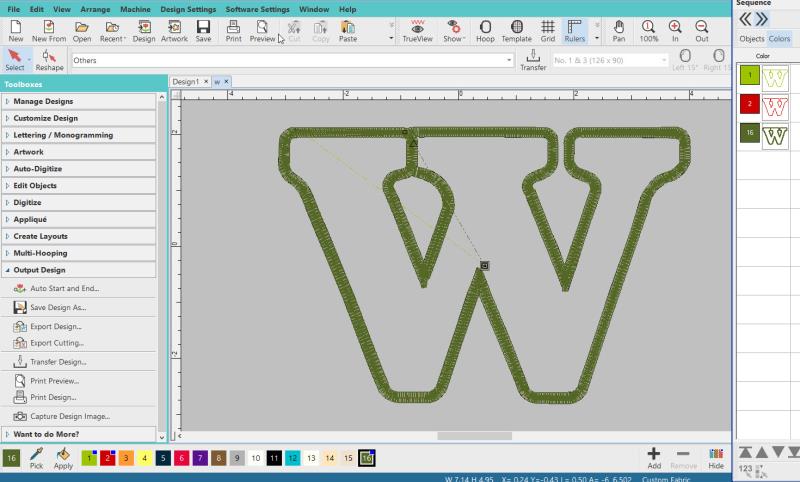
Step 7: | This will leave color 1 as the placement line, color 2 the tackdown line, and color 3 the cover stitch. If you wish, change the cover stitch to green. Each step is shown in a different color to force a stop at the machine for placing and trimming the applique fabric before the satin cover is stitched. Go through each letter and delete all but the three needed colors. Save the designs in the format needed for stitching. |  (Click Image to Enlarge) |
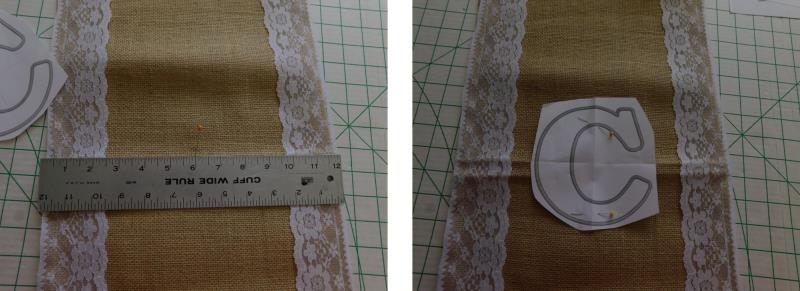
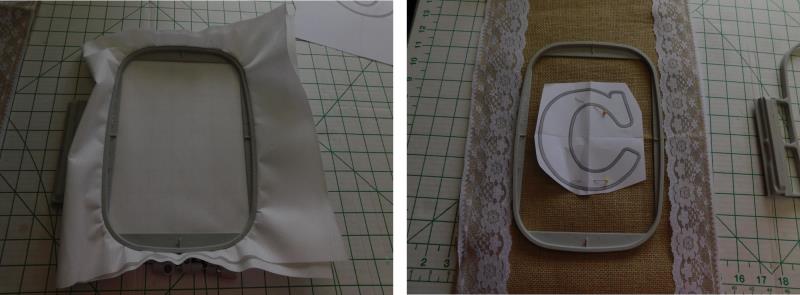
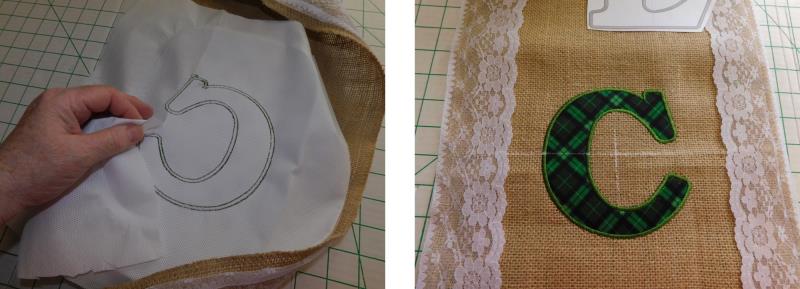
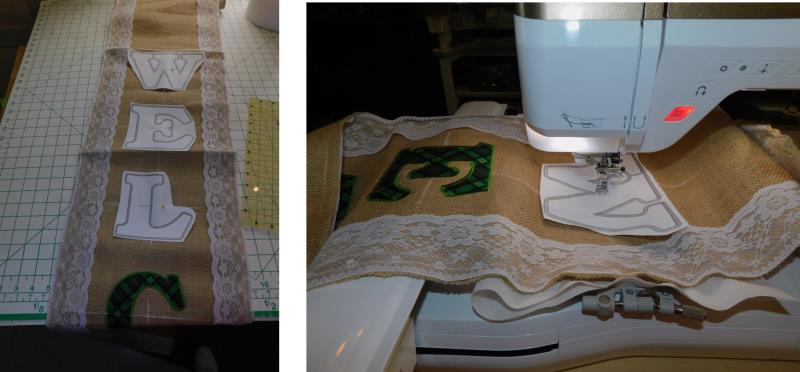
Step 8: | 8. Measure the banner—it is roughly 12” wide. However, there were areas that were wider and other areas narrower. Fold the banner in half lengthwise, matching the short ends to find the center of the banner lengthwise. Use a ruler to mark the center of the banner. The letters will be measured and placed off this mark. Now fold the line in half to find the center. Cut around the letter C print, and use the crosshairs to center the letter on the marks; pin in place. |  (Click Image to Enlarge) |
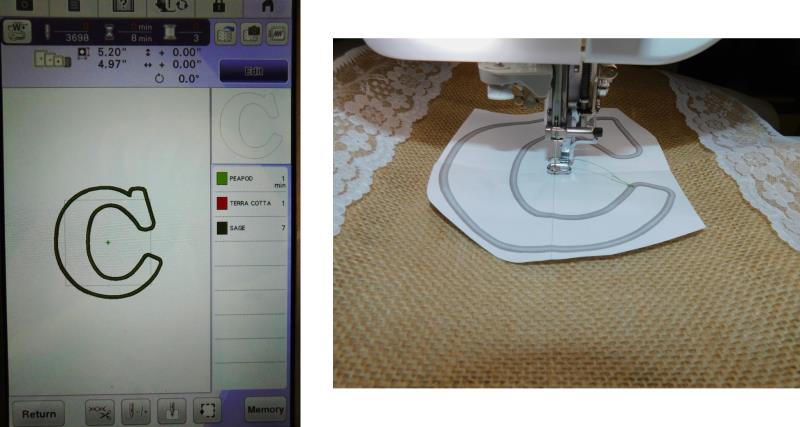
Step 9: | Load the C design on the machine. Hoop two layers of tearaway stabilizer. The letter will be aligned in the center of the hoop for stitching. |  (Click Image to Enlarge) |
Step 10: | Spray the stabilizer with temporary spray adhesive. Carefully place the fabric under the needle and align the needle to the center crosshair. Remove the paper and stitch the first color, the placement line. |  (Click Image to Enlarge) |
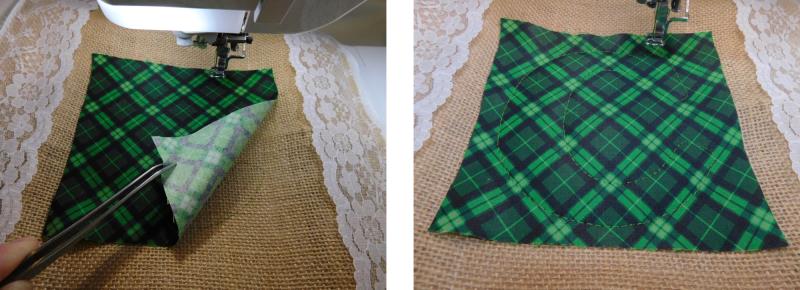
Step 11: | Place the fabric down over the placement line. Start the machine and stitch the second color, the tackdown line. |  (Click Image to Enlarge) |
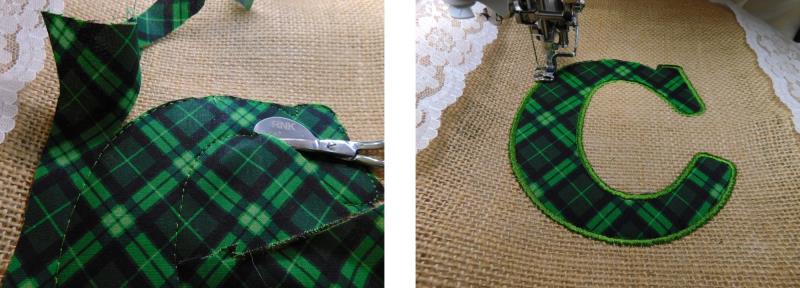
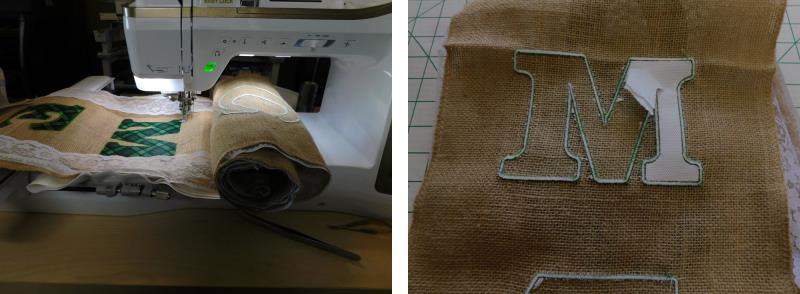
Step 12: | Very carefully remove the fabric from under the machine and use the mini RNK applique scissors to trim away the excess fabric close to the stitching. Place the hoop back on the machine and stitch the third color, the satin cover stitch. |  (Click Image to Enlarge) |
Step 13: | When the design is finished stitching, remove the fabric from the hoop and gently remove the excess stabilizer. Now the other letters will be aligned to this first letter and stitched in the same manner. |  (Click Image to Enlarge) |
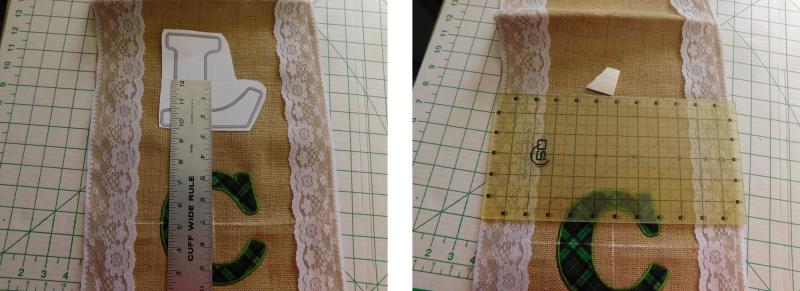
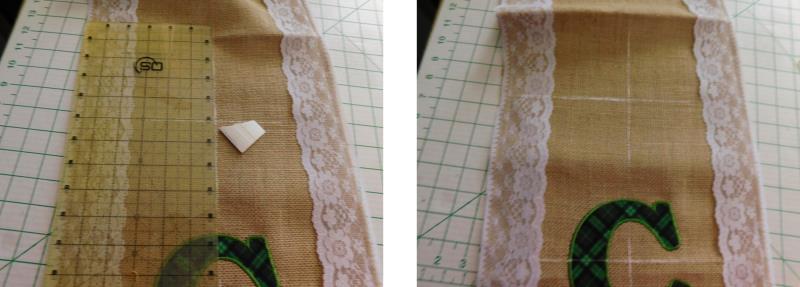
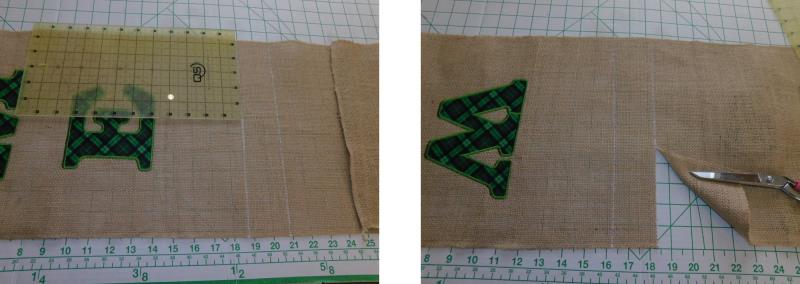
Step 14: | For each letter, measure up (or down) 7” from the previous letter center mark and this will be the center alignment for the next letter, in this case the L. Use tailor’s chalk to mark up 7” from the center of the C, and then measure across the banner at this point and mark the center across. |  (Click Image to Enlarge) |
Step 15: | For each letter the marking will be done up and down the banner like this. |  (Click Image to Enlarge) |
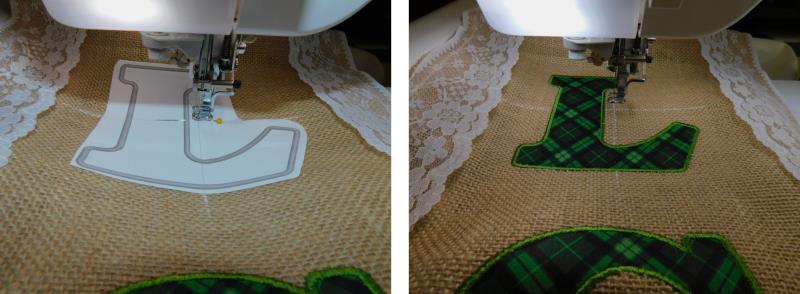
Step 16: | Hoop stabilizer, spray, center the letter under the needle and stitch. |  (Click Image to Enlarge) |
Step 17: | Continue marking and stitching. Be aware, depending on your machine, the letter W may need to be rotated for stitching. |  (Click Image to Enlarge) |
Step 18: | The same for the letter M. As you are working down the banner, roll the previously stitched portion of the banner so it will fit within the bed area of the machine. After all the letters are stitched, remove the stabilizer from the inside of each letter, too. Next will be to even out the lace and make casings at the top and bottom of the banner. |  (Click Image to Enlarge) |
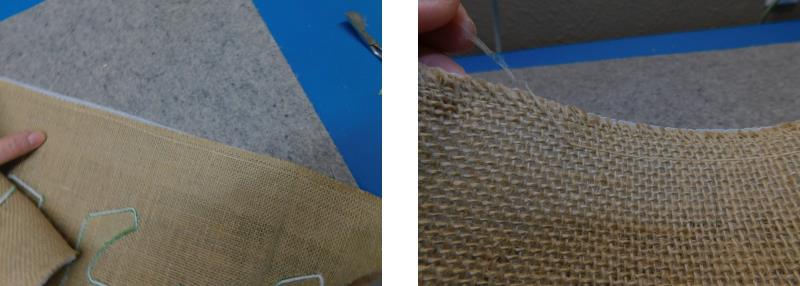
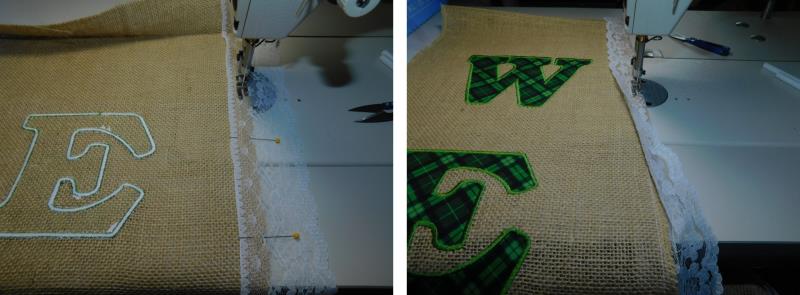
Step 19: | As was stated earlier, the banner is not even all the way down which means the lace may end up being closer to some letters and farther away for others, so to make the letters look centered, remove the lace (for this banner, there was a chain stitch that made it easy.) |  (Click Image to Enlarge) |
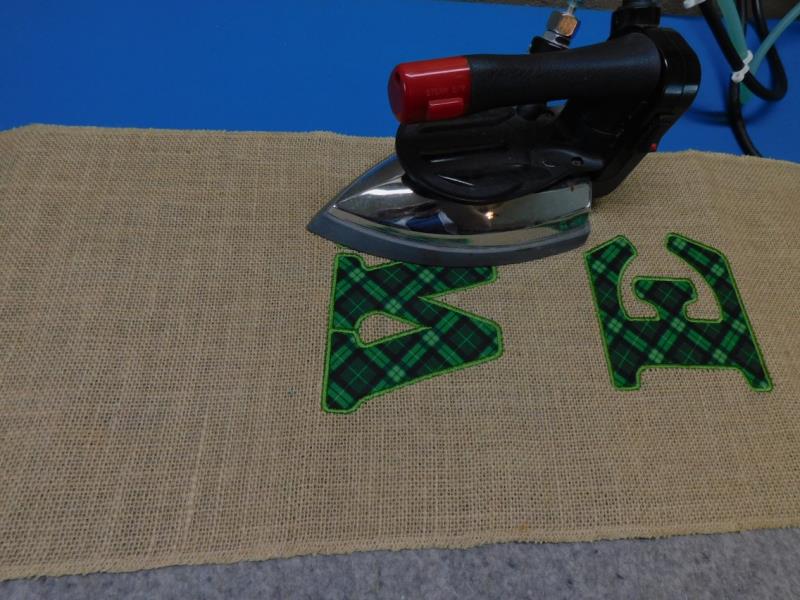
Step 20: | Press the banner well. Do not stretch it out of shape which can be easily done when working with burlap. |  (Click Image to Enlarge) |
Step 21: | The spacing will be continued. From the E at the bottom, mark 7” down from the center of the E and then to add the casing, measure down 2” below that and cut along the second line. |  (Click Image to Enlarge) |
Step 22: | Fold the fabric along the first line, to the back, and press to form the casing. |  (Click Image to Enlarge) |
Step 23: | For the top casing, measure up 7” from the center of the W, add 2”, cut along that line and fold and press that casing to the back. |  (Click Image to Enlarge) |
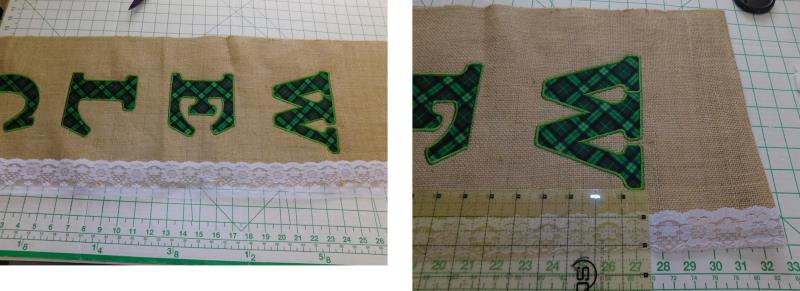
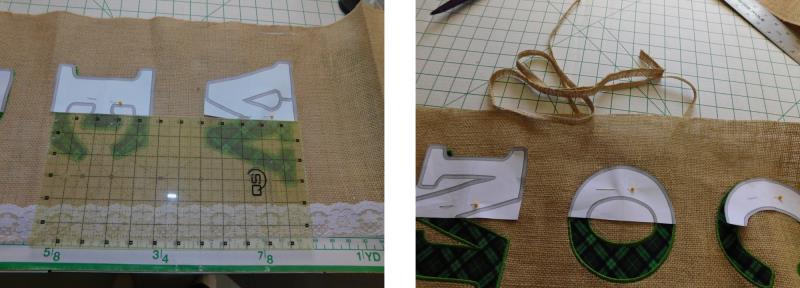
Step 24: | This part was a little tricky—trying to decide where to place the edge of the lace. The paper letters were cut along the vertical crosshair and placed over the applique’d letter. The edge of the lace was then placed 4” from the center as shown. I looked at how far off the edge was from each letter and made a determination as to how much needed to be cut off to straighten each long edge of the burlap. Some areas were up to ½” and other areas were barely any. Just measure, mark, and cut to make it even. |  (Click Image to Enlarge) |
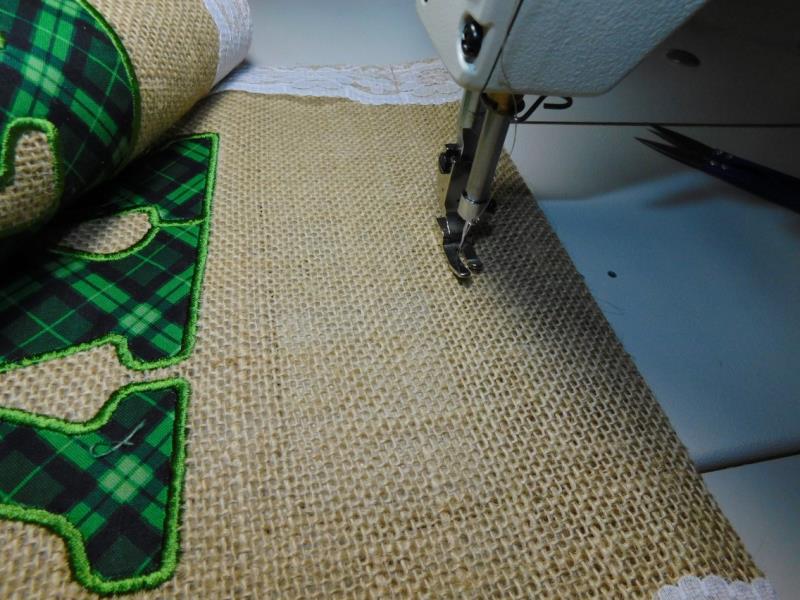
Step 25: | To sew the lace back on, find a line on the lace (I used the row of flowers) and bin the right side of the lace up on the back side of the banner and baste the lace in place. Flip the banner to the right side, flip the lace to the right side covering the cut edge, and sew the lace in place ¼” from the edge. Repeat for the other side. Open out the casing areas to sew the lace all the way through the edges of the casing sides. |  (Click Image to Enlarge) |
Step 26: | Fold the casings back in place and stitch them down. |  (Click Image to Enlarge) |
Step 27: | By this time, the FSL pieces should be dry. Lay the lace pieces as shown and pin them in place. |  (Click Image to Enlarge) |
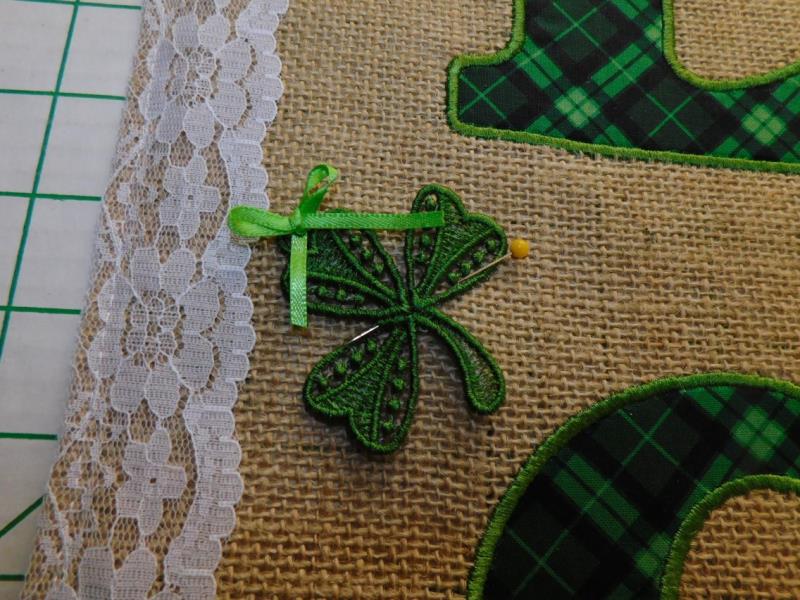
Step 28: | Using the 1/8” green ribbon, create little bows to cover the hanger area of the lace. |  (Click Image to Enlarge) |
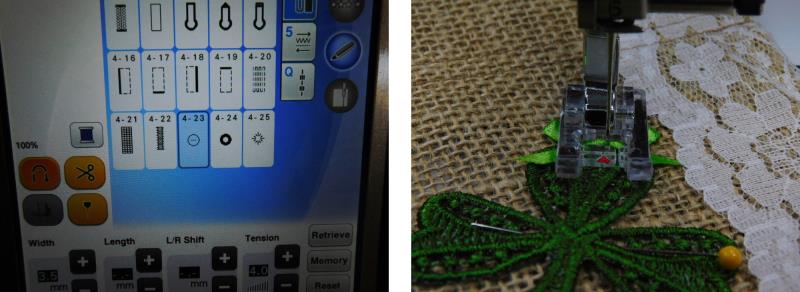
Step 29: | Using the button sewing feature of the machine, stitch the bow in place, and use the same function to tack the lace down in one or two additional places to tack it to the banner. Repeat for all the lace pieces. |  (Click Image to Enlarge) |
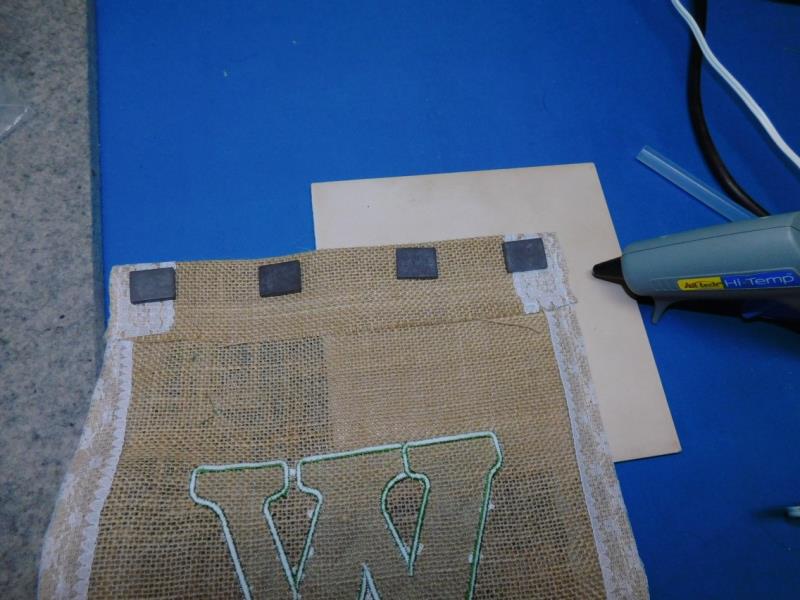
Step 30: | Heat up the hot glue gun. At the top and bottom casing, affix four magnets to the top and four to the bottom of the back side of the banner over the casing. Option: if your refrigerator won’t accept magnets, place a rod or dowel through the casings so the banner may be hung at the front door. |  (Click Image to Enlarge) |
Step 31: | Hang up the banner on the refrigerator. Congratulations on creating a special Welcome for your family and friends for the St. Patrick’s Day festivities! |  (Click Image to Enlarge) |
|