Border OptionsHugging border, circle, square, or rectangle — with a 3mm satin stitch.
Backing OptionsAvailable with iron-on, sew-on, or velcro backing.
Fast ShippingShipped quickly from the USA.
Free Online Tools
Powerful embroidery utilities that save time and prevent costly mistakes.
Stitch AssistantRECOMMENDED
Get the exact stabilizer, machine settings, needle, and thread color sequence for every embroidery design you purchase — based on that design's stitch density, dimensions, and color count.
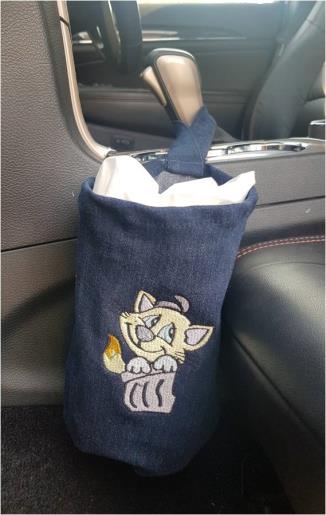
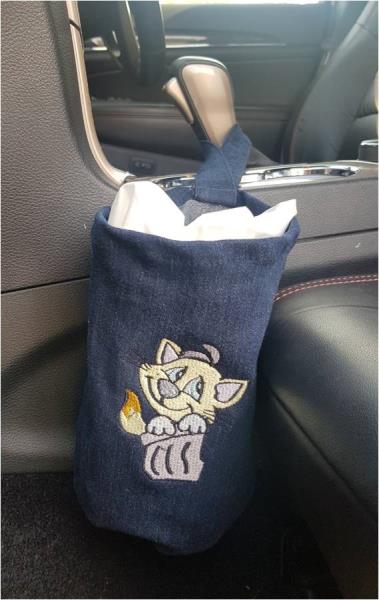
Keep your car organized with this eco-friendly car bin bag crafted from upcycled denim. It conveniently hangs from your gear stick for easy access, helping to maintain a tidy vehicle. Step-by-step instructions are included.
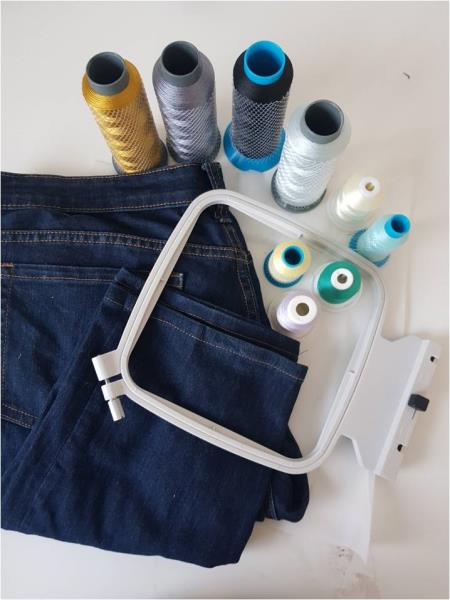
Gather the materials and read through the instructions before beginning. Have a copy of the color sequence on hand to refer to.
(Click Image to Enlarge)
Step 2:
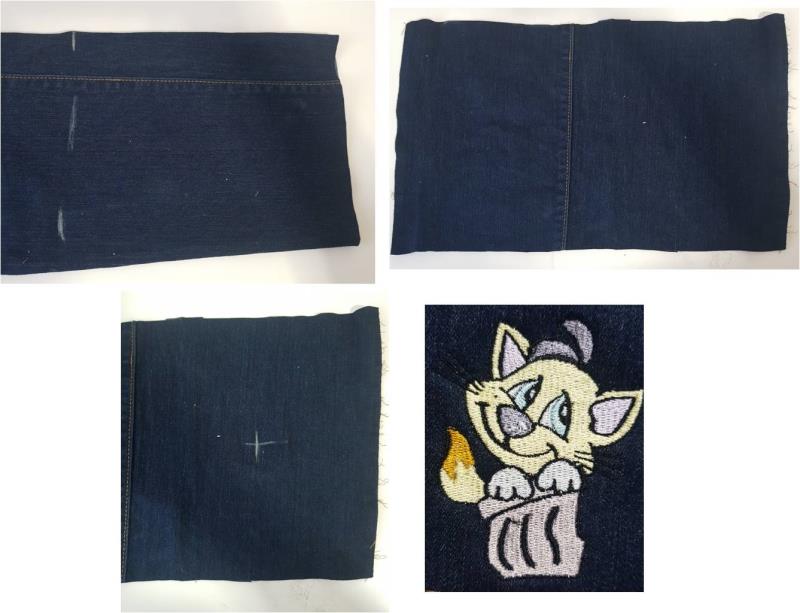
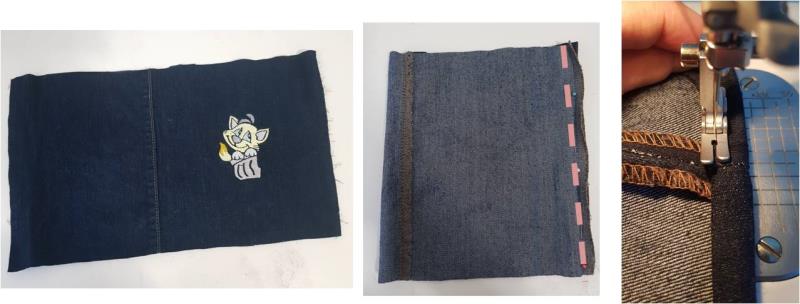
From one of the jean legs, cut off the bottom hem and measure up 9” and cut, it creates a tube panel. Open up the outside seam and mark the centre of the right hand side of the panel. Hoop your stabilizer, attach your fabric and stitch out the design.
(Click Image to Enlarge)
Step 3:
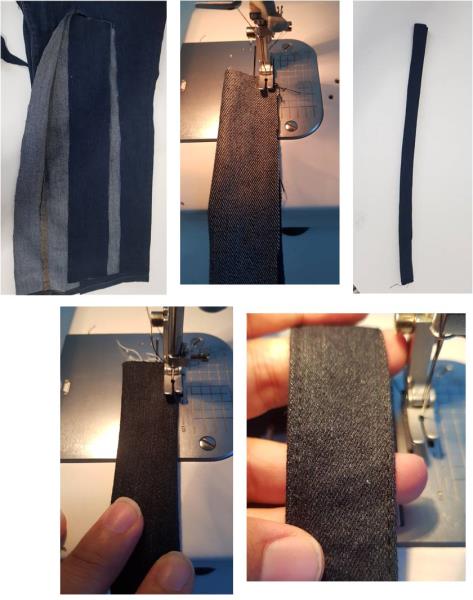
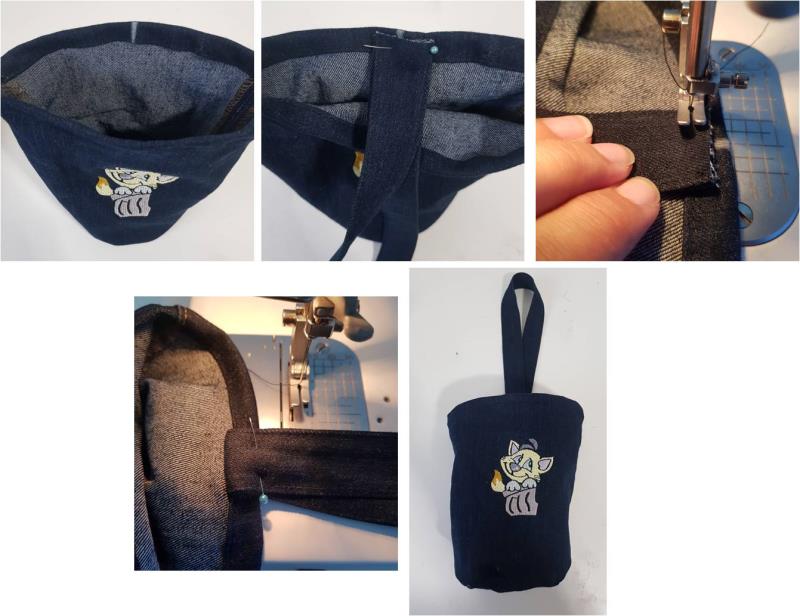
From either the same leg of the jeans or the other leg, cut a rectangle 2 ¾” wide x 19 ½” long, this will form the handle. (the length could vary here depending on where you are hanging your bag from, so be sure to check if this length is suitable for your car). With right sides facing, stitch down the length of the strip using a ¼” seam. Turn the tube through the right way and press flat. Now topstitch the handle on both sides.
(Click Image to Enlarge)
Step 4:
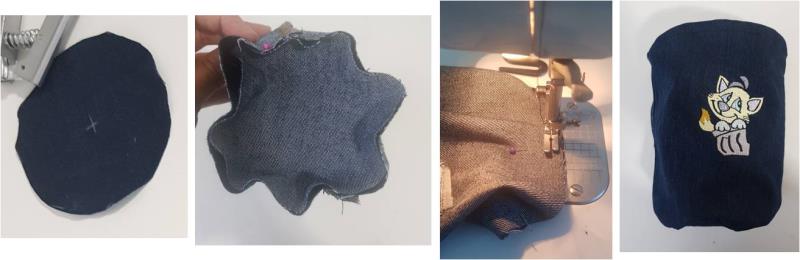
Now with the bag panel, fold it with right sides facing and stitch up the side seam. Then along the top edge of the bag, turn under 10mm twice to form a closed hem and stitch down.
(Click Image to Enlarge)
Step 5:
From the denim jeans, cut a circle with a 4 ¾” diameter, this will form the base of your bag. Pin this circle to the base of your bag and stitch around with a 10mm seam allowance. Turn your bag right way out
(Click Image to Enlarge)
Step 6:
Find the centre back of the bag and mark, ensuring the embroidery design is centre front. Fold your handle strap in half lengthwise and pin both ends to the bag at the centre back mark, raw edges should face towards the top edge of the bag, stitch the handle in place. Then turn the handle up, the cover the stitch line you just made, pin in place and stitch down, stitching close to the top edge.