Labor Day 10 Off 30
Live Chat
Embroidery Designs
Welcome, Embroiderer
Login
Boho FSL Dream Catcher

Boho FSL Dream Catcher Embroidery Project

By   Kylie Burke   on   January 28, 2020
  • SKILL LEVELIntermediate
  • TIME REQUIRED03:00
Description

Dream catchers are very popular and when you make your own you can customise it to your liking so enjoy being creative with this project.

Step of

Materials

Project Preview Video

Materials
  • 8” Metal ring or hoop of your choice
  • Water dissolvable backing
  • Emb thread (a color for the doily, feathers and flowers)
  • Variety of decorative trims
  • 1mtr white string
  • 1.5mtrs satin ribbon
  • 22” of 2mm white flat cord/thonging
  • Hot glue gun

  • Designs used in this project


    Step 1:
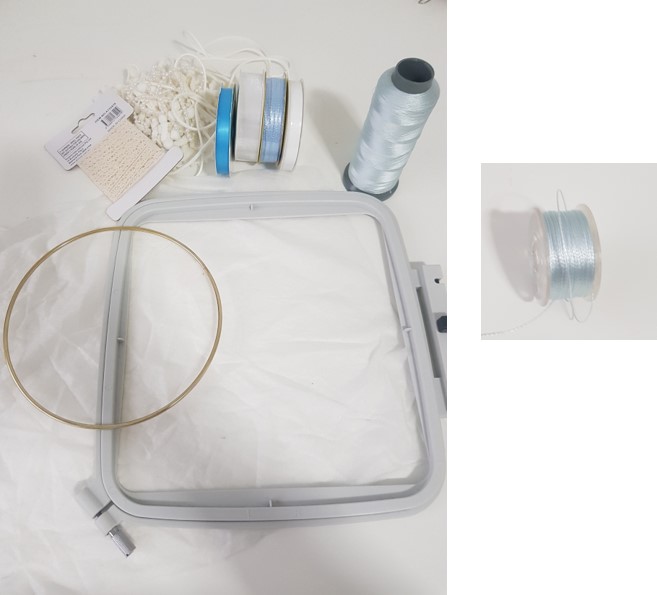
    Gather the required materials and have a copy of the embroidery color sequence on hand to refer to. For FSL, remember to load your bobbin with your chosen thread color as you do see both sides of the design. 

    (Click Image to Enlarge)


    Step 2:
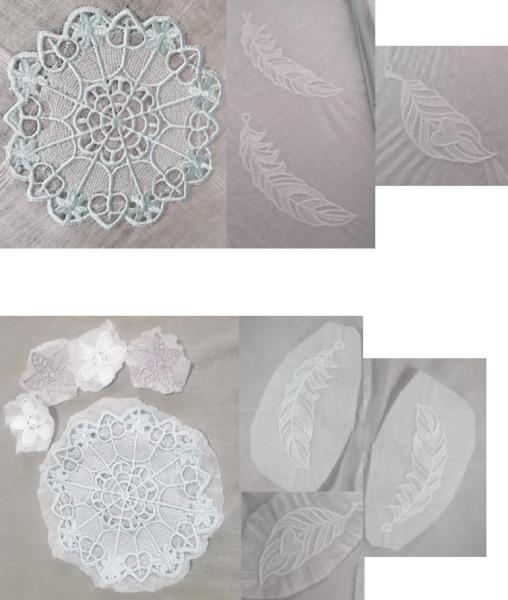
    Hoop the water dissolvable backing and load the embroidery files. I increased the doily size to 120%, if you have a smaller metal hoop then you do not need to increase the size. Stitch out the doily, feathers and flowers designs. Once stitched out, cut away the excess backing leaving a small amount around each design. Follow the manufacturers instructions to dissolve the backing and allow the FSL to dry overnight if possible

    (Click Image to Enlarge)


    Step 3:
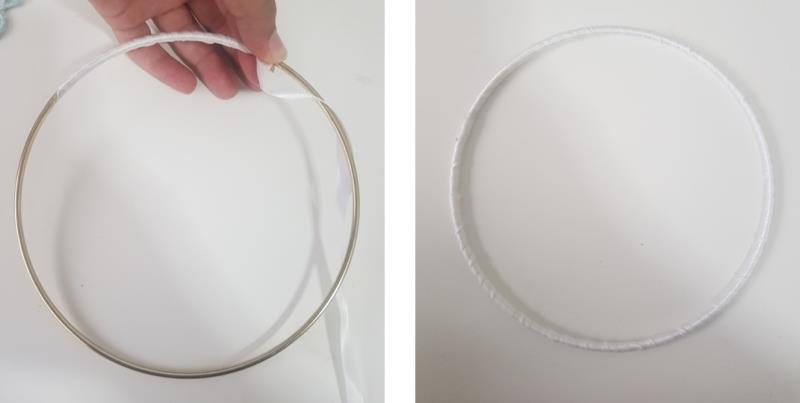
    This step is optional, but I have covered my metal hoop with satin ribbon, simply wrap it around the hoop and secure at the end.

    (Click Image to Enlarge)


    Step 4:
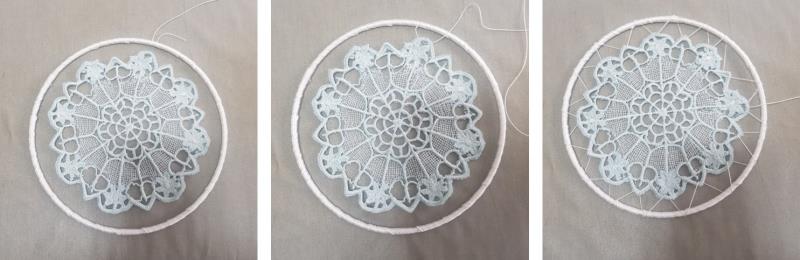
    Position your FSL doily in the middle of the hoop, tie one end of you string to the hoop and thread he string through the gaps of the FSL doily design to catch it and then wrap it again around the hoop to secure. Continue all the way around and again tie off the string to finish.

    (Click Image to Enlarge)


    Step 5:
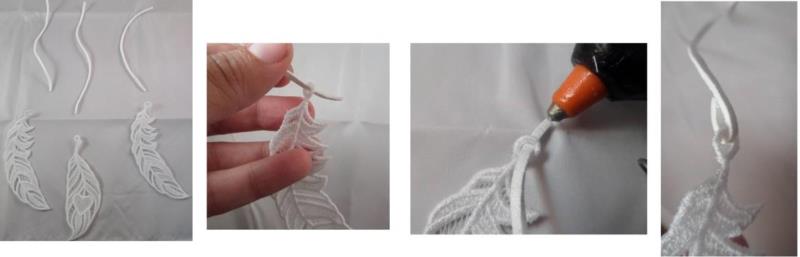
    With the white flat cord, cut 2 lengths of 5” and 1 length of 6” to attach to the feathers. Thread the cord through the end of the feather and use a small amount of glue to secure.

    (Click Image to Enlarge)


    Step 6:
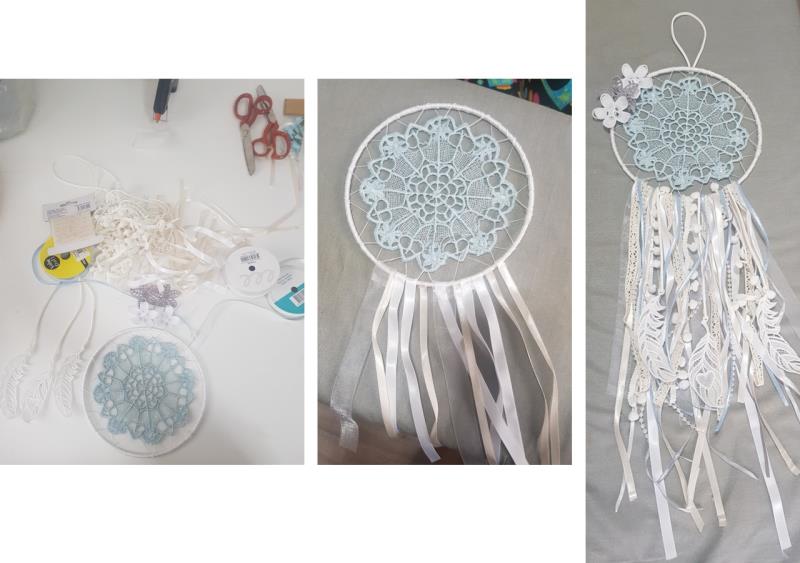
    Using your chosen decorative trims, cut varied lengths of between 20cm and 30cm. Attach each trim/ribbon piece and the feathers to the bottom of the hoop and secure with the hot glue. Add as much or as little of the trims as you like. Then glue your 3d flowers to the side of the hoop, I choose to use them separately. Also cut a 5” piece of flat cord and glue to the top of the hoop for you to be able to hang it. 

    (Click Image to Enlarge)


    Step 7:
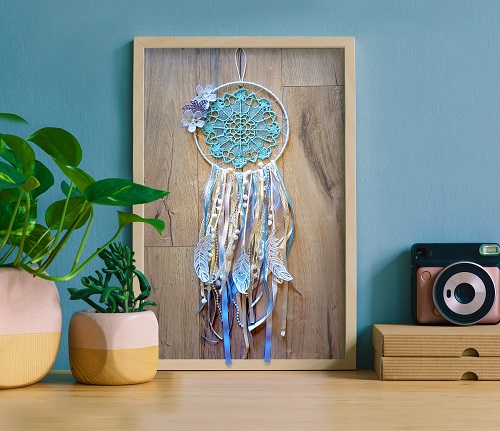
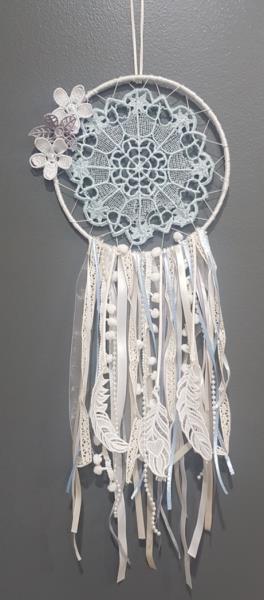
    Your boho dream catcher is now complete and ready to hang.

    (Click Image to Enlarge)

    Meet the Author: Kylie Burke
    Kylie Burke
    Kylie is based in Australia and loves creating and sharing her unique pieces.
    More From This Author
    Link is Broken, Please check the URL
    Exclusive Embroidery Offers!
    Copyright © {{ currentDate | date:'yyyy'}} - EmbroideryDesigns.com
    GET 50% OFF! ×