
















































Embroidery 101: Naturally Metallic Embroidery Project
A quick tutorial on adding natural shimmer to your design.
Materials
Project Preview Video

Cut Away Stabilizer - 2.5 Oz wt.

Cut Away Stabilizer - 2 oz wt.
A quick tutorial on adding natural shimmer to your design.
In nature, sunlight dances off surfaces catching our eye and igniting our imagination. In a forest scene, we can see the reflection of sunlight off of wet surfaces such as leaves and rocks. In a winter scene, sunlight can be blinding as it hits the snow and ice producing a magical effect. Underwater, sunlight brings the reef inhabitants alive. Their movement is amplified by the sunlight glinting off their smooth shiny surfaces. It is difficult to achieve the same effects in our embroidery but not impossible. Although there are many metallic threads available, they do not always produce the desired effect. Using gold metallic thread for leaves is perfectly acceptable for holiday wear but not realistic for a landscape. |

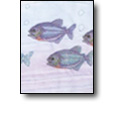
The only thing shiny underwater is the hardware worn by a SCUBA diver. What's an embroiderer to do? Try looking underneath to the surface below. I'm going to show you how to add the effect of sunlight without changing the natural beauty of your embroidery. We're going to change the density of our design, add a metallic fabric as underlay and finish the design. Log onto www.dzgns.com and download the free fish design, #90010.
Hoop the fabric and place a small piece (4"x 4") of metallic fabric in the design area. Embroider the first color in rust and second color in blue. Carefully remove the hoop from the machine (DO NOT REMOVE THE FABRIC FROM THE HOOP) and trim away the excess metallic fabric. Finish the design with this color sequence: pink, dark pink, dark purple, yellow, orange, navy, white and black.
The possibilities are endless as the combinations are infinite. Experiment with a variety of metallic fabrics and various threads to give your embroidery eye-catching appeal! |


