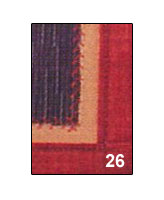
Border OptionsHugging border, circle, square, or rectangle — with a 3mm satin stitch.
Backing OptionsAvailable with iron-on, sew-on, or velcro backing.
Fast ShippingShipped quickly from the USA.
Free Online Tools
Powerful embroidery utilities that save time and prevent costly mistakes.
Stitch AssistantRECOMMENDED
Get the exact stabilizer, machine settings, needle, and thread color sequence for every embroidery design you purchase — based on that design's stitch density, dimensions, and color count.
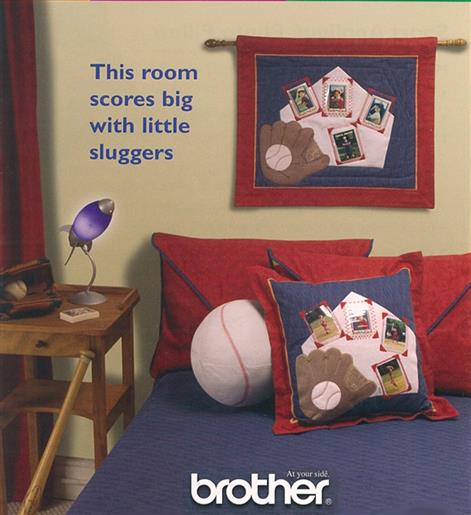
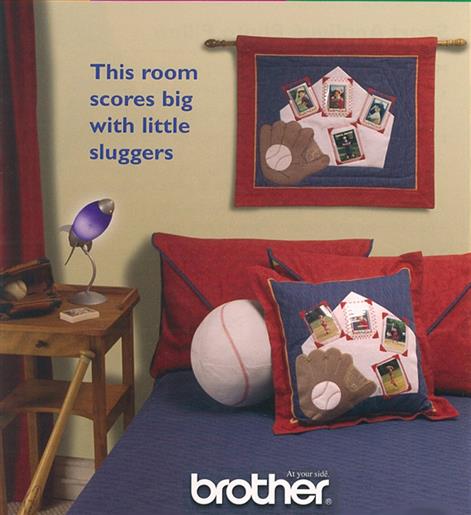
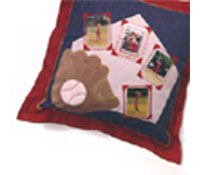
Create a charming baseball-themed pillow set with easy applique techniques. Perfect for sports enthusiasts, these pillows add a personalized touch to any room. Step-by-step instructions are included.
Main pillow fabric- 1 piece 18 ½" x 18 ½" (front).
Main pillow fabric- 1 piece 24" x 24" (back)
Gold accent fabric- measuring 3" x 18 ½"
Red accent fabric- 2 strips measuring 3" x 18 ½" (used for top and bottom of pillow front)
White appliqué fabric- measuring 16" x 21" (used for homeplate and baseball)
Light brown fabric- measuring 12" x 12" (used for baseball glove)
Fusible webbing- used for appliquéing home plate, baseball, baseball glove and gold accent trim.
Transparent lightweight vinyl (see thru plastic) 4 pieces measuring 3" x 3 ½"
Water-soluble fabric marker
Decorative thread- used for “X” stitching on glove (lacing)
Assorted machine embroidery thread (brown, white, and red)
Pattern pieces (homeplate, baseball glove)
Pillow form- 18" x 18"
All purpose sewing machine thread to match pillow fabric
Sewing needle for hand sewing (eye to accommodate decorative thread for lacing)
4 wallet-size photos
Sewing machine with built-in decorative stitches
Final Product: What You Will Create
Step 1:
(Click Image to Enlarge)
Cut 1 piece main fabric- 18 ½" x 18 ½" (front). Please wait to cut the
back, measurement may differ according to seam allowances.
Step 2:
Cut white appliqué fabric and fusible webbing 16" x 21". Iron fusible
webbing to the back of the white appliqué fabric piece. Cut out
homeplate from the fused white appliqué fabric, following the homeplate pattern. Note: part of this material will be used for the baseball.
Step 3:
Remove paper backing from homeplate piece and center on main fabric front. Iron in place.
Step 4:
Thread your machine with white machine embroidery thread and use the appliqué stitch to sew homeplate to the pillow front.
Step 5:
Cut light brown glove fabric and fusible webbing 12" x 12".
When cutting out the glove, be sure to completely cut out the section
with the dashed lines. This section will be replaced with a basket weave
technique using strips of fabric.
Step 9:
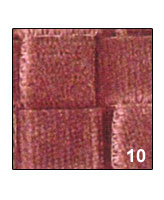
Cut out 8 strips ½" wide and approximately 4 ½" long from the glove
material. Remove the paper backing and make a basket weave square. With a
piece of waxed paper underneath, gently press to hold in place until
needed.
Step 10:
(Click Image to Enlarge)
It should look like the picture below (10) when done. This section will be placed under the thumb and forefinger of the glove.
Step 11:
Peel off the paper backing from the glove appliqué and position it at
lower left corner of homeplate on the pillow front. Gently lift the
thumb and forfinger enough to slip under the basket weave square. Press
the entire glove in place. Remember to remove the wax paper.
Step 12:
Thread your machine with brown machine embroidery thread. Using the
appliqué stitch, sew the glove on the pillow front. Use other decorative
stitches to embellish the glove further.
Step 13:
(Click Image to Enlarge)
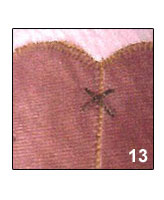
Define the fingers with decorative stitching. Connect the glove fingers
by using decorative thread or yarn. Thread a sewing needle and by hand
make three X’s to connect the fingers.
Step 14:
With an ordinary glass from the kitchen, about 3" diameter, trace around
it to form a circle using the remainder of the white fabric. This will
become the baseball for the center of the glove. Cut out the ball, peel
off the backing and iron in place.
Step 15:
Thread your machine with white machine embroidery thread and with the appliqué stitch sew the baseball to the glove.
Step 16:
(Click Image to Enlarge)
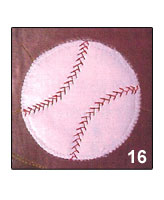
Next thread your machine with red machine embroidery thread. Using the
feather stitch, sew two curved lines to form the stitching of the ball.
Step 17:
Now it is time to do the photo picture pockets, that display your favorite photos.
Step 18:
Follow the steps below "Decorative Photo Pockets". When completed with all four photo pictures pockets, continue onto step 19.
Place the wallet size photos on the pillow front in the desired positions.
To mark the placement, trace around all four sides of each photo with a water-soluble fabric marker.
Remove the photos, and draw a second line ¼" from the first line. This line is for the decorative stitching..
Thread the machine with red machine embroidery thread.
Choose a decorative stitch, and stitch at the top of the photo pocket..
Cut 4 pieces of transparent vinyl 3" x 3 ½". (One for each picture).
Place the transparent vinyl even with the
left, right, and bottom outside line markeings of each pocket position.
This positioning will leave enough room for the picture to slide in
easily from the top.
Stitch a line of decorative stitching (same as the top stitching) on the remaining edges using the market lines as guides.
Cut a piece of red accent fabric into one
strip measuring 1 ½" wide by approximately 6" long. Cut a matching piece
of fusible webbing and iron to the back of the fabric strip.
Cut this strip into four 1" squares, then
cut these squares diagonally twice. Each 1" square will make 4 small
triangles to be used for the four corners of each picture pocket.
Remove the backing from the triangle
pieces. With the point of the iron, adhere to the corners of the picture
pocket frame. Be careful not to touch the hot iron to the vinyl
pockets.
Stitch around the small red triangles with an applique type stitch.
The pocket is now complete.
Step 19:
Cut the gold accent fabric and fusible webbing 3" x 18 ½" . Iron webbing
to back of gold accent fabric. Cut into 4 strips measuring ¾" x 18 ½"
and iron to all four edges of the pillow front.
Step 20:
Thread your machine with red machine embroidery thread. Embroider the
inside edge of the gold accent fabric, using a decorative stitch of your
choice.
Step 21:
Cut red accent fabric into 2 strips measuring 3" x 18". Place on left
and right side of pillow front with the right sides together. Thread
your machine with matching all-purpose sewing thread. Sew to pillow
front.
Step 22:
Press seams away from the center.
Step 23:
(Click Image to Enlarge)
Cut red accent fabric into 2 strips measuring 2" x 24". Place on top and
bottom of pillow front with right sides together. Sew to pillow front.
Press seams away from center. This will form an accent border completely
around your pillow front.
Step 24:
Cut main pillow fabric for back of the pillow, 24" x 24". (measurements
may vary according to seam allowances of the front section).
Step 25:
(Click Image to Enlarge)
With right sides together (front and back) stitch ¼" seam allowance
completely around the pillow, leaving an opening of about 14" at the
bottom. Clip the corners and remove any bulk if necessary.
Step 26:
(Click Image to Enlarge)
Turn right side out and press. With a water-soluble pen, mark a straight
line 1 ¾" from the edge around the entire pillow front. Thread your
machine with matching machine embroidery thread and top stitch on the
line leaving an opening as before, at the bottom of the pillow.
Step 27:
Insert pillow form, stuffing in as far as possible. Pin the bottom of
the pillow and finish top stitching the flange opening. Continue by hand
to finish closing the pillow.
Step 28:
(Click Image to Enlarge)
Baseball Pillow
Cut out two paper patterns. Tape together at the fold line to create a full-size pattern. Download pattern
Cut the pillow fabric pieces on the bias.
Using a fabric marker or chalk, transfer the pattern piece dot at each point to the fabric pieces.
With right sides together, pin two pillow pieces together. Be sure to match the dots on each end.
Using a ½" seam allowance, stitch from one dot to the other. Be sure to reverse stitch on each end.
Press seam open.
Repeat step 5 and sew other pillow sections together in two piece sections.
Pin the two piece sections together matching top and bottom dots.
Sew together using ½" seam allowances.
Leave one section open.
Press seam open.
Turn pillow right side out.
Thread your machine with red machine thread.
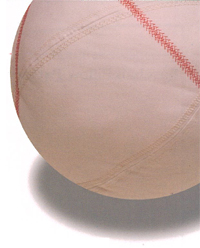
Use the feather stitch on your sewing machine to create the baseball stitching on the pillow.
Turn the pillow wrong side out again. Stitch from the end dots in toward the center on both ends. Leave 4" to 6" for turning.