Border OptionsHugging border, circle, square, or rectangle — with a 3mm satin stitch.
Backing OptionsAvailable with iron-on, sew-on, or velcro backing.
Fast ShippingShipped quickly from the USA.
Free Online Tools
Powerful embroidery utilities that save time and prevent costly mistakes.
Stitch AssistantRECOMMENDED
Get the exact stabilizer, machine settings, needle, and thread color sequence for every embroidery design you purchase — based on that design's stitch density, dimensions, and color count.
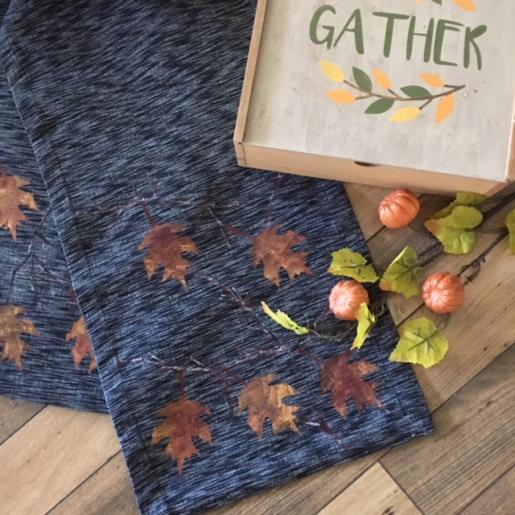
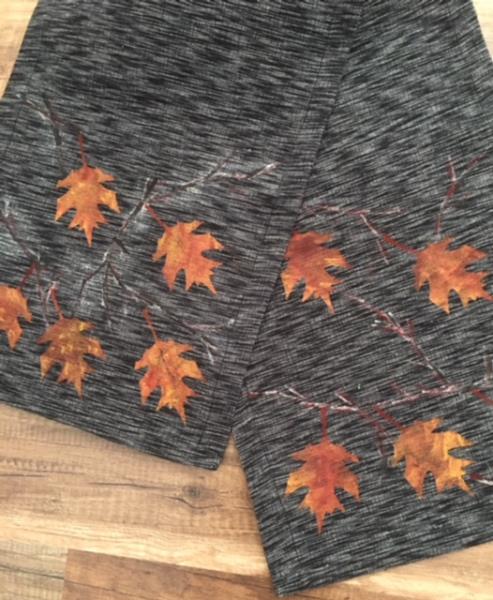
Enhance your autumn decor with this exquisite hand painted table runner featuring autumn leaves. Perfect for adding a touch of fall elegance to any table setting. Step-by-step instructions are included.
Step
of
Hand Painted Fall Leaves Table Runner
By Linda Mills
Create a falling leaves table runner by using your cutting machine to make multiple simple leaf stencils from the fall leaves SVG/Print Art design. Apply stencils to a store purchased table runner and then paint... mixing your colors of red, yellow, orange to reflect the cornucopia of autumn colors.
Step 1:
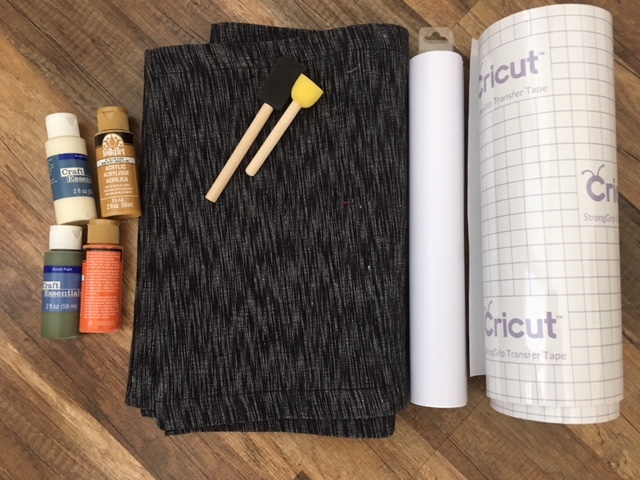
Gather all supplies and review instructions before beginning.
*BASIC KNOWLEDGE OF A CUTTING MACHINE AND HOW TO PREPARE VINYL FOR STENCIL IS NEEDED.
(Click Image to Enlarge)
Step 2:
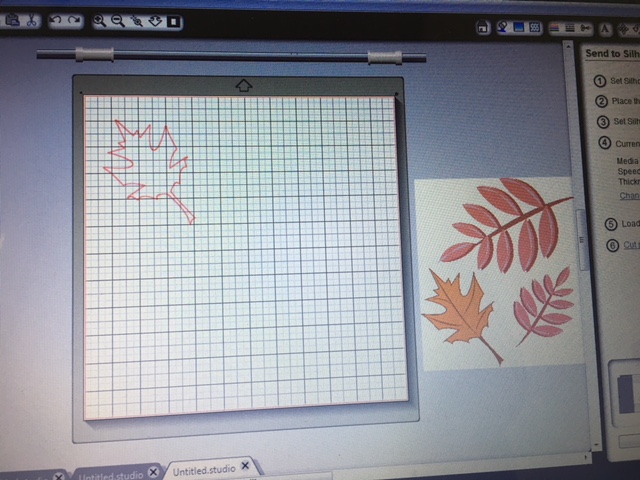
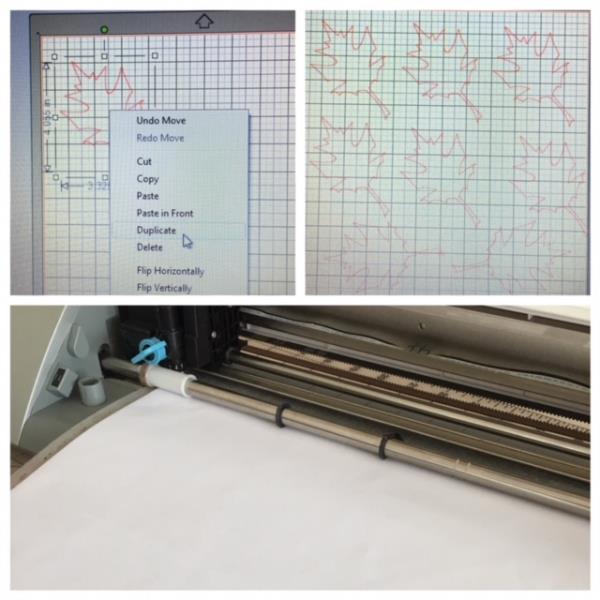
Bring into your cutting machine software the Fall Leaves SVG/Print Art design per your software’s instructions. Edit the SVG/Print Art design to one single maple leaf design by deleting the other two leaves.
For Silhouette Cameo owners/users: If your silhouette machine has not been updated to allow working with an SVG ( cuttable ) file....You can work around this by downloading the print art design as a jpeg or png file. You will find instructions on how to work around to “cut” your design by reviewing step 4 of my Thanksgiving themed wood art/SVG project tutorial.
(Click Image to Enlarge)
Step 3:
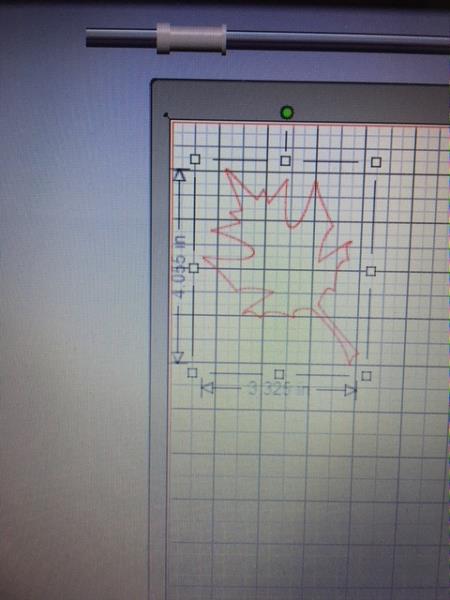
Size the single leaf design to approximately 4.035” x 3.325”.
(Click Image to Enlarge)
Step 4:
MAKING MULTIPLE LEAF STENCILS *A total of 10 leaf stencils were used in this tutorial which was based on the size of the runner used.
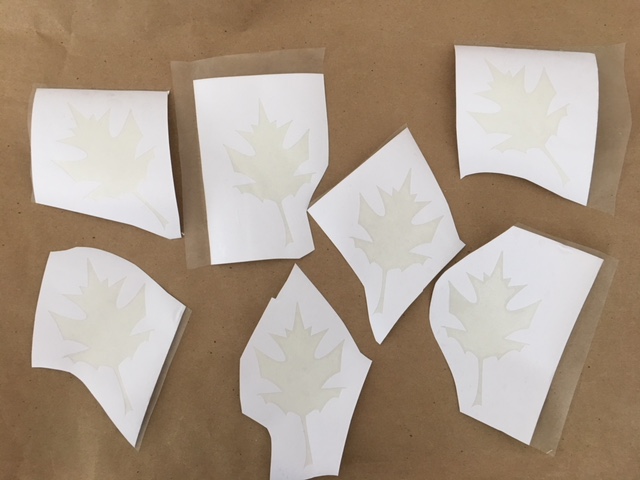
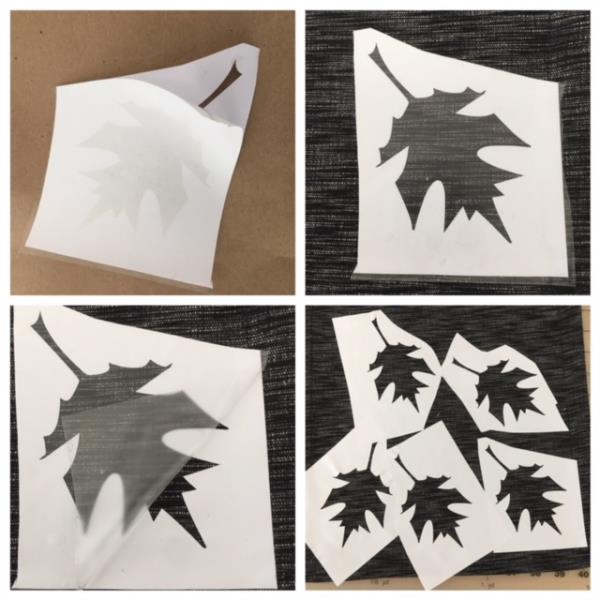
Duplicate your leaf design per your software’s instructions and position/arrange the leaf design so that you can get as many leaf designs onto your 12” x 12” vinyl. ( i was able to get 8 . See photo for positioning) cut vinyl per your cutting machine’s instructions using any color vinyl. Repeat for the additional leaf stencils. Weed your designs for a stencil. Apply transfer paper.
*WEEDING VINYL IS THE PROCESS OF REMOVING THE UNWANTED VINYL FROM YOUR CUT DESIGN.
(Click Image to Enlarge)
Step 5:
Cut each design into an individual leaf stencil
(Click Image to Enlarge)
Step 6:
POSITIONING THE STENCILS ONTO TABLE RUNNER
Use 5 leaf stencils for each end of table runner. Remove the backing from the stencils as you position each one onto one end of the table runner. Fingertip press to secure and remove transfer paper. (use picture as a guide)
(Click Image to Enlarge)
Step 7:
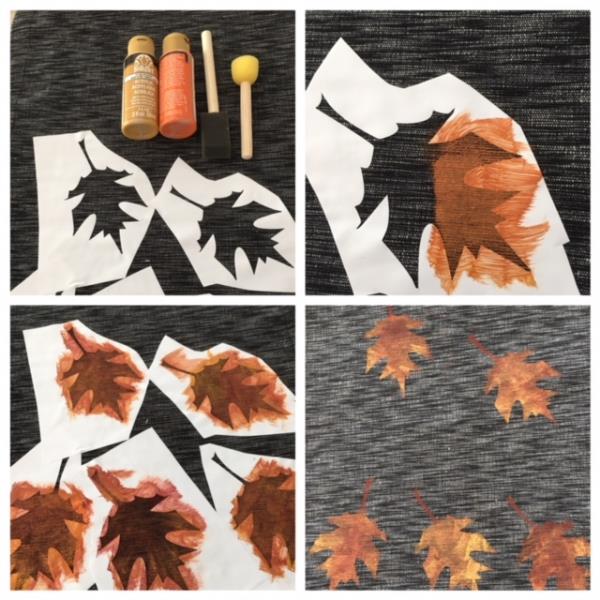
PAINTING Paint colors used in this tutorial were fall colors of orange, yellow , red. Paint the open area of your leaf stencils. Use your favorite method of applying the colors to obtain the different hue effects of fall leaf colors. Let dry . Remove stencils .
(Click Image to Enlarge)
Step 8:
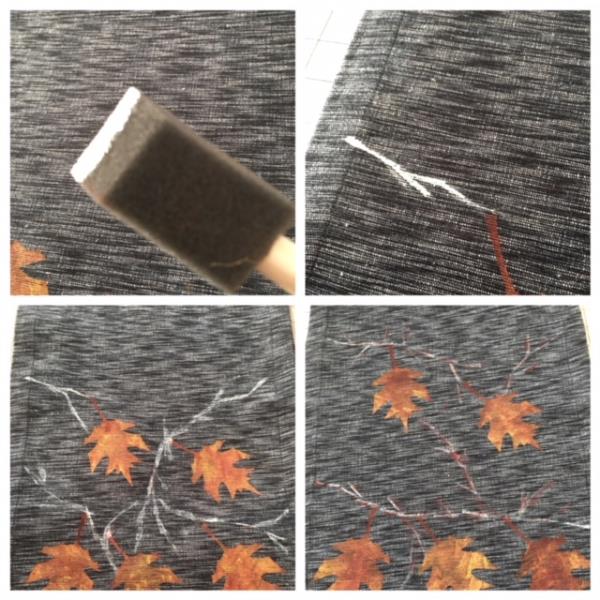
CREATING THE BRANCHES You will be creating branches connecting your leaves free hand. Using your sponge brush..dip the point into the color paint you chose for your branch. Then lightly apply to your runner making a line. Continue to do this to connect. ( see picture ) I choose an off white/ivory paint color to accent the branches as the table runner used in this tutorial is a black and white woven fabric. A darker color was used to apply on top of the white to achieve a fall color look. Have fun with this process! Use your artistic creativity. Let dry. Repeat steps 6 through 8 for other end of your runner.
(Click Image to Enlarge)
Step 9:
Woohoo! You did it. Your painted Fall Leaves Table Runner is complete! Great job!