














































PROJECT INSTRUCTIONS
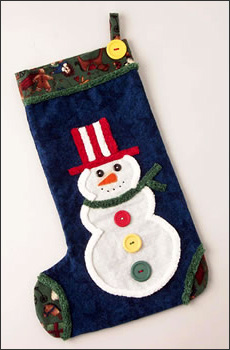


PROJECT INSTRUCTIONS

Project: Snowman Embellishment Embroidery Project
By
Fran Morgan
on
December 01, 2004
Description
This cute guy is just in time for your winter sewing. He’ll look great on a stocking, sweatshirt or wall-hanging!
Step
of
Materials
Project Preview Video

Cut Away Stabilizer - 2.5 Oz wt.
$8.94
Circle Price: $8.05

Cut Away Stabilizer - 2 oz wt.
$8.52
Circle Price: $7.67
| Materials Chenille By The Inch™ 01 Strawberry 10" 02 Parsley 10" 03 Coconut 25" Embroidery floss Black Orange Paper-backed fusible web 1/4 yd. Two 1/2" buttons Three assorted-size buttons for body Chenille Brush™ Chenille Cutting Guide™ Background of choice |
|
Projects You May Like
Meet the Author:
Fran Morgan

Fran Morgan, an avid quilter, designer, and quilting teacher, has been featured in numerous quilt publications and television shows. She travels regularly teaching her love of Chenille By the Inch® and sculptural quilting. In 2001, she and her business partners, Donna Robertson and Robert Scacci, founded the company Fabric Café, publisher and manufacturer of Chenille By the Inch®.
Feedback
Characters Remaining
Please Login to Submit a Feedback
Invalid Characters, Please enter a valid Comment
Please enter a valid Comment
Reviewed On
Link is Broken, Please check the URL