{{superHeaderAds.title}}
Live Chat
Embroidery Designs
Welcome, Embroiderer
Login
Roll-Up Brush Bag
{{mainImageAlt || (productInfo._source && productInfo._source.name) || ''}}

Roll-Up Brush Bag Embroidery Project

By   Kylie Burke   on   May 20, 2019

PROJECT DETAILS

SKILL LEVEL
Experienced
TIME REQUIRED
02:30
Description

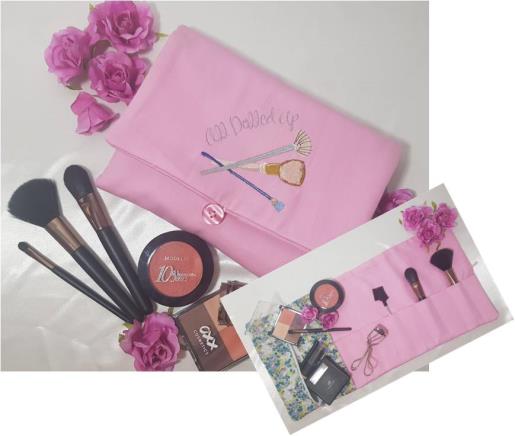
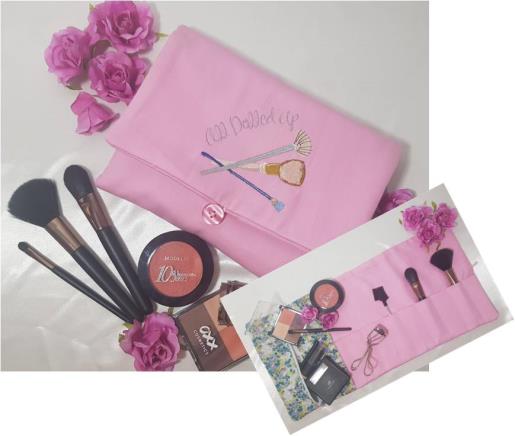
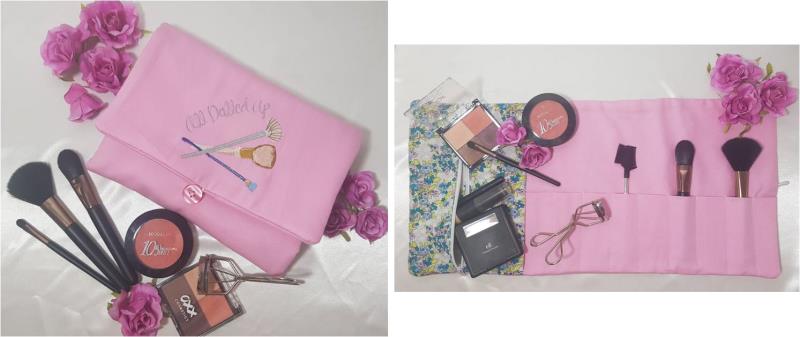
With plenty of room for all your beauty brushes and a pouch to hold your make-up, this bag is the perfect addition to your cosmetic bags and will soon become your go-to bag.

Project Preview Video

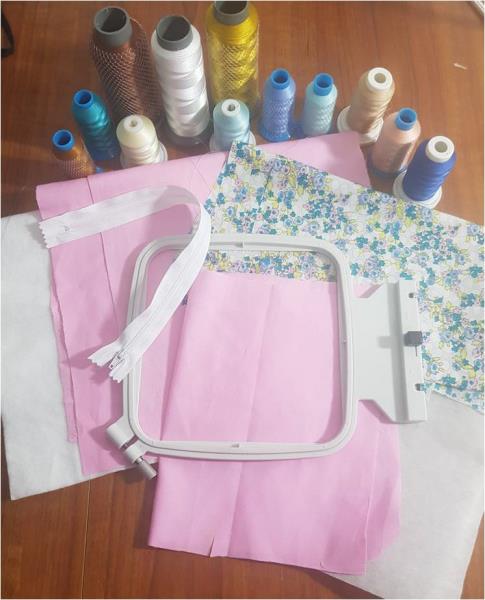
Materials
  • Plain color cotton drill fabric
  • Floral cotton fabric
  • Quilt batting or felt
  • 4” hoop
  • Tearaway stabilizer
  • Embroidery threads
  • 9” zipper
  • 2” hat elastic
  • 15mm button

  • Designs used in this project

    Final Product: What You Will Create


    Step 1:
    Gather the materials and read through the instructions before beginning. Have a copy of the color sequence on hand to refer to

    (Click Image to Enlarge)


    Step 2:
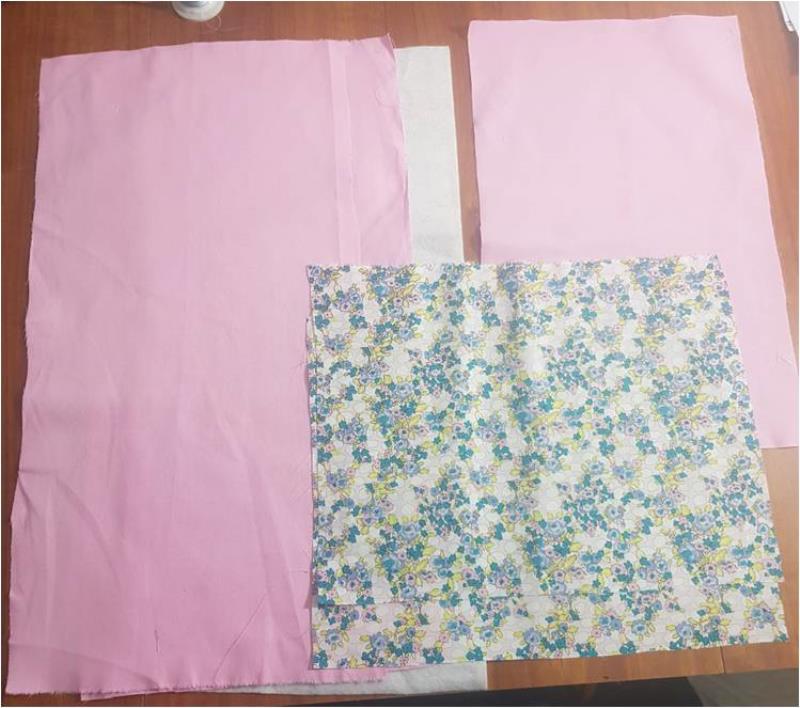
    Cut all required pieces of fabric. From the plain cotton drill cut 2 pieces 20” x 10” and 1 piece 9” x 14”. From the floral fabric cut 2 pieces 13” x 10”. From the felt cut 1 piece 20” x 10”.

    (Click Image to Enlarge)


    Step 3:
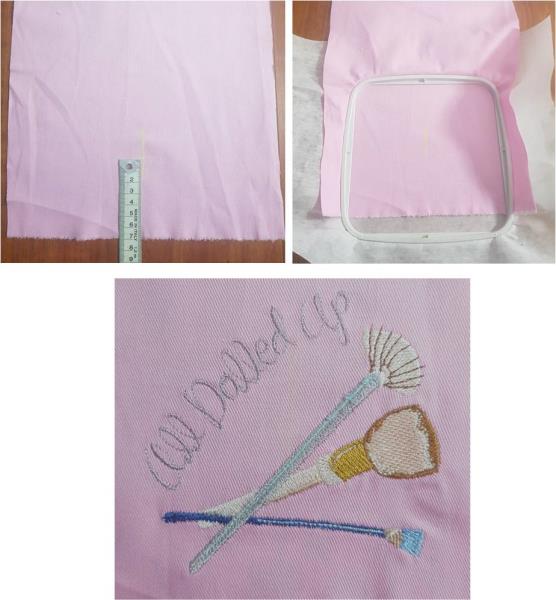
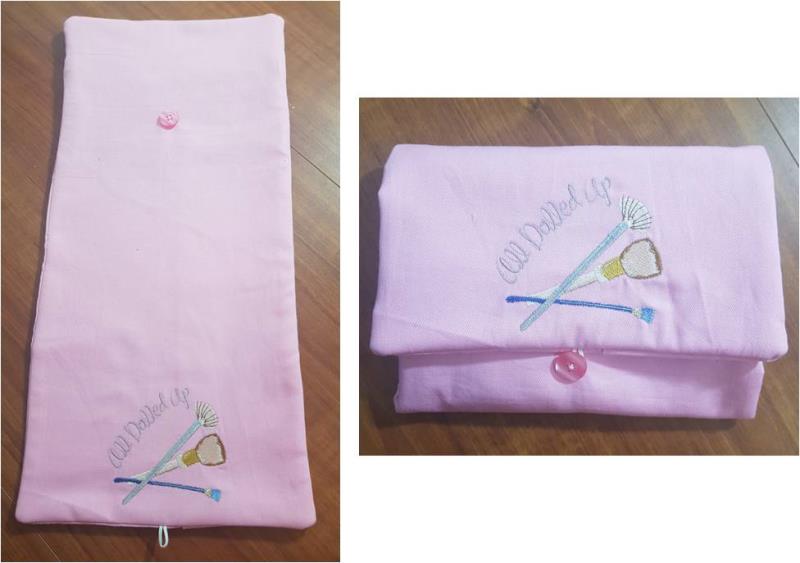
    On the large rectangle of plain cotton drill, with the right side facing up, along the short edge measure across the width and mark the centre then measure up 70m and mark. This represents the middle of the embroidery design. Hoop the stabilizer and fabric and stitch out the embroidery design.

    (Click Image to Enlarge)


    Step 4:
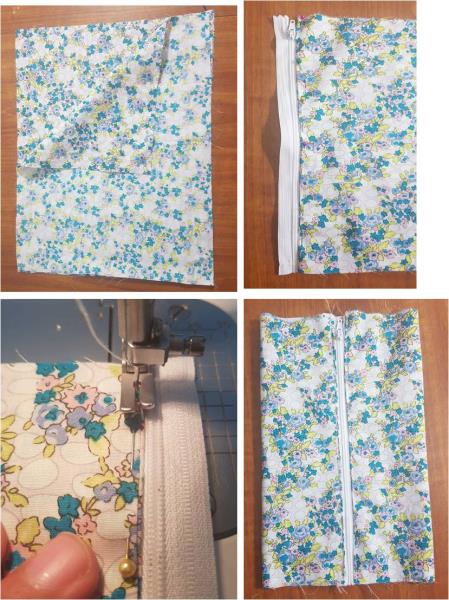
    Now onto the floral fabric, place the pieces right sides together and stitch along the 2 short sides to form a tube, turn out the right way and press the seams. Now lay one of those seams along the zipper tape and pin into place then stitch down. Fold the other seam onto the zip tape and stitch in place, this forms a tube. 

    (Click Image to Enlarge)


    Step 5:
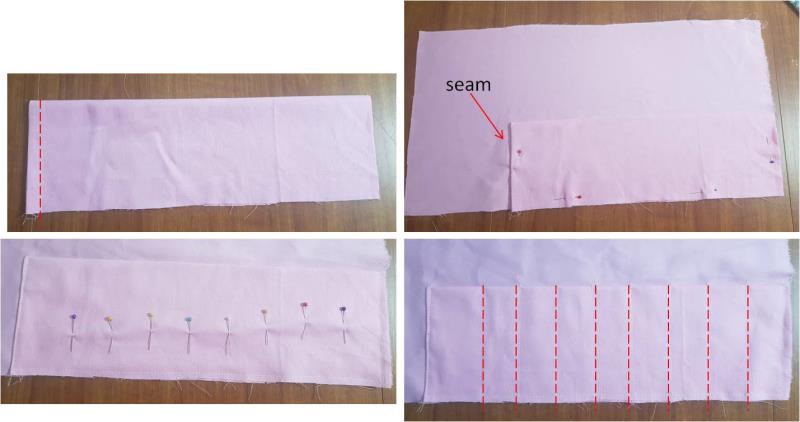
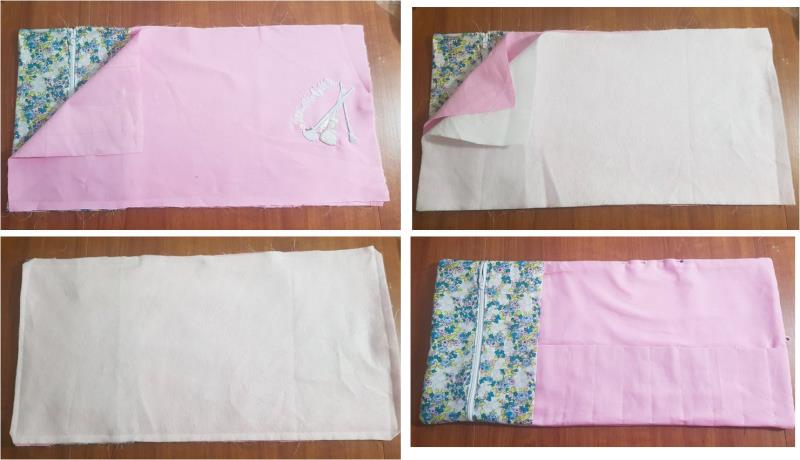
    Now with the 9” x 14” rectangle of plain cotton drill, fold it in half widthwise with right sides together and stitch along one of the short edges using a ¼” seam, turn it out the right way and push out the corner of that seam. Now with the non-embroider panel facing right side up, lay the smaller rectangle piece onto the “non-embroidered” plain cotton panel. Ensure the smaller rectangle is placed in the bottom right hand corner, matching raw edges with the seam inside. Now along the smaller rectangle, measure in from the side and mark every 1.5”, stitch a straight line through all layers ensuring you back stitch at the top of the smaller panel to secure it in place. 

    (Click Image to Enlarge)


    Step 6:
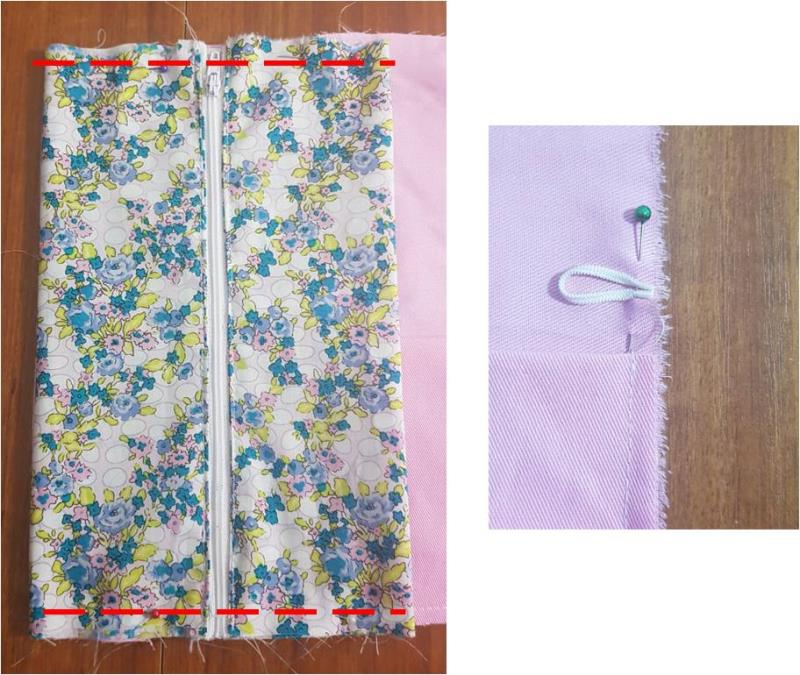
    With the same non-embroidered panel, place the floral tube onto the other end of the panel and stitch in place along the top and bottom. It will sit at the end of the smaller rectangle which you stitched on in step 5. Then at the other end of the same panel, find the centre along the short edge and stitch the elastic into place. 

    (Click Image to Enlarge)


    Step 7:
    Now place the embroidered panel face down onto the panel with the floral pouch, ensuring that the embroidery is at the opposite end to the floral pouch. Place the felt piece ontop then stitch around all edges, but leave a gap to allow you to turn it through. Turn through to the right side, push out the corners then hand stitch the gap closed. 

    (Click Image to Enlarge)


    Step 8:
    On the outside of the bag, at the opposite end to the embroidery, measure up 120mm and stitch on the button ensuring it is centered. Give the bag a good press to smooth the edges. 

    (Click Image to Enlarge)


    Step 9:
    Your roll-up brush bag is now ready!

    (Click Image to Enlarge)

    Meet the Author: Kylie Burke
    Kylie Burke
    Kylie is based in Australia and loves creating and sharing her unique pieces.
    More From This Author
    Link is Broken, Please check the URL
    Exclusive Embroidery Offers!
    Copyright © {{ currentDate | date:'yyyy'}} - EmbroideryDesigns.com
    GET 50% OFF! ×