{{superHeaderAds.title}}
Live Chat
Embroidery Designs
Welcome, Embroiderer
Login
Mason Jar Tissue Holder
{{mainImageAlt || (productInfo._source && productInfo._source.name) || ''}}

Mason Jar Tissue Holder Embroidery Project

By   Linda Mills   on   May 13, 2019

PROJECT DETAILS

SKILL LEVEL
Some Experience
TIME REQUIRED
01:00
Description

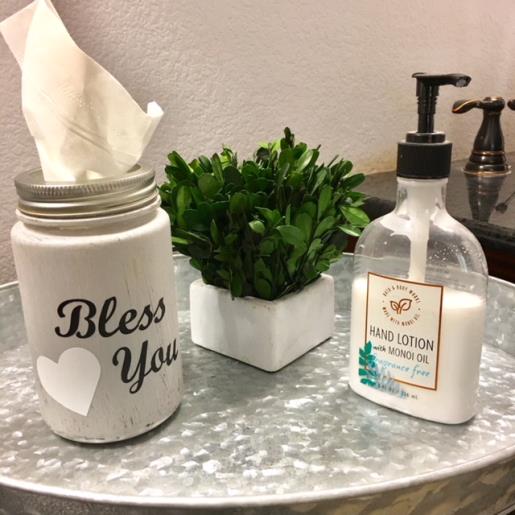
This Mason Jar Tissue Holder is a perfect accessory to any home décor. Simple, easy project and great for the beginner with basic knowledge in using a cutting machine.

Project Preview Video

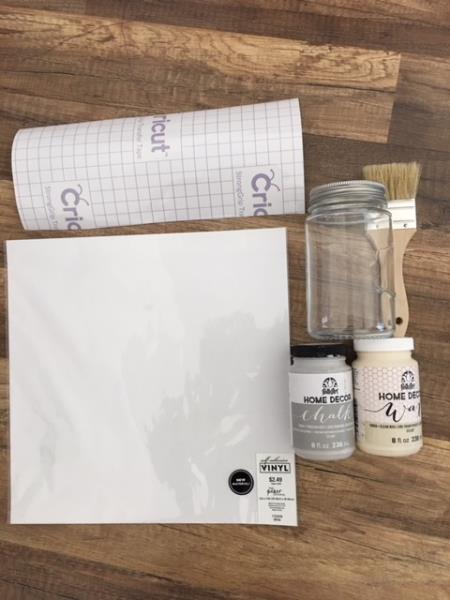
Materials
  • MASON JAR ( SMOOTH SIDES)
  • VINYL REMNANTS OR 12” X 12” VINYL SHEET ( COLOR(S) OF CHOICE)
  • TRANSFER PAPER/Tape
  • PAINT BRUSH
  • CHALK PAINT ( COLOR OR CHOICE)
  • CLEAR WAX Paint
  • CUTTING MACHINE ( I.E CRICUT,SILHOUETTE CAMEO)
  • * BASIC KNOWLEDGE OF A CUTTING MACHINE AND HOW TO PREPARE VINYL FOR DECAL IS REQUIRED.

  • Designs used in this project

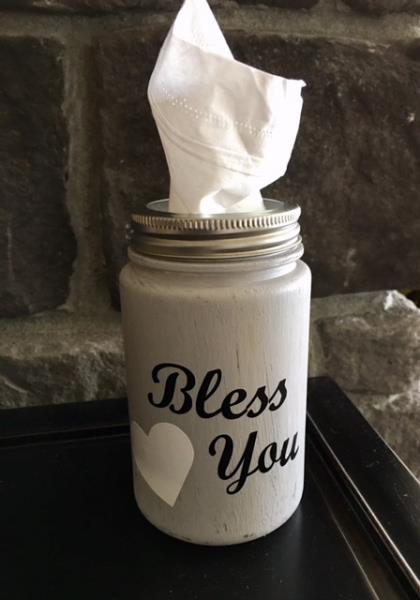
    Final Product: What You Will Create

    Preface:
    A simple and easy project for the cutting machine beginners. Using a basic heart SVG/Print Art design and a font from you cutting machine software turns a plain mason jar into a decorative accessory for your home.  


    Step 1:
    Gather all supplies and review instructions before beginning. 

    (Click Image to Enlarge)


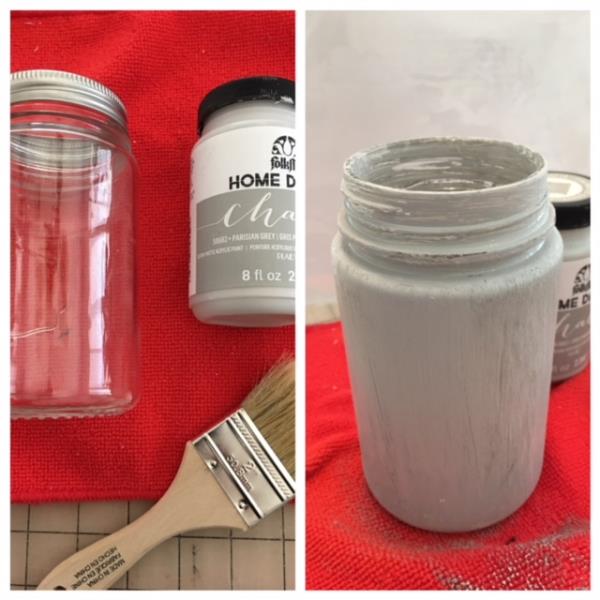
    Step 2:
    Remove the lid and band from your jar. Chalk paint the outside of your mason jar and allow to dry approx 10-20min . Then add a coat of the clear wax. Allow to dry 10 -20 min.

    (Click Image to Enlarge)


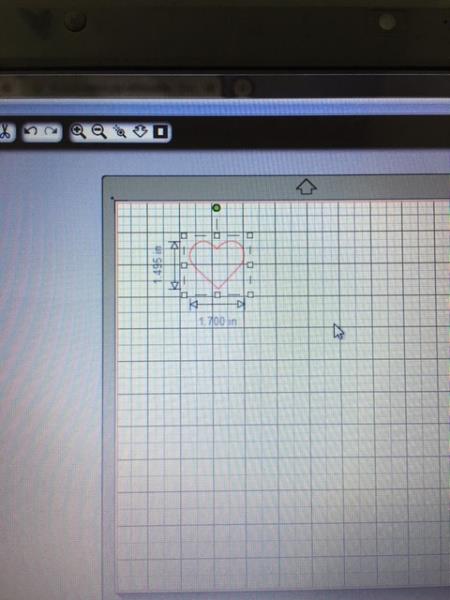
    Step 3:
    While your project is drying let’s create the decal. Bring the heart SVG/print art design into you cutting machine’s software program. Resize the heart to approx 1.5” x 1.7” . Cut design using a scrap vinyl color of choice. 
     
    *FOR SILHOUETTE CAMEO OWNERS/USERS: IF YOUR SILHOUETTE MACHINE HAS NOT BEEN UPDATED TO ALLOW WORKING WITH AN SVG (CUTTABLE) FILE.. YOU CAN WORK AROUND THIS BY DOWNLOADING THE PRINT ART DESIGN AS A JPEG OR PNG FILE. YOU WILL FIND INSTRUCTIONS ON HOW TO WORK AROUND TO “CUT” YOUR DESIGN BY REVIEWING STEP 4 OF MY THANKSGIVING THEMED WOOD ART/SVG PROJECT TUTORIAL.
     

    (Click Image to Enlarge)


    Step 4:
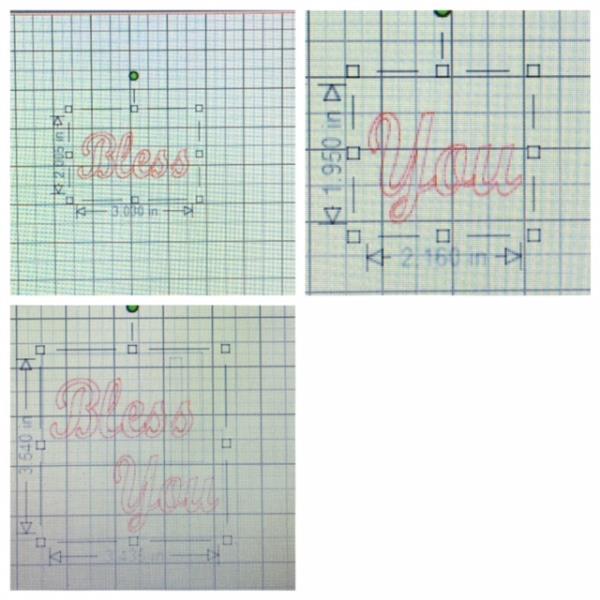
    Create the words: Bless You by using a font from your cutting machine software program.  Per your cutting machine's software instructions. ( Font used in this tutorial: Script MJ Bold)  Size the words as follows:
                                          Bless   3” x2” 
                                          You     1.95” x 2.160”
     
    Then group the words as shown in picture and size to 3.540” x 3.435”
    Cut from any color vinyl of choice. ( Black vinyl was used in this tutorial)   

    (Click Image to Enlarge)


    Step 5:
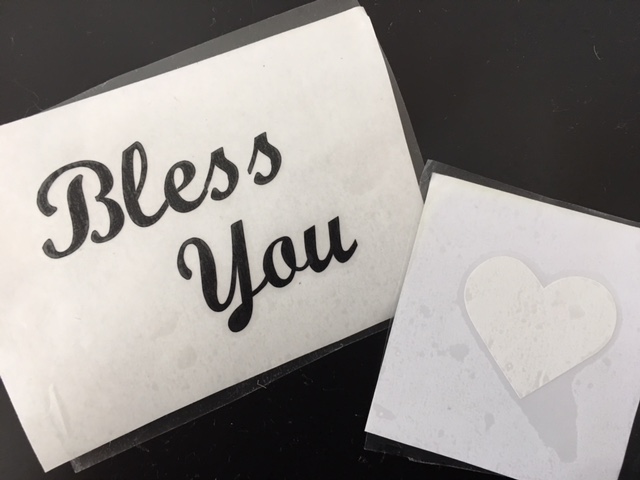
    Weed your cut vinyl of the heart and words for a decal and apply your transfer tape.
    (WEEDING VINYL IS THE PROCESS OF REMOVING THE UNWANTED VINYL FROM YOUR CUT DESIGN)

    (Click Image to Enlarge)


    Step 6:
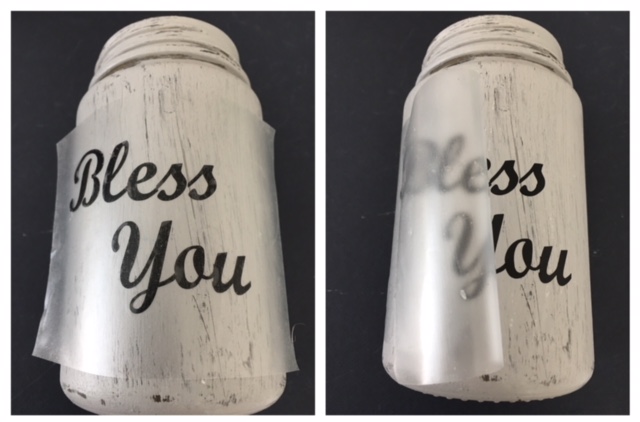
    Apply and center your “Bless You” decal to your jar. Slowly remove transfer tape.

    (Click Image to Enlarge)


    Step 7:
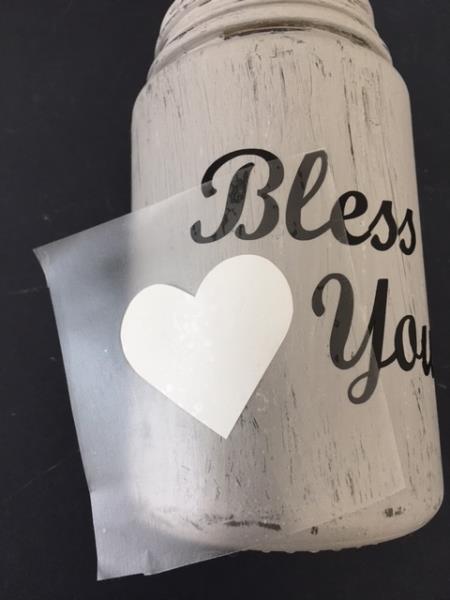
    Apply heart decal and position as shown in picture and remove transfer tape.

    (Click Image to Enlarge)


    Step 8:
    Screw the jar band back onto the jar. Now add some tissue and your Mason Jar Tissue Holder is now complete. Congratulations you did it!

    (Click Image to Enlarge)

    Meet the Author: Linda Mills
    Linda Mills
    Linda loves to create by sharing her different sewing and machine embroidery techniques so others can utilize their machines to the fullest
    More From This Author
    Link is Broken, Please check the URL
    Exclusive Embroidery Offers!
    Copyright © {{ currentDate | date:'yyyy'}} - EmbroideryDesigns.com
    GET 50% OFF! ×