Live Chat
Embroidery Designs
Welcome, Embroiderer
Login
Live Love Laugh TShirt
{{mainImageAlt || (productInfo._source && productInfo._source.name) || ''}}

Live Love Laugh TShirt Embroidery Project

By   Kylie Burke   on   April 29, 2019
  • SKILL LEVELIntermediate
  • TIME REQUIRED01:00
Description

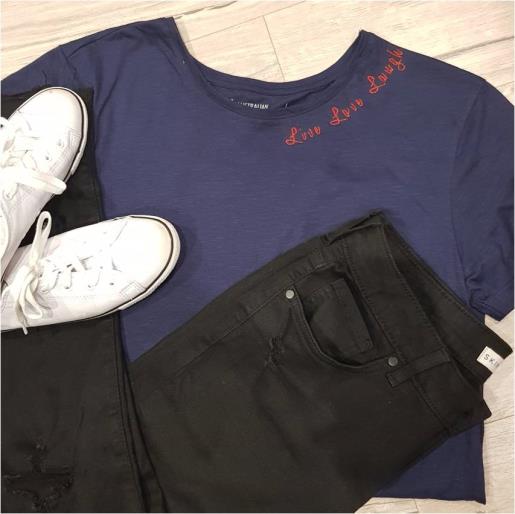
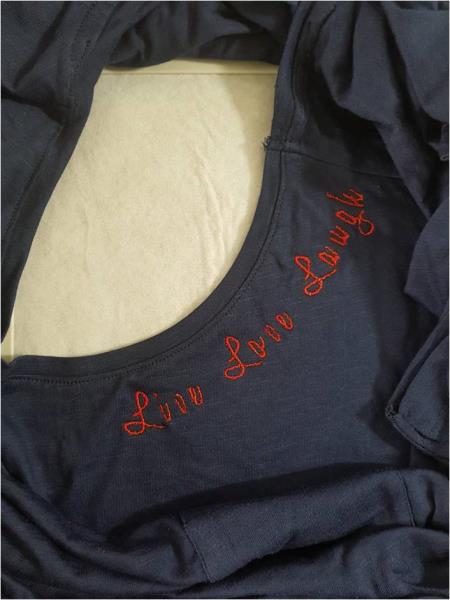
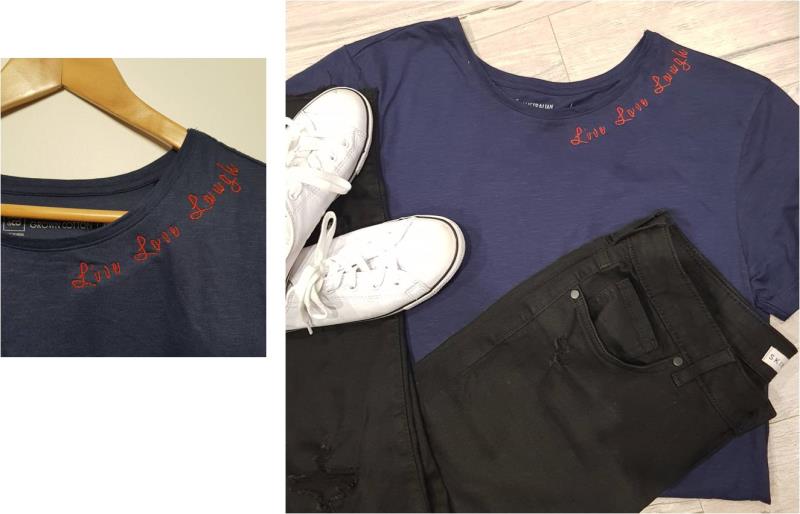
A simple text saying added to a plain shirt can sometimes be all your outfit needs for a statement. Add this design to the neckline of your TShirt for a modern touch.

Step of

Materials

Project Preview Video

Materials
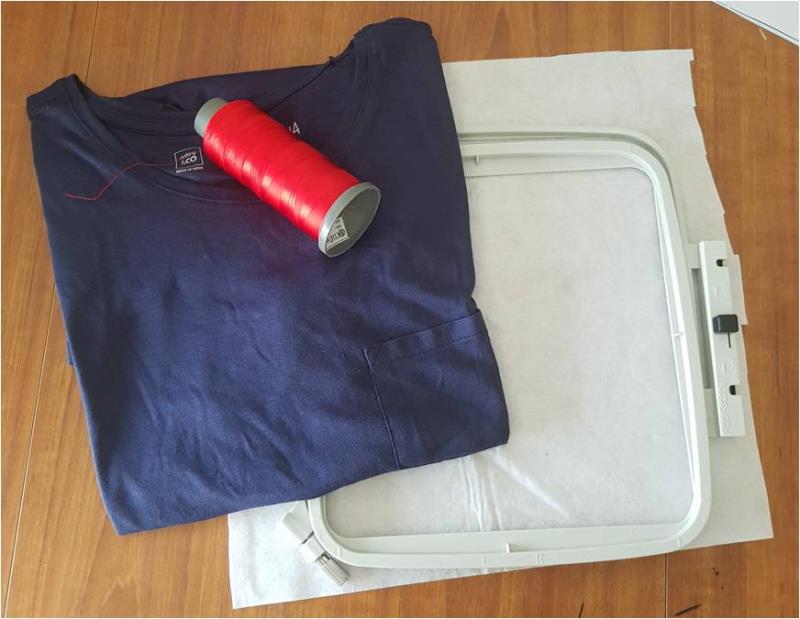
  • Plain cotton t-shirt
  • Red embroidery thread
  • 8” hoop
  • Cutaway stabilizer
  • Embroidery software

  • Designs used in this project

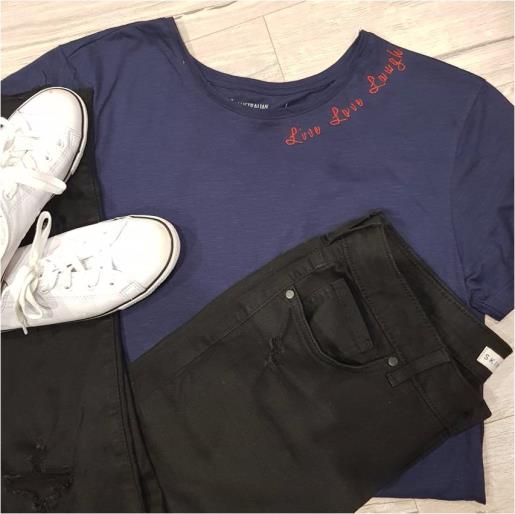
    Final Product: What You Will Create


    Step 1:
    Gather your materials and have a read through these instructions before you begin your project.

    (Click Image to Enlarge)


    Step 2:
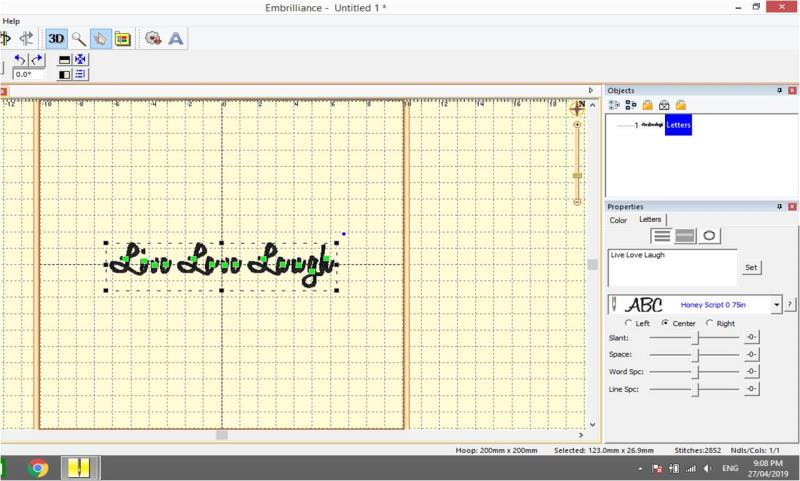
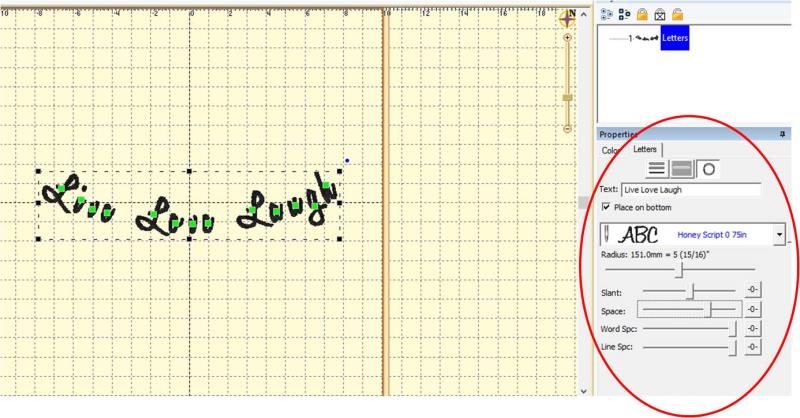
    You will require an embroidery software program to create this design as we will use the BX font. I have used Embrilliance which is a free downloadable software. Once you have downloaded the Honey Script font in BX format, load the font into the Embrilliance software. Click on the bold “A” located in the top tool bar and the text properties box will pop up on the right. Here, select the Honey Script font from the drop down menu, type in Live Love Laugh into the text field and click set.

    (Click Image to Enlarge)


    Step 3:
    Again in the properties section, select the “circle” button located above the text field box, this make the font curved. Then tick the box “place on bottom” to curve it downward. Then set the radius to 151.0mm and I have played with the settings to space the letters more. Then save the file to upload to your machine.

    (Click Image to Enlarge)


    Step 4:
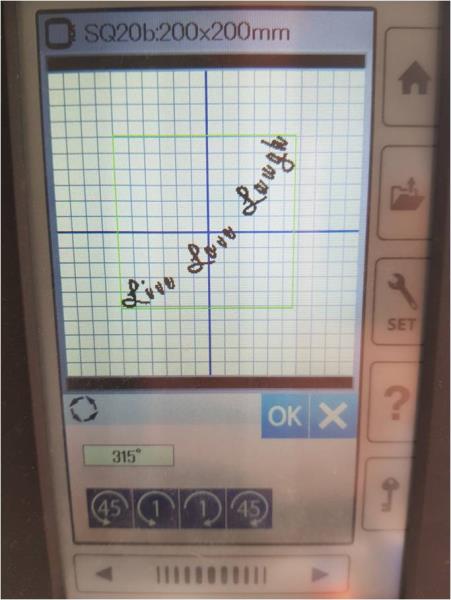
    Once uploaded onto your machine, edit the file to rotate it 45 degrees (which will make it at a 315 degree angle)

    (Click Image to Enlarge)


    Step 5:
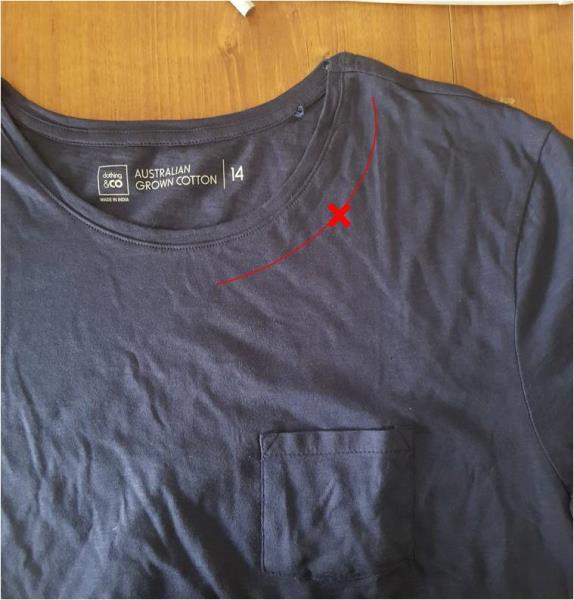
    Lay your shirt flat and mark the position you want the embroidery. It is a little tricky as it is a curved text but you will want to mark the center of the text in order to check the curve suits the neckline of your shirt.

    (Click Image to Enlarge)


    Step 6:
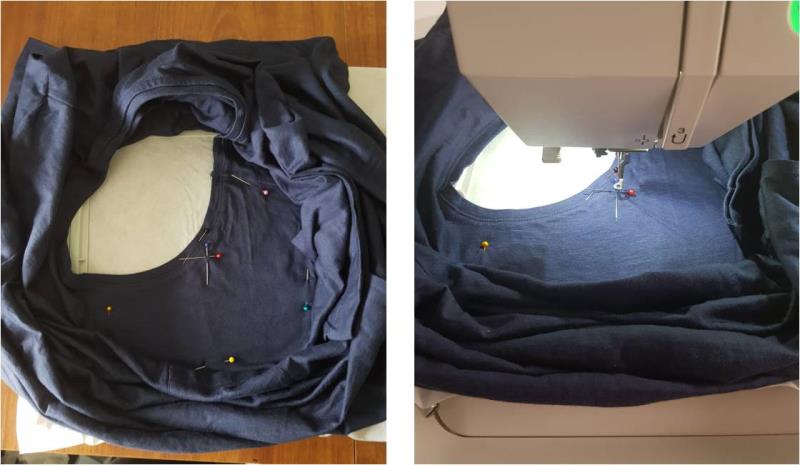
    Hoop the cutaway stabilizer then position the shirt on the stabilizer, ensuring that the center point of your design is centered within the hoop. Then pin the shirt in place and get excess t-shirt out of the way of the stitch area. Attach the hoop to your machine and stitch out the design.

    (Click Image to Enlarge)


    Step 7:
    Remove the design from the hoop and cutaway the stabilizer from the back. Give your shirt a good press from the back side.

    (Click Image to Enlarge)


    Step 8:
    A simple text saying can make a plain shirt a real standout! Enjoy your newest creation.

    (Click Image to Enlarge)

    Meet the Author: Kylie Burke
    Kylie Burke
    Kylie is based in Australia and loves creating and sharing her unique pieces.
    More From This Author
    Link is Broken, Please check the URL
    Exclusive Embroidery Offers!
    Copyright © {{ currentDate | date:'yyyy'}} - EmbroideryDesigns.com
    GET 50% OFF! ×