Border OptionsHugging border, circle, square, or rectangle — with a 3mm satin stitch.
Backing OptionsAvailable with iron-on, sew-on, or velcro backing.
Fast ShippingShipped quickly from the USA.
Free Online Tools
Powerful embroidery utilities that save time and prevent costly mistakes.
Stitch AssistantRECOMMENDED
Get the exact stabilizer, machine settings, needle, and thread color sequence for every embroidery design you purchase — based on that design's stitch density, dimensions, and color count.
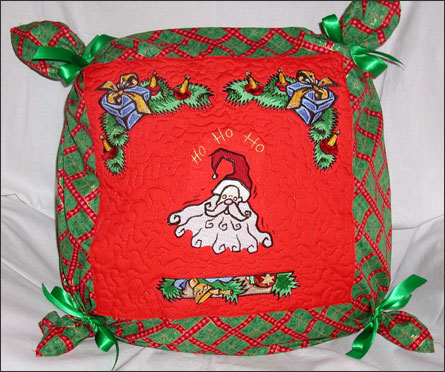
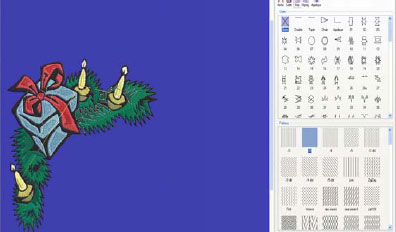
Open the clip art used in the corners of the scarf under specocc/xmas. Design #0681_1423.
Step 2:
Set the hoop size (under paper size)at the top left of your screen, to reflect the largest sewing field of your machine.
TIP: If you do not see this option at the top left of
your screen you may need to select this toolbar from the menu screen,
Click "window"/"Toolbars" and place a check mark next to status
bar/standard/Property Bar/toolbox.
Step 3:
Size the corner clip art to fit your largest sewing field.
Step 4:
(Click Image to Enlarge)
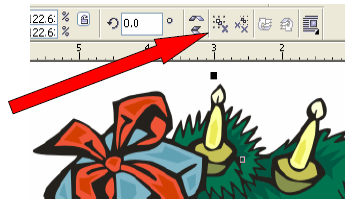
Select the design by clicking on it, and then click the ‘ungroup’ icon.
Step 5:
Once the design is ungrouped then it can be ‘simplified’. (Simplify is
to automatically remove all of the stitches under other stitch areas.)To
select the complete design, double click on the pick tool.
Step 6:
Now you can click on the ‘simplify’ icon along the top tool bar.
(Click Image to Enlarge)
Step 7:
(Click Image to Enlarge)
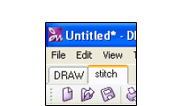
Click the ‘stitch’ tab to send the design to the stitch side of the program.
Step 8:
(Click Image to Enlarge)
By Clicking on areas of the design you will be offered the pattern and
style stitch options. All of the satin stitch areas were changed to the
‘step’ stitch.
Step 9:
Click the file/save as and give your design a name. Save your design in
the .draw format first. Now save your design in the machine format you
need for your machine.
Step 10:
This same design is stitched a second time in the right corner so it
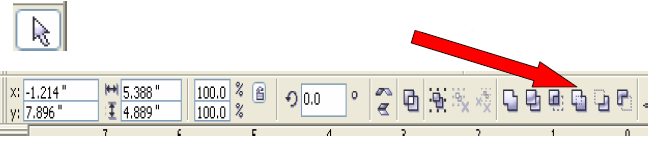
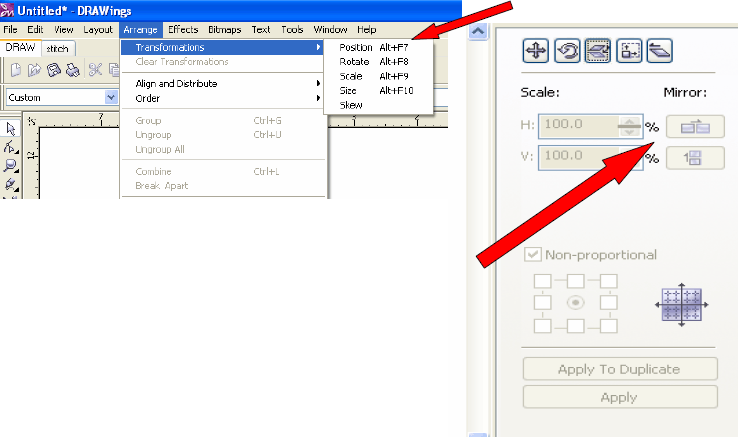
must be mirror imaged. This is done in the software by clicking on
‘arrange’/ transformations/ Position.
(Click Image to Enlarge)
Step 11:
This docker will appear on the right side of the screen. Click the
horizontal mirror and click ‘Apply’. (See image in previous step)
Step 12:
Save the mirror imaged design in the format you need for your machine.
Step 13:
Go back to the ‘DRAW’ side of the program and delete this corner design.
Step 14:
(Click Image to Enlarge)
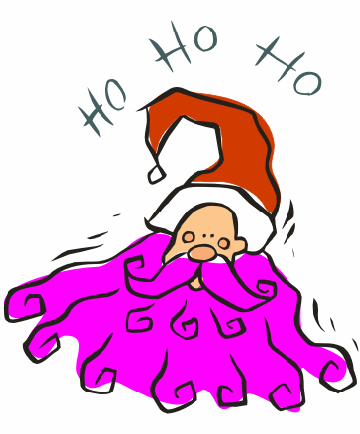
Open design # 0678_1200 under the same Xmas category as the last design.
Step 15:
Size the design to the largest sewing field your machine will stitch.
Step 16:
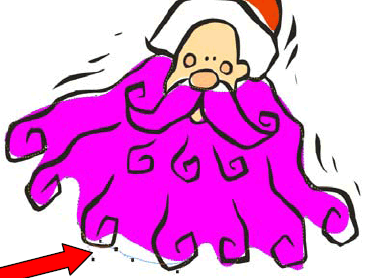
As you can see the beard area of the design is white. To be able to see
where the color starts and stops you will want to give it color.
Step 17:
Select the design and click the ‘ungroup’ icon. (as in step 4).
Step 18:
Click on the area inside the beard then left click on a color block on the right side of your screen. TIP: If you do not have any of the color dockers showing on the right
side of the screen, click on ‘Window’/ Color palettes. Put a check mark
next to ‘default CMYK’ and ‘default RGB
Step 19:
(Click Image to Enlarge)
The design can be stitched the way it is. OR you can manipulate the fill
color in the beard and hat to fill within the lines. Click the area of
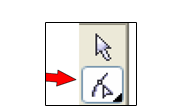
the design to manipulate then click the ‘shape tool’ (located on the
left tool bar just below the pick tool).
Step 20:
By selecting the visible nodes, the color area can be moved any
direction you want. This will enable you to move the fill area within
the outlines of the beard and the hat.
Step 21:
(Click Image to Enlarge)
To add a node to a fill line, double click the left mouse button. This
will enable you to move any part of the fill line into a different
position. Remember: Adding color to white areas will make the fill area
easier to see and easier to move.
Step 22:
Once the design looks the way you want it, click the ‘stitch’ tab.
Step 23:
Click the hat fill area and select style number #19 to create a lacy effect.
Step 24:
Click the beard fill area and select pattern fill Circles7 to give the area a wavy look.
Step 25:
The design is ready to save. Click file/save as and name the design.
Save it as a .draw file first then save the design as your machine
format.
Step 26:
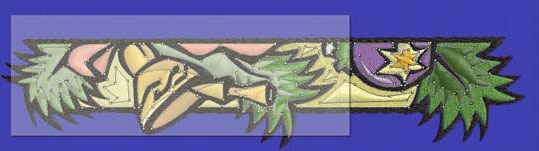
Design #0681_1482 is the next design used on the pillow scarf.
(Click Image to Enlarge)
Step 27:
Rotate this design to a horizontal position using the transformations docker explained in step 7.
Step 28:
Size the design to the largest sewing field of your machine.
Step 29:
Click the stitch tab then change the larger fill areas to ‘step’ instead of ‘satin’.
TIP: You can change the fill type of several areas at
the same time by dragging a box around the complete area. When ‘step’
is selected, all highlighted areas change to a fill stitch.
Step 30:
Click file/save as and save the design in the .draw format first. Now
save it in the format for your machine. Remember: Saving your design as
the .draw format will give you the ability to open and resize or re-edit
it at any time. .DRAW format saves both the stitch and the vector
information.
Step 31:
Embroidering the designs:
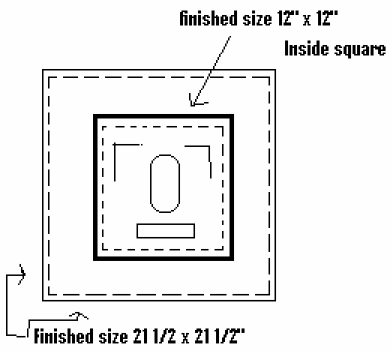
You will be cutting the solid color fabric into a
square measuring 13” x 13” so hoop your fabric accordingly to embroider
each design in place.
Step 32:
Hoop your fabric with a cutaway stabilizer.
Step 33:
Stitch the corner designs first.
Step 34:
After both corners designs have been stitched, center the Santa design between them.
Step 35:
The final border design is stitched in the center about an inch below the Santa.
Step 36:
Metallic threads are used in various parts of the embroidery to give it a little shine.
Step 37:
Cutting the Fabric:
Once the designs are all embroidered, cut the
solid color fabric to a size of 13” x 13” keeping the stitched design
centered with equal amounts of space around the edge.
Step 38:
Press the edges of the solid color fabric under ½” on each side to create a 12 x 12” square.
Step 39:
Cut the holiday print fabric into 2 22” x 22” pieces.
Step 40:
Press the raw edges under ¼” and stitch using a zig zag stitch. A serger can also be used to hem the raw edges.
Step 41:
(Click Image to Enlarge)
Assembly of the pillow scarf:
Center the embroidered fabric on top of the holiday fabric square.
Step 42:
Place the quilt batting under the embroidered piece and pin.
Step 43:
Stitch around all 4 edges of the embroidered square.
Step 44:
Using free motion embroidery (leave the embroidery foot on your machine
and drop the feed dog), outline the embroidered designs to define them.
Step 45:
It is optional to stiple the open areas of the quilted top. A straight stitch can be used instead of a stippling stitch.
Step 46:
The project is now complete and ready to attach to an existing pillow.
Step 47:
Place a square on both top and bottom of the pillow and secure each corner with rubber bands.
Step 48:
To finish, tie ribbon bows around each rubber band.
Debi Mueller is Vice President of Product Development of Stitch Tree, Inc.®. She has over 10 years experience in the sewing industry focusing on customer service and embroidery software plus over 5years in computer programming. In addition to her computer savvy, Debi owned and operated a wall papering business for 7 years that honed her creativity for home decorating