Border OptionsHugging border, circle, square, or rectangle — with a 3mm satin stitch.
Backing OptionsAvailable with iron-on, sew-on, or velcro backing.
Fast ShippingShipped quickly from the USA.
Free Online Tools
Powerful embroidery utilities that save time and prevent costly mistakes.
Stitch AssistantRECOMMENDED
Get the exact stabilizer, machine settings, needle, and thread color sequence for every embroidery design you purchase — based on that design's stitch density, dimensions, and color count.
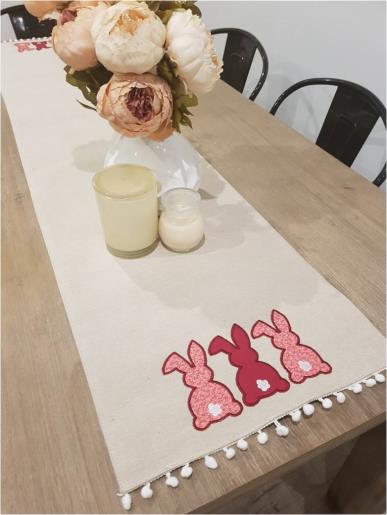
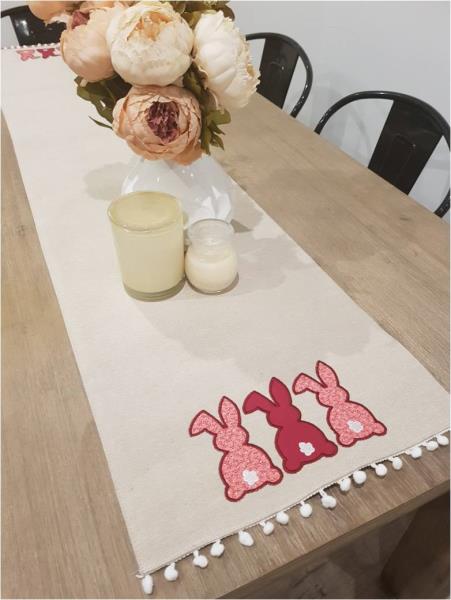
Enhance your Easter decor with this charming table runner featuring an applique design of three bunnies. Perfect for adding a festive touch to your dining area. Step-by-step instructions are included.
Step
of
Applique Bunny Trio Easter Table Runner
By Kylie Burke
I decided to use a pre-made table runner as it was the perfect color I was looking for. You could make a simple rectangular runner from your desired fabric
Step 1:
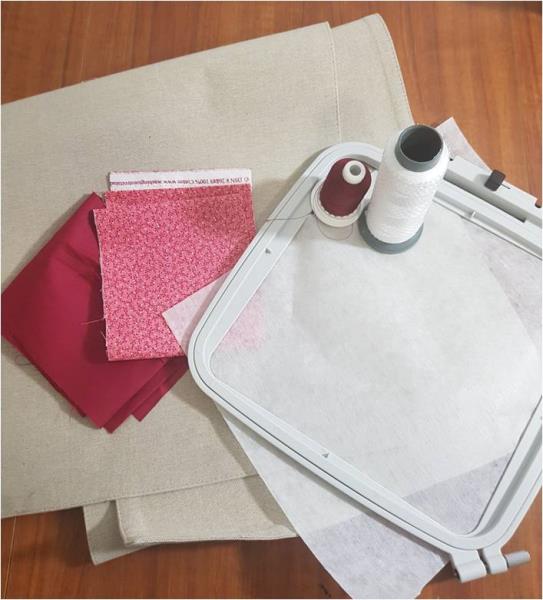
Gather the materials and read through the instructions before beginning. Have a copy of the color sequence on hand for reference to ensure you are across each step of the appliqué.
(Click Image to Enlarge)
Step 2:
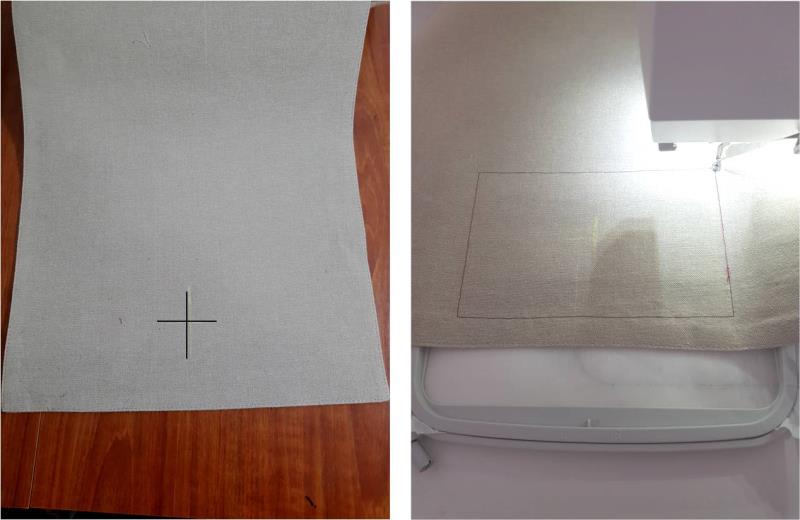
On the table runner, measure across the width and mark the centre. The height of this embroidery design is 107mm so I have marked up 130mm from the bottom of the runner which indicates the center of the embroidery design. Hoop the tearaway stabilizer and attach the hoop to your machine. I have chosen to “float” the runner, so the first center the runner under your machine foot then use a tack down stitch to hold the runner in place. You could also pin it down.
(Click Image to Enlarge)
Step 3:
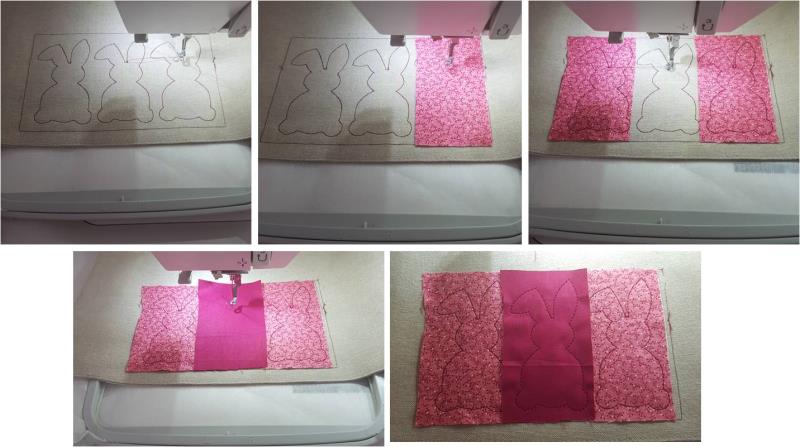
Stitch out the first “color” which is the outline of all 3 bunnies. The second “color” is the placement stitch for the first bunny so lay your chosen fabric over the bunny, ensuring it covers the outline and stitch it down. The next two “colors” are the placement stitches for the remaining bunnies.
(Click Image to Enlarge)
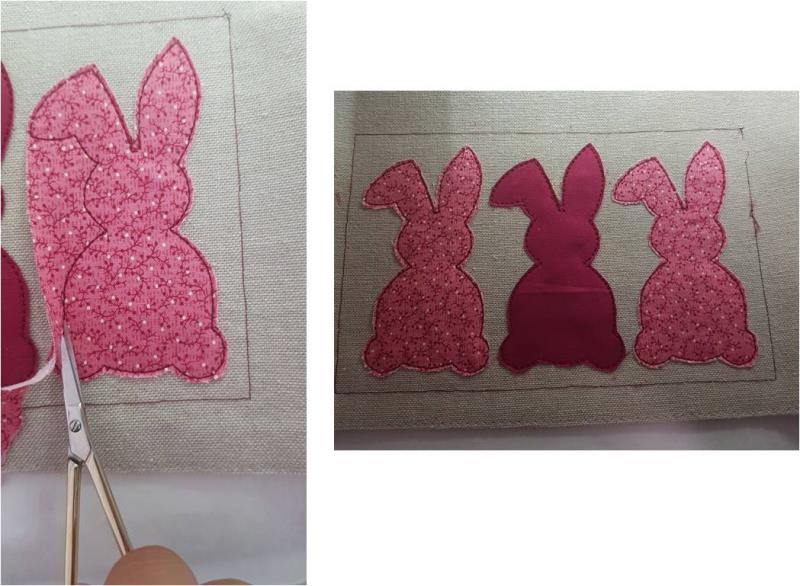
Step 4:
The next step is to cut away the excess fabric from around each bunny, it is best to remove the hoop from the machine for this step. Cut closely around each outline, ensuring not to cut the stitchline.
(Click Image to Enlarge)
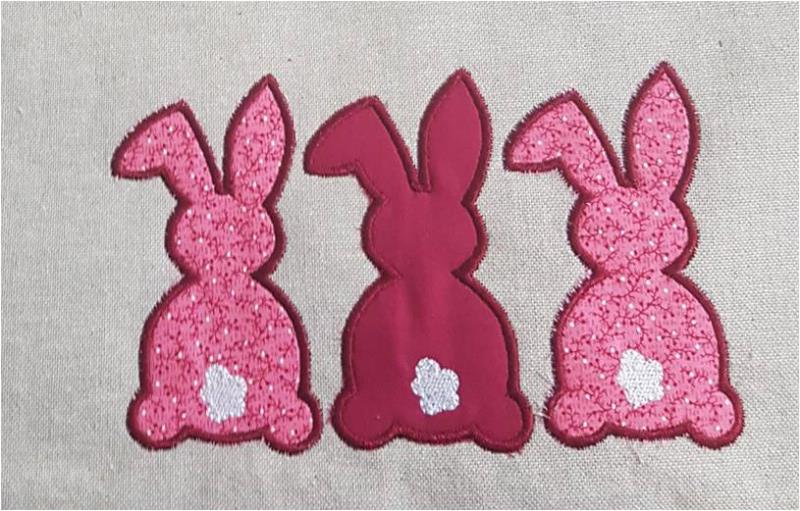
Step 5:
Re-attach the hoop to the machine and continue with the rest of the design. I have chosen to use the same thread color for all bunny outlines, you can change this if preferred as each bunny is a separate stitch color. Repeat the above steps to apply the design to the other end of the runner.
(Click Image to Enlarge)
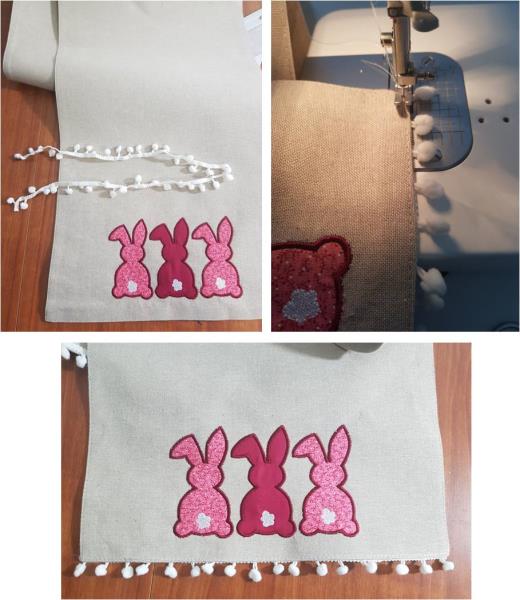
Step 6:
From the pom pom trim, cut 2 lengths the same length as the width of the table runner. Stitch the trim to the bottom of the runner, repeat for both ends.